Cropping an image is one of the most common tasks when working with images in MATLAB. It allows you to focus on specific parts of the image, removing unnecessary sections. MATLAB provides simple and efficient tools for cropping, whether you're using it for data analysis,
Understanding the Image Cropping Process

Before you start cropping an image in MATLAB, it’s important to understand the general process. Cropping involves selecting a rectangular portion of an image, which is then extracted and saved as a new
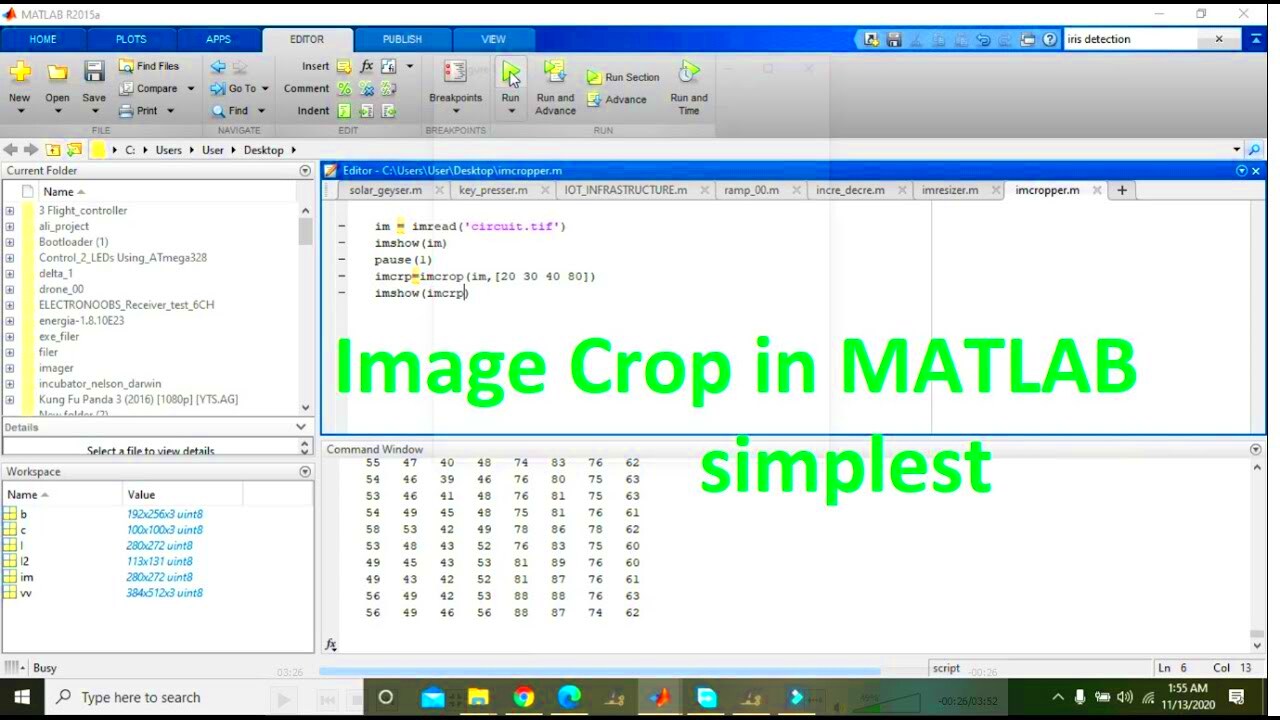
- Image Loading: The first step is to load the image into MATLAB. You can use the
imreadfunction for this. - Defining the Crop Area: After loading the image, you need to specify the region you want to crop. This is done by defining the coordinates of the top-left and bottom-right corners.
- Extracting the Region: MATLAB allows you to create a new image by using the coordinates you defined. The
imcropfunction can be used for this purpose. - Saving the Cropped Image: Finally, once you’re happy with the cropped image, you can save it to your desired location using the
imwritefunction.
Understanding these basic steps will make the cropping process smoother and more intuitive as you work with MATLAB’s image processing tools.
Preparing Your Image for Cropping in MATLAB

Before cropping an image in MATLAB, you need to prepare the image properly. Here’s how you can do that:
- Import the Image: The first step is to load the image into MATLAB. Use the
imread('filename')function to import the image into the workspace. This will read the image file into an array that MATLAB can manipulate. - Display the Image: It’s a good idea to display the image first, so you know exactly what you're working with. You can use the
imshowfunction to show the image in a figure window. - Inspect the Image: Zoom in and explore the image to see which area you want to crop. Knowing the pixel locations of the area you want to retain is crucial. You can use MATLAB’s built-in interactive tools like the Image Viewer to inspect the image.
- Define the Crop Area: Decide on the portion of the image to keep. Use MATLAB’s
imcropfunction to interactively select the cropping area, or manually input the coordinates of the area you want to crop.
Preparing your image properly ensures that the cropping process goes smoothly, and you get the exact result you want. Be sure to check the image for any unwanted parts before you start cropping to avoid unnecessary steps later on.
Using MATLAB Functions to Crop an Image

MATLAB provides several built-in functions to make cropping an image quick and easy. The most commonly used function for cropping is imcrop, but there are other ways to crop as well. Here’s a step-by-step guide on how to use MATLAB functions for cropping:
- Using imcrop Function: The
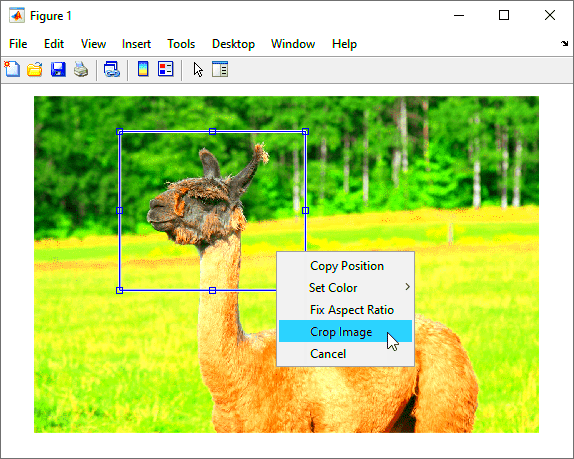
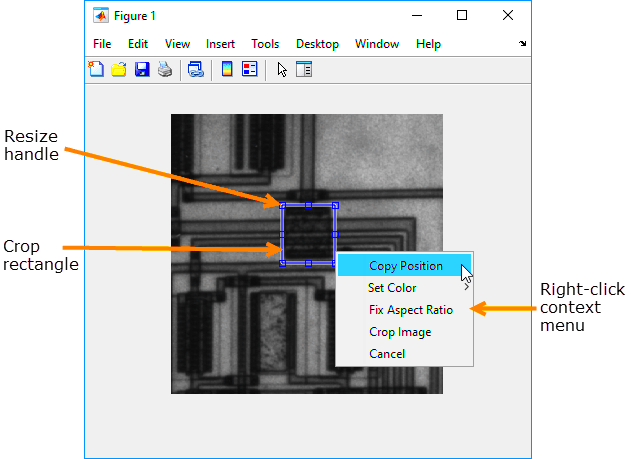
imcropfunction allows you to interactively select the area you want to crop. When you callimcrop, MATLAB will display the image and let you draw a rectangle around the section you wish to keep. Once the rectangle is set, you can hit “Enter,” and the selected portion will be cropped out. - Manual Cropping: If you want to crop without using the interactive tool, you can manually specify the coordinates for the region to crop. For example:
This will crop the image between the pixel rowscroppedImage = originalImage(y1:y2, x1:x2);y1andy2, and columnsx1andx2. - Using ROI (Region of Interest): Another way to crop images is by using the ROI tool, which allows more flexibility with shape and size. With the
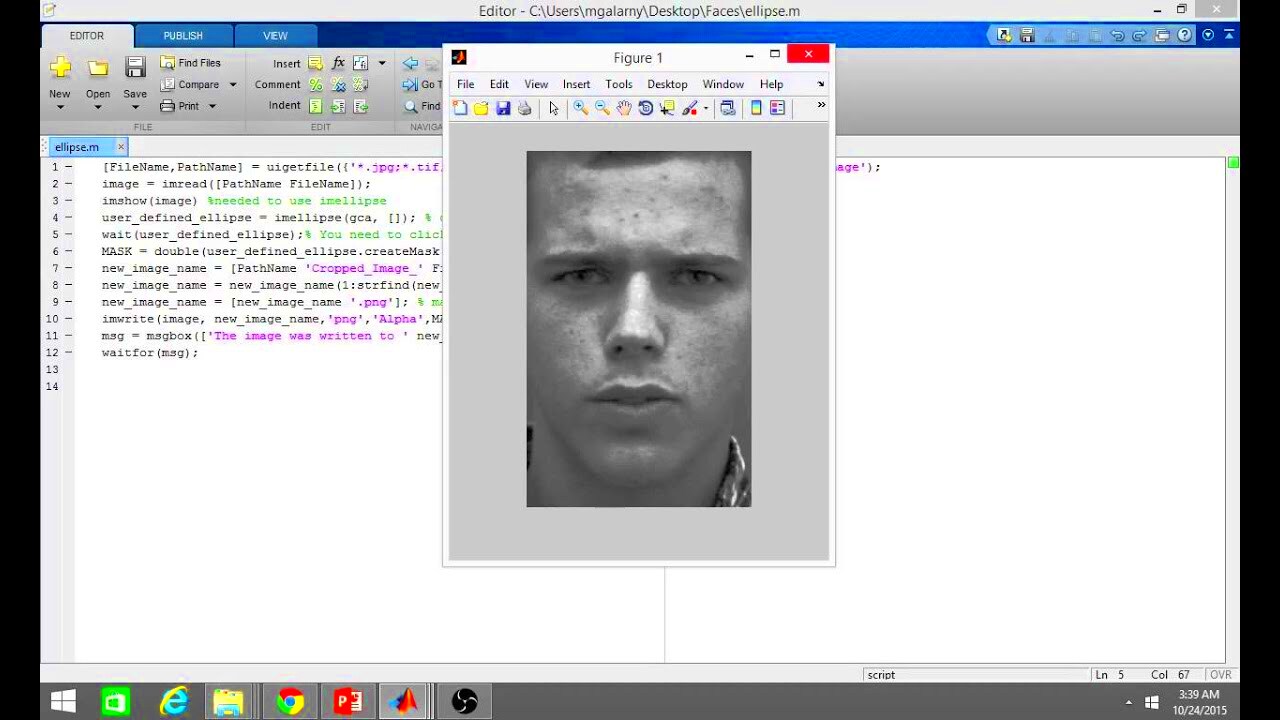
drawrectangleordrawpolygonfunctions, you can define a region and crop it.
By using these functions, you can crop images efficiently depending on your specific needs, whether you’re working with interactive tools or manually selecting pixel coordinates.
Adjusting the Crop Area in MATLAB
After selecting the area you want to crop, you may find that you need to adjust the cropping region to get the best result. MATLAB makes it easy to modify the crop area before finalizing it. Here’s how you can do that:
- Interactive Adjustment: When using the
imcropfunction interactively, you can drag the corners or edges of the cropping rectangle to resize it. This makes it easy to fine-tune the selection before you confirm the crop. - Manual Adjustments: If you’re cropping manually by specifying coordinates, you can adjust the
x1,x2,y1, andy2values to fine-tune the crop area. You can change these values directly in the MATLAB script or command window to get the exact crop you want. - Zoom In for Precision: To adjust the cropping area more precisely, you can zoom into the image using the
imshowfunction with a zoom tool. This allows you to select smaller regions and make more accurate adjustments to your cropping selection.
With these techniques, you can ensure that the cropped area perfectly matches your requirements. Whether you’re working with predefined coordinates or adjusting interactively, MATLAB gives you the flexibility to refine your crop area as needed.
Saving the Cropped Image in MATLAB
Once you’ve successfully cropped the image, the next step is saving it. MATLAB allows you to save the cropped image in various formats, such as JPEG, PNG, or TIFF. Here’s how to save the image after cropping:
- Using imwrite: The
imwritefunction is the most common way to save an image. It takes the cropped image and writes it to a file. For example:
This command saves the cropped image in the current directory as a JPEG file. You can specify different file formats by changing the file extension (e.g., .png, .tif).imwrite(croppedImage, 'cropped_image.jpg'); - Specifying Image Quality: When saving a JPEG image, you can adjust the quality by adding additional parameters to the
imwritefunction:
This saves the image with 90% quality, which can help reduce file size.imwrite(croppedImage, 'cropped_image.jpg', 'Quality', 90); - Saving to Different Locations: You can also specify a different directory to save the cropped image by providing the full path in the file name:
imwrite(croppedImage, 'C:/Users/Username/Documents/cropped_image.jpg'); - Saving Multiple Images: If you’ve cropped multiple sections of the image, you can save each one with a unique file name, or use loops to automate the process of saving multiple cropped images.
Once the image is saved, it’s ready to be used or shared. The imwrite function ensures that the cropped version is saved in the desired format and location, making the process seamless.
Common Issues and Troubleshooting Tips for Cropping in MATLAB
While cropping an image in MATLAB is usually straightforward, you may run into a few common issues. Below are some troubleshooting tips to help you resolve any problems you encounter:
- Image Not Displaying: If your image doesn’t display when using
imshow, make sure the image file path is correct and that the image is properly loaded. You can check the size of the image usingsize(image)to ensure it’s loaded into MATLAB. - Incorrect Crop Area: Sometimes, the crop area might not match what you intended. This could be due to incorrect coordinates or not adjusting the cropping rectangle correctly. Use the interactive
imcroptool, or double-check thex1, x2, y1, y2values when specifying the crop manually. - Out-of-Bounds Errors: If you get an error like "Index exceeds matrix dimensions," it means your crop coordinates are out of bounds. Ensure that the values for
x1, x2, y1, y2are within the image’s dimensions, which you can check usingsize(image). - Saving Issues: If you’re having trouble saving the cropped image, check the file format and ensure the directory exists. If MATLAB can’t write to the specified path, you might need to specify a new location or adjust the file permissions.
- Low-Quality Output: When saving the cropped image in formats like JPEG, you may notice a loss in quality. Use the
'Quality'parameter withimwriteto control the output quality when saving images in formats like JPEG.
By addressing these common issues and following the troubleshooting tips, you can improve your experience while cropping images in MATLAB.
Frequently Asked Questions
Here are some frequently asked questions that will help clear up any confusion while cropping images in MATLAB:
- Can I crop an image without using the imcrop function? Yes, you can crop an image manually by specifying the coordinates for the crop area using array indexing. For example,
croppedImage = image(y1:y2, x1:x2). - How do I crop a specific shape, like a circle? If you want to crop a circular area, you can use MATLAB’s ROI tools like
drawcircleto create a circular selection, which can then be applied as a mask to your image. - Can I crop multiple regions of an image? Yes, you can crop multiple regions by either using the
imcropfunction multiple times or by setting up a loop to automatically crop and save each region. - What if the image quality changes after cropping? If the image quality decreases, try using a lossless format like PNG or TIFF, or adjust the quality parameter when saving the image as a JPEG with
imwrite. - Is it possible to crop images in batch? Yes, you can automate the process of cropping multiple images using loops in MATLAB. This is useful if you need to crop several images in a similar manner.
Conclusion on Cropping Images in MATLAB
Cropping images in MATLAB is a simple yet powerful task that opens up many possibilities for image processing and manipulation. Whether you need to crop an image for analysis, create specific sections for presentation, or focus on a particular object, MATLAB provides the tools to do it efficiently.
By understanding the basic functions like imcrop, learning to manually adjust crop areas, and knowing how to save your results, you can easily tailor your images to suit your needs. Troubleshooting common issues ensures that your experience remains smooth, and the FAQs cover any additional questions you might have along the way.
Now that you have a solid grasp of how to crop images in MATLAB, you can explore more advanced techniques such as automated cropping, working with different image formats, or applying filters and transformations after cropping. Whatever your goal, MATLAB offers the flexibility and power to handle all your image cropping tasks efficiently.

 admin
admin


