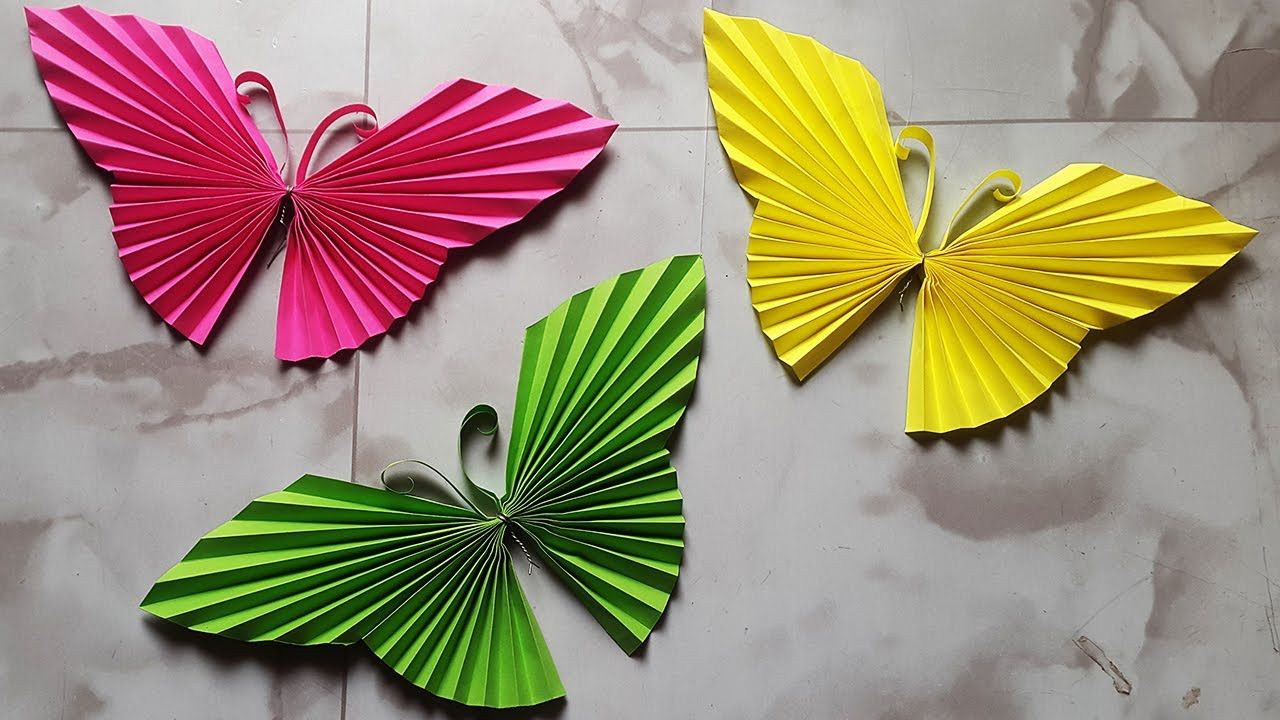
Have you ever found yourself captivated by the delicate beauty of butterflies? Imagine bringing that charm into your home with just a few sheets of paper! Paper butterflies are a fantastic DIY project that allows you to express creativity while enjoying a bit of craft time. They're versatile enough to be used for decoration, gifts, or even as elements for a fun classroom project. Plus, they offer the perfect opportunity to spend some quality time with your kids or friends while making something beautiful together. Whether you opt for a simple design or a more intricate creation, paper butterflies can brighten up any space, adding a touch of whimsy and color. So grab your materials and get ready to dive into the world of paper crafting!
Materials Needed for Making Paper Butterflies

Before you start folding and cutting, it's essential to gather all the materials you'll need to make your beautiful paper butterflies. Here’s a handy checklist:
- Paper: You can use any lightweight paper like origami paper, construction paper, or even recycled paper. Different colors and patterns will add variety to your butterflies.
- Scissors: A good pair of scissors is crucial for cutting out your butterfly shapes. If you’re using thicker paper, consider using a craft knife for cleaner edges.
- Glue Stick or Tape: This will help secure the different parts of your butterflies together, especially for 3D designs.
- Markers or Crayons: Use these to add details or designs on your butterflies. Let your imagination run wild!
- Embroidery Thread or Pipe Cleaners: If you want to hang your butterflies, these materials can help create antennas or hanging loops.
- Templates: You can sketch your own butterfly designs or print templates from the internet for different styles.
Now that you have all your materials ready, you're one step closer to creating beautiful, fluttering paper butterflies that can liven up any room! Let’s get crafting!
Also Read This: Fast Methods to Upload a Video on Dailymotion from Your Android Device
Step-by-Step Instructions for Creating Simple Paper Butterflies

If you’re looking to add a touch of whimsy to your home decor or perhaps create a fun craft project, making simple paper butterflies is an excellent choice. Follow this easy step-by-step guide, and you’ll be fluttering with excitement in no time!
- Gather Your Supplies: Before you start, make sure you have everything you need. Collect colorful paper (construction paper or scrapbook paper works great), scissors, a pencil, and glue. Optional items include embellishments like glitter, stickers, or markers.
- Draw the Butterfly Shape: Using your pencil, sketch out a simple butterfly shape on your paper. Start with a basic oval for the body and then draw two large wings on either side. Don’t worry about perfection; butterflies in nature are unique!
- Cut Out the Shape: Carefully cut along your pencil lines. Make sure to hold the paper steady to ensure clean edges. You should now have a beautiful butterfly cutout.
- Add Details: Use markers or colored pens to draw patterns on the wings. Lines, dots, or swirls work great. Feel free to let your creativity shine through!
- Assemble Your Butterfly: If you want to add dimension, gently fold the wings upwards or curl them slightly. Then, use glue to attach your butterfly to a background surface or leave it freestanding.
- Display Your Creation: Once finished, find the perfect spot to showcase your stunning paper butterflies. You can place them on walls, precariously perch them on your desk, or string them together for a garland effect!
And there you have it! Creating simple paper butterflies is not only enjoyable but also a fantastic way to brighten up any space.
Also Read This: How to Download Dailymotion Videos on Android Quickly
Different Techniques for Decorating Your Paper Butterflies
Now that you've mastered the art of making paper butterflies, let’s explore some fun and creative techniques for decorating them. After all, the beauty lies in the details!
- Watercolor Effects: Use watercolors to give your butterflies a unique, soft appearance. Just dip your brush in water and blend different colors to create beautiful gradients and swirls.
- Patterned Paper: Consider using patterned scrapbooking paper for your butterflies. The various designs can add an extra layer of interest without needing much embellishment.
- Stamping: Utilize rubber stamps with ink pads to print various designs onto the wings. This technique makes it easy to create intricate patterns.
- Glitter Magic: Who doesn’t love a little sparkle? After coloring your butterflies, apply a layer of glue and sprinkle glitter on top! Just be sure to do this over a tray to catch the excess glitter.
- Fabric Additions: To give your butterflies a unique texture, try cutting small pieces of fabric and gluing them onto the wings. This technique adds depth and a fun tactile element.
- Natural Elements: Get inspired by nature! Attach dried flowers or leaves to your butterflies for an earthy vibe. Use clear-drying glue to secure them firmly.
Experiment with these techniques to discover your signature style. Each butterfly can be a delightful expression of your creativity, so let your imagination take flight!
Also Read This: Understanding Dailymotion TS Files and Their Functionality
5. Creative Variations of Paper Butterflies to Try
If you're looking to spice up your DIY paper butterfly game, you’re in for a treat! There are countless creative variations that not only challenge your skills but also inspire your imagination. Let’s explore some fun ideas that you can try out!
- 3D Paper Butterflies: Fold your butterflies in a way that gives them a 3D effect. You can achieve this by folding the wings upwards, making them look like they’re about to take flight!
- Butterfly Mobile: Create a stunning mobile by stringing different sized butterflies at varying heights. It's perfect for a child’s room or as whimsical décor.
- Butterfly Lanterns: Use translucent paper for your butterflies and attach LED lights behind them. When lit up, these beauties will create a magical atmosphere.
- Mixed Media Butterflies: Combine paper with other materials! Think fabric, beads, or even glitter for a touch of sparkle. The mixed textures will give your butterflies a unique flair.
- Butterflies with Patterns: Instead of plain paper, try using patterned scrapbook paper or even old magazines. The design will add an intriguing element to your creations.
These variations allow you to play not just with color but also form and function, so get excited and let your creativity lead the way!
Also Read This: Understanding Rumble Pricing and Subscription Options
6. Inspiration from Dailymotion: Unique Paper Butterfly Designs
In the vast sea of DIY inspirations, Dailymotion stands out as a fantastic platform for visual learners eager to dive into the world of paper butterflies. The videos available there showcase fantastic tutorials that will fill your heart with creativity. Here are some unique paper butterfly designs you might find:
| Design Type | Description | Video Link |
|---|---|---|
| Pop-Up Butterflies | Watch your butterflies come to life with pop-up mechanisms that surprise and delight! | Link to Video |
| Watercolor Butterflies | Creating beautiful, textured butterflies using watercolor techniques. | Link to Video |
| Stenciled Butterflies | Explore how stencils can create intricate designs with minimal effort. | Link to Video |
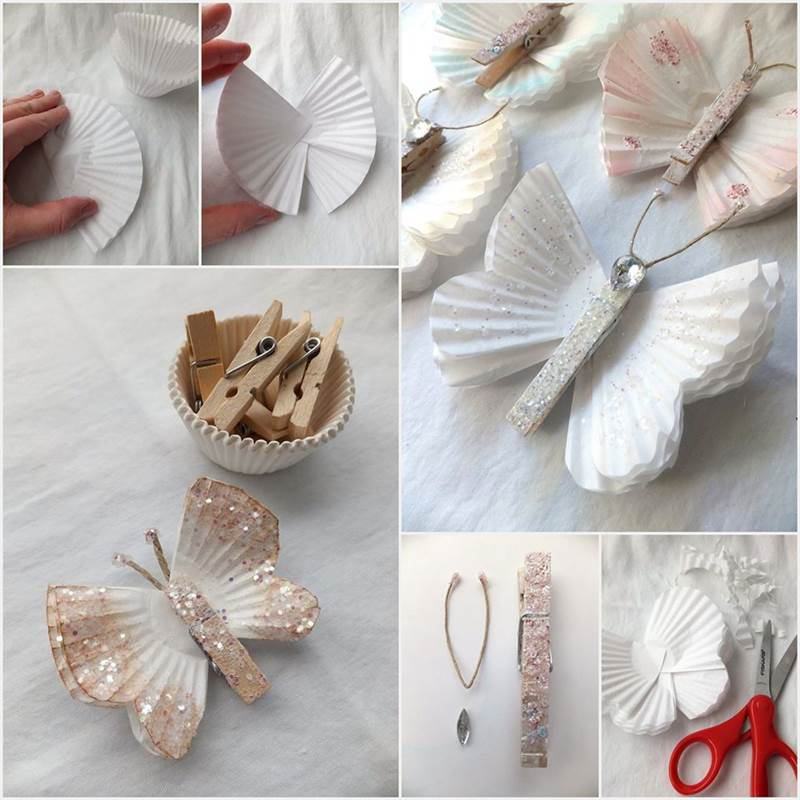
| Cupcake Wrapper Butterflies | Transform ordinary cupcake wrappers into charming butterfly shapes. | Link to Video |
Whether you're a seasoned crafter or just starting, these videos will give you insider tips and tricks to hone your skills in creating gorgeous butterflies. So grab your craft supplies and let the inspiration from Dailymotion flutter into your next project!
Also Read This: Make Delicious Zarda in Urdu with Easy Dailymotion Tutorials
7. Tips for Displaying Your Paper Butterflies
Once you've crafted your stunning paper butterflies, it's time to show them off! There are countless ways to display your creations, so let’s explore some creative ideas that can transform your space.
- Wall Art: Create a butterfly wall collage! Use adhesive putty or pins to attach your butterflies to the wall in a beautiful arrangement. You can also frame them in shadow boxes for an elegant look.
- Mason Jar Display: Place your butterflies in mason jars to create whimsical centerpieces. You can add fairy lights or colored stones at the bottom for an enchanting effect.
- Hanging Mobile: Make a butterfly mobile by attaching your butterflies to a hoop or branch using fishing line. Hang it in a window or above a table for a stunning focal point.
- Gift Wrapping: Use your paper butterflies as decorative elements on gift wraps. A butterfly perched atop a beautifully wrapped gift adds a personal touch that’s sure to delight the recipient.
- Seasonal Decor: Change your displays with the seasons by creating themed arrangements. In spring, use pastel colors, and during fall, opt for warmer hues!
Whichever method you choose, remember to have fun with it! Personalize your display to reflect your style and the story behind your crafted butterflies.
8. Conclusion and Encouragement to Try DIY Paper Butterfly Crafts
In conclusion, creating paper butterflies is not just an intriguing craft; it's also a wonderful way to express your creativity. It’s the perfect activity for all ages—whether you're a DIY novice or a seasoned pro, these delightful little creatures can brighten up your day and your space.
So, why not give it a shot? Gather your materials and dive into this creative world. Here’s a quick summary of why you should try making your own paper butterflies:
- Enhances Creativity: Crafting is an excellent outlet for expressing your unique style and ideas.
- Perfect for All Occasions: These butterflies can adorn your home, gifts, or even be part of a special event's decor!
- Fun and Therapeutic: Engaging in crafts can be a stress-reliever, offering a meditative experience.
So go ahead, unleash your imagination, and let your paper butterflies take flight! You’ll be amazed at what you can create with just a little paper and a whole lot of heart. Happy crafting!
 admin
admin


