Are you looking for a fun and creative way to present a gift? Making a paper gift bag is not only an enjoyable craft project but also results in a beautiful, custom-made bag that adds a personal touch to your gift-giving. Whether you want to wrap a special treat for a birthday, holiday, or any special occasion, a DIY paper gift bag can be a thoughtful alternative to store-bought options. Plus, the best part is that you can personalize it to match the recipient’s taste or the theme of the event. Let’s dive into the fun world of crafting your very own paper gift bag!
Materials Needed

Before we jump into crafting, let’s gather all the materials you’ll need. Having everything on hand will help make the process smooth and enjoyable. Here’s a handy list of materials to get you started:
- Colored paper or cardstock: Choose a sturdy paper in colors and patterns that suit your occasion.
- Scissors: A good pair of scissors will help you cut your paper easily.
- Glue or double-sided tape: You'll need this to secure the sides of the bag.
- Ruler: A ruler helps ensure your measurements are precise.
- Pencil: For marking measurements on your paper.
- Hole puncher: This is for making holes for the bag handles.
- String, ribbon, or handles: Use these to create a stylish handle for your bag.
Optional:
- Stickers, stamps, or embellishments: Get creative with decorations to personalize your bag.
- Washi tape: This can add flair to your bag’s design.
With these materials ready, you’re all set to embark on a creative crafting adventure. Roll up your sleeves, and let's get started!
Also Read This: How to Fix Common Image Issues in GIMP: A Troubleshooting Guide
Step-by-Step Instructions

Making a paper gift bag is a fun and rewarding project that anyone can tackle, regardless of crafting experience! Let’s break down the process into simple steps to ensure your gift bag turns out perfectly. You’ll need a few materials first:
- Construction paper or decorative scrapbook paper
- Scissors
- Glue or double-sided tape
- Ribbon or string (optional for handles)
- A ruler
- A pencil
Now, let’s dive into the steps:
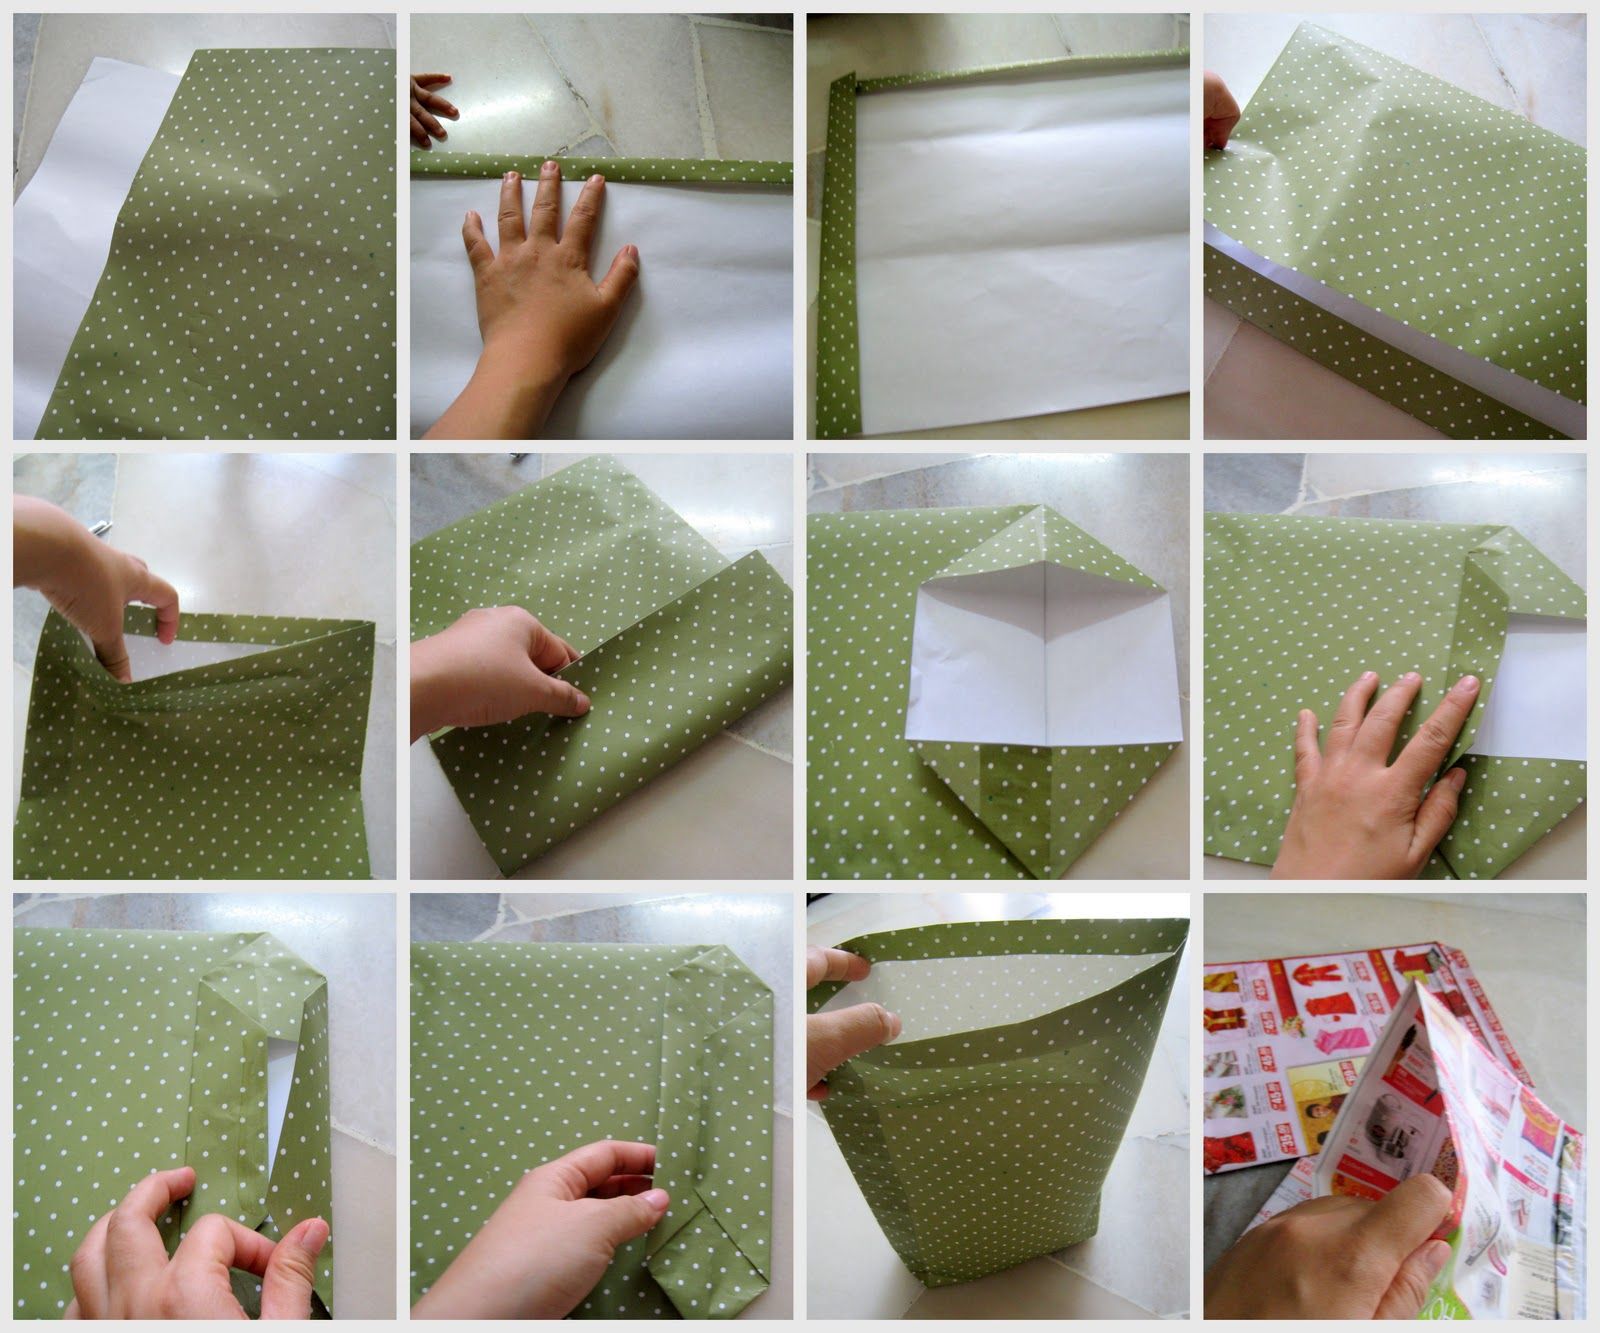
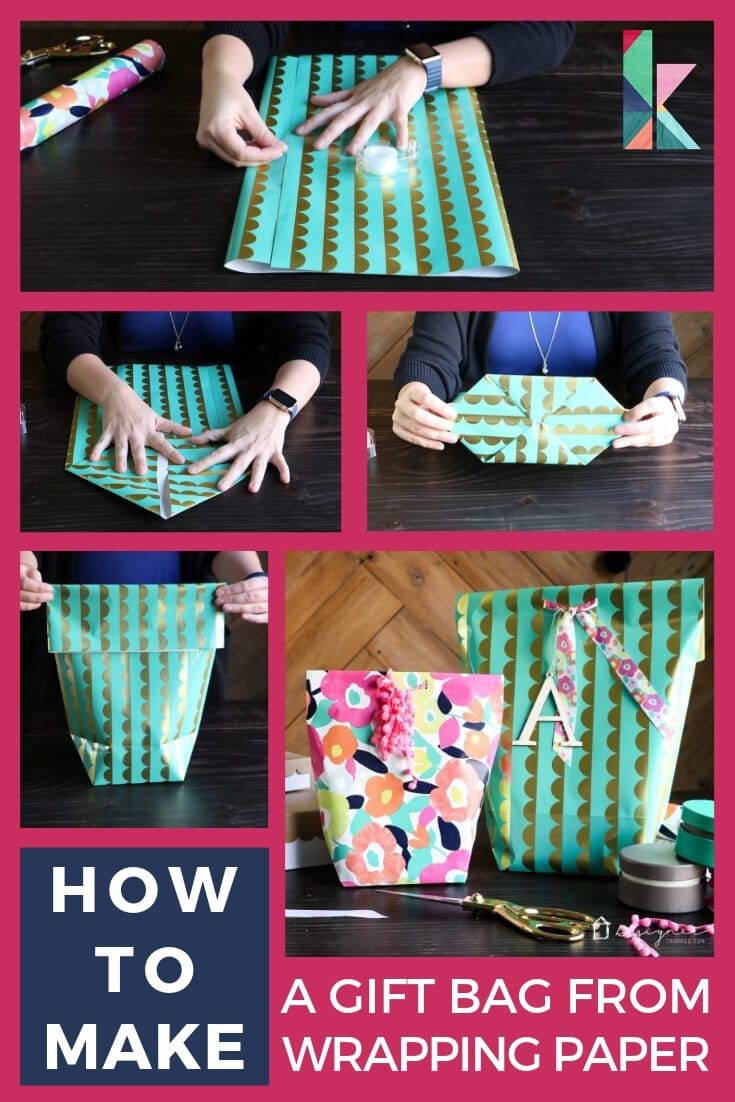
- Cut Your Paper: Start by cutting a piece of paper to measure 10 inches wide by 15 inches long. This size will give you a decent-sized bag.
- Score the Folds: Use the ruler and pencil to mark 3 inches from the top of the piece. This will be the flap of your bag. Mark 4 inches down from the bottom for the base.
- Fold the Paper: Carefully fold along the scored lines. The top fold creates the bag’s opening, and the bottom fold shapes the base.
- Glue the Sides: Apply glue or tape along the edges of the folded paper to secure the sides. Make sure it’s tightly pressed to avoid any gaps.
- Shape the Bottom: To create the base, push in the sides so they meet in the middle and flatten the bottom. Glue it down securely.
- Decorate & Handle: Add your personal touch to the bag with decorations! You can also attach ribbon or string for handles by punching holes in the bag’s top edge.
Voilà! You now have a beautiful paper gift bag ready for your presents!
Also Read This: Searching Simplified: A Guide to Finding Products on AliExpress
Creative Design Ideas
Your paper gift bag can be a canvas for your imagination! Here are some creative design ideas to make your bag not just functional, but also a stunning piece of art:
- Seasonal Themes: Decorate your bag according to the season! For instance, use autumn leaves during fall or snowflakes for winter. A little themed décor goes a long way!
- Color Blocking: Use different shades of paper to create a color-blocked effect. Cut various sizes of paper and glue them onto the base layer for a trendy look.
- Stencils and Stamps: Utilize stencils or rubber stamps to add unique patterns or images. This can be anything from floral designs to geometric shapes!
- Personalized Touch: Write the recipient’s name or a thoughtful message on the bag using markers or paint. Personalization makes the bag extra special!
- Layered Textures: Incorporate different materials. Think burlap for handles, lace around the edges, or glitter glue for a sparkling finish!
Remember, the sky’s the limit! Get creative and let your personality shine through your gift bag design! Happy crafting!
Also Read This: How to Use WireImage to Create a Strong Brand Image
Tips for Perfecting Your Paper Gift Bag
When it comes to making a paper gift bag, there are a few tricks that can elevate your crafting game from good to great! Let’s dive into some essential tips to ensure your paper gift bag not only looks awesome but is also sturdy enough to hold your special gift.
- Choose Quality Paper: Always opt for thicker paper if you want your bag to have a strong structure. Cardstock or scrapbook paper works wonderfully.
- Get the Right Dimensions: Measure your gift before you start cutting! Make sure the dimensions of your paper will comfortably fit your item.
- Use Decorative Edges: Consider using decorative scissors or a paper cutter to create scalloped or angled edges for added flair.
- Reinforce Handles: Instead of just cutting holes for your handles, reinforce them with tape or a piece of scrap paper to prevent tearing.
- Embellish Wisely: A little embellishment can go a long way. Think about adding stickers, stamps, or even a bit of glitter to make your bag pop!
- Practice Your Folding: Clean, crisp folds are key to a professional-looking bag. Don’t rush—take your time and use a bone folder for precise folds.
- Seek Inspiration: Don’t hesitate to look for inspiration online! Social media platforms like Pinterest can provide tons of creative ideas and techniques.
By keeping these tips in mind, you can perfect your paper gift bag crafting skills, making each bag a unique masterpiece ready to hold your thoughtful gifts!
Conclusion
Creating a paper gift bag is not just a fun activity; it’s a wonderful way to add a personal touch to your gifting experience. Whether you’re preparing for a birthday, holiday, or just want to surprise someone special, your handmade gift bag tells a story of care and creativity.
From choosing the right materials to perfecting your technique, every step in the process allows you to express your artistic flair. Remember to play around with different designs, sizes, and embellishments to make each bag unique. You might even find yourself making bags for all sorts of occasions!
So, gather your supplies, put on your crafting hat, and get ready to transform regular paper into something truly special. You might just discover that crafting not only fulfills your creative ambitions but also brings a smile to the faces of your loved ones when they receive your beautifully packaged gifts.
 admin
admin


