Rubber band bracelets have taken the crafting world by storm! These colorful and fun accessories are not only trendy, but they're also a fantastic way to express your creativity. Whether you're a seasoned crafter or just starting out, making rubber band bracelets can be a delightful experience. With a simple twist and a little bit of imagination, you can create unique and stylish pieces that reflect your personality.
What's great about rubber band bracelets is their versatility. You can find countless designs online, ranging from simple single-strand styles to intricate patterns. The best part? You can customize them with different colors, styles, and charms to make each bracelet truly one-of-a-kind. So, grab your materials, and let's dive into the wonderful world of rubber band bracelet-making!
Materials Needed

Before you jump into crafting your rubber band bracelets, it's important to gather the right materials. Having everything prepared will not only make the process smoother but also more enjoyable. Here's a list of the essential materials you'll need:
- Rubber Bands: The star of the show! You'll need assorted colors and sizes, depending on the design you choose. Standard size bands work great, but don’t hesitate to experiment with different thicknesses!
- Bracelet Loom (Optional): While you can create bracelets without a loom, using one can help you achieve more complex designs with ease. There are plenty of looms available that cater to different skill levels.
- Hook or Crochet Hook: A hook is used to pull the rubber bands through each other, making it easier to weave and secure your design. If you don’t have a loom, a crochet hook can serve as a perfect alternative.
- S Clips or C Clips: These little fasteners are essential for securing the ends of your bracelet. They help to keep everything in place, so your hard work doesn’t unravel!
- Scissors: You’ll need a pair of scissors for trimming any excess rubber bands or cutting them to size.
- Charms (Optional): For a personal touch, consider adding charms to your bracelets! Pick charms that resonate with you or represent your interests.
With these materials in hand, you’re all set to unleash your creativity and start crafting beautiful rubber band bracelets. Let your imagination run wild, and have fun with it!
Basic Techniques for Weaving

Creating rubber band bracelets can be both fun and rewarding! Before diving into the actual crafting, let’s discuss some basic techniques that will enhance your weaving skills. Here are a few essential techniques to get you started:
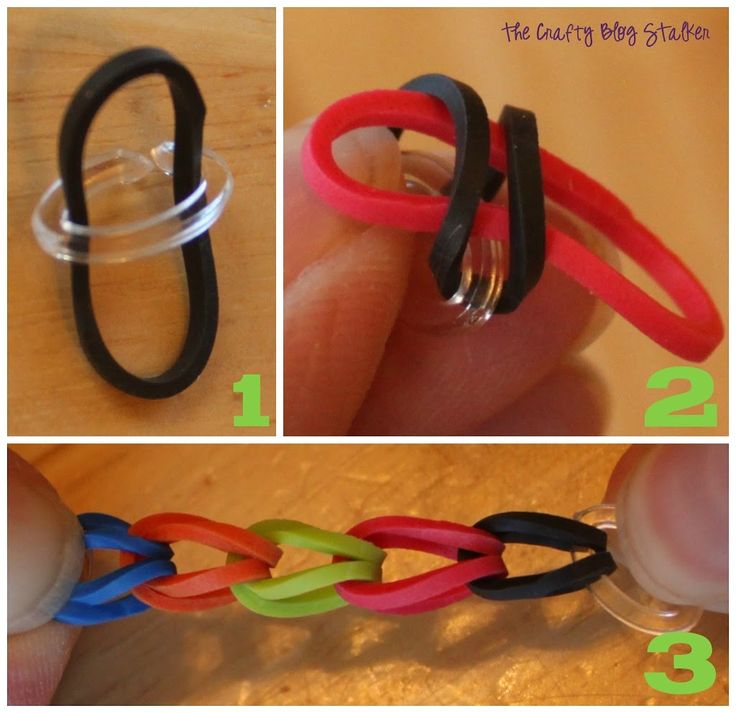
- Single Chain Weave: This is the simplest form of weaving. It involves linking bands in a chain-like fashion. To create a single chain, you’ll need to place one band over another, securing them together by weaving.
- Rainbow Loom Technique: This method makes use of a loom to assist in the weaving process. The bands are placed on pegs, and a hook or the loom is used to pull them through one another, creating intricate patterns.
- Fishtail Weave: This technique is a bit more advanced but produces stunning results! You’ll use two bands at a time and alternate between them as you weave, creating a beautiful fishtail-like design.
- Triple Cross Weave: Here, you’ll be working with three rubber bands at once. This technique makes for a thicker and more robust bracelet, perfect for those who like a bolder look.
Every technique has its charm, so feel free to experiment and find which one suits your style best. Remember, practice makes perfect, and soon enough, you'll be creating fantastic designs!
Step-by-Step Instructions

Now that you're familiar with some basic techniques, let’s get into the nitty-gritty of making your very own rubber band bracelet! Follow these simple steps:
- Gather Your Materials: For this project, you’ll need:
- Rubber bands (choose your colors)
- A loom or a simple clip
- A hook (optional but helpful)
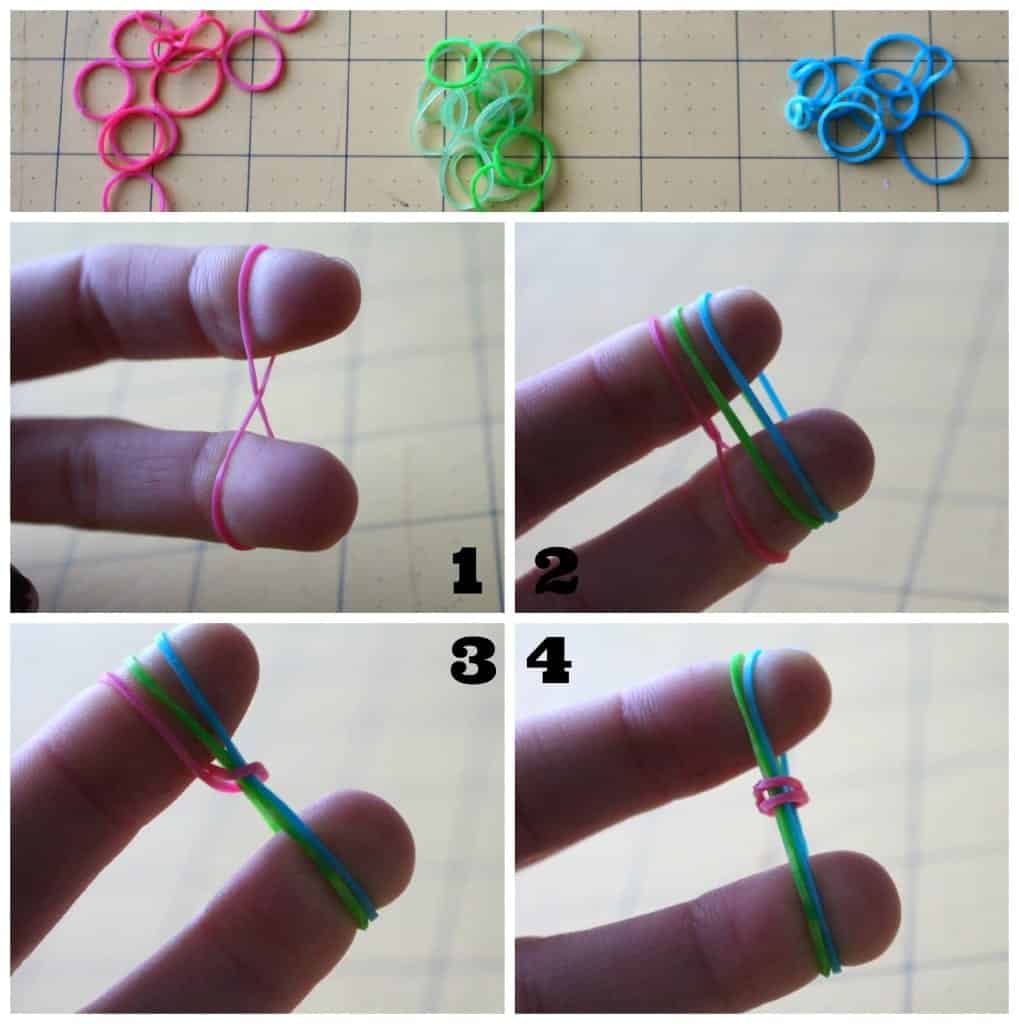
- Set Up Your Loom: If you’re using a loom, position the pegs in a staggered formation. If you're working without one, form a basic triangle with your fingers.
- Start Weaving: Take your first rubber band, twist it, and place it on the loom pegs or around your fingers to start the initial loop.
- Add More Bands: Continue adding rubber bands by looping them over the previous bands, following your chosen weaving technique.
- Secure Your Bracelet: Once your bracelet reaches the desired length, use a clip to secure the end or tie it off if you're not using a loom.
- Admire Your Creation: Finally, remove your bracelet from the loom or fingers, and give yourself a pat on the back! You’ve just made a fantastic rubber band bracelet!
With practice, you’ll be able to try more complex designs. Happy crafting!
5. Creative Designs and Patterns
If you’re diving into the world of rubber band bracelets, you’re in for a treat! There’s a multitude of designs and patterns that can take your crafting to the next level. Here are some popular styles you might want to try out:
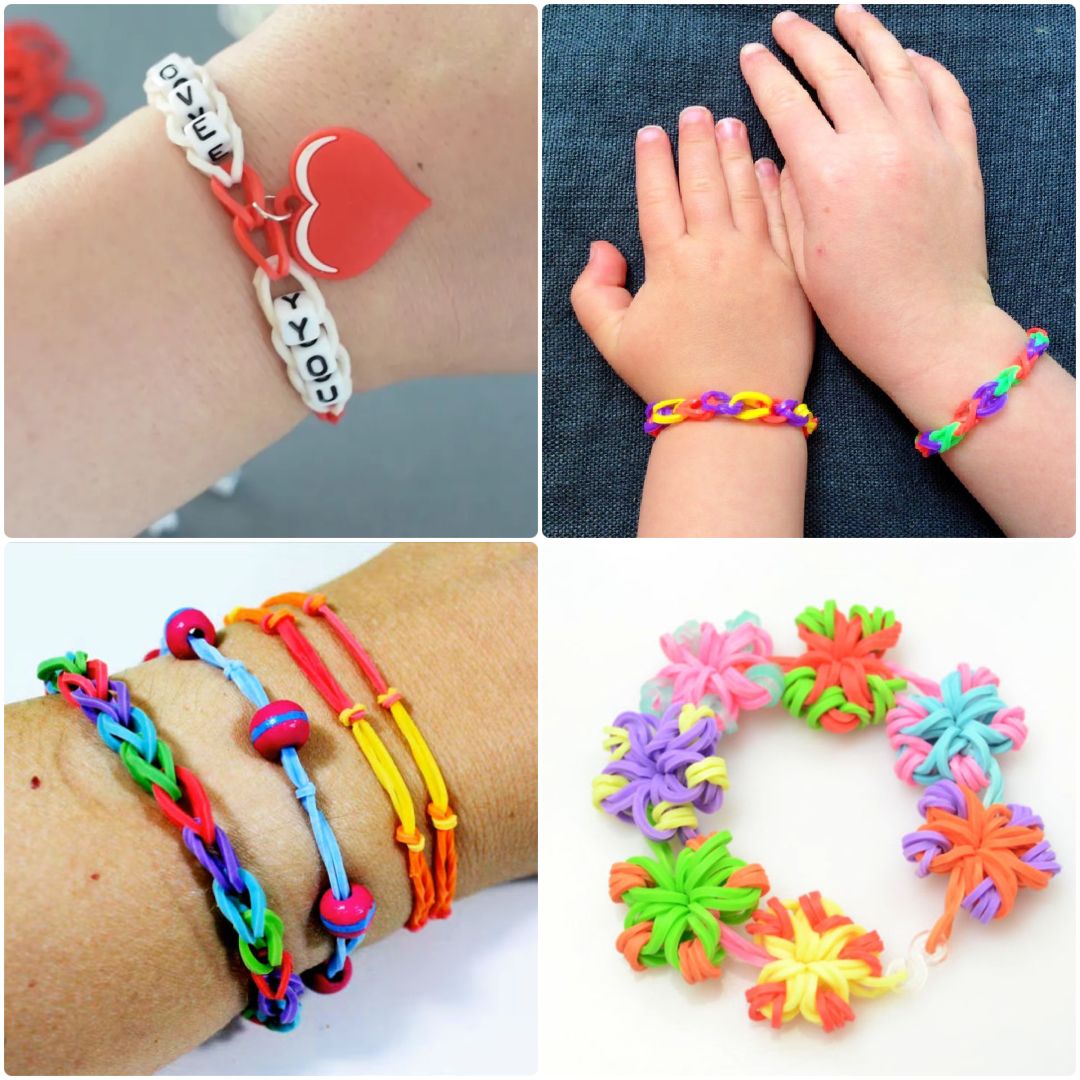
- Classic Rainbows: This is a staple design where you use multiple colors to create a vibrant rainbow effect. It’s simple yet eye-catching!
- Fishtail Bracelets: This style features interwoven bands to resemble a fishtail. It’s a bit more intricate but well worth the effort.
- Triple Single: A fun twist that involves three strands instead of one, creating a thicker and more robust bracelet.
- Hexafish: A captivating pattern that looks complex but is relatively easy to master. It combines elements of the fishtail and adds another layer of design.
- Diamond Pattern: This design showcases a diamond-like structure that’s both symmetrical and stunning.
Exploring these designs not only allows you to express your creativity but also helps you develop your skills. You can even mix and match colors or add charms for an extra flair! Don’t hesitate to experiment with different combinations to come up with your unique creations.
6. Tips for Perfecting Your Bracelets
If you want your rubber band bracelets to look professional and last longer, here are some essential tips to keep in mind:
- Choose Quality Bands: High-quality rubber bands are less likely to break. Opt for brands specifically made for crafting.
- Maintain Consistent Tension: When weaving, ensure that your bands are not too tight or too loose. This makes a big difference in the finished look.
- Use a Loom or Fingers Wisely: If you're just starting out, using a loom can help maintain consistency in size and spacing. However, once you’re confident, feel free to use just your fingers!
- Secure Your Ends: Make sure to properly secure the ends of your bracelet with strong connectors. This prevents your hard work from unraveling.
- Practice Makes Perfect: Don’t be discouraged by mistakes. Each failed attempt is a step towards mastering your bracelet-making skills.
Take your time, enjoy the process, and most importantly, have fun! With these tips and a bit of practice, you’ll be crafting beautiful rubber band bracelets in no time.
Where to Share Your Creations
Once you've crafted your stunning rubber band bracelets, you might be wondering where to show off your handiwork! Sharing your creations not only adds an extra layer of satisfaction but also connects you with fellow enthusiasts. Here are some fantastic platforms and communities where you can share your rubber band bracelet designs:
- Social Media Platforms: Websites like Instagram and Pinterest are perfect for showcasing your creations. Use relevant hashtags like #RubberBandBracelets or #CraftingCommunity to reach a larger audience.
- Crafting Forums: Join online craft forums or groups on platforms like Reddit or Facebook. Engaging in discussions and sharing your works can help you connect with like-minded crafters.
- YouTube: If you're comfortable with video, consider creating a channel where you can demonstrate your bracelet-making process. Tutorials are especially popular!
- Local Craft Fairs: Don’t forget about real-world opportunities! Attend local craft fairs or community events to showcase and even sell your bracelets.
- Personal Blog or Website: If you’re passionate about crafting, starting your own blog can serve as a space to share your work, tips, and tutorials.
By sharing your creations, you not only celebrate your creativity but also inspire others to pick up the craft. Remember, it’s all about community and connection!
Conclusion
Making rubber band bracelets is more than just a fun hobby; it’s a fantastic way to express your creativity and develop fine motor skills. Whether you’re creating a simple single chain or an intricate fishtail design, you’ll discover the joy of crafting with each colorful band that you weave together.
In this tutorial, we've covered everything you need to know to get started. From gathering your materials to learning various techniques and, importantly, where to showcase your finished pieces, you've got a roadmap for your rubber band bracelet journey.
As you progress, don’t hesitate to experiment with different colors, patterns, and even materials! The possibilities are endless. We encourage you to share your creations, seek feedback, and, most importantly, enjoy the creative process. Remember, every bracelet tells a story, and yours is just beginning!
Happy crafting!


