Have you ever glanced at a beautifully designed piece of content and wondered how they achieved those stunning curved images? Well, you're in luck! In this guide, we'll explore the world of image bending in Canva, a popular graphic design tool. Not only does Canva make it easy to create professional-looking designs, but it also allows you to experiment with image shapes, including those delightful curves that can turn a good design into a fantastic one. Let's dive in and discover how you can elevate your visual content using this simple yet powerful feature!
Getting Started with Canva
Alright, let’s get the ball rolling! First off, if you haven't signed up for Canva yet, it's super easy and free. Just visit their website and create an account. They offer a user-friendly interface that's perfect for both beginners and seasoned designers. Here’s what you need to do:
- Step 1: Visit the Canva website and click on 'Sign up' or 'Log in' if you already have an account.
- Step 2: Choose your preferred design format. Canva offers various options, from social media posts to presentations and flyers.
- Step 3: Explore the templates available. Whether it’s for a presentation or a social media post, there are countless pre-made templates you can customize!
- Step 4: Upload your images. Click on 'Uploads' in the left-hand sidebar, then drag and drop your images, or select them from your device.
- Step 5: Familiarize yourself with the tools. Canva provides an array of features including text boxes, illustrations, and shapes!
Remember, the best way to learn is through exploration. So dive in, have fun, and start creating stunning visuals with curved images!
Also Read This: How to Convert Slides to Digital Images for Archiving
Choosing the Right Image for Bending
When it comes to bending images in Canva, the choice of image is crucial. Not every image will yield satisfying results when curved. Here are a few tips to help you select the best images for your creative endeavors:
- High Resolution: Always opt for high-resolution images. They will maintain their quality even after distortion, ensuring your final product doesn't look pixelated.
- Simple Backgrounds: Images with simple or solid backgrounds are easier to bend gracefully. Avoid overly complex images that may become distorted in undesirable ways.
- Subject Focus: Choose images where the focus subject can be effectively centered. This typically involves portraits or objects that won’t stretch awkwardly when curved.
- Editability: If you plan on further editing your image, select those that are either PNGs or JPEGs with clean lines and shapes. This makes sure that they blend well with the curves.
- Styles that Suit Curves: Images that have a natural flow or movement tend to look more appealing when bent. Think of images like leaves, fabric, or waves.
By putting careful thought into your image selection, you can drastically enhance the visual quality of your curved images. This attention to detail will make your designs look professional and captivating!
Also Read This: Learn How to Make and Share Memes Videos on iFunny With This Method
Using the Shape Tool to Create Curves
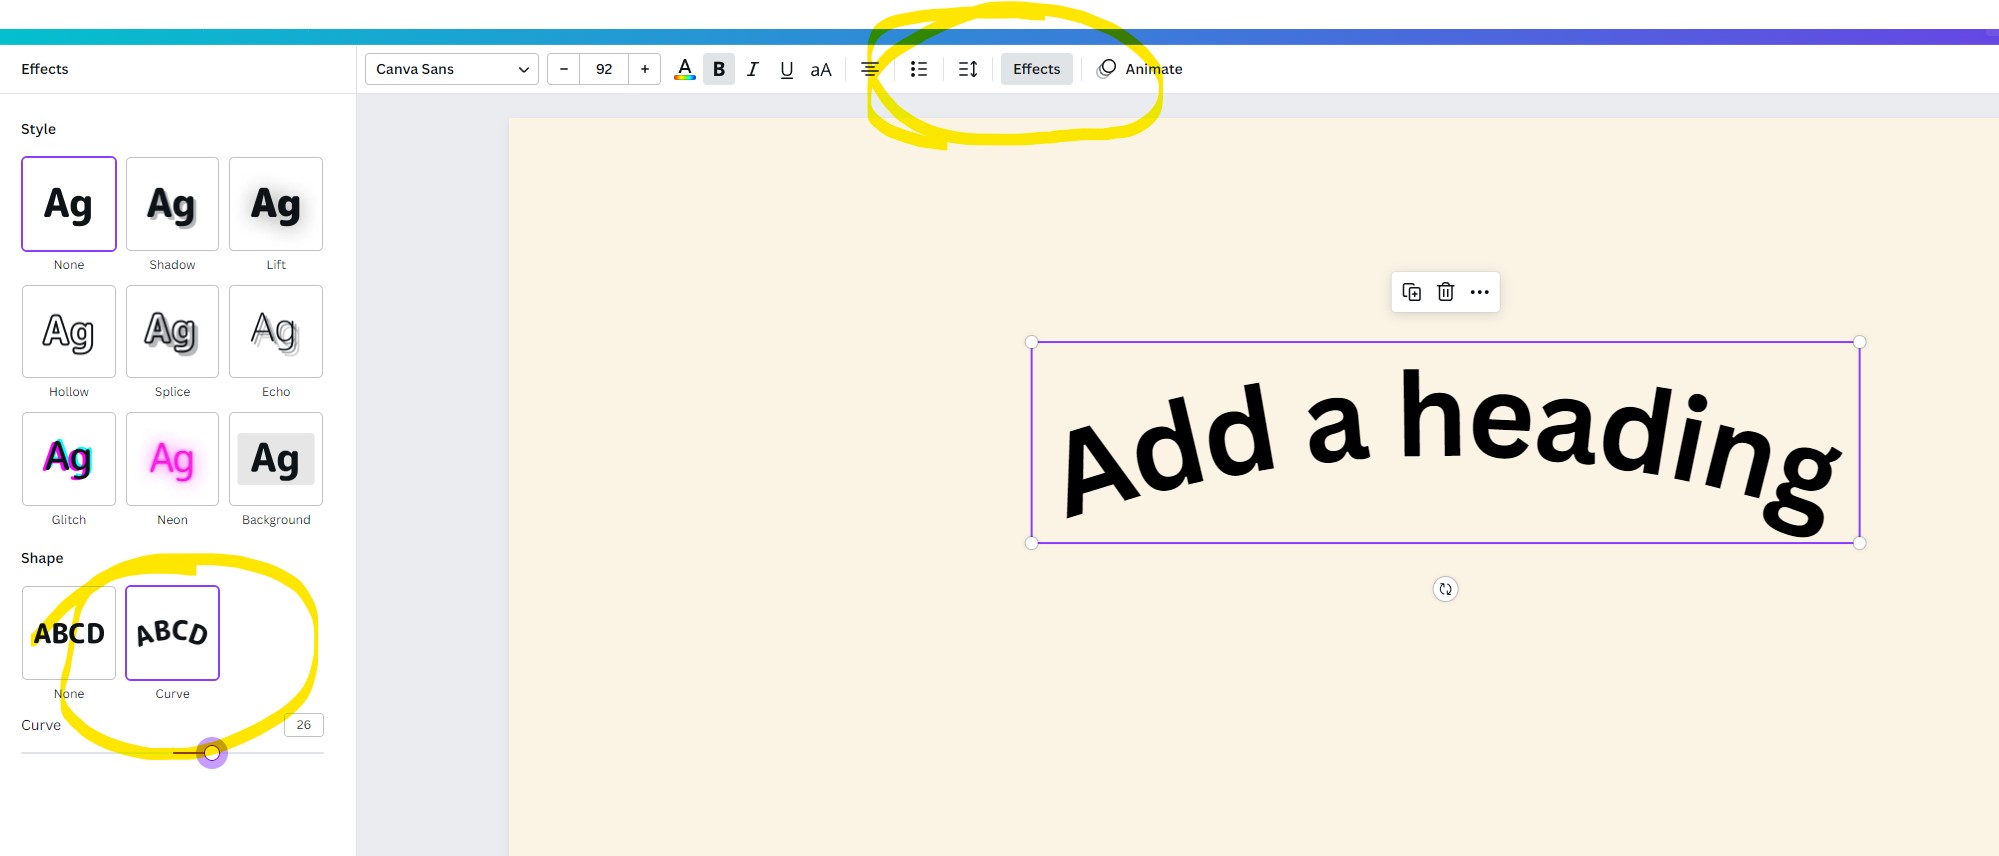
The Shape Tool in Canva is a delightful feature that helps you create curves easily and effectively. Here’s a step-by-step guide on how to utilize it:
- Accessing the Shape Tool: Open your design and navigate to the left panel. Locate the ‘Elements’ section and click on it. Then, scroll until you find the ‘Shapes’ category.
- Select a Shape: Choose a curved shape like a circle or a rounded rectangle. These shapes provide a solid base for your image bending.
- Adjust the Size: Click on the shape to adjust its size. Drag the corners or use the toolbar to get the exact size you require.
- Positioning Your Image: Drag and drop your image over the shape. Ensure that it covers the entire shape space to prepare for bending.
- Masking the Image: To create a perfect bend, right-click on the image and select ‘Mask’. This action will clip your image to the shape, creating the curve effect.
- Fine-tuning: Don’t forget to tweak the position and size of your image within the shape to achieve the desired curvature.
Using the shape tool opens up a world of creativity in Canva, allowing you to design uniquely curved images that stand out. So, have fun experimenting with various shapes and find those creative flows!
Also Read This: Simple Guide to Cropping Images in Figma
5. Adjusting Image Settings for a Perfect Bend
When you’re venturing into creating curved images in Canva, adjusting the image settings is essential for achieving that perfect bend. No one wants a distorted or pixelated image, right? Let’s dive into some key adjustments you can make.
First things first, consider the dimensions of your image. It’s crucial to upload images that match the design size you have in mind. Why? Because resizing too much can lead to blurriness. Here’s a simple checklist:
- Choose High-Quality Images: Always use images with high resolution.
- Set Proper Dimensions: Use Canva’s recommended dimensions for your design.
- Use the Correct File Format: PNGs work great for images with transparency, while JPEGs are ideal for photographs.
Next, let’s talk about image adjustments. In Canva, you have a variety of settings at your disposal:
- Brightness: Adjust the brightness to ensure your image stands out against the background.
- Contrast: Playing with contrast helps in enhancing the visibility of curved details.
- Saturation: Boost colors to make your image pop.
Finally, after these adjustments, it’s a good idea to preview how your image interacts with the bend effect. Always tweak until it feels just right!
Also Read This: Can You Livestream on Dailymotion? Everything You Need to Know
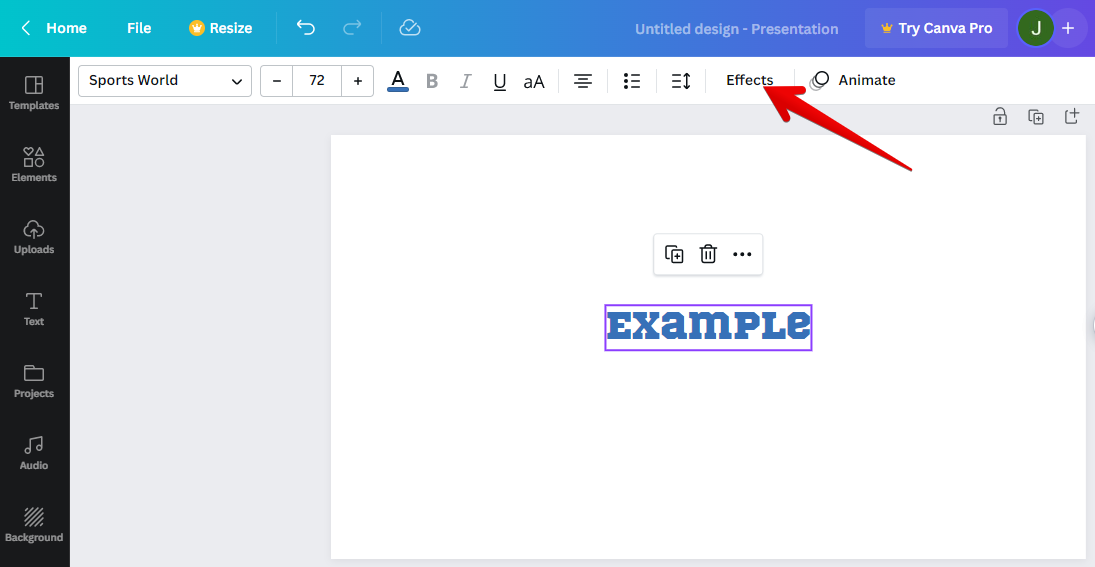
6. Final Touches: Adding Effects and Enhancements
Now that you’ve got your curved image looking gorgeous, it's time for those final touches that can elevate your design. Let’s explore how to effectively add effects and enhancements to make your creation really shine.
Canva offers a plethora of options, and you can do the following:
- Shadows: Adding a shadow can provide depth and make your image feel more three-dimensional.
- Glows: A soft glow effect can give your image an ethereal touch. Don’t overdo it though, subtlety is key!
- Filters: Use filters to create a consistent visual tone across your design. From vintage vibes to modern aesthetics, the choice is yours.
Additionally, you may want to include some text overlays or icons that resonate with your image. Here’s a quick table to help you decide which effect works best:
| Effect | Ideal For | Tips |
|---|---|---|
| Shadow | Creating depth | Keep it soft and subtle. |
| Glow | Highlighting features | Use light colors for a fresh look. |
| Filter | Setting a mood | Pick a filter that aligns with your theme. |
Once you apply these effects, don’t forget to step back and look at your work. Sometimes a little distance gives you the best perspective to see if anything needs tweaking. Happy designing!
Also Read This: Capturing Famous Places Across the USA in Photos
7. Saving and Exporting Your Curved Image
Once you’ve put the finishing touches on your curvy masterpiece in Canva, the next step is to save and export it for your desired use. Don’t worry, it’s a pretty straightforward process! Here’s how to do it:
- Click on the Download Button: In the top right corner of the Canva interface, you’ll see a button that says “Download.” Go ahead and click on that.
- Select the File Type: Canva gives you multiple options for file types. Choose from formats like PNG, JPEG, or PDF. Generally, for images, PNG or JPEG works best, but if you need a document, go for PDF.
- Adjust Settings: If you're opting for PNG or JPEG, you might have the option to select the quality or size of your image. Higher quality usually means larger file size, so make sure to balance quality with your intended use.
- Click Download: After you’ve selected all your settings, hit that “Download” button again, and the image will be saved to your computer.
And voilà! You’ve successfully exported your curved image. Whether you’re planning to share it on social media, use it in a presentation, or print it out, your creation is ready to shine!
Also Read This: How to Get Traffic on YouTube for More Views and Subscribers
8. Tips and Tricks for Bending Images Effectively
Bending images in Canva can be a game-changer for your design projects, but there are some nuances that can help you get stunning results. Here are some practical tips to keep in mind:
- Choose the Right Image: Not all images lend themselves well to bending. Opt for images with clear focal points that won't get distorted too much when curved.
- Use Guidelines: Utilize Canva’s grid and guidelines to maintain symmetry when applying curves. It helps keep everything looking balanced and professional.
- Play with Positions: Don’t hesitate to experiment with different placements of your curved image. Sometimes the magic happens when you step outside the box!
- Utilize Colors and Shadows: Adding a shadow effect can give depth to your curved images. A splash of color or gradient can also enhance the curvature effect.
- Preview and Adjust: Always take a moment to preview your design before saving. Zoom in and out to see if the bend looks natural or if adjustments are needed.
Remember, the key to bending images effectively is practice. The more you play around with the tools in Canva, the more skilled you’ll become at weaving those curves into your designs!
Creating Curved Images in Canva
Canva is an incredibly versatile graphic design platform that allows users to create stunning visuals easily. One popular trend in design is the use of curved images, which can add a unique touch to any project. This guide will provide a step-by-step approach to creating curved images in Canva, empowering you to enhance your brand or personal projects.
Step-by-Step Guide
- Open Canva: Begin by logging into your Canva account or signing up for a free one.
- Choose a Template: Select a template that suits your needs or start with a blank canvas.
- Add an Image: Upload your desired image or choose one from Canva's extensive library.
- Use the Elements Feature: Click on the 'Elements' tab on the left sidebar.
- Select Shapes: Choose a shape that you want to curve your image into, such as a circle or a wave shape.
- Position the Image: Place your image on top of the selected shape.
- Crop the Image: Double-click the image to access the cropping tool, allowing you to fit the image precisely within the shape.
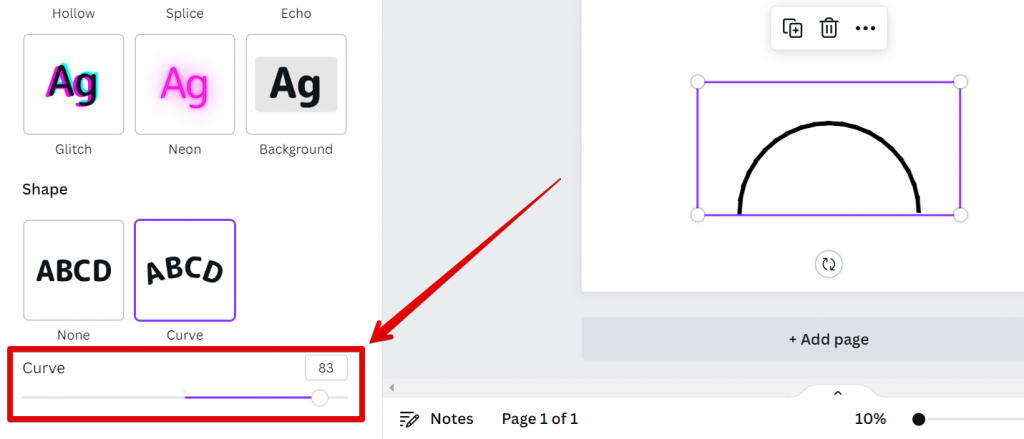
- Adjust Curvature: Use the corners of the shape to adjust its curvature to your liking.
- Finalize Your Design: Add any additional elements, text, or designs to complete your project.
Tips for Creating Effective Curved Images
- Use High-Quality Images: Ensure your images are high-resolution for the best results.
- Experiment with Colors: Play with colors that complement your design.
- Maintain Balance: Ensure that the curved image harmonizes with other elements in your design.
By following this comprehensive guide, you can easily create beautiful curved images in Canva that enhance your visual storytelling and captivate your audience.
Conclusion: Creating curved images in Canva is a straightforward process that adds a creative flair to your designs, helping you stand out and effectively communicate your message.
 admin
admin