An Apple ID is more than just an email address and password; it is your gateway to a world of Apple services. Whether you're diving into the App Store to download that new game you've heard about, or syncing your photos across all your devices with iCloud, having an Apple ID is essential. This single account enables you to seamlessly connect to various services and stay in touch with the Apple ecosystem. If you're new to Apple products or even if you've been using them for a while, understanding the purpose of an Apple ID is crucial. Let's delve into what an Apple ID is all about and prepare you for a smooth setup process.
Why You Need an Apple ID

Having an Apple ID opens up a plethora of opportunities, and here are some compelling reasons why you should create one:
- Access to Apple Services: Your Apple ID allows you to access the App Store, iCloud, Apple Music, and more. You won't miss out on any exciting apps, songs, or cloud features.
- Effortless Syncing: An Apple ID helps you sync data across multiple devices. Whether it’s contacts, calendars, or notes, having everything synchronized makes life easier.
- Find My iPhone: Protect your devices with the "Find My" app. If you ever misplace your iPhone or iPad, your Apple ID will help you locate it easily.
- Purchase and Download Content: Once you've set up your Apple ID, you can buy apps, games, and music, or download free content without hassle.
- Personalized Experience: With an Apple ID, you can tailor your experience by receiving recommendations based on your preferences.
- Two-Factor Authentication: Security is a big deal. Apple ID provides robust security features, including two-factor authentication, adding an extra layer of protection to your account.
In a nutshell, an Apple ID is a versatile tool that enhances your experience across all things Apple. So, if you’re ready to dive deeper into the Apple world, creating an Apple ID is your first step!
Step 1: Accessing the Apple ID Creation Page

Creating an Apple ID is your first step towards accessing the myriad of Apple services, from downloading apps on the App Store to utilizing iCloud for storage. So how do you get started? First things first, you’ll need to access the Apple ID creation page. Here’s how to do it:
- Using a Web Browser: Open your preferred web browser—whether it's Safari, Chrome, or Firefox. In the address bar, type appleid.apple.com/account and press Enter.
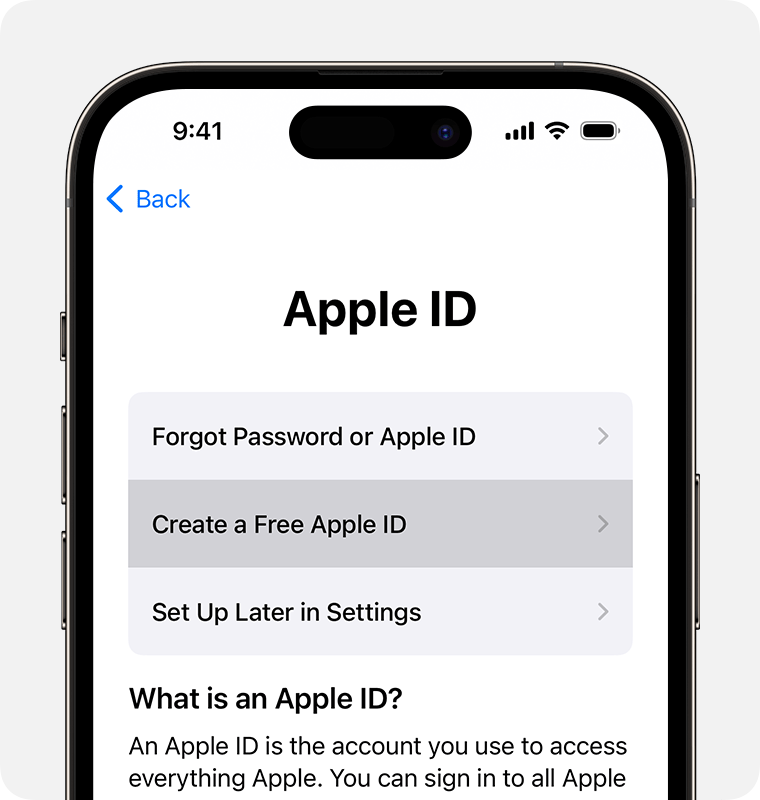
- On an iPhone or iPad: Go to the Settings app. At the top, tap on "Sign in to your iPhone" or "iPad". Then, click on “Don’t have an Apple ID or forgot it?” and select “Create Apple ID.”
- From a Mac: Click on the Apple menu (), then go to "System Preferences." Look for the "Apple ID" or "iCloud" option and choose to create a new Apple ID.
Once you're on the page, look for the "Create Your Apple ID" option. Click on that to proceed to the next steps. It’s that simple! Now you’re one step closer to enjoying everything that Apple offers.
Step 2: Entering Your Information
Now that you’re on the creation page, it’s time to fill in the necessary details to set up your Apple ID. Here’s how to do it:
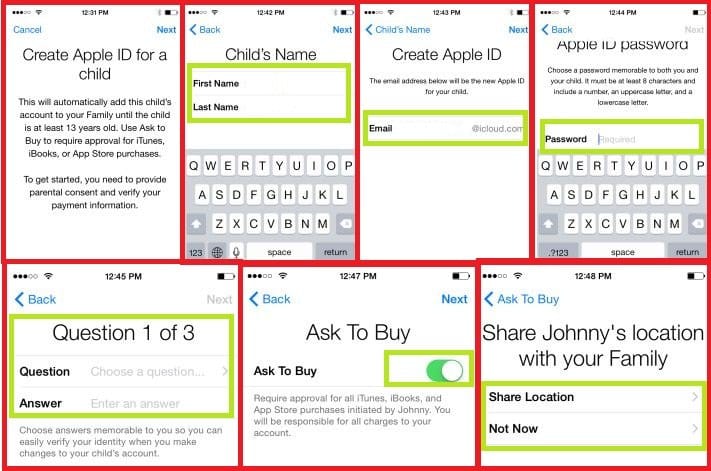
You'll encounter several fields to fill. These include:
- First and Last Name: Make sure to provide your real name, as this will be associated with your Apple account.
- Email Address: This email will serve as your Apple ID. It needs to be unique, so choose something you’ll remember and have access to.
- Password: Create a strong password—one that includes a mix of upper and lower case letters, numbers, and special characters. Apple will provide guidelines to help you create a secure password.
- Security Questions: Select and answer the security questions. These questions will help verify your identity if you ever need to reset your password.
- Date of Birth: Enter your date of birth. This helps Apple provide age-appropriate recommendations and secure your account.
Once you've filled out all the required fields, double-check for typos or missing information. Then, click on the "Continue" button to proceed. This will lead you to the next steps, including verifying your email address. Hang tight—you're almost there!
Step 3: Verifying Your Email Address
Once you've filled out the necessary information to create your Apple ID, it’s time to verify your email address. This is a crucial step in the process, as it ensures that you own the email account that you're linking to your Apple ID. It also enhances the security of your account. So, let’s break down how to do this!
Here’s what you need to do:
- Check Your Email Inbox: After submitting your information, head over to the email inbox of the address you provided. Look for an email from Apple that contains the verification link.
- Open the Email: Once you find the email, open it. Make sure to check your spam or junk folder if you don’t see it in your main inbox. Apple’s confirmation emails can sometimes sneak into these folders.
- Click the Verification Link: In the email, you'll find a link that says something like "Verify your email address" or "Complete your registration." Click on this link.
- Confirmation Page: After clicking the link, you'll be redirected to a confirmation page that informs you that your email address has been verified. 👏
And voilà! You have officially verified your email address. This step is vital for password recovery and security notifications, so don’t skip it!
Step 4: Setting Up Security Questions
Now that your email is verified, let's move on to enhancing your Apple ID security through the setup of security questions. This step might seem a bit tedious, but trust me, it’s worth it to keep your account secure.
Security questions act as an extra layer of protection, especially if you forget your password. Here’s how to set them up:
- Choose Your Questions: You will be prompted to select security questions from a list. Make sure to choose questions that are not only easy for you to remember but also hard for others to guess. Some examples include:
- What was the name of your first pet?
- What is your mother’s maiden name?
- What city were you born in?
And just like that, you’ve set up your security questions! It’s all about keeping your account safe and sound. Now you can rest easy knowing that you’ve put in the effort to secure your Apple ID. 😊
Step 5: Completing the Setup Process
Congratulations on making it this far in creating your Apple ID! You’re almost there, and the final step involves some essential parts to ensure your new account is up and running smoothly. Let’s walk through this together.
After you have filled in all your personal details and selected your preferences, you’ll be directed to the verification screen. Here’s what to expect:
- Verification Email: Check your email inbox for a verification email from Apple. If it hasn’t arrived within a few minutes, don’t forget to peek into your spam or junk folder. Make sure to click on the link in that email to verify your new Apple ID.
- Two-Factor Authentication: Depending on your device and settings, you might be asked to set up two-factor authentication. This adds an extra layer of security, ensuring that only you can access your account.
- Payment Information: If you're planning to make purchases through iTunes, the App Store, or Apple Books, now’s the time to add your payment information. You can either enter your credit card details or choose to “None” if you don't want to add payment details right now.
- Account Recovery: It's vital to set up account recovery options. This may include security questions or a backup email address, making sure you'll have access even if you forget your password.
Once you’ve completed these steps and verified your account, you’re all set! You can start enjoying everything Apple has to offer with your new Apple ID.
Troubleshooting Common Issues
Despite how straightforward creating an Apple ID may seem, issues can arise. Don’t worry; they’re usually easy to resolve! Here are some common problems you might encounter and how to fix them:
| Issue | Solution |
|---|---|
| Email Already in Use | Make sure you’re not trying to create an account with an email address that’s already associated with another Apple ID. If it is, you’ll need to recover that account instead. |
| Verification Email Not Received | Check your spam folder, and ensure you've given the correct email address. You can request a new verification email if necessary. |
| Unable to Verify Phone Number | Ensure that your phone can receive messages, and check that you're entering the correct phone number. You may also try a different number if you continue to have issues. |
| Password Not Accepted | Remember that your password must meet Apple’s complexity requirements. Ensure it includes at least eight characters, a number, and a special character. |
If you encounter any issues that aren’t listed here, Apple’s support resources are fantastic and can guide you further. Remember, patience is key, and with a little persistence, you’ll be enjoying your shiny new Apple ID in no time!
Creating an Apple ID: A Comprehensive Step-by-Step Guide
Having an Apple ID is essential for accessing various Apple services such as the App Store, iCloud, iTunes, and more. Follow this comprehensive step-by-step guide to create your Apple ID swiftly and easily.
Step 1: Access the Apple ID Creation Page
To start, navigate to the official Apple ID creation page:
- Visit appleid.apple.com.
Step 2: Fill Out Your Information
Once on the site, you will need to enter the following details:
| Field | Description |
|---|---|
| First Name | Your first name. |
| Last Name | Your last name. |
| Email Address | A valid email that will be your Apple ID. |
| Password | Create a strong password (at least 8 characters). |
| Country/Region | Select your country from the dropdown menu. |
Step 3: Verification
After entering your information, Apple will send a verification code to the email address you provided. Check your email, retrieve the code, and enter it on the Apple ID page to verify your account.
Step 4: Security Questions
To enhance your account's security, select three security questions from the list provided and answer them. Make sure the answers are memorable but secure.
Step 5: Accept Terms and Conditions
Read through Apple’s terms and conditions. Once you agree, check the box to accept them and click “Continue.”
Step 6: Finalize Your Account
Your Apple ID is now created! You can use this ID to log into all Apple services.
Conclusion and Next Steps
Creating an Apple ID is a straightforward process that unlocks a world of features on your Apple devices. Now that you have your Apple ID set up, consider exploring iCloud for storage, setting up two-factor authentication for enhanced security, and browsing the App Store for apps that suit your needs.
 admin
admin


