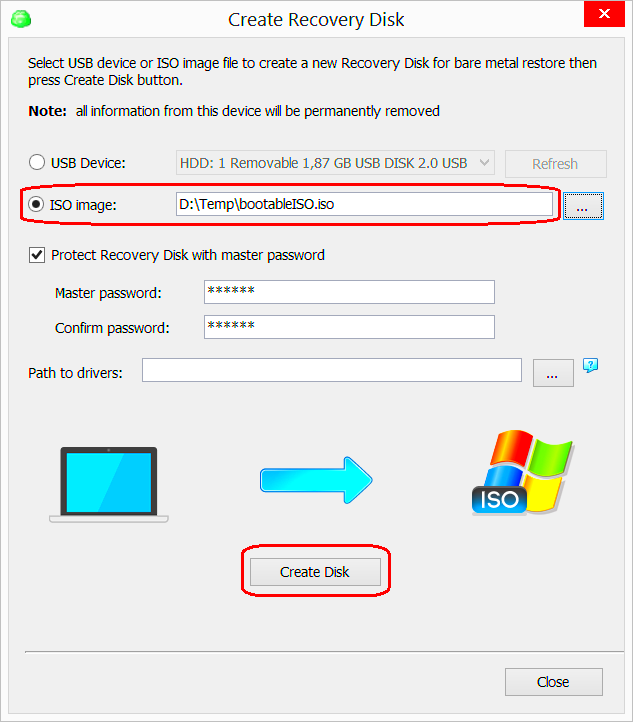
Creating a bootable ISO image is a useful skill, whether you're setting up a new operating system, running system diagnostics, or installing software. A bootable ISO is a file that contains an exact copy of the data and structure of a disc, such as a CD, DVD, or USB drive, but in a format that can be used to start (or "boot") your computer. This guide will help you understand how to create one for various systems, and walk you through the necessary steps to ensure a smooth process.
Understanding What a Bootable ISO Image Is

A bootable ISO image is essentially a virtual copy of a physical disc that is designed to be used to start up your computer. ISO files are often used for operating systems, installation media, and recovery tools. When you create a bootable ISO, you're preparing your system to start directly from this image instead of your hard drive, which can be helpful when installing software or troubleshooting problems. Here are a few things to note about bootable ISO images:
- ISO Format: The term "ISO" comes from the file extension ".iso," which is derived from the ISO 9660 standard used for CDs and DVDs.
- Bootable Function: The bootable ISO image includes all the necessary files and instructions to boot a computer or virtual machine.
- Common Uses: Common uses for bootable ISOs include installing operating systems, running recovery tools, and troubleshooting hardware issues.
In short, a bootable ISO image acts like a virtual "disc" that can be run directly from a USB stick or external drive, without needing a physical CD or DVD.
Essential Tools You Need to Create a Bootable ISO Image

To create a bootable ISO image, you'll need a few key tools to make the process seamless. These tools vary depending on the operating system you're using, but here are the essential ones you should consider:
- ISO Creation Software: These programs help you convert a physical disc or operating system files into an ISO image. Some popular options include ImgBurn for Windows, Disk Utility on macOS, and dd on Linux.
- Bootable USB Creator: To transfer the ISO image to a USB drive, you'll need software that allows you to make the drive bootable. Examples include Rufus for Windows, BalenaEtcher for multiple platforms, and UNetbootin for Linux.
- Operating System Files: Whether you’re creating a bootable ISO for Windows, macOS, or Linux, you’ll need the operating system installation files. These can usually be downloaded from official websites or repositories.
- USB Drive: A minimum of 4GB of storage is required for most operating systems. Make sure the drive is empty or contains nothing important, as the process will erase all data on it.
Once you have these tools in hand, you can move on to the actual process of creating your bootable ISO image. In the next sections, we will guide you through creating bootable ISO images on Windows, macOS, and Linux systems.
Steps to Create a Bootable ISO Image on Windows

Creating a bootable ISO image on Windows is a straightforward process, but you'll need the right tools. One of the most popular programs for this job is Rufus, a lightweight, free tool that makes creating bootable USB drives quick and easy. Below are the steps you can follow to create your own bootable ISO image on Windows:
- Download Rufus: Visit the official Rufus website and download the latest version of the software. It's a small file and doesn’t require installation, so you can run it directly.
- Prepare Your USB Drive: Insert a blank USB drive into your computer. Make sure it has at least 4GB of available space, as this is typically required for operating systems like Windows 10.
- Select Your ISO File: In Rufus, under the “Boot selection” section, click the “Select” button and browse for the ISO file you want to make bootable. This could be a Windows installation ISO or any other bootable ISO file.
- Choose Partition Scheme: Select the partition scheme according to your system. Most modern systems will use GPT (GUID Partition Table), while older systems may require MBR (Master Boot Record).
- Start the Process: Once everything is set up, click the “Start” button. A warning will pop up letting you know that all data on the USB drive will be erased. Click “OK” to proceed.
- Wait for Completion: Rufus will now create your bootable USB drive. Once the process is complete, you’ll have a fully functional bootable drive.
Now, your USB drive is ready to boot into the operating system or utility you've selected. Simply plug it into the target computer and boot from the USB to begin installation or troubleshooting.
How to Create a Bootable ISO Image on macOS
Creating a bootable ISO image on macOS is a bit different from Windows, but it’s just as easy. macOS comes with built-in tools like Disk Utility and Terminal that allow you to create a bootable ISO image. Here’s a simple step-by-step guide:
- Download the macOS Installer: First, download the macOS installer from the Mac App Store. You can download the installer for macOS Monterey, Big Sur, or any version you need.
- Prepare a USB Drive: Insert a USB drive into your Mac. The drive should have at least 16GB of free space, as macOS installers are large files.
- Open Disk Utility: Launch Disk Utility from the Applications > Utilities folder. Select the USB drive and click “Erase.” Format it as Mac OS Extended (Journaled) and set the scheme to GUID Partition Map.
- Create the Bootable Image Using Terminal: Open Terminal and use the “createinstallmedia” command to create the bootable image. For example, for macOS Monterey, the command would look something like this:
- Wait for the Process to Complete: The command will copy the necessary files to the USB drive and make it bootable. Wait for the process to finish, which may take some time.
sudo /Applications/Install\ macOS\ Monterey.app/Contents/Resources/createinstallmedia --volume /Volumes/UntitledOnce the process is complete, you can use the USB drive to boot any Mac and install macOS. Simply restart the Mac, hold down the Option key, and select the USB drive to begin the installation process.
Creating a Bootable ISO Image Using Linux
Linux provides several methods for creating a bootable ISO image, including using the command line with tools like dd or graphical tools like UNetbootin or BalenaEtcher. Here’s how you can do it using the command line method on Linux:
- Insert a USB Drive: Insert a USB drive with at least 4GB of storage into your Linux computer. Make sure the drive is empty, as the process will erase all data on it.
- Identify the USB Drive: Open a terminal and type the following command to list all connected drives:
- Write the ISO to the USB Drive: Use the dd command to copy the ISO to the USB drive. For example, if your ISO file is called “ubuntu.iso” and your USB drive is located at /dev/sdb, use the following command:
- Wait for the Process to Finish: Once the process is complete, the terminal will return to the command prompt. The USB drive is now bootable and ready to use.
lsblkThis will display a list of storage devices. Identify the correct device for your USB drive (e.g., /dev/sdb).
sudo dd if=ubuntu.iso of=/dev/sdb bs=4M status=progress && syncThis command will write the ISO file to the USB drive. Make sure to replace "ubuntu.iso" with the actual name and location of your ISO file.
Alternatively, you can use UNetbootin or BalenaEtcher for a more user-friendly approach. These tools allow you to select your ISO file and USB drive, and then automatically make the drive bootable.
Now your USB drive is ready for use! You can plug it into any compatible computer and boot from it to install or repair an operating system.
Common Issues While Creating a Bootable ISO Image and How to Fix Them
Creating a bootable ISO image can be a straightforward process, but sometimes issues arise that can prevent the process from completing successfully. Here are some common problems you might encounter and tips on how to fix them:
- USB Drive Not Booting: If your USB drive isn’t booting, it could be because the ISO image wasn’t written correctly. Make sure you're using a reliable tool like Rufus (for Windows) or Disk Utility (for macOS). If the drive is still not booting, check the boot order in the BIOS and ensure USB booting is enabled.
- Incorrect ISO Image: Ensure that the ISO file you’re using is not corrupted. Sometimes, a damaged or incomplete download can cause the bootable image to fail. Always download ISO files from official sources and verify their integrity with checksums or hashes provided on the download page.
- Partition Scheme Mismatch: If your USB drive works on one computer but not on another, the partition scheme might be wrong. Modern computers use GPT (GUID Partition Table), while older systems require MBR (Master Boot Record). Make sure the partition scheme matches the system you’re trying to boot.
- File System Errors: If your USB drive isn’t recognized or shows errors, it may need to be reformatted. Use tools like Disk Management on Windows or Disk Utility on macOS to reformat the drive and ensure it’s using the correct file system (FAT32 is usually recommended for bootable drives).
By troubleshooting these common problems, you should be able to resolve most issues when creating a bootable ISO image. Make sure to always double-check your settings, and use trusted tools to ensure a successful outcome.
Best Practices for Storing and Using a Bootable ISO Image
Once you’ve created your bootable ISO image, it’s important to store and use it properly to ensure it remains functional and ready when you need it. Here are some best practices to follow:
- Keep Multiple Copies: Always have more than one copy of your bootable ISO image. Store one copy on a USB drive or external hard drive and another copy on your computer or in cloud storage. This ensures you’ll have access to the file even if one storage device fails.
- Label Your Media: If you're using physical media like USB drives or DVDs, label them clearly with the name of the operating system or tool they contain. This will make it easier to identify the drive later, especially if you have multiple bootable images.
- Update Your ISO Files: Over time, operating systems and tools get updated. It's important to regularly download new versions of your bootable ISO image to ensure you have the latest patches and improvements.
- Test Your Bootable Drive: Before relying on a bootable USB or DVD for system recovery or installation, always test it on a secondary system to make sure it works. This will save you from potential headaches when you're in a time-sensitive situation.
- Store in Safe Conditions: Store your USB drives and DVDs in a cool, dry place, away from direct sunlight and extreme temperatures. USB drives are relatively sturdy, but they can still be damaged by environmental factors.
By following these best practices, you’ll ensure that your bootable ISO images are always ready to go when you need them, without the risk of them becoming corrupted or lost.
FAQ: Frequently Asked Questions About Bootable ISO Images
Here are some frequently asked questions about bootable ISO images, along with their answers:
- What is the difference between a regular ISO file and a bootable ISO?
A regular ISO file is a simple image of a disc, whereas a bootable ISO includes special files and instructions that allow a computer to boot from it. A bootable ISO is typically used to install an operating system or run a recovery tool. - Can I create a bootable ISO from any ISO file?
Not all ISO files are designed to be bootable. For instance, a data disc ISO won’t work for booting. Make sure the ISO is specifically intended for booting, such as operating system installation images or recovery tools. - How do I check if my bootable ISO is working?
The best way to check if your ISO image is bootable is to test it on a system. Insert the bootable USB or DVD and restart the computer. Ensure that the boot order is set to prioritize the USB or DVD drive, and see if the system boots from it. - Can I use a bootable USB drive on any computer?
Most modern computers support booting from USB drives. However, older systems may not support booting from USB or may require you to enable USB booting in the BIOS. Check your system’s compatibility before attempting to boot from a USB drive. - Why isn’t my bootable USB drive working?
There are several reasons why your bootable USB might not work. Common issues include using the wrong file system, an incompatible partition scheme, or an improperly created bootable image. Double-check the settings and try recreating the bootable drive using trusted software.
If you have any more questions, don't hesitate to reach out. Bootable ISO images are a great tool, but sometimes it helps to get a little extra guidance to ensure everything runs smoothly!
Conclusion: Key Takeaways for Creating a Bootable ISO Image
Creating a bootable ISO image is a valuable skill that can help you install or repair operating systems, troubleshoot computer problems, or run system recovery tools. By following the steps outlined for different operating systems, you can easily create bootable USB drives or DVDs to boot your computer from a variety of media. Here are some key takeaways to remember:
- Choose the Right Tools: Use reliable software like Rufus for Windows, Disk Utility for macOS, or dd for Linux to create your bootable ISO. These tools simplify the process and ensure the image is written correctly.
- Use the Correct Partition Scheme: Make sure the partition scheme matches the system you're trying to boot. Most modern systems use GPT, while older systems may require MBR.
- Test Your Bootable Drive: Before relying on your bootable ISO, test it on a different computer to ensure it boots successfully. This can save you time if issues arise later.
- Keep Your ISO Files Updated: Operating systems and tools are regularly updated. Always download the latest ISO files to ensure you're working with the most current version.
- Be Prepared for Common Issues: If your bootable image isn’t working, common issues include partition errors, incorrect file formats, or damaged ISO files. Troubleshooting these problems is key to resolving them quickly.
With these tips in mind, you can confidently create and use bootable ISO images for a variety of tasks, ensuring that you’re always prepared when you need to install, repair, or recover your system.

 admin
admin


