Have you ever been captivated by the art of crafting? If so, making a simple paper gun might just be the perfect project for you! Paper guns are not only fun to create but also offer a fantastic way to unleash your creativity. They're lightweight, safe, and can provide hours of entertainment. In this blog post, we’ll walk you through the basics of crafting your very own paper gun, complete with a step-by-step video guide. So, roll up your sleeves, gather your materials, and let’s get started!
Materials Needed for Crafting a Paper Gun
Before diving into the crafting process, it’s essential to gather all the materials you will need. Here’s a handy list to help you prepare:
- Paper: Choose a sturdy paper like cardstock or construction paper. These types provide better durability.
- Scissors: For cutting your paper into the necessary shapes.
- Glue or Tape: To secure different parts of the gun together.
- Pencil: For marking measurements and outlines on your paper.
- Ruler: To ensure precise measurements while cutting.
- Optional - Markers or Paint: To decorate your paper gun once it's assembled!
Here’s a quick overview of how each material contributes to your project:
| Material | Purpose |
|---|---|
| Paper | Forms the main body of the gun. |
| Scissors | Cutting out the shapes needed for assembly. |
| Glue/Tape | Securing the various parts together. |
| Pencil | Marking guidelines for cuts. |
| Ruler | Ensuring accuracy in measurements. |
| Markers/Paint | Adding a personal touch to your finished product. |
Once you have all your materials ready, you’ll be well-equipped to start crafting your paper gun. In the next section, we’ll outline the step-by-step process to guide you through the creation. Happy crafting!
Also Read This: Make Your Nose Appear Slimmer with Makeup Tutorials on Dailymotion
3. Step-by-Step Instructions for Making Your Paper Gun
Creating your own paper gun can be a fun and rewarding project! Let’s dive into the simple steps to craft your very own paper gun. You won’t need any fancy tools—just some basic supplies and a bit of patience.
What You’ll Need:
- A piece of sturdy paper or cardstock
- Scissors
- Glue stick or tape
- Marker or colored pencils for decoration
Step 1: Preparing the Paper
Start by cutting your paper into the necessary shapes. You’ll want a rectangular piece for the body of the gun (about 6 inches by 2 inches) and another smaller rectangle (around 3 inches by 1 inch) for the handle. Feel free to adjust these dimensions based on your preference!
Step 2: Shaping the Body
Take the larger rectangle and fold it in half lengthwise. This will give your gun a bit of stability. Unfold it and make small cuts along the fold (about halfway through the paper) every inch. This creates slits that will make it easier to shape the gun later.
Step 3: Assembling the Gun
Now, fold the slits outward to create the barrel. You can secure the folds with glue or tape. Attach the smaller rectangle to one end as the handle. Make sure it’s aligned well for a comfortable grip.
Step 4: Adding Details
Time to make your paper gun look awesome! Use your markers or colored pencils to add details like a trigger, sights, or even a cool design on the body. Get creative! The more personal touches you add, the more unique your gun becomes.
Step 5: Final Touches
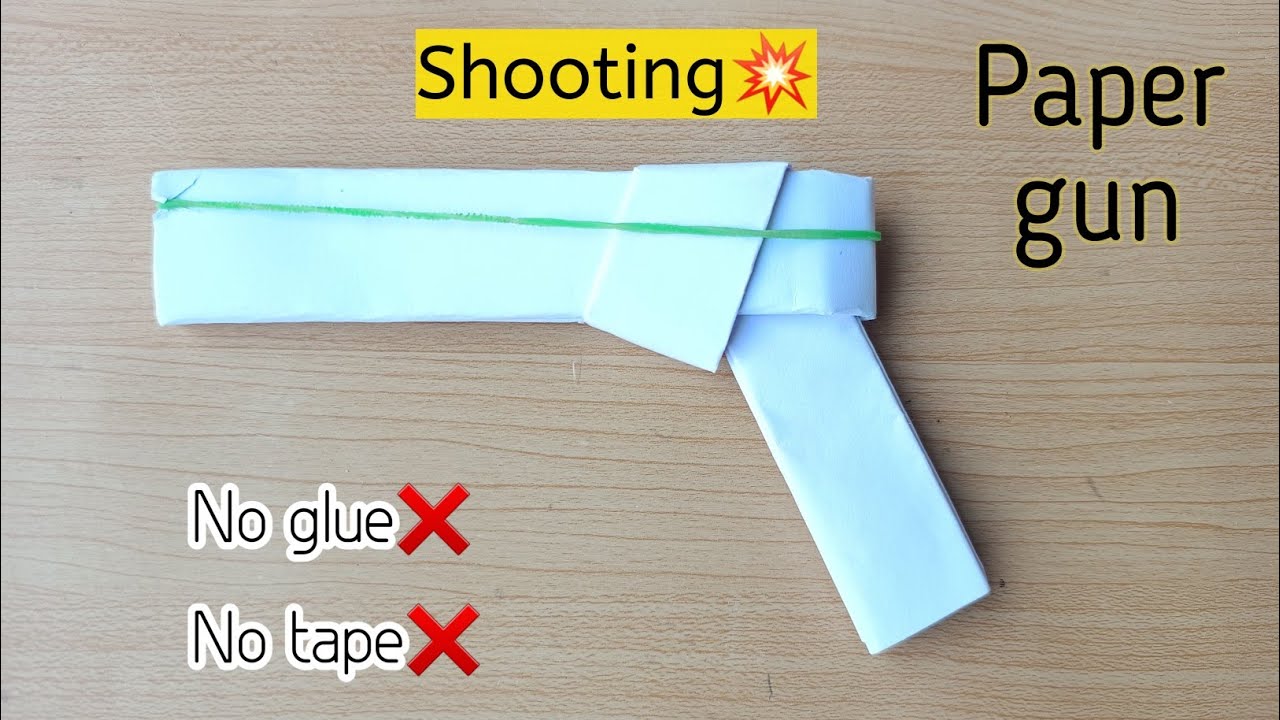
Once everything is glued or taped down, give your paper gun a few minutes to dry if you used glue. Once dry, you can carefully test its "firing" mechanism by creating paper “bullets”—just small rolled-up pieces of paper that you can launch by flicking them off the end. Remember, it's all for fun!
For a visual guide, don’t forget to check out the accompanying video in the post! Seeing the steps in action can make the process even easier.
Also Read This: How to Make a Real Gun at Home: Dailymotion’s Crafting Tutorial
4. Tips for Enhancing Your Paper Gun Design
Now that you’ve mastered the basics, let’s elevate your paper gun to the next level! Here are some tips to enhance your design and make it stand out:
- Experiment with Colors: Don’t shy away from vibrant colors! Use markers or paint to create a camouflage effect or even a futuristic metallic finish.
- Add Accessories: Consider adding a paper scope or a silencer. You can make these by creating additional paper shapes and attaching them to the body of your gun.
- Try Different Sizes: Create a mini version or a larger one! Adjusting the dimensions can give your paper gun a completely different look and feel.
- Incorporate Moving Parts: If you’re feeling adventurous, try adding a folding mechanism for a moving barrel or a trigger that actually pulls back. It might take some engineering, but it’s worth the effort!
- Personalize It: Add your name or a fun logo. You could even design a theme, like a superhero or a character from a video game!
Remember, this is all about creativity and fun. The more you experiment, the better your paper gun will be! Don’t forget to share your creations online or with friends. Happy crafting!
Also Read This: Ultimate Guide to Safely Removing Ads from Dailymotion Videos
5. Exploring Different Types of Paper Guns
When it comes to crafting paper guns, the creativity and variety are endless! Each type offers a unique experience in terms of construction and playability. Let’s dive into some popular types you can try your hand at making:
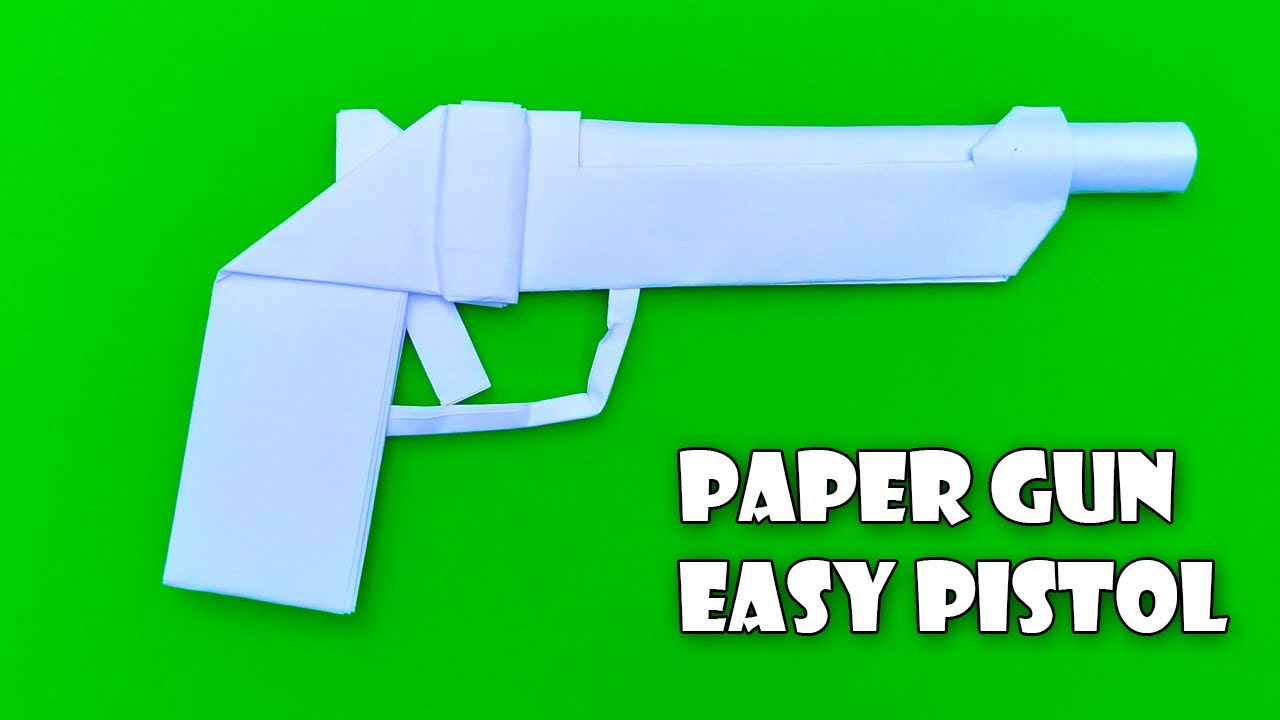
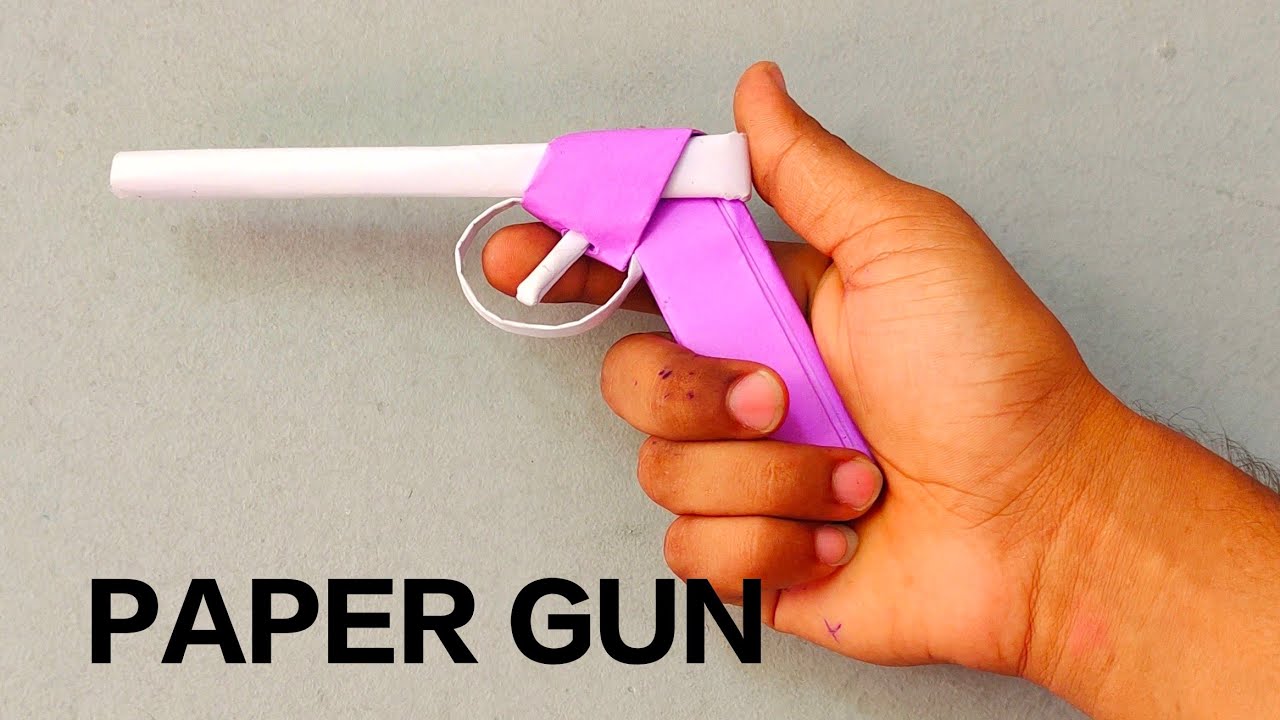
- Paper Pistol: This is the most common type, often resembling classic handguns. With just a few folds and cuts, you can make a simple but effective paper pistol that’s lightweight and easy to wield.
- Paper Rifle: For those who want something a bit more ambitious, paper rifles can be incredibly fun to make. They usually involve more intricate folds and may even include features like a stock or scope made from paper.
- Paper Crossbow: If you’re looking for a twist, why not try a paper crossbow? It’s a bit more challenging but can be very rewarding. You’ll need some elastic bands for the firing mechanism, adding a whole new level of excitement!
- Paper Nerf Gun: Inspired by popular toy brands, a paper Nerf gun can be a great project for enthusiasts. It mimics the design of actual Nerf guns, and you can even create soft projectiles using paper balls.
- Origami Guns: For those who love the art of origami, there are intricate designs that allow you to create beautiful paper guns just by folding. They may not shoot, but they make for stunning decorative pieces!
Each type of paper gun has its own set of challenges and skills to develop. Whether you’re a beginner or an experienced crafter, there’s something here for everyone. Choose based on your skill level and the materials you have at hand. Remember, the goal is to have fun and express your creativity!
6. Watch the Step-by-Step Video on Dailymotion
Ready to bring your paper gun crafting skills to the next level? Watching a detailed video guide can be incredibly helpful! I’ve found an excellent step-by-step tutorial on Dailymotion that walks you through the entire process, from gathering materials to the final touches.
Here’s what you can expect to learn from the video:
- Material Selection: Discover which types of paper work best for different gun designs and how to choose the right tools.
- Folding Techniques: Watch and learn various folding techniques that are essential for crafting the perfect paper gun.
- Assembly: Follow along as the video demonstrates how to assemble each part seamlessly for maximum durability and functionality.
- Customization Options: Get tips on how to personalize your paper gun with color, patterns, or even stickers for that extra flair!
To watch the video, simply head over to Dailymotion and search for “Crafting Paper Guns: Step-by-Step Guide.” Trust me, having a visual reference makes the crafting process much smoother and more enjoyable. So grab your materials, follow along, and let your creativity flow!
 admin
admin