Continuous Word Flow: Making Microsoft Word One Continuous Page
By: HD Stock Images
August 10, 2024
411
Introduction to Continuous Word Flow
In Microsoft Word, creating a document with a continuous flow can significantly enhance readability and provide a more seamless reading experience. This approach involves removing traditional page breaks and allowing content to flow uninterrupted from one section to the next.This technique is especially useful for documents like reports, proposals, or any text-heavy content where a continuous format is preferable. By using Word's layout and formatting tools effectively, you can achieve a clean and professional look that maintains reader engagement and improves the overall presentation of your work.
Microsoft Word offers a variety of layout options to help you format your document according to your needs. Understanding these options is crucial for creating a continuous flow document. Here’s a closer look at the key layout features available in Word:
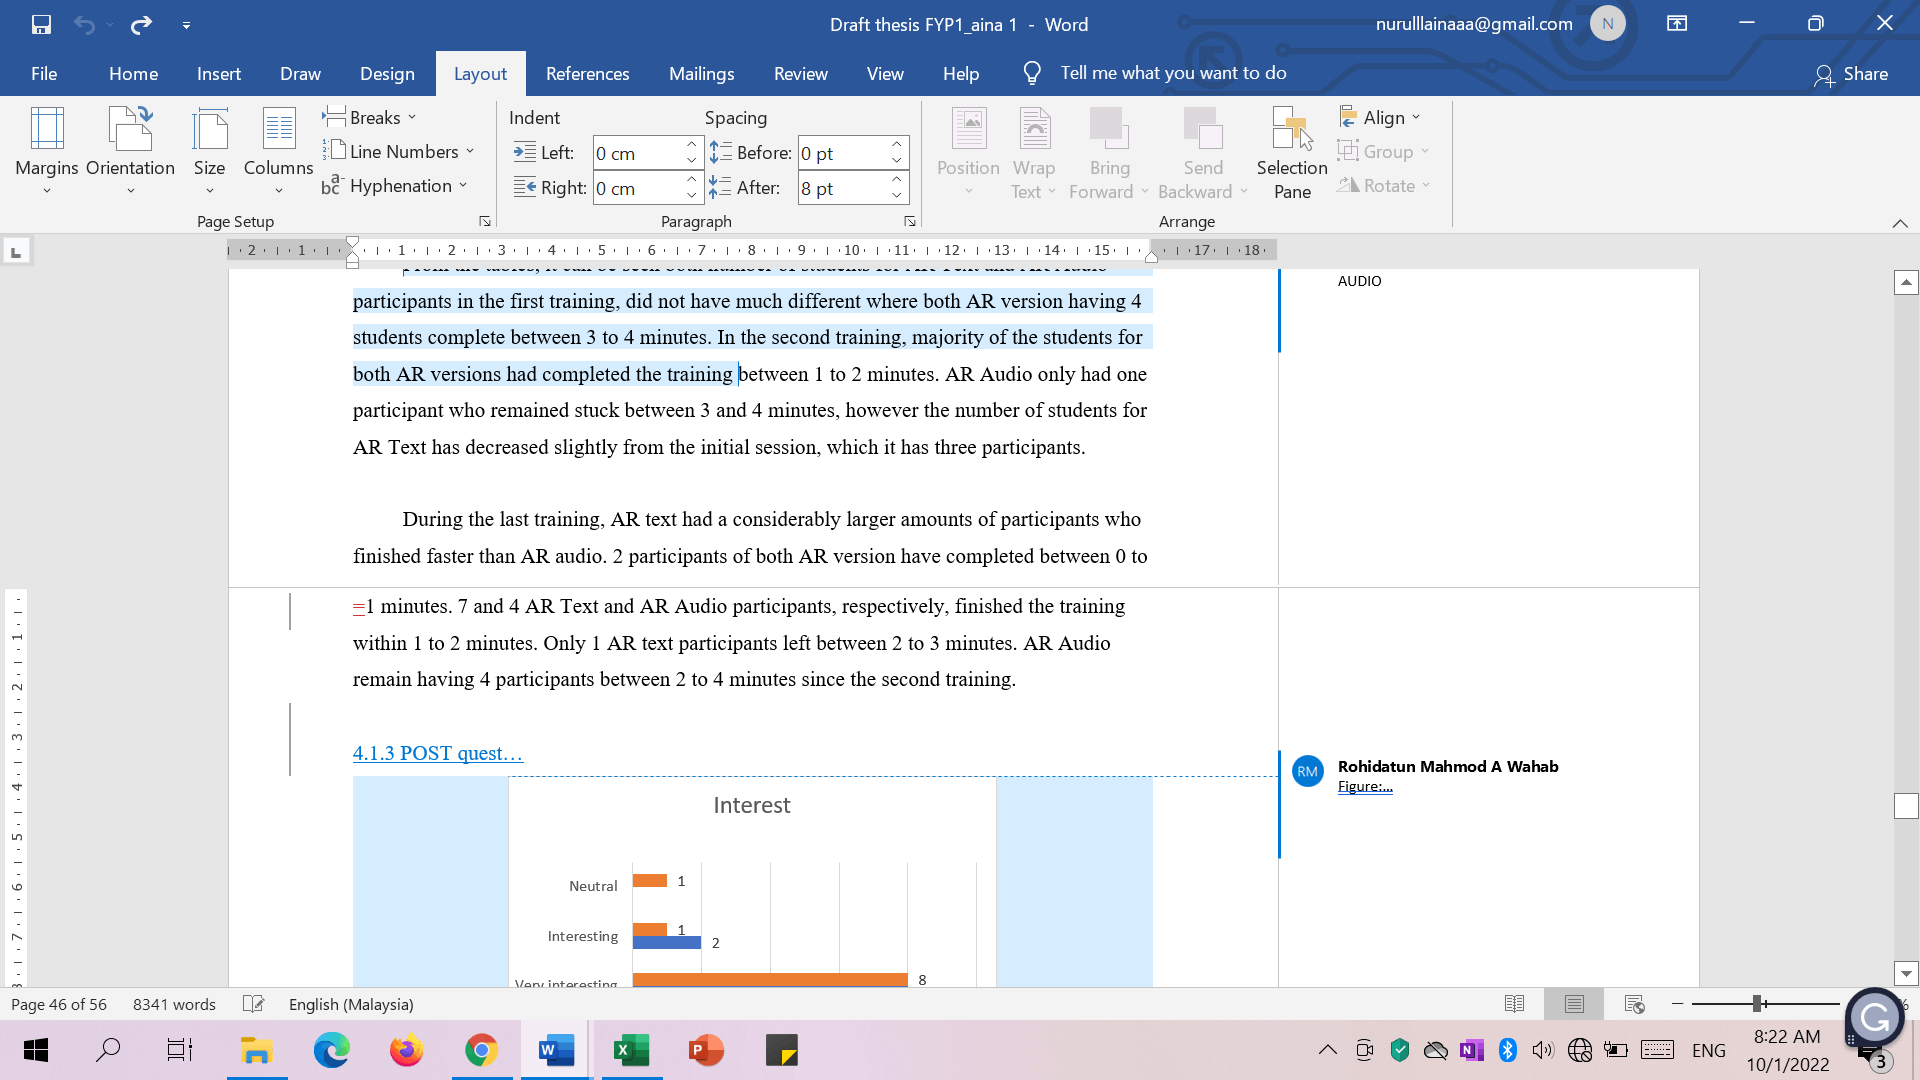
Page Layout
The Page Layout options allow you to customize how your document appears on the page. This includes setting margins, page orientation, and size. For a continuous flow, consider the following settings:
Margins: You can adjust the margins under the "Layout" tab. For a continuous document, you might want to use standard margins or customize them to fit your content needs.
Orientation: Choose between Portrait and Landscape orientations. Portrait is typically used for most documents, but Landscape can be useful for wider tables or graphics.
Size: The default page size is usually Letter, but you can select other sizes like A4 or custom dimensions if required.
Section Breaks
Section breaks are essential for creating different formatting within the same document. They allow you to apply unique layout settings to specific sections without affecting the rest of the document. However, for a continuous flow, minimizing the use of section breaks is advised. If necessary, follow these guidelines:
Next Page: Starts the new section on the next page.
Continuous: Keeps the new section on the same page, which is useful for maintaining flow.
Even/Odd Page: Starts the new section on the next even or odd page.
Columns
Using columns can enhance the readability of your document by breaking up text into manageable sections. This is particularly useful for newsletters or brochures. To set up columns:
Go to the "Layout" tab.
Select "Columns" and choose the number of columns you want.
Customize the width and spacing of columns if needed.
Headers and Footers
Headers and footers can include important information like page numbers, document title, or author’s name. In a continuous flow document, headers and footers can be managed as follows:
Same as Previous: Ensures that the header/footer remains consistent throughout the document.
Different First Page: Allows a unique header/footer for the first page.
By effectively utilizing these layout options, you can ensure that your document maintains a professional and continuous flow, enhancing both its readability and overall appearance.
Creating a continuous flow document in Microsoft Word involves setting up your document so that it appears as one uninterrupted page of content. This can be particularly useful for longer documents or reports where a seamless flow enhances readability. Follow these steps to achieve a continuous flow:
1. Adjust Page Layout
Start by setting up your page layout to support a continuous flow:
Margins: Navigate to the "Layout" tab, click "Margins," and select "Normal" or customize them to fit your needs. Reduced margins can help fit more content on each page.
Orientation: Ensure the orientation is set to "Portrait" or "Landscape" based on your content requirements. For most continuous flow documents, "Portrait" is preferable.
Size: Choose an appropriate page size from the "Size" option in the "Layout" tab. Standard sizes like "Letter" or "A4" are generally used.
2. Remove Page Breaks
Page breaks can interrupt the flow of your document. To remove them:
Go to the "Home" tab and click "Show/Hide ¶" to view hidden formatting marks.
Locate any manual page breaks (indicated as "Page Break").
Place the cursor before the page break and press "Delete" to remove it.
3. Use Continuous Section Breaks
If you need to apply different formatting in certain parts of the document, use continuous section breaks:
Place the cursor where you want the new section to start.
Go to the "Layout" tab, click "Breaks," and select "Continuous" under Section Breaks.
This allows you to change formatting without interrupting the flow.
4. Configure Headers and Footers
To maintain a consistent appearance, configure your headers and footers:
Double-click the header or footer area to open the "Header & Footer" tools.
Use the "Same as Previous" option to ensure uniform headers and footers across sections.
Customize content as needed, such as adding page numbers or document titles.
5. Format Content Properly
Ensure your content flows naturally by formatting it properly:
Paragraphs: Adjust line spacing and indentation under the "Paragraph" settings to improve readability.
Columns: If using columns, ensure they are set up correctly to avoid disruptions in the text flow.
6. Proofread and Review
Finally, review your document to ensure everything is aligned and flows continuously:
Check for any remaining page breaks or section breaks that might affect the flow.
Ensure headers, footers, and content are consistent throughout the document.
By following these steps, you can create a continuous flow document in Microsoft Word that maintains a seamless and professional appearance throughout.
Properly adjusting page margins and orientation is crucial for creating a document with a continuous flow. These settings help define how content is arranged on each page, influencing readability and the overall appearance of your document. Here’s how to adjust page margins and orientation effectively in Microsoft Word:
Adjusting Page Margins
Page margins define the space around the edges of your document. Adjusting margins can help fit more content on a page or create a more aesthetically pleasing layout. Follow these steps to adjust margins:
Go to the "Layout" tab on the Ribbon.
Click on "Margins" to view the available options.
You can select one of the predefined margin settings such as "Normal", "Narrow", "Wide", or "Mirrored". Alternatively, choose "Custom Margins" to set your own:
Option
Description
Normal
1-inch margins on all sides.
Narrow
0.5-inch margins on all sides, allowing more content per page.
Wide
1.25-inch margins, providing more space for comments or notes.
Mirrored
Mirrored margins for binding documents, with wider inner margins.
To set custom margins:
Click "Custom Margins" at the bottom of the Margins dropdown.
In the Page Setup dialog box, adjust the top, bottom, left, and right margins as needed.
Click "OK" to apply the changes.
Changing Page Orientation
Page orientation determines whether the document is in portrait (vertical) or landscape (horizontal) format. Changing the orientation can help better fit content, especially for wide tables or images. Here’s how to change the page orientation:
Navigate to the "Layout" tab.
Click on "Orientation" to reveal the options.
Select either "Portrait" (default vertical layout) or "Landscape" (horizontal layout).
Portrait orientation is typically used for most documents, while Landscape orientation is useful for wide documents like spreadsheets or large graphics.By carefully adjusting margins and orientation, you can ensure that your document not only looks professional but also maintains a smooth, continuous flow of content.
Section breaks in Microsoft Word are powerful tools that allow you to manage different parts of your document separately. By using section breaks effectively, you can enhance the flow and organization of your document. Here’s a guide on how to use section breaks for better document flow:
What Are Section Breaks?
Section breaks are used to divide a document into distinct sections. Each section can have its own formatting, such as headers, footers, page numbers, and layout settings, without affecting other sections. This flexibility can be particularly useful for:
Creating different header and footer layouts.
Applying varied page orientations or sizes within the same document.
Separating content with distinct formatting needs.
Types of Section Breaks
There are several types of section breaks available in Word, each serving different purposes:
Type of Section Break
Description
Next Page
Starts the new section on the next page, useful for starting a new chapter or major section.
Continuous
Keeps the new section on the same page, allowing for different formatting without starting a new page.
Even Page
Starts the new section on the next even-numbered page, often used for print documents that require even page alignment.
Odd Page
Starts the new section on the next odd-numbered page, typically used for documents that are to be printed double-sided.
Inserting Section Breaks
To insert a section break, follow these steps:
Place your cursor where you want the new section to begin.
Go to the "Layout" tab on the Ribbon.
Click on "Breaks" in the Page Setup group.
Choose the desired type of section break from the list.
Managing Section Breaks
Once section breaks are added, you can manage them to ensure smooth flow:
Remove Section Breaks: If you need to delete a section break, click on the break to select it and press Delete.
Adjust Formatting: Modify headers, footers, or page layout settings in each section individually by double-clicking on the header or footer area.
By utilizing section breaks effectively, you can create a well-organized document that maintains a smooth flow while accommodating different formatting needs throughout.
Managing Headers and Footers in Continuous Documents
Headers and footers are essential elements of a document, providing consistent information such as page numbers, titles, and author names. In a continuous document, managing headers and footers effectively ensures that your document maintains a professional appearance without disruptions. Here’s how to manage headers and footers in a continuous document:
Understanding Headers and Footers
Headers appear at the top of each page, while footers appear at the bottom. Both can contain text, images, or page numbers. In continuous documents, it’s crucial to maintain consistency throughout the document to enhance readability and presentation.
Inserting Headers and Footers
To insert or modify headers and footers:
Double-click on the header or footer area of your document. This action opens the Header & Footer Tools.
In the "Header & Footer Tools" tab, you can choose from predefined header and footer styles or create your own.
Add text, images, or page numbers as needed.
Managing Consistency
For a continuous flow document, it’s important to ensure that headers and footers are consistent across all sections. To manage this:
Same as Previous: This option links the current section’s header or footer to the previous section. Use it to maintain uniformity.
Different First Page: This option allows you to create a unique header or footer for the first page of a section, which is useful for titles or cover pages.
Different Odd & Even Pages: Use this option if you need different headers or footers on odd and even pages, which is often used in printed documents.
Editing Headers and Footers
To edit headers and footers:
Double-click on the header or footer area you wish to edit.
Make your changes directly in the header or footer section.
Use the "Header & Footer Tools" tab to insert page numbers, dates, or other elements.
Removing Headers and Footers
If you need to remove headers or footers:
Double-click on the header or footer area to activate it.
Select the content you want to remove and press Delete.
To remove headers or footers from a specific section, ensure you are in the correct section and delete the content.
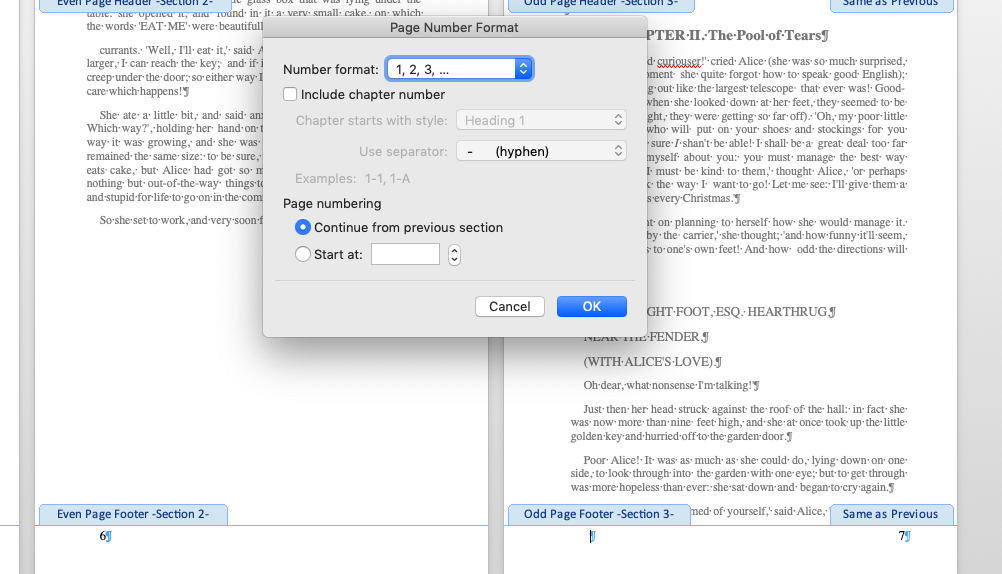
Using Page Numbering
Adding page numbers helps in organizing and navigating a lengthy document:
In the "Header & Footer Tools" tab, click on "Page Number."
Select the position and format for the page numbers.
Choose to start numbering from a specific number if required.
By effectively managing headers and footers, you ensure a consistent and professional look throughout your continuous document, making it easier to navigate and read.
Maintaining consistency throughout your document is crucial for a professional appearance and ease of reading. Consistency in formatting, style, and layout helps ensure that your document is cohesive and polished. Here are some essential tips for maintaining document consistency:
1. Use Styles and Formatting
Applying consistent styles for headings, paragraphs, and other text elements helps maintain uniformity throughout your document:
Apply Heading Styles: Use predefined heading styles (e.g., Heading 1, Heading 2) for chapter titles and subheadings. This not only ensures uniformity but also helps in generating a table of contents.
Use Paragraph Styles: Set up and apply paragraph styles for body text, quotes, and other sections to keep font size, line spacing, and indentation consistent.
Create Custom Styles: If the built-in styles don’t meet your needs, create custom styles and apply them consistently across your document.
2. Set Up a Consistent Layout
Ensure that the layout of your document is uniform by following these guidelines:
Margins: Set standard margins for your document to ensure text is aligned consistently on all pages. Go to the "Layout" tab and select "Margins" to adjust.
Page Orientation: Choose between "Portrait" and "Landscape" orientations based on your content needs and maintain it consistently throughout the document.
Page Size: Ensure the page size is consistent. Adjust this under the "Layout" tab by selecting "Size."
3. Maintain Uniform Headers and Footers
Headers and footers provide important document information and should be consistent:
Link to Previous: Use the "Same as Previous" option in the "Header & Footer Tools" tab to keep headers and footers uniform across sections.
Page Numbers: Insert page numbers consistently. Use the "Page Number" option in the "Header & Footer Tools" tab to position and format page numbers uniformly.
Different First Page: If needed, set up different headers/footers for the first page by selecting "Different First Page" in the "Header & Footer Tools" tab.
4. Use Consistent Fonts and Colors
Uniform fonts and colors contribute to a cohesive appearance:
Fonts: Choose a readable font and use it consistently for body text and headings. Avoid mixing too many fonts.
Colors: Use a consistent color scheme for text, headings, and other elements. Set colors using the "Font" and "Paragraph" settings in the "Home" tab.
5. Proofread and Review
Finally, thorough proofreading and review are essential to ensure consistency:
Spell Check: Use Word’s spell check feature to catch and correct any inconsistencies or errors.
Review Formatting: Check each section to ensure formatting and styles are applied consistently.
Get Feedback: Have someone else review your document for a fresh perspective on consistency and overall appearance.
By following these tips, you can ensure that your document maintains a high level of consistency, which enhances its readability and professional quality.
While working with Microsoft Word to create a continuous document, you might encounter some common issues. Addressing these issues promptly ensures that your document maintains its intended appearance and functionality. Here are some frequent problems and troubleshooting tips:
1. Unwanted Page Breaks
Page breaks can disrupt the flow of your document. To resolve this issue:
Show Formatting Marks: Go to the "Home" tab and click "Show/Hide ¶" to view all formatting marks, including page breaks.
Remove Page Breaks: Place your cursor before the page break and press Delete, or place your cursor after it and press Backspace.
2. Inconsistent Headers and Footers
If your headers and footers are not consistent throughout the document, follow these steps:
Check Section Breaks: Ensure that the "Same as Previous" option is selected for headers and footers in the "Header & Footer Tools" tab to maintain consistency across sections.
Remove Unnecessary Section Breaks: If you find section breaks that are not needed, remove them to ensure uniformity.
3. Formatting Issues with Text
Text formatting inconsistencies can make your document look unprofessional. To address this:
Apply Styles: Use consistent styles for headings and body text. Go to the "Home" tab and apply appropriate styles to maintain uniform formatting.
Check for Manual Formatting: Remove any manual formatting that might override your styles by selecting the text and clicking "Clear Formatting" in the "Home" tab.
4. Layout Problems
Issues with page layout can affect the appearance of your document:
Adjust Margins: Go to the "Layout" tab, click "Margins", and select the appropriate margin settings.
Verify Page Orientation: Ensure that the page orientation (Portrait or Landscape) is set correctly by selecting "Orientation" in the "Layout" tab.
5. Troubleshooting Table Issues
Tables may sometimes cause layout problems. To fix these issues:
Adjust Table Properties: Right-click on the table, select "Table Properties", and adjust alignment, text wrapping, and size settings as needed.
Fix Column Widths: Ensure that column widths are consistent and not causing content to overflow. Adjust column widths by dragging the column borders or using the "Table Layout" tab.
6. Page Numbering Issues
If page numbering is not displaying correctly:
Insert Page Numbers: Go to the "Insert" tab, click "Page Number", and choose your preferred position and format.
Update Page Numbers: If page numbers are incorrect, update them by right-clicking on the page number and selecting "Update Field".
By following these troubleshooting tips, you can resolve common issues and ensure your continuous document appears as intended, maintaining both functionality and professional quality.
Here are some frequently asked questions about managing and formatting continuous documents in Microsoft Word:
1. How do I create a continuous page in Microsoft Word?
To create a continuous page, remove page breaks and use continuous section breaks. You can adjust margins and layout settings to ensure that your content flows seamlessly from one section to the next. Go to the "Layout" tab, select "Breaks", and choose "Continuous" under Section Breaks to achieve this effect.
2. What is the difference between a section break and a page break?
A section break divides the document into sections that can have different formatting, such as headers, footers, and page orientations. A page break simply moves the content after it to the next page without affecting the formatting of the previous content. Section breaks are useful for creating different sections within a document, while page breaks are used to start new pages.
3. How can I remove unwanted page breaks in my document?
To remove unwanted page breaks:
Go to the "Home" tab and click "Show/Hide ¶" to view all formatting marks.
Locate the page break you want to remove.
Place your cursor before the page break and press Delete, or place your cursor after it and press Backspace.
4. How do I ensure consistency in headers and footers across different sections?
To maintain consistency in headers and footers:
Ensure that the "Same as Previous" option is selected in the "Header & Footer Tools" tab. This links the current section’s header or footer to the previous one.
If you need different headers or footers, use the "Different First Page" option for unique formatting on the first page of each section.
5. What should I do if my page numbers are not displaying correctly?
If page numbers are not displaying correctly:
Insert or update page numbers by going to the "Insert" tab, selecting "Page Number", and choosing the desired position and format.
If page numbers are incorrect, right-click on the page number and select "Update Field" to refresh the numbering.
6. How can I adjust margins and page orientation for a continuous document?
To adjust margins and page orientation:
Go to the "Layout" tab to access margin settings and orientation options.
Select "Margins" to choose or customize your margin settings.
Click on "Orientation" to choose between "Portrait" or "Landscape" orientations based on your document needs.
Conclusion
Creating and managing a continuous document in Microsoft Word involves several key practices to ensure a seamless and professional presentation. By understanding and applying the right techniques, you can enhance the readability and visual appeal of your documents. Here’s a summary of the essential points covered:
Continuous Flow: Ensure that your document maintains a smooth flow by removing unnecessary page breaks and using continuous section breaks. Adjusting page margins and orientation helps in accommodating more content effectively.
Effective Use of Styles: Utilize Microsoft Word’s styles and formatting options to keep headings, paragraphs, and other text elements consistent. This not only helps in maintaining uniformity but also in organizing your document efficiently.
Headers and Footers: Manage headers and footers to provide consistent information throughout your document. Use the "Same as Previous" option to link headers and footers across sections and ensure uniformity.
Section Breaks: Utilize different types of section breaks to control formatting and layout changes within your document. This flexibility allows for varied formatting while maintaining a continuous appearance.
Troubleshooting: Address common issues such as unwanted page breaks, inconsistent headers and footers, and formatting problems by following troubleshooting tips. Regular proofreading and review can help catch and correct these issues.
By applying these practices, you can create a document that not only looks polished and professional but also enhances the reader’s experience. Whether preparing a report, a proposal, or any other long document, a well-organized and consistently formatted document reflects your attention to detail and dedication to quality.
About Author
admin
Making up design and coding is fun. Nothings bring me more pleasure than making something out of nothing. Even when the results are far from my ideal expectations. I find the whole ceremony of creativity completely enthralling. Stock Photography expert.
 Microsoft Word offers a variety of layout options to help you format your document according to your needs. Understanding these options is crucial for creating a continuous flow document. Here’s a closer look at the key layout features available in Word:
 admin
admin


