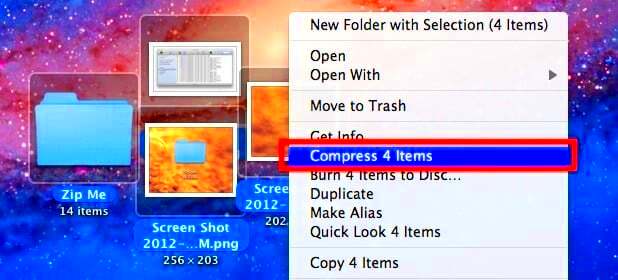
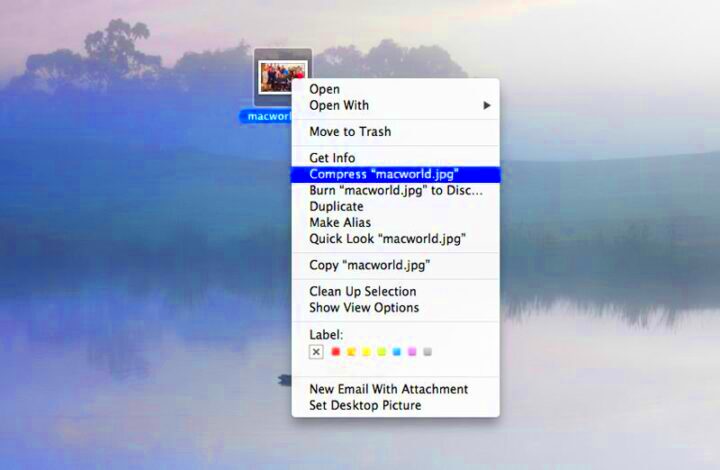
Image compression on a Mac is a vital process that helps reduce the file size of
images while retaining as much quality as possible. This is especially useful for those who deal with a lot of
images, whether for personal use or professional projects.
Why Image Compression Matters for Storage

When it comes to managing storage on your Mac, image files can take up a significant amount of space. Here are a few reasons why image compression is important:
- Saving Space: Compressed images take up less storage, allowing you to keep more files on your device.
- Faster Uploads and Downloads: Smaller file sizes mean quicker transfers when uploading images online or sending them via email.
- Improved Performance: Websites with compressed images load faster, enhancing the user experience.
- Better Organization: Reducing file sizes makes it easier to organize and manage your image library.
By prioritizing image compression, you not only free up valuable space but also improve the overall efficiency of your Mac.
Different Methods for Compressing Images
There are several effective methods to compress
images on your Mac. Here’s a breakdown of the most popular ones:
| Method | Description | Pros | Cons |
|---|
| Preview App | Built-in tool for viewing and editing images. | Easy to use, no downloads needed. | Limited compression options. |
| ImageOptim | A free app that reduces file size without losing quality. | Great quality preservation, batch processing. | Requires a download. |
| Photoshop | Professional software with extensive editing capabilities. | High level of control over compression settings. | Subscription fee, more complex to use. |
Choosing the right method depends on your specific needs and how often you work with
images. Each option offers its own set of features and benefits.
How to Use Preview for Image Compression
Using the Preview app on your Mac is one of the simplest ways to compress
images without needing any extra software. This built-in tool offers a quick and efficient method for reducing file sizes while still maintaining a decent image quality. Here’s a step-by-step guide on how to use Preview for image compression:
- Open Your Image: Right-click on the image file you want to compress, then select "Open With" and choose "Preview."
- Access the Export Option: In the Preview menu, click on "File" and then select "Export."
- Choose Your Format: In the export dialog, you can select the desired file format (like JPEG or PNG). JPEG generally offers better compression.
- Adjust the Quality Slider: Use the quality slider to determine the level of compression. Lower quality results in a smaller file size.
- Save the Compressed Image: Choose a new name or location for the compressed file, then click "Save."
This method is straightforward and works well for one-off image compressions. However, if you have a large batch of
images, you might want to consider more advanced options.
Using Third-Party Apps for Efficient Compression
If you're looking for more control over the compression process or need to handle multiple images at once, third-party apps can be a game-changer. Here are some popular options:
| App Name | Description | Key Features |
|---|
| ImageOptim | A user-friendly app that specializes in lossless image compression. | Batch processing, drag-and-drop functionality, supports various formats. |
| JPEGmini | Focuses on reducing JPEG image sizes while preserving quality. | Significant size reduction, fast processing, integrates with Adobe products. |
| TinyPNG | An online tool that also offers a desktop app for compressing PNG and JPEG files. | Easy to use, maintains transparency in PNGs, bulk compression option. |
Using these third-party apps can streamline your workflow and save you time, especially when working with large batches of images.
Best Practices for Maintaining Image Quality
When compressing images, it's crucial to strike a balance between reducing file size and maintaining quality. Here are some best practices to help you keep your images looking great:
- Choose the Right Format: For photographs, use JPEG; for graphics with text or transparency, consider PNG.
- Use the Right Compression Settings: Avoid excessive compression. Test different settings to find the sweet spot.
- Check Before and After: Always compare your compressed image with the original to ensure quality hasn’t degraded.
- Keep Original Files: Always save the original image before compression, just in case you need it later.
- Consider Resolution: For web use, a resolution of 72 DPI is typically sufficient, while prints may require 300 DPI.
By following these best practices, you can effectively compress images without sacrificing quality, ensuring your visuals always look their best.
Comparing File Formats for Compressed Images
When it comes to image compression, the file format you choose can significantly impact both the size and quality of your images. Each format has its strengths and weaknesses, making it essential to select the right one for your specific needs. Let’s compare some of the most common file formats used for compressed images:
| File Format | Best For | Compression Type | Pros | Cons |
|---|
| JPEG | Photographs and images with many colors | Lossy | Small file sizes, widely supported | Quality loss at high compression |
| PNG | Graphics, text, and images needing transparency | Lossless | Retains quality, supports transparency | Larger file sizes compared to JPEG |
| GIF | Simple animations and images with limited colors | Lossless | Supports animation, small sizes for simple images | Limited to 256 colors |
| WebP | Web images needing both quality and size efficiency | Both lossy and lossless | Better compression than JPEG and PNG | Not as widely supported by all browsers |
Choosing the right format depends on the type of image you’re working with and your intended use. Understanding these differences can help you make an informed decision.
FAQs About Image Compression on Mac
Image compression can raise many questions, especially if you're new to the process. Here are some frequently asked questions about compressing images on your Mac:
- What is image compression? It’s the process of reducing the file size of an image, making it easier to store and share.
- Does compressing an image reduce its quality? Yes, especially with lossy formats like JPEG. However, lossless formats maintain quality while still reducing size.
- How can I tell if my image is compressed? You can check the file size in Finder. A significantly smaller size usually indicates compression.
- Can I compress images in bulk on a Mac? Yes, using apps like ImageOptim or through batch processing in Preview.
- Is there a way to restore a compressed image to its original quality? No, once a lossy image is compressed, the lost quality cannot be recovered. Always keep the original file.
If you have more questions, feel free to explore online resources or consult with fellow Mac users for tips and tricks!
Conclusion on Image Compression for Better Storage
Image compression is an essential skill for anyone using a Mac, whether for personal projects or professional needs. By understanding the different methods, formats, and best practices, you can effectively manage your storage space while maintaining image quality. Remember to choose the right file format for your images, use built-in tools or third-party apps for compression, and follow best practices to preserve quality.In the digital age, managing storage efficiently is more important than ever. By implementing these strategies, you can keep your Mac running smoothly and ensure that your images look great, whether you're sharing them online or keeping them for personal use. Happy compressing!
 When it comes to managing storage on your Mac, image files can take up a significant amount of space. Here are a few reasons why image compression is important:
 admin
admin


