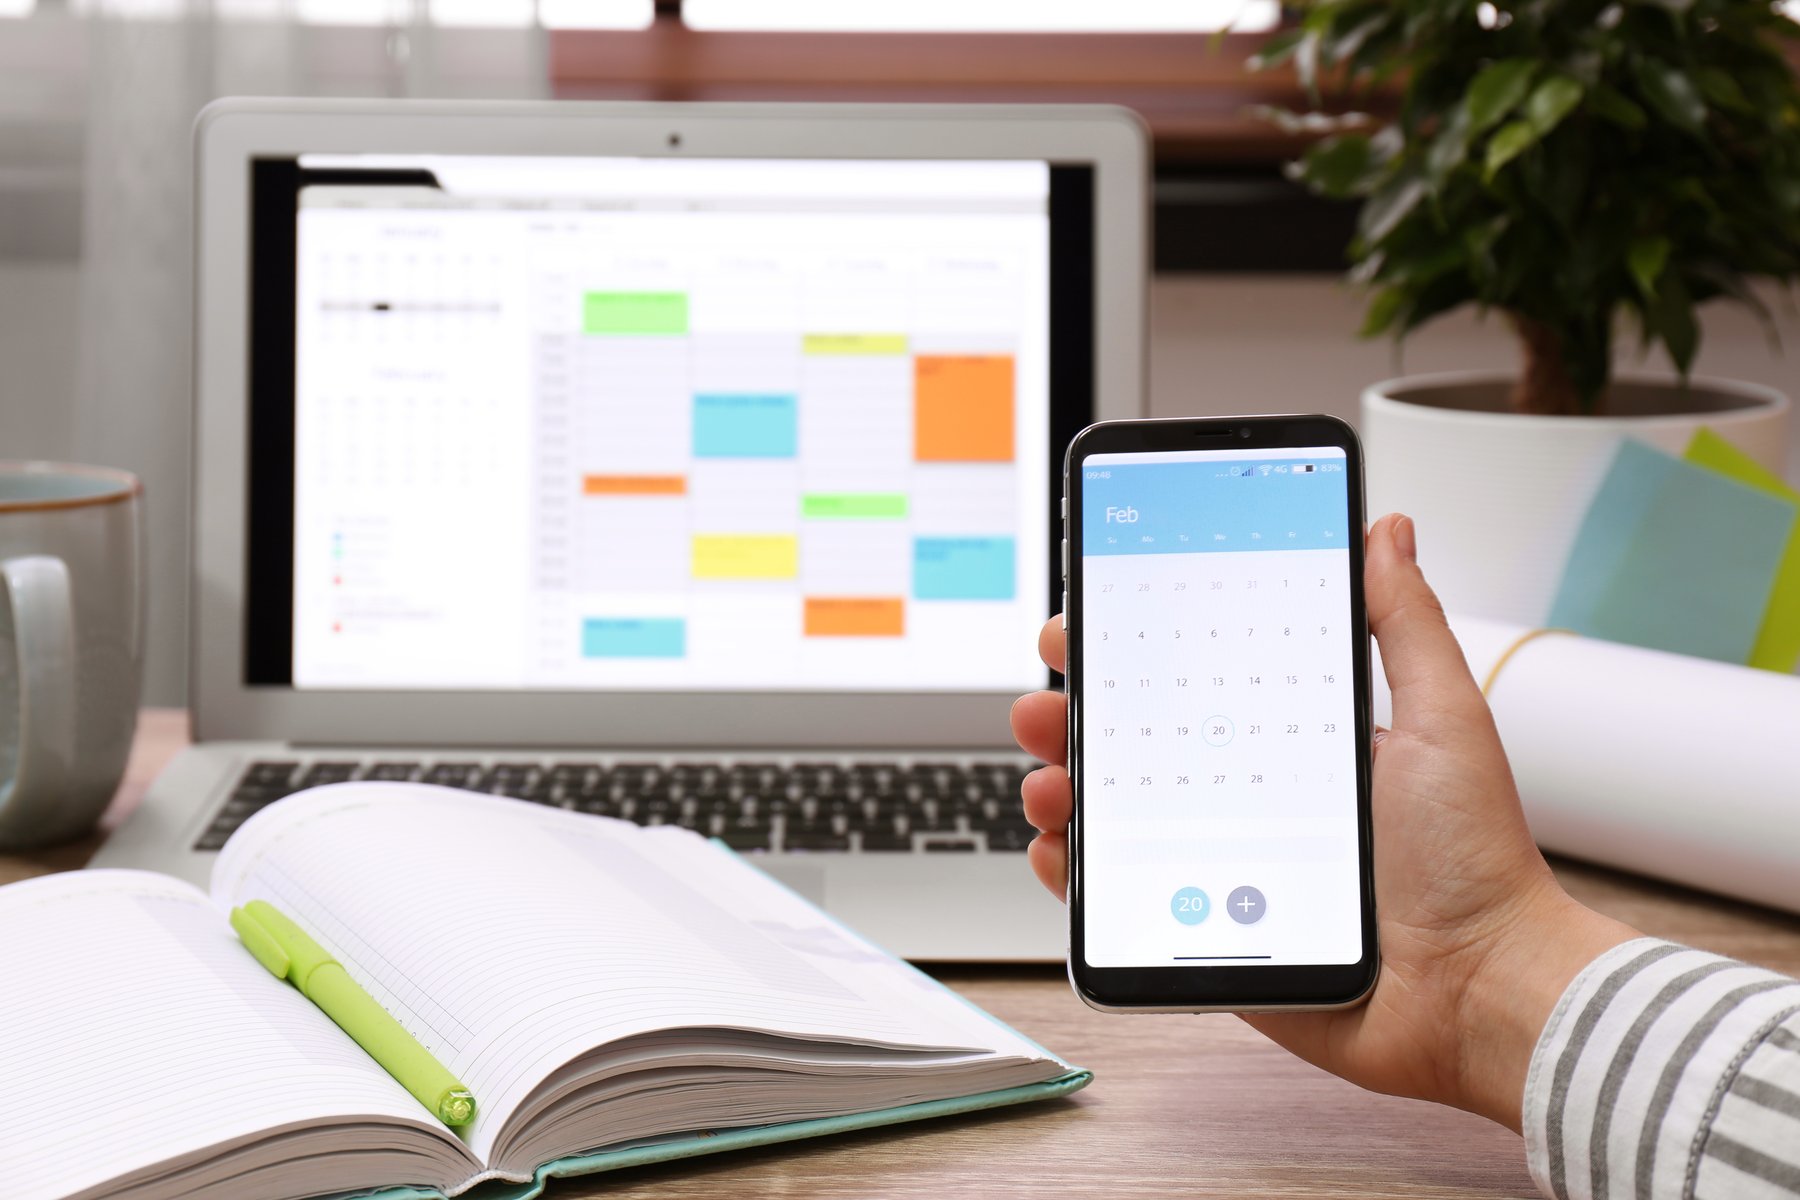
Microsoft Bookings is an online scheduling and appointment management tool that is part of the
Microsoft 365 suite of applications. It is designed to simplify the process of managing appointments, meetings, and events for businesses and organizations.Here’s a detailed overview of what
Microsoft Bookings is and what it can do for you:
Overview of Microsoft Bookings
Microsoft Bookings provides a centralized platform for managing appointments, allowing you to:
- Schedule Appointments: Easily set up and manage appointments for your business.
- Manage Staff Schedules: Coordinate schedules for different staff members, ensuring that all appointments are covered.
- Customize Booking Pages: Create a personalized booking page for customers to view available times and book appointments.
- Send Notifications: Automatically send email confirmations and reminders to customers and staff about upcoming appointments.
- Integrate with Microsoft 365: Seamlessly integrate with other Microsoft 365 tools like Outlook and Teams for better coordination.
Key Components of Microsoft Bookings
| Component | Description |
|---|
| Booking Page | Your public-facing page where customers can see available time slots and book appointments. |
| Calendar | A central calendar that displays all appointments and allows you to manage and adjust schedules. |
| Staff Management | Manage staff availability, assign services, and oversee appointments. |
| Services | Define different types of appointments or services you offer, including duration, price, and staff assignments. |
| Customer Management | Keep track of customer details, view appointment history, and manage customer interactions. |
| Settings | Configure business hours, appointment policies, and booking rules. |
Benefits of Using Microsoft Bookings
Microsoft Bookings offers several benefits for businesses, including:
- Improved Efficiency: Automates the scheduling process and reduces administrative tasks.
- Better Customer Experience: Provides an easy-to-use booking system for customers, reducing the need for phone calls and emails.
- Enhanced Organization: Centralizes appointment management and staff schedules in one place.
- Accessibility: Accessible from any device with an internet connection.
In summary, Microsoft Bookings is a comprehensive scheduling tool that helps businesses manage appointments, improve customer interactions, and streamline administrative tasks. Its integration with Microsoft 365 and its user-friendly features make it a valuable asset for modern business management.
Key Features of Microsoft Bookings
Microsoft Bookings offers a variety of features designed to streamline the appointment scheduling process for businesses of all sizes. Here, we will explore some of the most important features of Microsoft Bookings, detailing how each one can benefit your business and improve the overall efficiency of your scheduling operations.
1. User-Friendly Booking Page
The Booking Page is the main interface where customers can schedule appointments. It is designed to be simple and intuitive, offering several key features:
- Customizable Layout: Customize the look and feel of your booking page to match your brand's style.
- Service Selection: Allow customers to choose from a list of available services, with options for different durations and prices.
- Real-Time Availability: Display real-time availability so customers can book appointments that fit both their schedule and your staff’s schedule.
- Online Booking: Enable customers to book appointments online at any time, reducing the need for phone calls or emails.
2. Automated Appointment Management
Microsoft Bookings automates many aspects of appointment management, including:
- Automatic Email Confirmations: Send automatic confirmation emails to customers when they book an appointment.
- Appointment Reminders: Send automated reminders to both customers and staff about upcoming appointments.
- Rescheduling and Cancellations: Allow customers to easily reschedule or cancel appointments online.
3. Staff Scheduling and Management
Microsoft Bookings offers several features for managing staff schedules:
- Staff Availability: Set individual staff schedules and availability to ensure appointments are booked at convenient times.
- Service Assignment: Assign specific services to different staff members based on their expertise.
- Team Calendar: View a centralized calendar that shows all appointments and staff schedules.
4. Integration with Microsoft 365
Microsoft Bookings integrates seamlessly with other Microsoft 365 applications:
| Application | Integration Benefits |
|---|
| Outlook | Sync appointments and view them in your Outlook calendar. |
| Teams | Schedule virtual meetings and integrate with Microsoft Teams for online appointments. |
| Excel | Export appointment data to Excel for reporting and analysis. |
| SharePoint | Share booking information and collaborate with team members via SharePoint. |
5. Customizable Booking Settings
Microsoft Bookings allows you to configure various settings to match your business needs:
- Business Hours: Set your business hours and define when customers can schedule appointments.
- Booking Policies: Establish rules for appointment scheduling, including advance notice requirements and cancellation policies.
- Service Options: Customize service details such as duration, price, and staff assignments.
6. Customer Management
Manage customer interactions and information with features such as:
- Customer Profiles: Maintain records of customer details and appointment history.
- Customer Feedback: Collect feedback from customers after their appointments to improve services.
7. Analytics and Reporting
Microsoft Bookings provides tools for tracking performance and making data-driven decisions:
- Appointment Reports: Generate reports on appointment trends and staff performance.
- Service Statistics: Analyze service demand and customer preferences.
These features make Microsoft Bookings a comprehensive solution for managing appointments and scheduling tasks. By leveraging these capabilities, you can improve operational efficiency, enhance customer satisfaction, and streamline your business processes.
How to Set Up Microsoft Bookings for Your Business
Setting up Microsoft Bookings for your business is a straightforward process that involves several key steps. This guide will walk you through the setup process, from creating your account to customizing your booking page and managing your first appointments.
Step 1: Sign In to Microsoft 365
To get started with Microsoft Bookings, you need a Microsoft 365 account. If you don’t have one, you can sign up for a subscription plan that includes Bookings. Follow these steps:
- Go to the Microsoft 365 website: Visit Microsoft 365 and click on the "Sign In" button.
- Enter Your Credentials: Provide your Microsoft 365 email and password.
- Access the Microsoft 365 Dashboard: Once logged in, you’ll be directed to the main dashboard where you can access various Microsoft 365 apps.
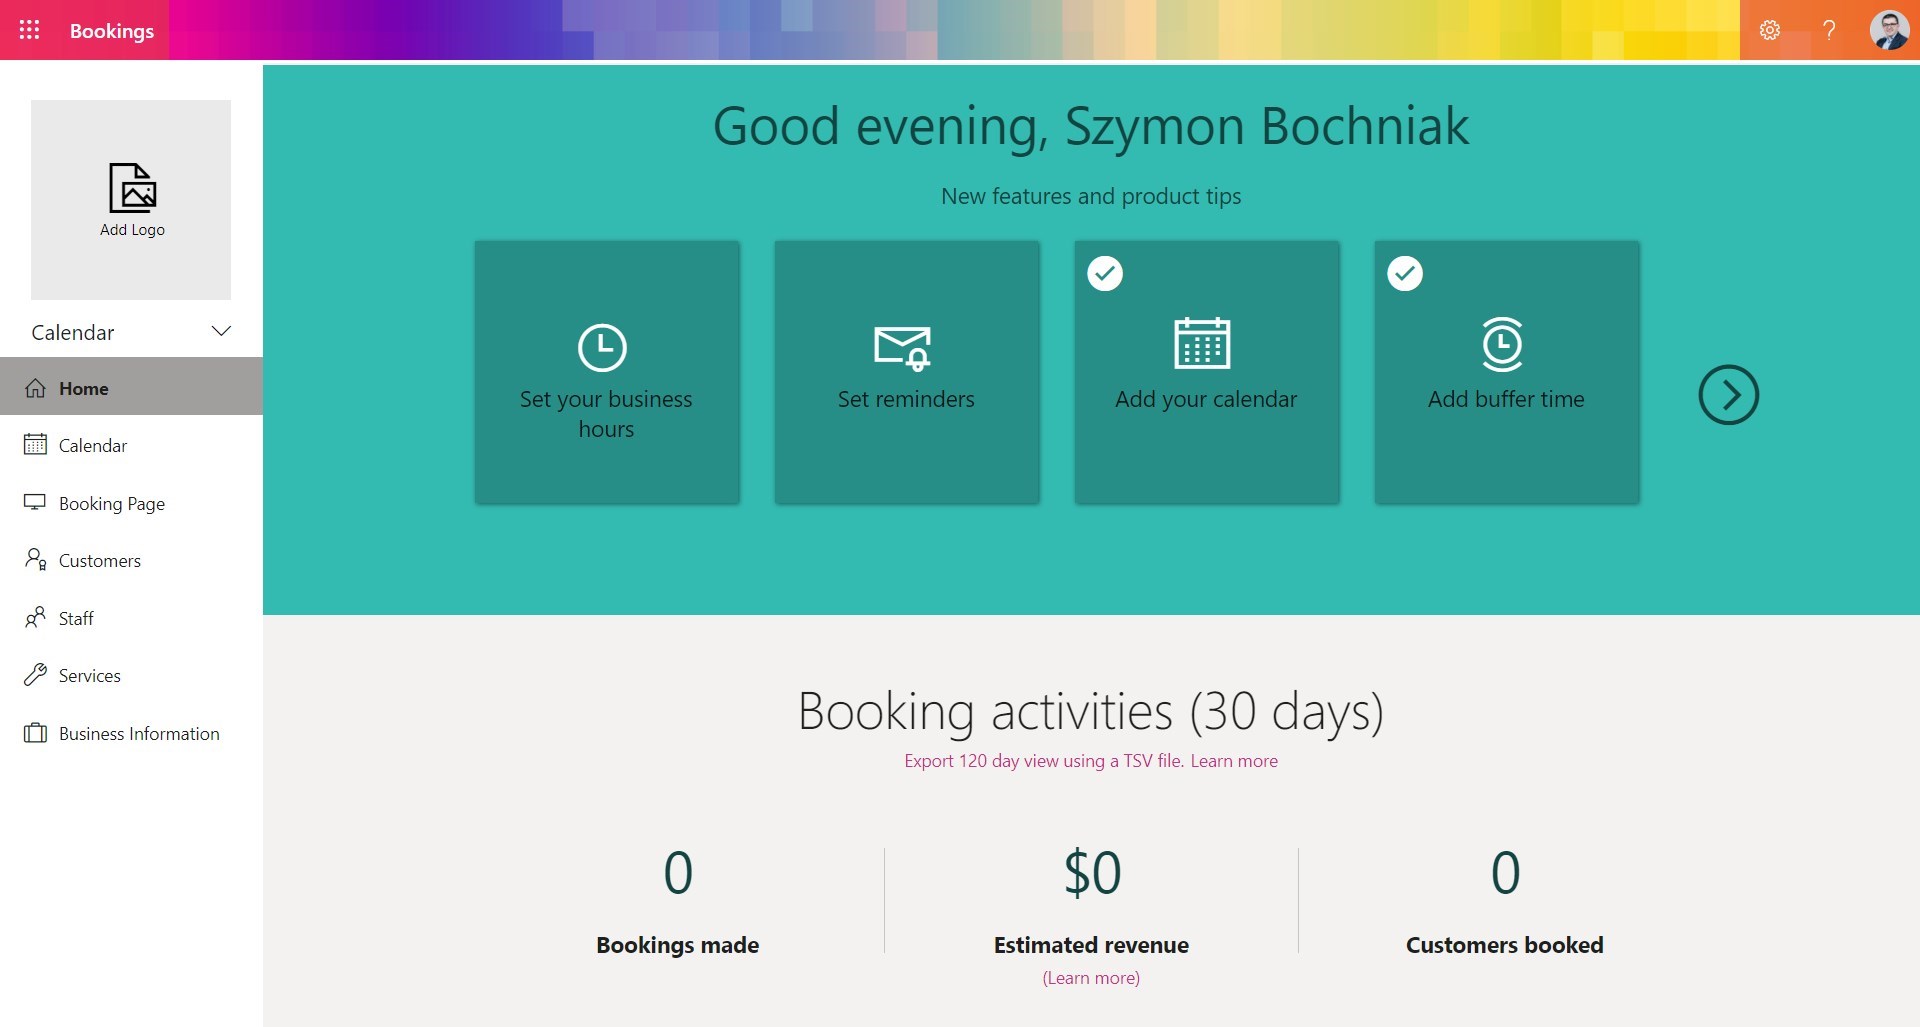
Step 2: Access Microsoft Bookings
To open Microsoft Bookings, follow these steps:
- Find the Bookings App: In the Microsoft 365 dashboard, locate the “Bookings” app. You might need to click on “All apps” to see the full list.
- Open Microsoft Bookings: Click on the “Bookings” icon to launch the application.
Step 3: Set Up Your Business Information
Once you’ve accessed Microsoft Bookings, you’ll need to enter your business details:
- Business Name: Enter your business’s official name.
- Business Address: Provide your business’s physical address.
- Contact Information: Add a phone number and email address for customer inquiries.
- Business Hours: Set your regular operating hours for each day of the week.
Step 4: Customize Your Booking Page
Customize your booking page to reflect your brand and service offerings:
- Design Your Booking Page: Choose a theme color, upload your logo, and add a welcome message.
- Set Up Services: Define the services you offer, including service name, description, duration, and price.
- Configure Service Settings: Set options such as service availability, whether a service is available for online meetings, and any required information from customers.
Step 5: Add and Manage Staff
Manage staff schedules and assign services:
- Add Staff Members: Enter staff details including names, email addresses, and roles.
- Set Staff Availability: Configure each staff member’s working hours and days off.
- Assign Services: Allocate specific services to staff based on their expertise.
Step 6: Configure Booking Settings
Adjust settings to fit your booking requirements:
- Booking Policies: Set up rules for how far in advance customers can book, cancellation policies, and rescheduling options.
- Notifications: Configure email and SMS notifications for appointment confirmations, reminders, and cancellations.
- Payment Options: If applicable, set up payment methods for paid services.
Step 7: Publish and Share Your Booking Page
Once you have configured all settings, you’re ready to go live:
- Publish Your Booking Page: Make your booking page available to the public by setting it to “Published” mode.
- Share Your Booking Page: Distribute the URL of your booking page via your website, email, or social media to reach your customers.
Step 8: Monitor and Manage Appointments
After setting up Microsoft Bookings, you can start managing appointments:
- View Appointments: Check the central calendar to view and manage all scheduled appointments.
- Adjust Schedules: Make changes to appointments, staff schedules, and service settings as needed.
- Track Analytics: Use reporting tools to analyze appointment trends and staff performance.
By following these steps, you will have successfully set up Microsoft Bookings for your business, enabling you to manage appointments effectively and enhance your customer service experience.
Customizing Your Booking Page
Customizing your booking page is a crucial step in setting up Microsoft Bookings. A well-designed booking page not only reflects your brand but also ensures a smooth and efficient scheduling experience for your customers. In this section, we’ll explore various aspects of customizing your booking page to meet your business needs.
1. Designing the Look and Feel of Your Booking Page
The design of your booking page plays a significant role in how customers perceive your business. You can customize several elements to match your brand’s identity:
- Choose a Theme Color: Select a primary color for your booking page that aligns with your brand. This color will be used for buttons, headings, and other key elements.
- Upload Your Logo: Add your business logo to the booking page header. A professional logo helps reinforce your brand’s identity.
- Write a Welcome Message: Craft a welcoming message to greet visitors. This message should introduce your services and encourage customers to book an appointment.
- Set a Favicon: Upload a favicon to represent your business in the browser tab. This small icon helps users identify your booking page among other open tabs.
2. Configuring Service Options
Effective service configuration ensures that customers can easily understand and select the services you offer:
- Add Services: Define the services you provide. Include details such as service name, description, duration, and price.
- Set Service Availability: Configure when each service is available based on your staff’s schedule and business hours.
- Define Service Categories: Group similar services into categories to help customers find what they’re looking for more easily.
3. Customizing Booking Options
Adjust booking options to suit your business needs:
- Booking Lead Time: Set how far in advance customers can book appointments. Options include “None,” “1 hour,” or “1 day.”
- Cancellation and Rescheduling Policies: Establish policies for appointment cancellations and rescheduling, including notice periods and penalties.
- Time Zone Settings: Ensure that your booking page reflects the correct time zone for your business operations.
4. Adding Custom Fields and Forms
Collect additional information from customers using custom fields and forms:
- Add Custom Fields: Include fields for specific information you need from customers, such as “Preferred Date” or “Special Requests.”
- Use Forms for Pre-Appointment Information: Create forms that customers can fill out before their appointment, helping you prepare for their visit.
5. Configuring Notifications and Reminders
Set up notifications to keep both customers and staff informed:
- Appointment Confirmations: Enable automatic email confirmations for new appointments.
- Reminders: Set up email or SMS reminders to notify customers and staff about upcoming appointments.
- Follow-Up Messages: Send follow-up messages to request feedback or offer additional services.
6. Managing Customer Access and Permissions
Control who can view and interact with your booking page:
- Public vs. Private Booking Pages: Decide whether your booking page is visible to the public or restricted to specific users.
- Access Control: Manage permissions for staff and administrators to access and modify the booking page.
7. Testing Your Booking Page
Before making your booking page live, it’s essential to test its functionality:
- Conduct a Test Booking: Go through the booking process as a customer to ensure that everything works smoothly.
- Check for Issues: Verify that all features, including service selections, form submissions, and notifications, are functioning correctly.
Example Booking Page Customization Options
| Customization Option | Description | Example |
|---|
| Theme Color | Primary color used for buttons and headings. | Blue (#0078D4) |
| Logo | Your business logo displayed on the booking page. | Logo |
| Welcome Message | Introduction text for visitors to your booking page. | “Welcome to [Your Business Name]! Book your appointment today!” |
| Booking Lead Time | Advance notice required for bookings. | 1 Day |
| Cancellation Policy | Rules for appointment cancellations. | “Cancel 24 hours in advance for a full refund.” |
By carefully customizing these aspects of your booking page, you can create a professional and user-friendly experience for your customers, which can lead to increased bookings and better customer satisfaction.
Managing Appointments and Staff
Effectively managing appointments and staff is key to running a smooth and efficient business. Microsoft Bookings offers several features to help you organize your schedule, coordinate with staff, and ensure that your appointments are handled effectively. In this section, we’ll explore how to manage appointments and staff using Microsoft Bookings.
1. Managing Appointments
Microsoft Bookings provides tools to help you oversee and manage all your appointments. Here’s how you can make the most of these features:
- View Appointments: Access the central calendar to see all upcoming and past appointments. This view allows you to manage your schedule and make adjustments as needed.
- Modify Appointments: Change appointment details, such as rescheduling or canceling appointments. You can also edit service information or update customer details.
- Search and Filter Appointments: Use search and filter options to quickly find specific appointments by date, service, or staff member.
- Appointment Notifications: Review and manage notifications related to appointments, including confirmations, reminders, and cancellations.
- Export Appointment Data: Export appointment details to Excel for reporting or analysis purposes.
2. Managing Staff Schedules
Keeping track of staff schedules is crucial for ensuring that all appointments are covered and that your team operates smoothly. Here’s how you can manage staff schedules:
- Add Staff Members: Enter details for new staff members, including their names, roles, and contact information.
- Set Staff Availability: Define the working hours for each staff member, including days off and lunch breaks. Ensure that the availability aligns with the business’s operating hours.
- Assign Services to Staff: Designate which services each staff member can provide. For example, one staff member may handle consultations, while another handles technical support.
- View Staff Schedules: Check the individual schedules for each staff member to ensure there are no conflicts and that all appointments are covered.
- Manage Staff Permissions: Control what actions each staff member can perform, such as modifying appointments or accessing specific booking details.
3. Managing Appointments and Staff: A Comparison Table
| Feature | Appointment Management | Staff Management |
|---|
| View Schedule | Access and view all appointments on the calendar. | Check staff availability and schedules. |
| Modify Details | Edit, reschedule, or cancel appointments. | Add new staff or adjust working hours. |
| Search and Filter | Find specific appointments by various criteria. | Search staff schedules or filter by service. |
| Notifications | Manage appointment confirmations and reminders. | Update staff on schedule changes and notifications. |
| Export Data | Export appointment details for reporting. | Track staff performance and manage schedules. |
4. Best Practices for Managing Appointments and Staff
Implementing best practices can help you make the most of Microsoft Bookings:
- Regularly Update Schedules: Ensure that both staff and appointment schedules are current to avoid conflicts.
- Communicate with Staff: Keep staff informed about schedule changes, customer requests, and any other important updates.
- Monitor Appointment Trends: Analyze appointment data to identify trends, peak times, and areas for improvement.
- Provide Clear Instructions: Ensure that staff are aware of their roles and responsibilities when managing appointments.
- Solicit Feedback: Collect feedback from both customers and staff to improve the booking process and service quality.
Example Managing Appointments vs. Managing Staff
| Task | Managing Appointments | Managing Staff |
|---|
| Scheduling | Set up, reschedule, or cancel customer appointments. | Define staff schedules, set availability, and manage time off. |
| Notifications | Send reminders and confirmations to customers. | Inform staff of schedule changes and appointment details. |
| Data Management | Track appointment history and export data for analysis. | Monitor staff performance and manage staffing resources. |
By utilizing these features and following best practices, you can efficiently manage both appointments and staff, ensuring that your business operates smoothly and meets customer expectations.
Integrating Microsoft Bookings with Other Microsoft Apps
Integrating Microsoft Bookings with other Microsoft applications can enhance your scheduling processes, streamline your workflows, and improve overall efficiency. Microsoft Bookings offers several integrations with Microsoft 365 apps that can help you manage appointments, communicate with clients, and analyze data more effectively. In this section, we will explore the key integrations available and how to leverage them for your business.
1. Integration with Microsoft Outlook
Microsoft Bookings integrates seamlessly with Microsoft Outlook, providing several benefits:
- Sync Calendars: Appointments scheduled through Bookings are automatically added to your Outlook calendar. This ensures that your schedule is up-to-date and prevents double-booking.
- Manage Appointments: View and manage your appointments from both the Bookings app and Outlook. Changes made in one application are reflected in the other.
- Appointment Notifications: Receive notifications for new bookings, cancellations, and rescheduled appointments directly in Outlook.
2. Integration with Microsoft Teams
Microsoft Teams integration offers additional features for virtual appointments:
- Schedule Virtual Meetings: Set up online meetings through Teams directly from your Bookings page. This feature is ideal for remote consultations and virtual service appointments.
- Join Meetings: Clients receive a Teams meeting link in their appointment confirmation email, allowing them to join the virtual appointment easily.
- Team Collaboration: Share booking information and collaborate with team members using Teams channels or chat.
3. Integration with Microsoft Excel
Exporting data to Excel allows for in-depth analysis and reporting:
- Export Appointment Data: Download appointment details, including dates, services, and customer information, to Excel for further analysis.
- Generate Reports: Use Excel to create custom reports, track appointment trends, and analyze staff performance.
- Data Management: Manage and manipulate appointment data to meet specific reporting requirements or to identify areas for improvement.
4. Integration with Microsoft SharePoint
SharePoint integration facilitates collaboration and information sharing:
- Share Booking Information: Share your booking page and appointment details with team members or stakeholders through SharePoint.
- Centralized Document Storage: Store and manage documents related to appointments, such as client files and meeting notes, on SharePoint.
- Collaborate on Projects: Use SharePoint to collaborate on projects and track the progress of appointment-related tasks.
5. Integration with Microsoft Power Automate
Automate workflows and integrate Bookings with other applications using Power Automate:
- Automate Notifications: Create workflows to automatically send notifications or reminders for upcoming appointments.
- Connect to Other Apps: Build workflows that connect Microsoft Bookings with other apps, such as sending appointment details to a CRM system or generating follow-up emails.
- Streamline Processes: Use pre-built templates or create custom flows to automate repetitive tasks and improve efficiency.
6. Integration with Microsoft Dynamics 365
Link Microsoft Bookings with Dynamics 365 for enhanced customer relationship management:
- Sync Customer Data: Import and export customer information between Bookings and Dynamics 365 to maintain up-to-date records.
- Manage Appointments: Track and manage customer appointments directly from Dynamics 365.
- Analyze Customer Interactions: Use Dynamics 365’s analytics tools to gain insights from appointment data and improve customer service.
Example Integration Benefits and Features
| Application | Integration Benefits | Key Features |
|---|
| Outlook | Sync calendars and manage appointments. | Calendar sync, appointment notifications, manage bookings. |
| Teams | Schedule virtual meetings and collaborate with team members. | Virtual appointments, Teams meeting links, collaboration tools. |
| Excel | Export data for reporting and analysis. | Data export, report generation, data manipulation. |
| SharePoint | Share information and collaborate on documents. | Information sharing, document storage, project collaboration. |
| Power Automate | Automate workflows and integrate with other apps. | Automated notifications, app connections, workflow creation. |
| Dynamics 365 | Manage customer relationships and analyze data. | Customer data sync, appointment management, analytics. |
7. Setting Up Integrations: A Quick Guide
Here’s a brief overview of how to set up these integrations:
- Outlook: Integration is automatic with your Microsoft 365 subscription. Check settings under “Calendar Sync” in the Bookings app.
- Teams: Enable the “Microsoft Teams” option when setting up services in the Bookings app.
- Excel: Export data using the “Export” button in the Bookings calendar or reports section.
- SharePoint: Share booking page URLs or documents through SharePoint’s “Share” features.
- Power Automate: Create flows from the Power Automate app using Bookings connectors.
- Dynamics 365: Link Bookings to Dynamics 365 via the “Dynamics 365” app settings.
By integrating Microsoft Bookings with these Microsoft apps, you can enhance your appointment management processes, improve team collaboration, and streamline your business operations.
Best Practices for Using Microsoft Bookings Effectively
To maximize the benefits of Microsoft Bookings, it’s important to follow best practices that ensure smooth scheduling, effective management, and improved customer satisfaction. This section covers essential tips and strategies for using Microsoft Bookings effectively in your business.
1. Optimize Your Booking Page
Creating an intuitive and professional booking page is key to attracting and retaining customers:
- Clear Service Descriptions: Provide detailed descriptions for each service, including what the service entails, the duration, and the cost. This helps customers make informed decisions.
- Update Availability Regularly: Keep your availability up-to-date to avoid scheduling conflicts and ensure that customers can book appointments during your actual working hours.
- Professional Appearance: Ensure your booking page reflects your brand’s professionalism. Use high-quality images, a consistent color scheme, and a well-written welcome message.
- Mobile-Friendly Design: Ensure your booking page is responsive and works well on mobile devices. Many customers will book appointments using their phones or tablets.
2. Use Automation Features
Automation can save you time and improve efficiency:
- Automate Appointment Reminders: Set up automated email or SMS reminders for upcoming appointments to reduce no-shows and keep customers informed.
- Enable Confirmations: Automatically send confirmation emails to customers when they book an appointment. Include all relevant details such as date, time, and service.
- Set Up Follow-Up Emails: Use automated follow-up emails to request feedback, offer additional services, or thank customers for their business.
3. Manage Your Staff Efficiently
Effective staff management ensures smooth operations and customer satisfaction:
- Set Clear Roles and Responsibilities: Define specific roles and responsibilities for each staff member, including which services they offer and their working hours.
- Schedule Regular Meetings: Hold regular meetings to discuss schedules, address issues, and review performance with your team.
- Monitor Staff Performance: Track appointments and gather feedback to evaluate staff performance and identify areas for improvement.
4. Regularly Review and Analyze Data
Data analysis helps you understand trends and improve your services:
- Track Appointment Trends: Use the analytics tools to review appointment volumes, peak times, and customer preferences.
- Analyze Customer Feedback: Regularly review feedback from customers to identify strengths and areas for improvement.
- Review Staff Utilization: Analyze staff schedules and workloads to ensure that resources are being used effectively and that no one is over or under-utilized.
5. Streamline the Booking Process
Make the booking process as easy and straightforward as possible for customers:
- Minimize Required Fields: Only ask for essential information during the booking process to avoid deterring customers.
- Provide Clear Instructions: Ensure that the booking process is easy to follow, with clear instructions and guidance for customers.
- Offer Multiple Booking Options: Allow customers to book appointments online, by phone, or through email to cater to different preferences.
6. Ensure Effective Communication
Clear and timely communication is crucial for a successful booking experience:
- Respond Promptly to Inquiries: Address customer questions and concerns in a timely manner to provide excellent service and build trust.
- Update Customers on Changes: Communicate any changes to appointments, such as rescheduling or cancellations, as soon as possible.
- Be Clear and Professional: Maintain a professional tone in all communications, including appointment confirmations, reminders, and follow-ups.
7. Maintain Data Security and Privacy
Protecting customer data is essential for maintaining trust and complying with regulations:
- Secure Customer Information: Ensure that all customer data is stored securely and that access is restricted to authorized personnel only.
- Comply with Regulations: Follow legal requirements for data protection, such as GDPR or CCPA, to ensure that you are handling customer information appropriately.
- Regularly Review Security Measures: Continuously assess and update your security measures to protect against potential breaches.
Example Best Practices for Microsoft Bookings
| Practice | Description | Benefits |
|---|
| Optimize Your Booking Page | Enhance page design, update availability, and ensure mobile compatibility. | Improves customer experience and increases bookings. |
| Use Automation Features | Automate reminders, confirmations, and follow-up emails. | Saves time and reduces no-shows. |
| Manage Your Staff Efficiently | Define roles, schedule meetings, and monitor performance. | Ensures effective staff management and improves service quality. |
| Regularly Review and Analyze Data | Track trends, analyze feedback, and review staff utilization. | Helps in making data-driven decisions for improvements. |
| Streamline the Booking Process | Minimize required fields, provide clear instructions, and offer multiple booking options. | Enhances the customer booking experience. |
| Ensure Effective Communication | Respond to inquiries promptly and communicate changes effectively. | Builds trust and ensures a smooth appointment process. |
| Maintain Data Security and Privacy | Secure customer data and comply with legal regulations. | Protects customer information and meets legal requirements. |
By following these best practices, you can make the most out of Microsoft Bookings and enhance your appointment scheduling processes, ultimately leading to a more organized and successful business.
Common Issues and Troubleshooting Tips for Microsoft Bookings
While Microsoft Bookings is a powerful tool for managing appointments, you may encounter some common issues. Knowing how to troubleshoot these problems can help you maintain smooth operations and ensure a positive experience for both you and your customers. This section covers frequent issues and provides practical solutions.
1. Issue: Appointment Slots Not Showing
If your appointment slots are not appearing on the booking page, consider the following troubleshooting steps:
- Check Service Availability: Ensure that the services are scheduled correctly and that the availability for those services is set up properly. Go to Services in the Bookings dashboard and verify the time slots.
- Verify Staff Availability: Make sure that the staff assigned to the service is available during the times you have set for the service. Check the Staff tab and adjust their availability if needed.
- Update Booking Page: Sometimes the issue might be with the cache. Refresh your booking page or clear your browser cache to see the updated schedule.
- Check Business Hours: Confirm that your business hours are set correctly. Go to Business Information and review the operating hours.
2. Issue: Customers Are Unable to Book Appointments
If customers are having trouble booking appointments, follow these steps:
- Confirm Booking Page URL: Make sure that you have shared the correct booking page URL with your customers. Check the Booking Page settings for the correct link.
- Check Service Settings: Ensure that the services are not set to “Hidden” and that the booking options are enabled. Verify this in the Services section.
- Test Booking Process: Perform a test booking yourself to identify where the issue might be occurring.
- Check Booking Permissions: Review permissions to make sure that customers can access the booking page and that you haven’t inadvertently restricted access.
3. Issue: Staff Members Cannot Access Their Schedules
When staff members have trouble accessing their schedules, try these solutions:
- Verify Staff Roles: Ensure that the staff members have been assigned the correct roles and permissions to view their schedules. Check the Staff tab for role assignments.
- Check Email Invitations: Confirm that staff members have received their invitations and have accepted them. Re-send the invitation if necessary.
- Update Staff Settings: Make sure that staff settings are correctly configured. Check availability and service assignments to ensure there are no conflicts.
4. Issue: Email Notifications Not Being Sent
If notifications are not being sent, consider the following checks:
- Review Notification Settings: Verify that the email notification settings are correctly configured. Go to Notifications in the Bookings app and ensure that notifications are enabled.
- Check Spam Filters: Ask customers and staff to check their spam or junk folders for missed notifications.
- Update Email Addresses: Ensure that the correct email addresses are entered for both customers and staff.
5. Issue: Data Sync Issues Between Bookings and Outlook
If there are problems with data synchronization between Bookings and Outlook, try these steps:
- Check Sync Settings: Ensure that the sync settings between Microsoft Bookings and Outlook are correctly configured. Verify this in the Calendar Sync settings.
- Update Outlook: Make sure that your Outlook application is up-to-date. Outdated versions may cause sync issues.
- Refresh Calendar: Try refreshing the calendar view in both Bookings and Outlook to force a sync.
6. Example Common Issues and Solutions
| Issue | Possible Causes | Troubleshooting Steps |
|---|
| Appointment Slots Not Showing | Incorrect service settings, staff availability issues, or cache problems. | Check service availability, verify staff schedules, clear cache, and review business hours. |
| Customers Unable to Book Appointments | Incorrect booking page URL, service settings issues, or restricted access. | Verify URL, check service settings, test booking process, and review permissions. |
| Staff Cannot Access Schedules | Incorrect staff roles, email invitation issues, or staff settings misconfigured. | Verify roles, check email invitations, and update staff settings. |
| Email Notifications Not Sent | Notification settings issues, spam filters, or incorrect email addresses. | Check notification settings, review spam filters, and verify email addresses. |
| Data Sync Issues with Outlook | Sync settings errors, outdated Outlook version, or calendar refresh problems. | Check sync settings, update Outlook, and refresh calendar. |
7. Seeking Further Help
If you have tried the above solutions and are still experiencing issues, consider the following options:
- Visit Microsoft Support: Access the Microsoft Support website for additional help and resources.
- Contact Microsoft Support: Reach out to Microsoft Support for personalized assistance with complex issues.
- Check Community Forums: Visit the Microsoft Community Forums to see if others have had similar issues and find potential solutions.
By following these troubleshooting tips and best practices, you can resolve common issues with Microsoft Bookings and ensure that your appointment management process runs smoothly.
FAQ about Microsoft Bookings
Microsoft Bookings is a versatile scheduling tool with various features and settings. Below are some frequently asked questions (FAQs) about Microsoft Bookings, along with clear answers to help you get the most out of the platform.
1. What is Microsoft Bookings?
Microsoft Bookings is an online scheduling tool that allows businesses to manage appointments, book services, and streamline scheduling processes. It integrates with Microsoft 365 to offer a range of features for appointment management, including booking pages, automated reminders, and staff scheduling.
2. How do I create a booking page in Microsoft Bookings?
To create a booking page:
- Log in to your Microsoft 365 account and open the Bookings app.
- Click on “Get Started” or select “Create a New Booking Page” from the dashboard.
- Enter your Business Information, including the business name, contact details, and working hours.
- Set up your Services by defining service details, duration, and pricing.
- Add Staff members by providing their contact details and assigning them to specific services.
- Customize your Booking Page by adding your logo, choosing colors, and writing a welcome message.
- Publish your booking page and share the URL with your customers.
3. Can I integrate Microsoft Bookings with Microsoft Teams?
Yes, Microsoft Bookings can be integrated with Microsoft Teams to schedule and manage virtual appointments. You can enable Teams meetings for your services by selecting the “Microsoft Teams” option when setting up a service. This feature allows customers to join appointments via a Teams meeting link.
4. How do I manage staff schedules in Microsoft Bookings?
To manage staff schedules:
- Go to the “Staff” section in the Bookings app.
- Select a staff member and adjust their Availability by setting working hours, breaks, and time off.
- Assign staff to specific Services and adjust their Service Settings as needed.
- Review and update staff schedules regularly to ensure availability aligns with your business needs.
5. How can I set up automated appointment reminders?
To set up automated reminders:
- In the Bookings app, go to the “Booking Page” section.
- Select “Notifications” and customize the reminder settings for email and SMS notifications.
- Choose when reminders should be sent, such as 24 hours or 1 hour before the appointment.
6. What should I do if my customers are not receiving appointment confirmation emails?
If customers are not receiving confirmation emails:
- Check that the “Email Notifications” settings are enabled and configured correctly in the Bookings app.
- Ensure that the Customer’s Email Address is entered correctly and check for any typos.
- Ask customers to check their spam or junk folders for the confirmation emails.
- Verify that your email server is functioning correctly and not blocking Bookings’ email notifications.
7. Can I use Microsoft Bookings on mobile devices?
Yes, Microsoft Bookings is accessible on mobile devices through a web browser. The booking page and staff dashboard are designed to be mobile-friendly, allowing you to manage appointments and view schedules on smartphones and tablets.
8. How do I export data from Microsoft Bookings?
To export data:
- Go to the “Calendar” or “Reports” section in the Bookings app.
- Select the “Export” option to download appointment details or report data in Excel format.
- Use Excel to analyze data, create reports, or manage appointment information.
9. How can I customize my booking page’s appearance?
To customize the booking page’s appearance:
- Access the “Booking Page” section from the Bookings app.
- Select “Customize” to modify the page layout, add your Logo, and adjust colors and fonts.
- Write a Welcome Message that aligns with your brand and provides clear instructions for customers.
10. What should I do if I encounter technical issues with Microsoft Bookings?
If you experience technical issues:
- Check for any known issues or outages on the Microsoft Office Status page.
- Restart your browser or clear the cache and cookies to resolve minor issues.
- Contact Microsoft Support for assistance with unresolved technical problems.
These FAQs should help you address common questions and issues related to Microsoft Bookings. For more detailed information, refer to the Microsoft Bookings documentation or contact Microsoft support for further assistance.
Conclusion
Microsoft Bookings is a powerful tool designed to streamline appointment scheduling, enhance customer service, and improve business efficiency. Whether you’re a small business owner or part of a larger organization, understanding and utilizing the features of Microsoft Bookings can lead to significant benefits for both you and your customers.Throughout this guide, we have explored various aspects of Microsoft Bookings, including:
- What Microsoft Bookings Is: A comprehensive scheduling solution integrated with Microsoft 365 for managing appointments and services.
- Key Features: Essential functionalities like online booking, automated reminders, and staff management that help streamline operations.
- Setup and Customization: Steps to set up your booking page, customize it to reflect your brand, and manage appointments effectively.
- Integration: How Microsoft Bookings integrates with other Microsoft apps like Teams and Outlook for a cohesive scheduling experience.
- Best Practices: Strategies for optimizing your use of Microsoft Bookings to improve service quality, efficiency, and customer satisfaction.
- Common Issues and Solutions: Troubleshooting tips for addressing frequent problems and ensuring smooth operations.
- FAQs: Answers to common questions to help you resolve issues and make the most of Microsoft Bookings.
By applying the knowledge and best practices from this guide, you can leverage Microsoft Bookings to:
- Improve Scheduling Efficiency: Automate appointment bookings, reduce administrative work, and manage staff schedules effectively.
- Enhance Customer Experience: Provide a seamless booking process, send timely reminders, and offer a professional service to your customers.
- Integrate with Other Tools: Utilize integrations with Microsoft Teams and Outlook for a more connected and efficient scheduling system.
- Grow Your Business: Streamline appointment management, increase bookings, and build stronger relationships with your customers.
Embracing Microsoft Bookings can lead to a more organized and successful business operation. We encourage you to explore all the features, implement best practices, and continuously evaluate your booking processes to achieve the best outcomes for your business.For ongoing support and updates, be sure to stay connected with Microsoft’s resources and community forums. Microsoft Bookings is a dynamic tool that evolves with technology, so keeping up with new features and best practices will help you stay ahead in managing your appointments and services.Thank you for reading this guide on Microsoft Bookings. We hope you found it informative and helpful in your journey to mastering this valuable scheduling tool.
 admin
admin