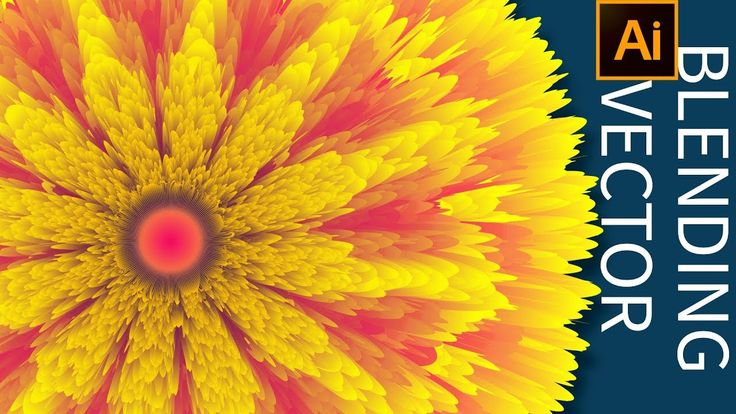
If you're diving into the world of graphic design, you've likely come across the term "VectorStock graphics." These are high-quality, scalable images that allow for endless possibilities in creativity. Unlike raster graphics, which can lose quality when resized, vector graphics maintain their sharpness no matter the scale. They’re perfect for everything from logos to intricate illustrations. In this blog post, we'll explore how to blend these graphics seamlessly for unique and stunning results while uncovering the numerous advantages of using vector graphics in your design projects.
Benefits of Using Vector Graphics in Design
Vector graphics are an artist's secret weapon, offering advantages that can significantly enhance your design projects. Here are some of the most compelling benefits:
- Scalability: One of the biggest perks of vector graphics is that they can be resized without any loss of quality. Whether you need your design for a small business card or a large billboard, vectors deliver crisp lines and clear details every time.
- Editability: With vector graphics, you can easily edit individual elements within your design. This means changing colors, shapes, and sizes requires little effort, allowing for a dynamic and iterative design process.
- Smaller File Sizes: Compared to raster images, vector files are typically smaller since they store mathematical equations rather than pixel data. This means easier storage and faster load times on websites.
- Endless Creative Possibilities: Because vector graphics are built from paths, you can create intricate designs without worrying about pixelation. This allows designers to experiment and blend different graphics seamlessly.
- File Compatibility: Vector graphics can be easily converted to different file formats, making them a versatile choice for various applications. Most design software supports popular vector formats like SVG, EPS, and AI, ensuring compatibility across platforms.
In addition to these benefits, vector graphics foster a creative environment where artists can collaborate without the fear of compromising quality. Here’s a brief overview of how these features can elevate your design:
| Feature | Benefit |
|---|---|
| Scalability | Perfect for any size, from small to large formats. |
| Editability | Allows for quick adjustments and updates. |
| Smaller File Sizes | Easier storage and faster loading times. |
| Creative Flexibility | Unlimited design potential to explore new ideas. |
| Compatibility | Seamlessly integrates with various platforms and software. |
In conclusion, using vector graphics opens up a world of possibilities. Their unique attributes not only enhance the visual appeal but also streamline the design workflow, making it more enjoyable and efficient. So, if you're looking to up your design game, consider integrating VectorStock graphics into your toolkit. The results might just surprise you!
Also Read This: Exploring Atrial Fibrillation Illustrations on VectorStock: What’s Available
3. Choosing the Right Vector Graphics for Your Project

When you're diving into the world of vector graphics, the first step is picking the right elements for your project. This might seem straightforward, but it can make all the difference in achieving a unique and visually appealing outcome. Here are a few tips to guide you:
- Define Your Project's Theme: Before you even start browsing, clarify the theme of your project. Are you going for something modern, vintage, abstract, or playful? Knowing your theme will help you narrow down your options and find graphics that complement each other.
- Consider Color Palette: A cohesive color palette can unify different vector graphics. Look for graphics that share similar shades or tones. You can use color picker tools or online palette generators to help you select colors that look harmonious together.
- Match Styles and Lines: Consistency in style is crucial. If you choose a sleek, minimalist vector, pairing it with a highly detailed illustration can create visual dissonance. Stick to similar line weights, levels of detail, and artistic styles to enhance the overall look.
- Check Resolutions: Ensure all graphics are vector files, which means they can be resized without losing quality. However, if you're pulling from raster image sources as well, always check they have high enough resolutions to maintain clarity in your final design.
- Look for Versatility: Some vector graphics are more adaptable than others. Choose graphics that can be easily manipulated or re-colored to fit into various parts of your project. This flexibility can save you time and help keep your design cohesive.
Remember, the key is to be intentional with your choices. Each graphic should serve a purpose, whether it’s to convey a message, fill space, or create a particular mood. Take your time in selecting these elements, as a thoughtful combination will pay off in your final artwork!
Also Read This: Transforming Your Brand Identity with Unique Vectors from VectorStock
4. Techniques for Blending Vector Graphics
Once you've gathered your vector graphics, the real fun begins—blending them together to achieve unique results. Here are some effective techniques to help you blend different vectors like a pro:
- Layering: One of the simplest yet most effective ways to blend vectors is through layering. Place graphics on top of one another and adjust their opacity to allow the background graphics to peek through. This creates depth and interest in your design.
- Masking: Use clipping masks to create intricate shapes using your vector graphics. This technique allows you to keep the elements you want while hiding parts that don’t fit, resulting in a clean composition that feels cohesive and intentional.
- Color Gradients: Enhance your graphics with color gradients to create smooth transitions between different vectors. This technique can tie separate elements together by integrating a unified color palette throughout your design.
- Shadow and Highlight Effects: Add shadows and highlights to create a sense of dimension. This technique works wonders when blending flat graphics into a more dynamic composition. It adds realism and can make your design feel more engaging.
- Textures and Patterns: Incorporating textures can elevate the overall look of your graphics. Use subtle textures or patterns to give a unique feel to your vectors, making them stand out while still harmonizing with the other elements in your design.
Blending vector graphics is all about experimentation. Don’t be afraid to play with different techniques until you find a combination that resonates with your style and project goals. Remember, the most striking designs often come from a willingness to try new things and push creative boundaries!
Also Read This: The Top Fall-Themed Graphics on VectorStock for Seasonal Campaigns
5. Tools and Software for Combining Vector Graphics
When it comes to blending vector graphics, having the right tools and software can make all the difference. Luckily, there are plenty of options out there, ranging from industry-standard software to more accessible, user-friendly platforms. Let’s explore some of the best tools you can use to combine VectorStock graphics into unique designs.
- Adobe Illustrator: The go-to choice for many graphic designers, Adobe Illustrator is packed with features that make blending vector graphics a breeze. With its powerful paths and shapes manipulation tools, you can easily combine and customize graphics. Plus, it offers extensive support for layers, which is essential for creating complex designs.
- CorelDRAW: Another robust graphic design software, CorelDRAW is known for its user-friendly interface and powerful vector editing capabilities. You can layer, shape, and blend graphics seamlessly, giving you plenty of creative freedom.
- Inkscape: If you’re looking for a free alternative, Inkscape is a fantastic choice. It supports many file formats, including those from VectorStock. The software offers a range of tools for editing and combining vectors, making it a great option for beginners and experienced designers alike.
- Canva: While more limited in terms of vector editing than Illustrator or CorelDRAW, Canva is an excellent option for those who prefer a simpler, drag-and-drop interface. You can easily layer and manipulate graphics to create unique compositions. Plus, it’s web-based, so no installation is required!
- Affinity Designer: This is a rising star in the graphic design world. Affinity Designer offers many of the advanced features you’d find in Illustrator, but at a more affordable price. Its dual display mode lets you work in both vector and raster formats, making it versatile for blending graphics.
Choosing the right software will depend on your specific needs, budget, and design experience. Each tool has its strengths, so consider trying out a few of them to see which feels most intuitive for your blending process. With the right software at your fingertips, the possibilities for creating unique designs are endless!
Also Read This: How to Spark Your Creativity Using Stunning Graphics from VectorStock
6. Step-by-Step Guide to Creating Unique Designs
Now that you’ve got your tools ready, let’s dive into a step-by-step guide for blending multiple vector graphics. This will help you create designs that are not only unique but also visually engaging. Ready to unleash your creativity? Let’s get started!
- Step 1: Choose Your Graphics - First things first, browse VectorStock or your preferred source to choose the graphics you want to blend. Pick a few that resonate with your design vision. It's helpful to select diverse graphics that complement each other.
- Step 2: Open Your Design Software - Launch the software you're using (Adobe Illustrator, Canva, etc.) and create a new project. Set your canvas size according to where you want to use your design—be it for social media, print, or web use.
- Step 3: Import Your Graphics - Import the chosen vector files into your project. Most design software allows you to drag and drop these files directly onto your canvas. Make sure to keep them organized in layers to maintain control over each graphic.
- Step 4: Position and Resize - Start positioning your graphics on the canvas. Resize them as necessary to create a balanced composition. Use alignment tools to ensure everything is properly aligned, which enhances the overall professional look of your design.
- Step 5: Blend and Combine - Here’s the fun part! Begin blending the graphics together. You can use various tools like opacity settings, blending modes, or masks (if available) to meld the graphics creatively. Try layering them in different configurations to see what looks best.
- Step 6: Add Effects and Colors - Consider adding gradients, shadows, or outlines to enhance your design. Color adjustments can also make a significant impact. Experiment with different color palettes to ensure your design captures the mood you’re aiming for.
- Step 7: Review and Export - Finally, take a step back and review your design. Make any necessary tweaks until you’re satisfied. Once everything looks perfect, export your work in the appropriate format for its intended use.
And there you have it! With these steps, you can effectively blend multiple vector graphics into unique designs that stand out. Remember, the key is to experiment and let your creativity flow—there's no one right way to do it, so have fun along the way!
Also Read This: A Step-by-Step Guide to Designing Infographics with VectorStock
7. Tips for Enhancing Your Blended Graphics
Once you've blended multiple VectorStock graphics, the next step is enhancement. This is where you can take your creation to the next level, adding polish and professional flair. Here are some practical tips to maximize the impact of your blended graphics:
- Adjust Colors: Consider using a consistent color palette. Tools like Adobe Color can help you find harmonious color schemes. Adjusting hues, saturation, and brightness can make each graphic feel more integrated.
- Add Texture: Sometimes, flat graphics can feel a bit lifeless. Adding textures can bring depth and interest to your designs. Try layering a subtle texture over your blended graphic to give it that tactile feel.
- Utilize Shadows and Highlights: Adding shadows can give your graphics dimension, making elements appear more lifelike. Similarly, highlights can help certain parts pop out, guiding the viewer's eyes where you want them to go.
- Experiment with Blending Modes: If you're using software like Photoshop or Illustrator, don't shy away from blending modes. They can create striking effects that can enhance the interaction between graphics in ways you might not expect.
- Maintain Visual Hierarchy: Make sure that the most important elements stand out. You can do this through size, color contrast, and placement. Consider which parts of your graphic you want to draw attention to and design accordingly.
- Incorporate Typography: If relevant to your graphic, adding text can provide context and enhance the narrative of your piece. Choose fonts that complement your visuals without overwhelming them.
- Seek Feedback: Sometimes, we become so immersed in our work that it’s hard to see it objectively. Don’t hesitate to ask for feedback from friends or fellow designers. Fresh eyes can provide valuable insights.
By following these tips, you can enhance your graphic blends in ways that not only look great but also convey your intended message effectively. Remember, the ultimate goal is to create something that resonates with your audience while maintaining your unique creative style.
Also Read This: Why Event Planners Depend on VectorStock for Unique Design Ideas
8. Showcasing Your Creative Results
Now that you’ve created something truly special, it’s time to showcase your blended graphics! Whether you're an aspiring designer looking to build a portfolio or a seasoned professional wanting to display your latest work, presenting your graphics effectively is key. Here are some tips on how to do just that:
- Create a Portfolio: Build an online portfolio showcasing your best works. Use platforms like Behance, Dribbble, or even personal websites. Organize your projects into categories, and make sure to explain the thought process behind each blend.
- Social Media Sharing: Share your graphics on social media platforms like Instagram, Pinterest, or Facebook. Use relevant hashtags to reach a wider audience. Consider creating a behind-the-scenes post detailing how you achieved your blends—this can engage your followers even more!
- Engage with the Community: Join design forums or groups. Platforms like Reddit or specialized design communities allow you to connect with others who can provide feedback, inspiration, and collaboration opportunities.
- Participate in Challenges: Engage in online design challenges. Websites like 99designs or DesignCrowd often host contests that can provide exposure while also challenging your skills.
- Print Your Work: Don't underestimate the power of physical representation. Create prints of your best graphics and consider showcasing them in exhibitions or local art fairs. This can help you reach audiences who may not be active online.
- Write a Blog or Tutorial: Share your process through a blog or video tutorial. This not only showcases your final results but also establishes you as a knowledgeable figure in the design community.
Remember, no matter how you choose to showcase your creative results, the key is to remain authentic and enthusiastic. Your passion for design should shine through, inviting others to appreciate your hard work and creativity!
Conclusion and Final Thoughts
Blending multiple VectorStock graphics can unlock a world of creativity and uniquely personalized designs. By following the methods outlined in this blog, you can:
- Enhance diversity: Combining various graphics enables you to offer variety in your projects.
- Establish a unique style: Fusing different elements allows you to create a distinctive visual signature.
- Save time: Using pre-made vector graphics reduces the time spent on design while still achieving high-quality results.
To maximize your creative outcomes, consider the following tips:
| Tip | Description |
|---|---|
| Experiment with Layers | Use layers to separately adjust different graphics without losing flexibility. |
| Match Color Palettes | Ensure color harmony to create a cohesive look across all elements. |
| Utilize Transparency | Play with opacity to create depth and interesting visual effects. |
Always remember that creativity is a journey—allow yourself the freedom to explore and innovate with VectorStock graphics. The more you experiment, the more distinctive your designs will become. Embrace the blending process and enjoy the unique outcomes it offers!
 admin
admin


