Posting your Work in Progress (WIP) on Behance can be a fantastic way to showcase your creative journey. Whether you're a designer, illustrator, or photographer, sharing your ongoing projects not only provides insight into your process but also fosters engagement with a community of like-minded creatives. In this guide, we’ll explore the best practices for sharing your WIP on Behance and why it's a valuable addition to your portfolio.
Why Sharing Your WIP is Important
Sharing your WIP on Behance isn't just about showing off your finished pieces; it's about connecting and engaging with your audience throughout the creative process. Here’s why it’s important:
- Builds Engagement: When you share your WIP, you invite feedback and conversation. This interaction can lead to valuable insights, suggestions, and even collaborations with other creatives.
- Shows Your Process: Many people are fascinated by the creative process. By sharing your WIP, you provide a behind-the-scenes look that can inspire and educate others. It showcases your skills and thought process, not just the final output.
- Establishes Your Brand: Your work is a reflection of you, and sharing your process helps establish your creative identity. Regularly posting WIP allows potential clients and followers to understand your style, approach, and the unique touch you bring to your projects.
- Encourages Accountability: When you put your work out there, you may feel a sense of responsibility to deliver. This accountability can help you stay motivated and on track, pushing you to complete your projects while also maintaining a consistent presence on the platform.
- Paves the Way for Future Opportunities: A strong Behance profile that includes your WIP can attract potential clients or employers. It showcases your versatility and ongoing growth as an artist, which could lead to future projects or job offers.
In short, sharing your WIP on Behance doesn't just benefit you as an artist; it enriches the broader community. You never know who might be watching and waiting to be inspired by your journey!
Also Read This: How to Embed Images for a Sleek Design
3. Step-by-Step Guide to Posting WIP on Behance
Ready to showcase your work in progress on Behance? Great! It’s a straightforward process that can help you connect with others in your field. Let’s break it down into simple steps so you can share your creative journey with the world.
- Create an Account or Log In: If you don't already have a Behance account, head over to their website and create one. If you already have an account, just log in using your credentials.
- Click ‘Create a Project’: Once you're logged in, look for the 'Create a Project' button on your dashboard. This will direct you to the project creation page where all the magic happens.
- Select Your Media: Here’s the fun part! You can upload images, videos, or even GIFs showcasing your WIP. Click the 'Upload' button and choose your files. Make sure to select high-quality visuals that capture your work effectively.
- Add Descriptions and Annotations: For each file uploaded, consider adding context. Describe what the viewer is seeing, share your thought process, and highlight any challenges you faced. This information can make your project more relatable and engaging.
- Organize Your Content: Use Behance's features to arrange your content logically. You can drag and drop to change the order of your visuals, and even add text blocks to enhance your narrative.
- Choose a Cover Image: Your cover image is the first thing people will see, so choose wisely! It should be visually striking and represent your project effectively to entice viewers to click through.
- Add Tags: Tags help others discover your work through search. Include relevant keywords that relate to your WIP. Think of what words someone might use to search for projects like yours.
- Publish Your Project: Once you’re satisfied with how everything looks and reads, hit the ‘Publish’ button! This will share your project with the Behance community, and you can also share it on other social networks to increase visibility.
Congratulations! You’ve officially posted your WIP on Behance. Now, get ready for feedback and interaction from fellow creatives!
Also Read This: Creating Impactful Fashion Industry Graphics with VectorStock
4. Tips for Creating Engaging WIP Posts
Creating a captivating WIP post is more than just uploading images and hitting publish. You want to draw viewers in, spark discussions, and possibly gain constructive feedback. Here are some tips to help you craft an engaging WIP post that resonates with your audience.
- Start With a Hook: Make your opening lines intriguing. Ask a question or state a bold observation about your project. This will catch the reader’s attention right away.
- Tell a Story: People love narratives. Share the story behind your project: What inspired you? What challenges did you encounter? How has your project evolved? The more personal you get, the more relatable your WIP will be.
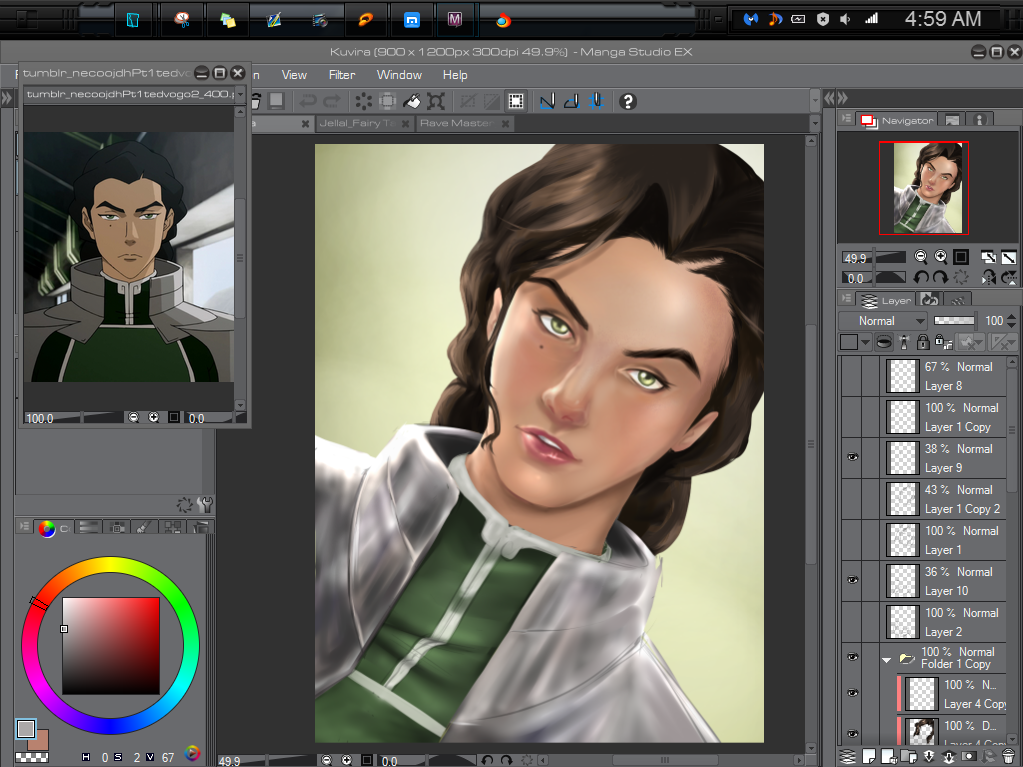
- Show the Process: In WIP posts, showcasing the journey is key. Include multiple stages of your work—from sketches to final touches. This transparency invites viewers into your creative process and makes them feel like part of your journey.
- Invite Feedback: Don’t be afraid to ask for opinions or critiques. Phrases like “What do you think about this color choice?” or “I’m contemplating a different layout—any thoughts?” can encourage engagement and dialogue.
- Use High-Quality Images: Make sure your images are sharp and well-composed. Consider lighting, angles, and editing to present your work in the best light possible. Blurry or poorly lit images can detract from the overall appeal.
- Engage with Your Audience: Once your WIP is posted, stay active! Respond to comments and messages. Engaging with your audience builds community and encourages more interaction on your projects.
- Keep Updating: Treat your WIP as a living document. As your project progresses, update your post with new images and insights. This not only keeps your audience interested but also shows your development as an artist.
By following these tips, you’ll not only create beautiful posts but also foster a supportive community around your work. Remember, sharing your WIP is a chance to connect and inspire others—so let your creativity shine!
Also Read This: How to Download from Behance for Free: A Guide to Accessing Free Creative Resources
5. How to Use Tags and Descriptions Effectively
When you post a Work in Progress (WIP) on Behance, how you use tags and descriptions can make a significant difference in how your project is discovered and appreciated by others. Let's break it down together!
Tags play an essential role in how your project gets found in search results. Think of them as the keywords that help people discover your work. Here are some tips for using tags effectively:
- Be Relevant: Only use tags that are directly related to your project. If you’re working on a digital illustration, tags like "digital art," "illustration," or "concept art" are appropriate.
- Mix General and Specific Tags: Include both broad categories (e.g., "graphic design") as well as more specific tags (e.g., "poster design for a music festival") to attract a wider audience while still targeting your niche.
- Check Popular Tags: Browse other projects similar to yours and take note of the tags they use. Adopting popular tags can help increase the visibility of your WIP.
- Limit Your Tags: Use a moderate number of tags—around 5 to 15 is a good rule of thumb. Too many can dilute your visibility, while too few might limit your reach.
Now, let’s talk about descriptions. This is your opportunity to provide context about your project, and it can really enhance the viewer's engagement. Here’s how to craft a compelling description:
- Be Clear and Concise: Start with a brief overview of what your project is about. What is the concept? What medium are you using? Aim for clarity to hook your audience right from the start.
- Share Your Vision: Explain why you’re creating this project and what inspired you. Are you exploring a new style or technique? Your narrative adds depth and helps others connect with your work.
- Invite Feedback: Encourage your audience to share their thoughts. You can phrase it like this: “I would love to hear your feedback or suggestions as I continue to develop this piece!” This opens up dialogue and shows that you value their opinions.
- Include Call-to-Actions: You can also suggest that viewers watch your post for updates or check out other related projects on your profile. This can increase engagement and encourage followers.
By thoughtfully incorporating tags and crafting interesting descriptions, you can enhance the visibility and impact of your WIP projects on Behance. This small effort can lead to a richer interaction with your audience and greater exposure in the creative community!
Also Read This: Creating a Stunning Website Design Portfolio on Behance
6. Showcasing Your Creative Process Through WIP
One of the most rewarding aspects of sharing WIP projects on Behance is the opportunity to showcase your creative process. This not only helps others see how you work but also allows you to reflect on your own journey as an artist. Let’s delve into some effective ways to do this!
First off, consider using multiple images to illustrate different stages of your project. For example, if you're designing a character, you might show:
- Initial sketches
- Color trials
- The final design
This kind of visual storytelling provides insight into your journey and can engage viewers more deeply. They’ll see not just the finished product but also the effort and thought that went into it.
Step-by-Step Commentary is another fantastic way to showcase your process. You can add notes to images to explain what you're doing, why you're making certain choices, or what challenges you're facing. Maybe you realized that a color scheme wasn’t working or that a layout felt off balance. Sharing these insights helps create a narrative that viewers can follow.
Also, don’t forget to include video clips if possible! Recording yourself as you work or providing a time-lapse of your creative process can captivate your audience even more. People love seeing the hand movements, brush strokes, or digital manipulations in real-time, which makes your work feel more relatable and authentic.
Finally, engage with your audience throughout the process. Ask questions such as:
- “What do you think about this color choice?”
- “Does anyone have tips for achieving a more dynamic composition?”
This interaction not only makes your WIP more engaging but also fosters a sense of community. Remember, your creative journey is just as important as the final result. By sharing your process, you're not just showcasing a project; you're inviting others into your world, inspiring them, and possibly even learning from them in the process.
Ultimately, using WIP to showcase your creative process allows you to connect with fellow creatives and potential clients on a deeper level. So, go ahead and share your journey—who knows who you might inspire along the way!
Also Read This: Shutterstock Alternatives: Exploring Other Stock Photography Platforms
7. Examples of Successful WIP Posts on Behance
Showing your work in progress (WIP) on Behance can open doors to valuable feedback and potential collaborations. Here are some inspiring examples from artists and designers who successfully showcased their WIPs:
1. The Illustrated Storyboard
An animator shared their storyboard sketches alongside completed animation frames. By presenting each phase of their project, viewers could appreciate the transformation from concept to final product. The post was rewarded with numerous likes and comments, highlighting how effective storytelling enhances WIP posts.
2. The Design Evolution
A graphic designer documented their logo redesign process. From initial sketches to digital drafts and final iterations, the designer used clear captions for each stage. This not only engaged fellow designers but also sparked discussions about branding strategies and design choices.
3. The Progression of a Painting
An illustrator shared the creation of a large-scale painting, showcasing each layer of paint and texture. This post was filled with behind-the-scenes photos, revealing techniques and materials used. The authenticity of sharing struggles and breakthroughs resonated with the community, resulting in supportive feedback and helpful critiques.
4. Crafting a 3D Model
A 3D artist shared their modeling process for a video game character, using time-lapse videos and screenshots. Not only did this make the post dynamic, but it also provided an insightful look at complex tasks like rigging and texturing. The artist's willingness to engage with comments resulted in constructive dialogue with peers.
These examples underscore a key takeaway: when posting WIP on Behance, it’s all about engaging your audience throughout your creative journey. By balancing visuals with informative commentary, you can make your process relatable and inspiring.
Also Read This: How to Promote Work on Behance Boosting the Visibility of Your Projects
8. Common Mistakes to Avoid When Posting WIP
Posting WIP on Behance is an excellent way to showcase your creative process, but it’s easy to fall into some common traps. Here’s a rundown of mistakes to avoid to ensure your posts don’t miss the mark:
- Neglecting Quality Images: Low-resolution or poorly lit photos can detract from your work. Always aim for clear, high-quality images that accurately represent your project.
- Skipping Explanations: Posting images without context can confuse viewers. Include thoughtful descriptions for each step to help your audience understand your reasoning and choices.
- Overloading with Content: While it’s great to show progress, too many images can overwhelm viewers. Curate your post to include only the most significant stages that highlight your creative journey.
- Ignoring Feedback: Engaging with your audience is crucial. If people take the time to comment, acknowledge their thoughts, and consider their suggestions. This not only builds community but can also improve your work.
- Not Updating Your WIP: If your project evolves, don't forget to update your post! This keeps followers engaged and showcases your growth and adaptability.
By sidestepping these common mistakes, you can create captivating WIP posts that not only attract attention but also engage and educate your audience. Remember, sharing your creative process is about building connections and fostering a vibrant community around your art! Happy posting!
Conclusion and Encouragement to Share Your Work
In conclusion, sharing your Work in Progress (WIP) on Behance can be a transformative experience for both your creative journey and your career. Not only does it offer you a platform to showcase your evolving projects, but it also allows you to:
- Gather Feedback: Engage with peers and professionals to gain insights and constructive criticism.
- Build a Community: Connect with other creatives who share similar interests and passions.
- Document Your Process: Create a visual record of your development, which can be beneficial for your portfolio.
- Boost Your Visibility: Increase the chances of being discovered by potential clients or collaborators.
Don’t be afraid to show your process as it unfolds. Remember, every expert was once a beginner, and sharing your progress can inspire others who are at different stages of their own creative paths. Embrace the journey, and post your WIPs regularly.
By posting your work, you not only embrace the learning process but also contribute to a vibrant community of artists. So, take a leap of faith, share your WIP, and watch how your art and skills flourish through collaboration and feedback!
 admin
admin


