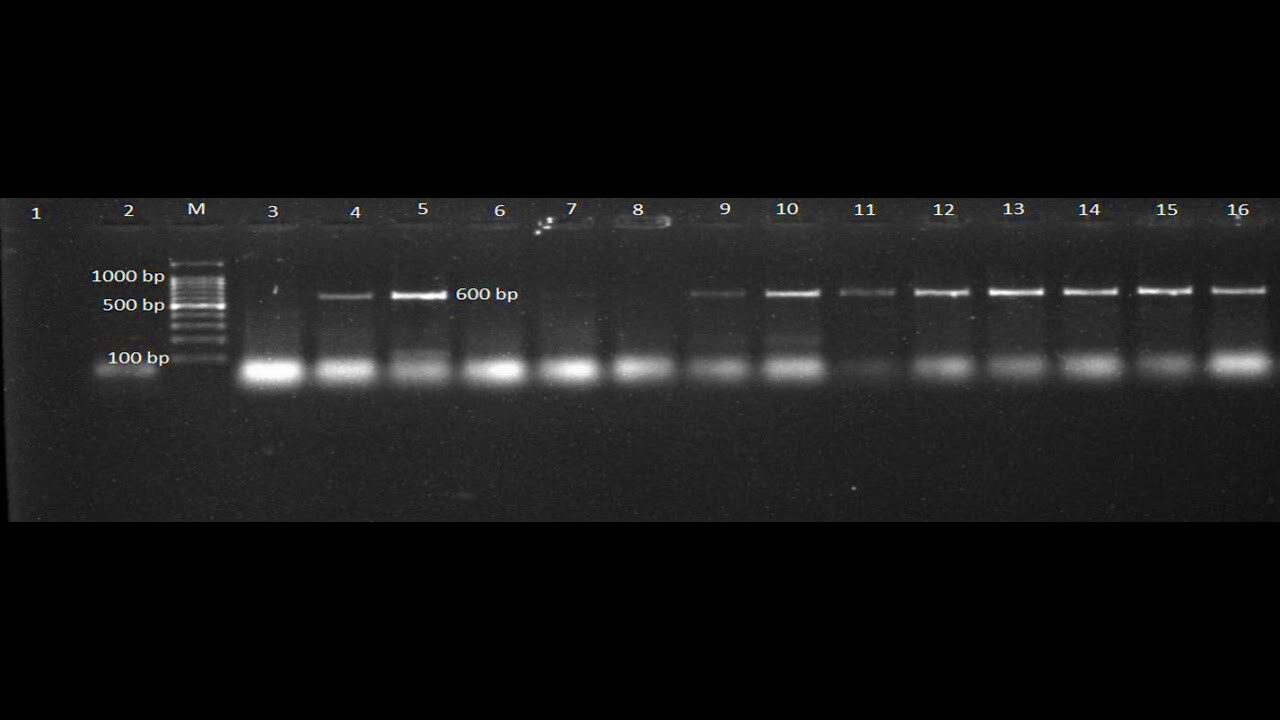
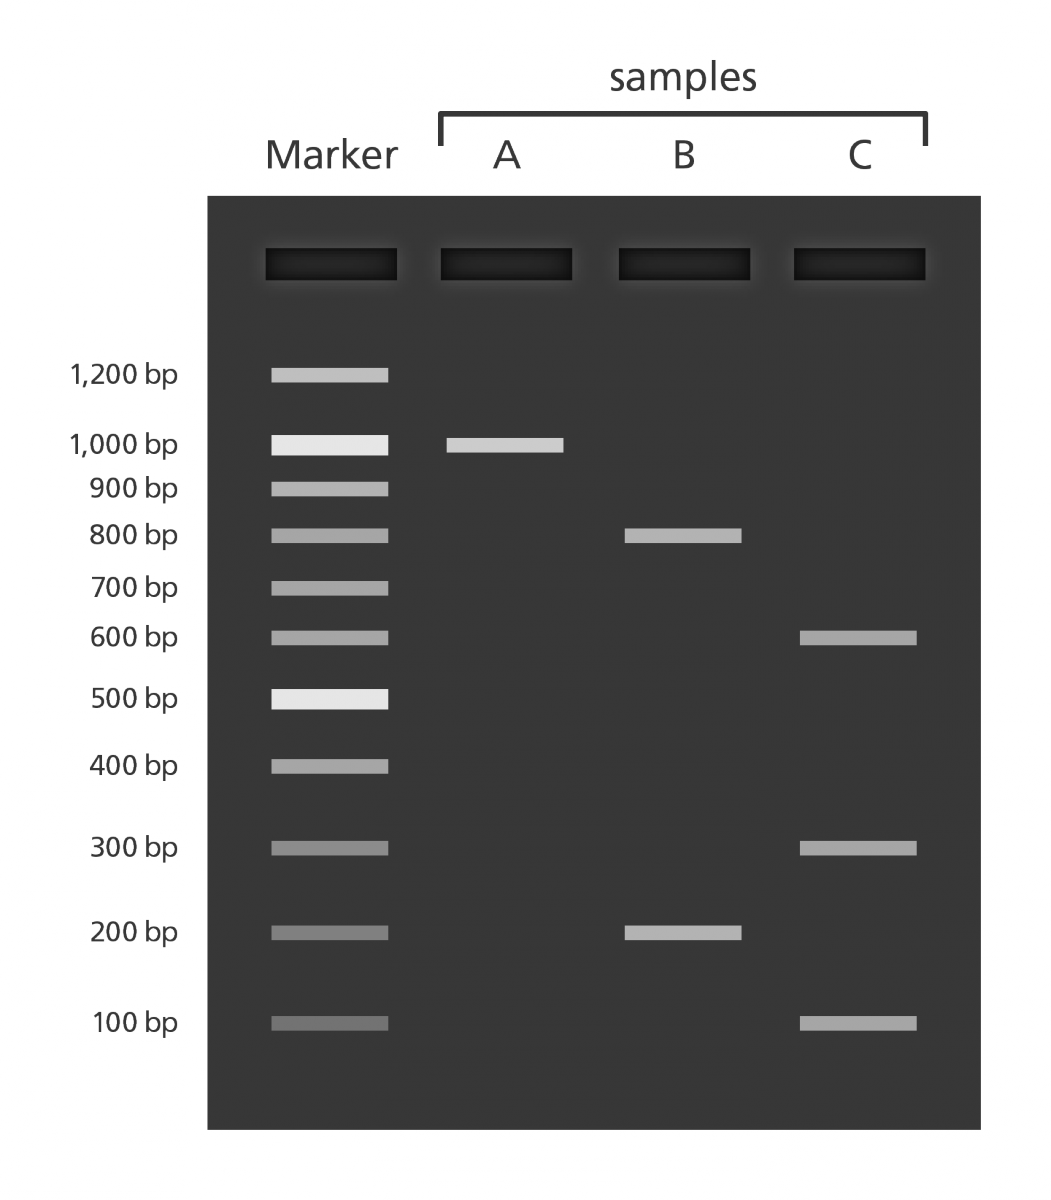
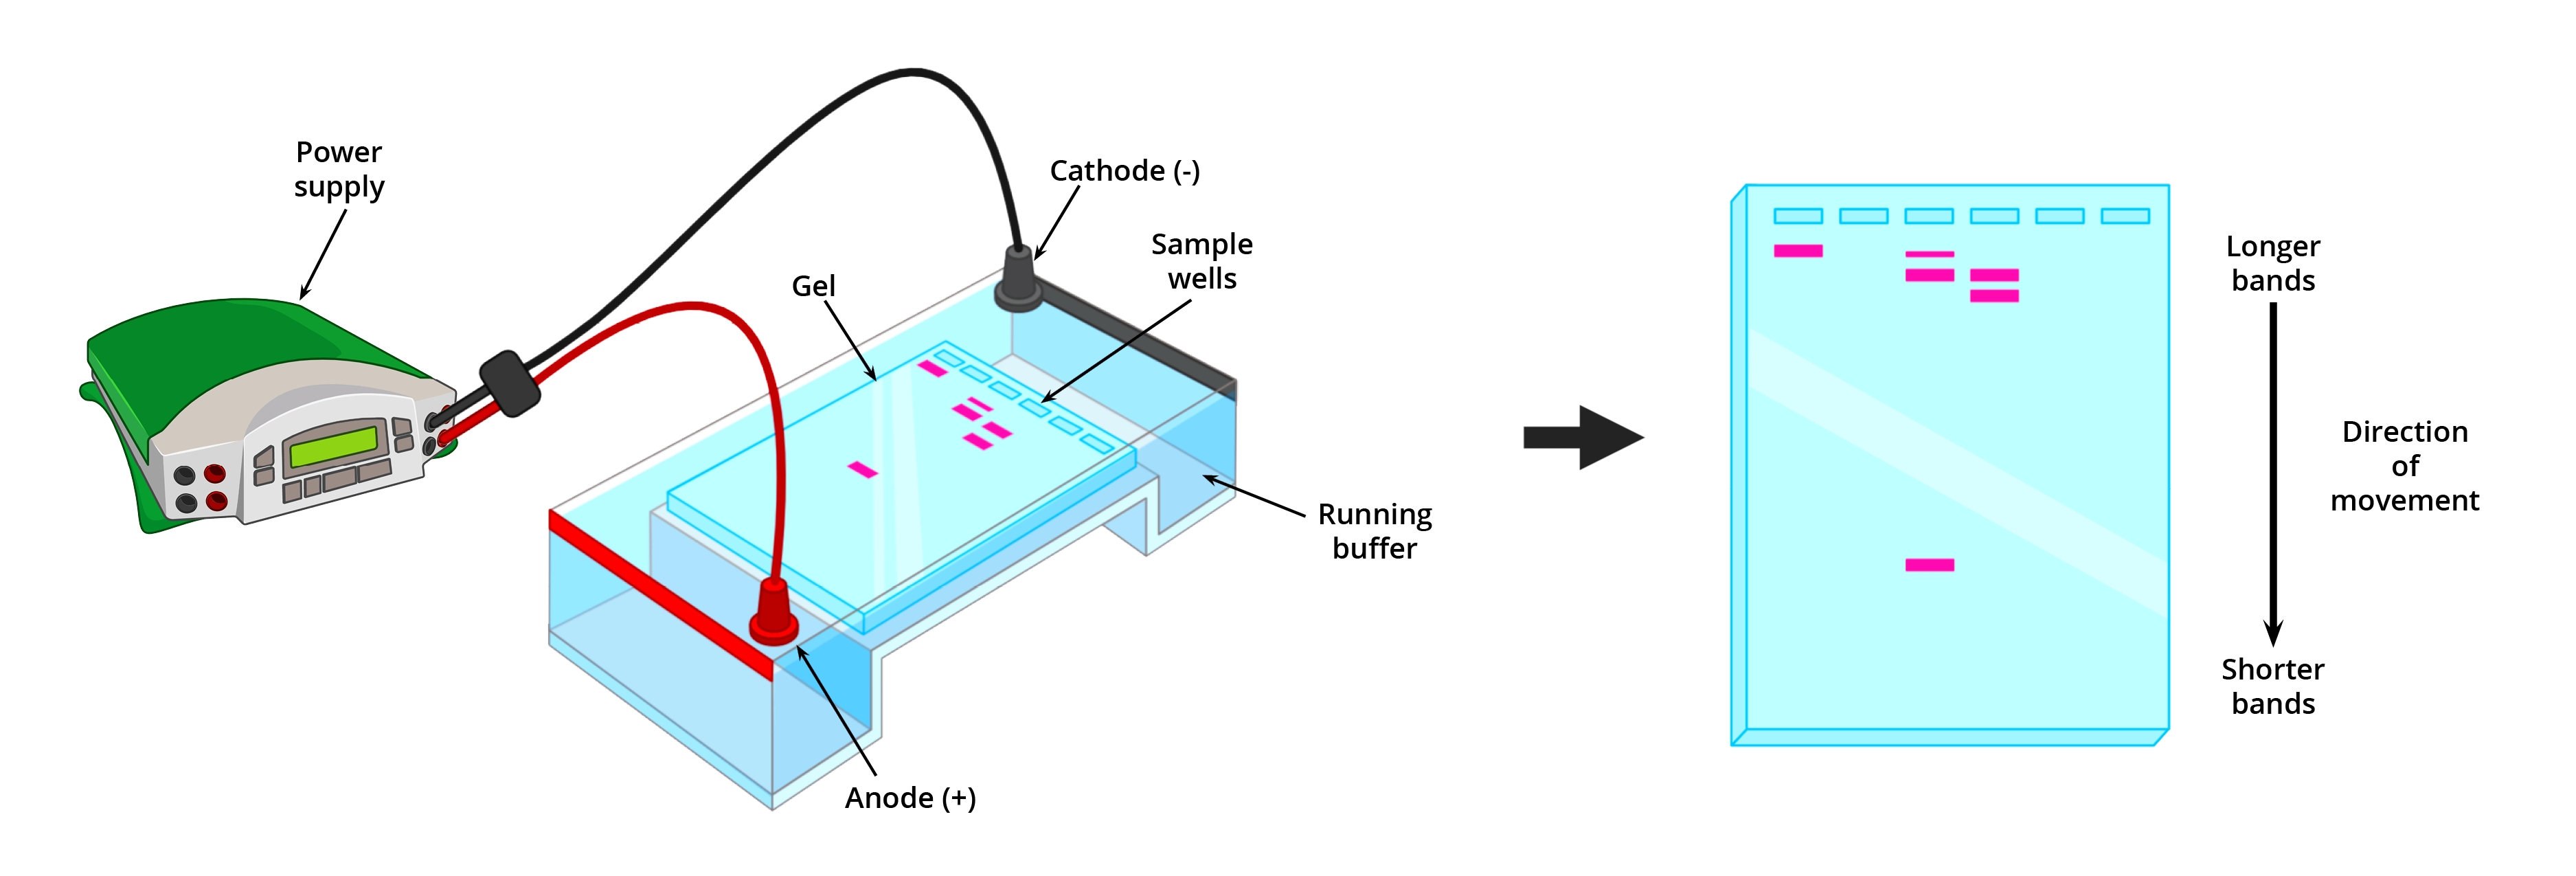
Gel electrophoresis is a crucial technique in molecular biology used to separate and analyze DNA, RNA, or proteins. The resulting
images provide valuable insights into the samples being studied. Capturing and labeling these
images correctly is essential for accurate data interpretation and sharing results with others.
Importance of Labeling Gel Electrophoresis Images

Labeling gel electrophoresis
images is not just about aesthetics; it plays a vital role in data clarity and reproducibility. Here are some key reasons why proper labeling is essential:
- Facilitates Understanding: Clear labels help viewers understand the context of the results, including what each band represents.
- Enhances Communication: Labeled images make it easier to share findings with colleagues and present data in reports or publications.
- Aids in Data Comparison: When images are labeled consistently, comparing results across different experiments becomes straightforward.
- Improves Professionalism: Well-labeled images reflect a high standard of work, enhancing your credibility in the scientific community.
Tools Needed for Labeling

To label your gel electrophoresis
images effectively, you'll need some basic tools. Here’s a list of essential items:
- Image Editing Software: Software like Adobe Photoshop, GIMP, or even simpler tools like Canva can help you add text and graphics to your images.
- Data Analysis Software: Tools such as ImageJ or Bio-Rad’s Image Lab can be useful for analyzing and labeling your gels.
- Good Quality Images: Ensure your images are high-resolution to maintain clarity when labeling.
- Labels and Annotations: Decide on a consistent format for labels, such as font size, color, and style, to maintain uniformity across your images.
Having these tools ready will streamline your labeling process, making it easier and more efficient.
Step by Step Process for Labeling

Labeling gel electrophoresis
images might seem daunting, but with a systematic approach, it becomes quite manageable. Here’s a simple step-by-step process to guide you:
- Capture the Image: Start by taking a high-resolution photo of your gel. Make sure the lighting is good to avoid shadows or reflections.
- Open the Image in Editing Software: Use your preferred image editing software to open the captured image. This is where the labeling magic happens!
- Add Labels: Use the text tool to add labels to each band. Clearly indicate what each band represents, such as “Sample 1” or “Control.”
- Use Arrows or Lines: If necessary, draw arrows or lines pointing to specific bands for added clarity. This helps viewers quickly understand which band corresponds to which label.
- Adjust Font and Color: Choose a font that is easy to read and a color that contrasts well with the background. Bold or larger fonts can help important labels stand out.
- Save the Labeled Image: Once you’re satisfied with the labels, save your work in a high-quality format, like PNG or TIFF, to maintain clarity.
By following these steps, you’ll create a well-labeled gel electrophoresis image that communicates your results effectively.
Common Mistakes to Avoid While Labeling
While labeling your gel electrophoresis
images, it’s easy to make a few common mistakes. Here are some pitfalls to watch out for:
- Using Inconsistent Fonts: Stick to one or two fonts for uniformity. Using too many different fonts can make the image look cluttered.
- Poor Contrast: Make sure the labels stand out against the background. Low contrast can make it hard to read the text.
- Overlapping Labels: Avoid placing labels too close to each other or overlapping with bands. This can lead to confusion.
- Ignoring Scale: If your image has a size marker, make sure to label it accurately. This helps in understanding the size of the bands.
- Neglecting to Proofread: Typos in labels can mislead viewers. Always double-check your text for accuracy.
Avoiding these mistakes will enhance the clarity and professionalism of your labeled images.
Best Practices for Clear Labels
Creating clear and effective labels is key to making your gel electrophoresis images understandable. Here are some best practices to keep in mind:
- Keep It Simple: Use concise labels that get straight to the point. Avoid long descriptions that clutter the image.
- Maintain Consistency: Use the same format for all labels in a series of images. This includes font type, size, and color scheme.
- Include a Legend: If your image has multiple samples or conditions, consider adding a small legend that explains each label.
- Label Axes: If applicable, label any axes or scales in your images. This adds context and makes your data more interpretable.
- Use High-Quality Graphics: Always work with high-resolution images to ensure labels remain clear and legible, even when zoomed in.
By following these best practices, you’ll create gel electrophoresis images that are not only visually appealing but also convey your findings effectively.
Tips for Saving and Sharing Labeled Images
Once you've labeled your gel electrophoresis images, it’s time to save and share them. How you do this can impact the quality and accessibility of your work. Here are some handy tips:
- Choose the Right Format: Save your images in formats like PNG or TIFF. These formats maintain high quality and are widely accepted in scientific communities.
- Use Descriptive Filenames: Instead of generic names like "image1," use descriptive filenames such as "Sample_A_Gel_Electrophoresis_2024.png." This makes it easier to identify files later.
- Compress Without Losing Quality: If file size is a concern, consider compressing your images. Tools like TinyPNG help reduce file sizes while preserving quality.
- Back Up Your Work: Store copies of your images on external drives or cloud storage to avoid losing them. Consider using services like Google Drive or Dropbox for easy access.
- Share with the Right Audience: When sharing, use platforms that are appropriate for your field. Scientific journals, academic social networks, or institutional repositories can be great places to showcase your work.
By following these tips, you can ensure that your labeled images are saved securely and shared effectively, maximizing their impact.
Frequently Asked Questions
Here are some common questions about labeling gel electrophoresis images and their answers:
- What is the best software for labeling images? Popular options include Adobe Photoshop, GIMP, and ImageJ. Choose one that fits your familiarity and needs.
- How can I ensure my labels are legible? Use high-contrast colors, clear fonts, and appropriate sizes. Test your images on different devices to check legibility.
- Can I label images after saving them? Yes, you can open saved images in editing software and add labels. Just make sure to save the updated version.
- Is there a standard way to label bands? While there isn’t a strict standard, being consistent with your labeling style across experiments is crucial for clarity.
- How do I cite labeled images in my work? Follow the citation style of your field, providing details like the image creator, date, and context of the image.
If you have any more questions, feel free to reach out to colleagues or search online forums for further assistance!
Conclusion
Labeling gel electrophoresis images is an essential skill that can significantly enhance the clarity and professionalism of your research. By following the steps outlined in this guide, avoiding common mistakes, and adhering to best practices, you can create informative and visually appealing images. Remember to save and share your work wisely to maximize its reach. As you become more proficient in labeling, you’ll find that it not only improves your own understanding but also aids in communicating your findings to others. Happy labeling!
 Labeling gel electrophoresis images is not just about aesthetics; it plays a vital role in data clarity and reproducibility. Here are some key reasons why proper labeling is essential:
 To label your gel electrophoresis images effectively, you'll need some basic tools. Here’s a list of essential items:
 Labeling gel electrophoresis images might seem daunting, but with a systematic approach, it becomes quite manageable. Here’s a simple step-by-step process to guide you:
 admin
admin


