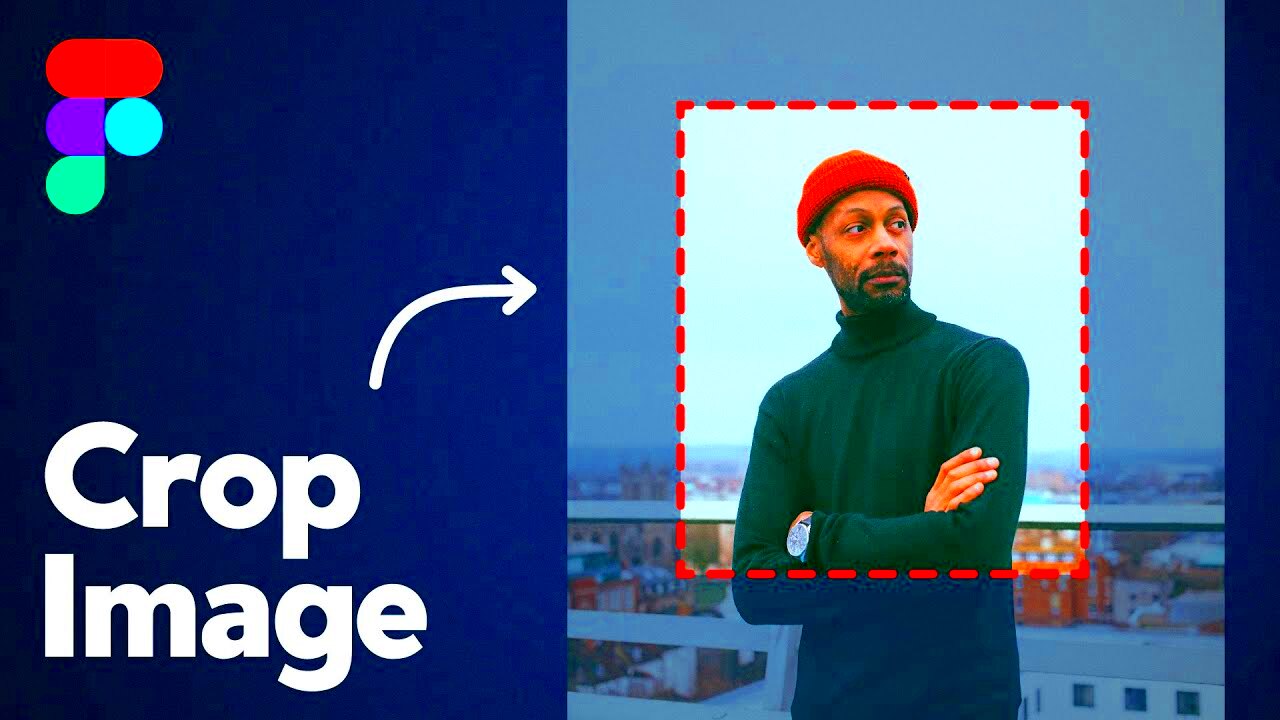
Cropping images is a key skill for designers, and Figma makes it simple to do while keeping your designs clean and sharp. Whether you’re working on a website, mobile app, or any other design project, cropping can help you focus on specific areas of an image, remove unwanted parts, or resize it to fit better into your design layout. In this guide, we’ll explore why cropping is essential, how Figma makes it easy, and how you can use this tool to enhance your design work.
Why Figma is Ideal for Cropping Images

Figma is a cloud-based design tool that offers a range of powerful features for both beginners and professionals. When it comes to cropping images, Figma stands out for several reasons:
- Cloud-Based Collaboration: Since Figma is cloud-based, you can collaborate with team members in real time, making it easy to crop and adjust images together.
- Easy-to-Use Interface: The interface is user-friendly, with intuitive tools for image manipulation. Cropping images in Figma doesn’t require complex steps.
- Precise Control: Figma offers precise control over your images, allowing you to crop exactly how you need for perfect alignment and visual consistency.
- Vector and Raster Support: Whether you’re working with vector graphics or raster images, Figma supports both, ensuring you can crop any type of image in your designs.
- Flexible Adjustment Options: You can easily adjust image constraints, apply masks, and resize elements to fit your design, giving you more flexibility than other design tools.
With these advantages, Figma provides a powerful, streamlined experience for cropping and refining images in your design projects.
Basic Steps to Crop an Image in Figma

Cropping images in Figma is straightforward and requires only a few simple steps. Here’s how you can get started:
- Select the Image: First, make sure you have your image ready. Click on the image you want to crop in your Figma workspace.
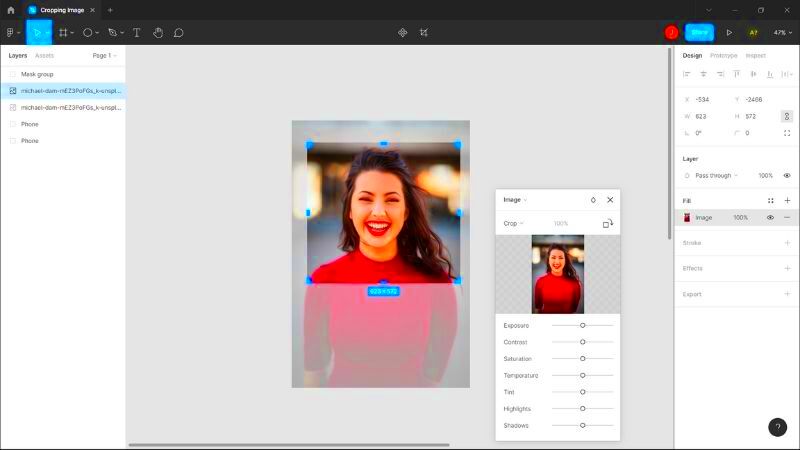
- Enter Crop Mode: Once you’ve selected the image, click on the "Crop" button that appears in the right-hand properties panel. This will enable the cropping tool.
- Adjust the Crop: You’ll see handles around the image, which allow you to adjust the crop. Drag these handles inward or outward to select the area you want to keep. You can move the image inside the crop area as well, making sure the composition looks right.
- Apply the Crop: Once you’re satisfied with the cropped area, click the "Apply" button. Your image will be cropped, and you’ll see the result immediately in your design.
These basic steps help you get started with cropping images in Figma. Whether you’re refining an image for a UI design or creating a custom visual, Figma’s crop tool gives you the precision you need to get the job done efficiently.
Using the Frame Tool for Precise Cropping
One of the most powerful features in Figma for cropping images is the Frame tool. By using frames, you can crop your images with even greater precision, allowing you to maintain clean and consistent designs. The Frame tool gives you control over how the image is displayed, making it ideal for more complex design projects. Let's dive into how the Frame tool works and how it can help you achieve the perfect crop.
Here’s how you can use the Frame tool for precise cropping in Figma:
- Create a Frame: First, select the image you want to crop. Then, use the Frame tool by pressing the F key or selecting it from the top menu. The Frame tool acts as a container for your image, letting you define the visible area.
- Resize the Frame: Once the image is inside the frame, resize the frame by dragging the edges to the desired dimensions. The frame will determine how much of the image is visible within your design.
- Adjust Image Position: If you need to reposition the image inside the frame, just click and drag the image to position it within the frame's boundaries. This allows you to control exactly what part of the image is visible.
- Mask the Image: To create a non-destructive crop, turn the frame into a mask by selecting both the frame and image, then pressing Cmd/Ctrl + Shift + M. This will "mask" the image, cropping it without permanently altering the original file.
Using frames gives you more control than traditional cropping, especially for precise layouts where every pixel matters. It's especially useful for maintaining aspect ratios or when working with complex images in your design.
Applying Constraints for Consistent Cropping
When working with multiple images in Figma, it’s important to maintain consistency. This is where applying constraints comes in. Constraints allow you to control how an image behaves when resized, ensuring that it stays within the intended dimensions and maintains its proportions.
Here’s how applying constraints can help you achieve consistent cropping:
- What Are Constraints? Constraints in Figma define how elements (such as images) behave when their parent frame is resized. You can apply constraints to both horizontal and vertical axes to control resizing behavior.
- Maintain Aspect Ratio: By setting constraints, you can ensure that images maintain their aspect ratios when resized. For example, if you want an image to scale proportionally within a frame, set the constraint to "Scale" or "Center" to prevent distortion.
- Consistent Cropping Across Devices: If you’re designing for multiple screen sizes (like mobile and desktop), applying constraints ensures that your images crop and resize consistently across different devices. This is essential for responsive design.
To apply constraints in Figma, simply select your image, then go to the right-hand properties panel under "Constraints." Choose how you want the image to behave in relation to the parent frame. This can be "Left", "Center", "Top", "Bottom", or any combination to fit your design needs.
By using constraints, you can crop and resize images confidently, knowing they will look great no matter the screen size or design adjustments.
Advanced Cropping Techniques in Figma
If you want to take your cropping skills to the next level in Figma, there are several advanced techniques you can use. These techniques offer greater flexibility and allow you to work with complex design elements more efficiently. Let’s dive into some advanced cropping methods that will make your workflow smoother and your designs more polished.
Here are a few advanced techniques you can try:
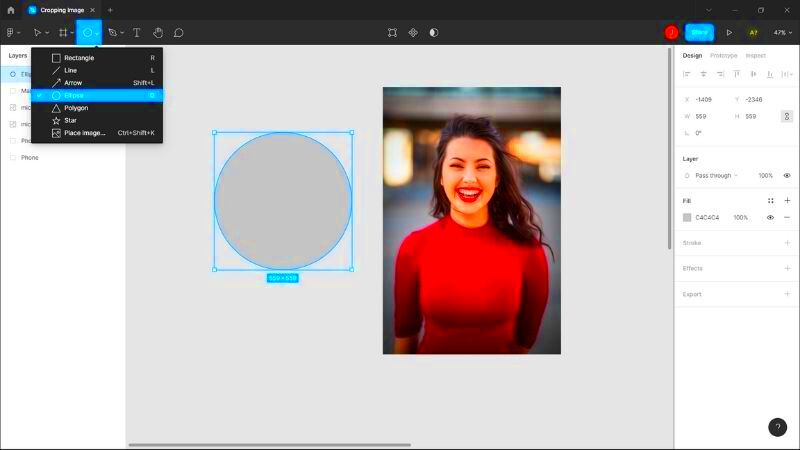
- Masking with Shapes: Instead of just using the Frame tool, you can create custom shapes to mask your images. This is perfect for non-rectangular crops, such as circular or polygonal crops. Simply create a shape (like a circle or triangle), position it over the image, and use it as a mask to crop the image into that shape.
- Vector Masks: For even more precision, you can use vector masks. Draw custom vector shapes with Figma’s Pen tool, then use these shapes as masks to crop the image. This method is ideal for intricate designs where you need to crop an image into a specific pattern or shape.
- Boolean Operations: If you need to crop an image into a unique shape, Boolean operations are your friend. Use Figma’s Boolean tools to combine, subtract, or intersect vector shapes, then apply the resulting shape as a mask to crop your image accordingly.
- Clipping Masks: Figma allows you to use clipping masks for non-destructive cropping. When you create a clipping mask, the image remains intact, but only the part within the mask’s boundary is visible, allowing for greater flexibility in your design.
These advanced techniques give you more creative control over your image cropping, allowing you to integrate images seamlessly into your designs. Whether you're working on unique layouts or high-fidelity prototypes, mastering these methods can elevate your design process.
Common Mistakes to Avoid While Cropping Images
While cropping images in Figma can be a quick and easy process, there are a few common mistakes that can affect the quality of your design. Avoiding these pitfalls will help you achieve better results and improve your workflow. Here are some of the most frequent mistakes to watch out for:
- Over-Cropping: One of the most common mistakes is cropping too much of the image. While it’s tempting to focus on just a small part of the image, cutting away too much can make the image lose its balance and context. Always leave enough space around the subject to maintain the overall composition.
- Ignoring Aspect Ratios: When cropping images, it’s crucial to keep the aspect ratio in mind, especially if you’re working with images that need to fit specific dimensions. Forgetting to maintain the correct ratio can lead to distorted or stretched images, which can negatively impact the design.
- Not Using Frames for Masking: Instead of directly cropping an image, it’s often better to use Figma’s frame and masking features. This allows you to crop non-destructively, meaning you can adjust the crop later without permanently changing the image.
- Unbalanced Cropping: If your crop is too tight or not aligned correctly, it can make your design feel uneven. Always ensure your cropped images have good balance and that the subject is well-positioned within the frame.
- Ignoring Image Resolution: Cropping images without considering their resolution can result in pixelation. Always make sure you’re cropping high-quality images that will remain sharp after resizing, especially for high-resolution displays.
Avoiding these common mistakes will help you crop images more effectively and improve the overall quality of your designs in Figma.
Tips for Better Image Composition After Cropping
Once you’ve cropped your image, the next step is ensuring it looks good within your design. Cropping can significantly impact the composition of your visuals, and there are several tips to help you achieve better balance and alignment in your final design. Let’s explore some helpful techniques for better image composition after cropping:
- Follow the Rule of Thirds: One of the best tips for improving image composition is using the rule of thirds. Imagine dividing your image into a 3x3 grid. Place the most important elements along the grid lines or at their intersections. This simple trick can make your image look more dynamic and balanced.
- Maintain Visual Balance: After cropping, make sure the elements in the image are balanced. If you crop too much from one side, the image can feel off-center. Ensure the subject is well-distributed, and leave enough breathing room around the edges for a harmonious look.
- Use Negative Space: Negative space, or the empty space around the subject, can help make the design feel less cluttered. After cropping, try to incorporate negative space to give the image room to breathe and draw more attention to the subject.
- Align to Design Elements: Ensure that your cropped image aligns with other elements in the design, such as text or buttons. For instance, you might want to leave some space on the right or left side of the image for text to flow naturally.
- Adjust the Contrast and Brightness: After cropping, take a moment to adjust the image’s contrast, brightness, or saturation to ensure it blends seamlessly with the rest of your design. A little touch-up can make a huge difference in how the image fits within the overall composition.
By following these tips, you can ensure your cropped images look great and fit perfectly into your design, whether it’s a website, app, or marketing material.
FAQ
Q1: How do I crop an image in Figma without losing quality?
A1: To crop an image in Figma without losing quality, you should use the Frame tool to mask the image. This non-destructive method keeps the original image intact, allowing you to adjust the crop later if needed. Avoid resizing images after cropping, as this can lead to pixelation.
Q2: Can I crop multiple images at once in Figma?
A2: Figma doesn’t support batch cropping directly, but you can apply the same crop to multiple images by creating a frame or mask and then duplicating it for each image. This way, you can keep the same dimensions and consistency across your designs.
Q3: What’s the best way to crop images for responsive design?
A3: For responsive design, use constraints to ensure your images resize properly across different screen sizes. Additionally, try to leave sufficient negative space in your images so they can adapt to various aspect ratios without looking cropped awkwardly.
Q4: Can I crop vector images in Figma?
A4: Yes, you can crop vector images in Figma using the Frame or Shape tools. You can create a mask with any shape and apply it to vector images to crop them precisely, just like raster images.
Q5: How can I restore a cropped image in Figma?
A5: If you’ve used the Frame tool for cropping, you can always adjust the frame’s size to reveal more of the image. If you’ve made permanent changes, undo the crop or work with a duplicate of the original image to restore it.
Conclusion
Cropping images in Figma is an essential skill for any designer looking to create precise and polished visuals. By understanding the basic tools and advanced techniques available in Figma, you can effectively crop images to fit your design’s needs. Whether you’re using simple cropping methods or experimenting with advanced techniques like masking and constraints, Figma offers a variety of options to help you get the perfect result. Avoiding common mistakes and focusing on image composition will also help improve the overall quality of your designs. With practice, cropping images in Figma will become second nature, allowing you to create more professional and cohesive designs.


