Welcome to the wonderful world of paper crafts! If you're looking for a fun and engaging activity to do with your kids, then you're in the right place. Crafting with paper is not only easy but also an excellent way for children to express their creativity. From simple shapes to intricate designs, paper crafts offer endless possibilities. This blog post will guide you through a delightful project: making a cute paper mouse! It’s a great way to spend quality time together, enhance fine motor skills, and spark your child's imagination!
Materials Needed for the Paper Mouse
Before we dive into creating our adorable paper mouse, let’s gather all the materials you’ll need. Don’t worry; most of these items are probably already in your home! Here’s a handy list:
- Colored paper - You’ll need gray, pink, and white if you want to get colorful with your mouse!
- Scissors - Ensure they're kid-safe for younger hands.
- Glue stick or liquid glue - Perfect for sticking all the pieces together.
- Markers or crayons - For adding fun details and decorations.
- Pencil - Great for sketching out shapes before cutting.
- Googly eyes - Optional, but they can bring your paper mouse to life!
- Paper plates or card stock - For a sturdier base if you prefer.
Once you have all your materials ready, you’ll find that making this paper mouse is a breeze! The best part about these supplies is they’re not only affordable but also encourage recycling—turning scrap paper into a new creation feels great!
Now that we’re all set with our materials, let’s move on to the fun part: crafting the paper mouse! Whether you’re a seasoned crafter or a complete novice, this project is perfect for all skill levels. Get ready to unleash your creativity!
Also Read This: Exploring Alternatives to Dailymotion for Sleek Sculpt Express
3. Step-by-Step Instructions
Creating your paper mouse is not just fun; it’s also a fantastic way to bring out your creativity! Let’s break it down into easy steps so you can follow along without any hassle. Gather your materials before you begin, as it will make the process smoother. Here’s what you’ll need:
- Colored paper (grey, pink, or your favorite colors)
- Scissors
- Glue or a glue stick
- Markers or crayons for decoration
- A small circle punch (optional)
Now, let’s dive into the crafting!
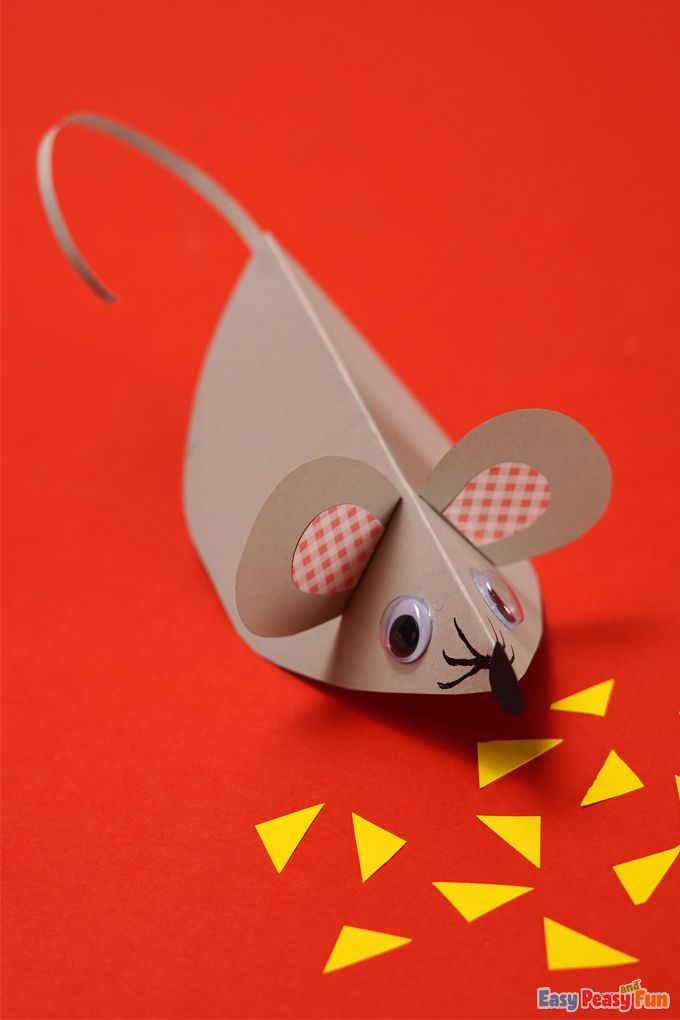
- Cut Out the Body: Start by cutting a large oval shape out of your grey paper. This will be the main body of your mouse. Aim for a size that fits well in your hand—around 4 to 5 inches long is perfect!
- Add the Ears: Next, cut out two smaller ovals from the pink paper for the ears. Make them about half the size of the body oval. You can glue them to the top of the body oval, letting them stick out like little mouse ears!
- Create the Face: Now, grab your markers or crayons. Draw two small circles for eyes and a tiny triangle for the nose. You can even use a small circle punch to cut out some circles from your pink paper for a more polished look!
- Tail Time: For the tail, cut a long strip from the grey paper. Make it thin and long, around 8-10 inches. You can curl it a bit by wrapping it around a pencil to give it a fun shape before gluing it to the back of your mouse.
- Final Touches: Once everything is glued together, let your creation dry for a few minutes. After that, get creative with your decorations! You can use glitter, stickers, or even draw cute patterns on the body with your markers.
And voilà! You have your very own adorable paper mouse. Make a whole family of them using different colors and sizes for extra fun!
Also Read This: How to Download Dailymotion Videos on iPhone: Quick Tips and Tricks
4. Tips for Personalizing Your Paper Mouse
Now that you’ve mastered the basics of creating your paper mouse, it’s time to let your imagination run wild! Personalizing your paper mouse can be one of the most exciting parts of this craft. Here are some creative tips to help you add your unique touch:
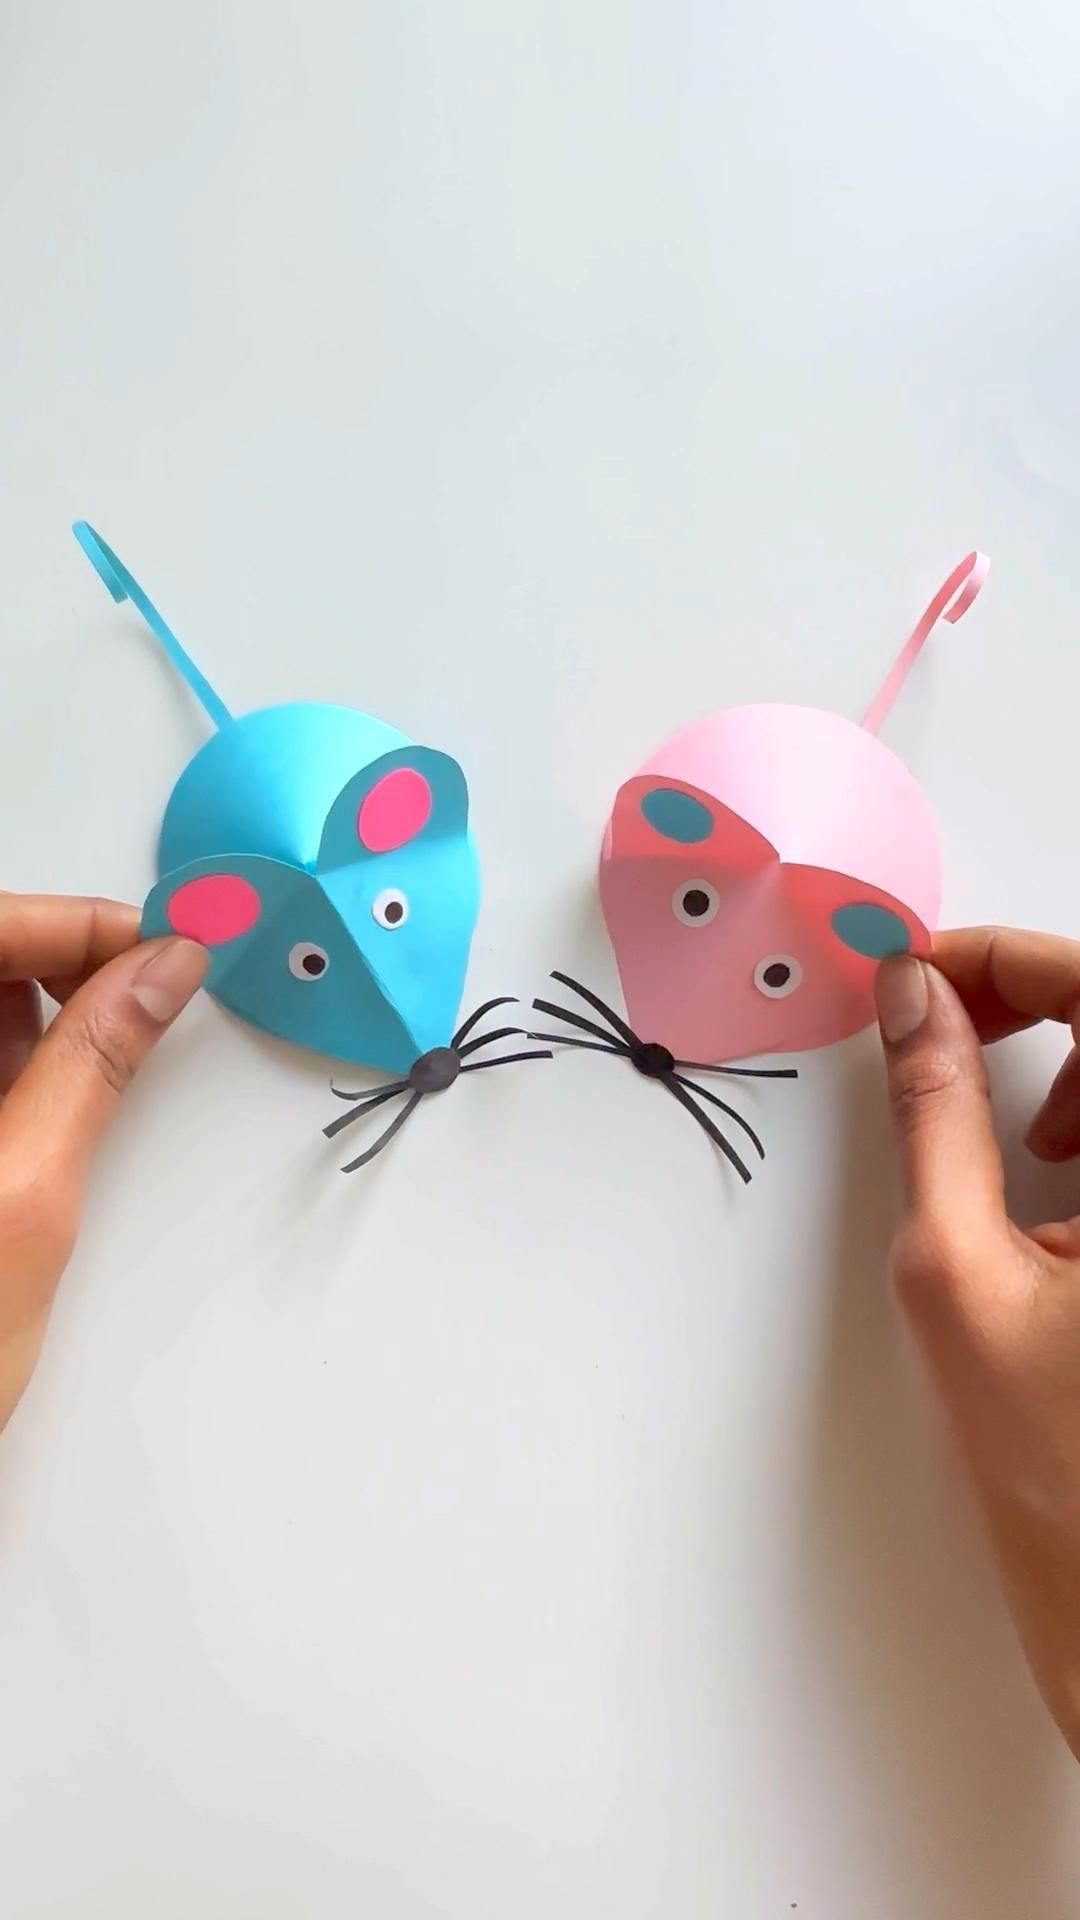
- Choose Unique Colors: Don’t feel limited to just grey and pink! Experiment with vibrant colors like blue, green, or even rainbow patterns to make each mouse truly stand out.
- Accessorize: Give your mouse some personality by adding accessories! You can make tiny hats out of paper or even draw scarves and bow ties for them. It's a great way to spark your creativity!
- Name Your Mice: Every paper mouse deserves a name! Think of fun or silly names and write them on a small piece of paper to attach to your mouse with glue. It’s a great way to get kids involved in storytelling.
- Make a Display: Once you’ve created a few mice, consider making a little display area. Use a box or a shelf where they can live together. You can decorate the space to represent a mouse house with mini furniture made of cardboard!
- Celebrate Seasons: Adapt your paper mouse for different seasons or holidays. For example, you can make a paper mouse dressed up for Halloween with a costume or hold a miniature pumpkin!
These personalization ideas will not only make your paper mice unique but will also enhance your crafting experience. Don’t forget to enjoy the process—after all, the fun is in getting creative!
Also Read This: How to Download Dailymotion Videos to MP3 – Simple Methods for Audio Downloads
5. Where to Share Your Paper Mouse Creations
Once your little ones have completed their delightful paper mouse crafts, you might be wondering what to do next. Sharing their creations can be a fun way to celebrate their hard work and creativity! Here are some fantastic platforms and ideas for showcasing those adorable paper mice:
- Family and Friends: Start by sharing photos with family and friends either in person or through social media. It’s a wonderful way to show off their masterpiece and get feedback!
- Social Media: Platforms like Instagram, Facebook, and Pinterest are great for sharing snapshots of their crafty endeavors. Use hashtags like #KidsCraft or #PaperMouseCraft to connect with other creative families.
- Crafting Blogs and Forums: Find online communities that focus on kids’ crafts. Many blogs welcome submissions from readers showcasing their projects. It can be inspiring to connect with others who share a love for crafting!
- Local Libraries and Schools: Consider reaching out to your local library or school to see if they host craft exhibitions or showcases. This could give your kids a wonderful chance to display their work publicly.
- Craft Events: If your community hosts events like fairs or craft parties, why not bring along their creations? It’s a wonderful way to connect with other kids and share ideas!
Don't forget to encourage your kids to tell the story behind their paper mouse! Every creation has a unique narrative, and sharing that can make it even more special. Plus, it instills confidence and communication skills in them as they express their thoughts and ideas.
6. Conclusion and Encouragement to Explore More Crafts
In wrapping up our Easy Paper Mouse Craft Tutorial, let’s take a moment to reflect on the journey you and your little ones have embarked on. Crafting is more than just a fun activity; it’s a way to nurture creativity, enhance fine motor skills, and foster a sense of achievement. Seeing those cut-out ears and little whiskers come together into a charming paper mouse can be such a joy!
But why stop here? There are endless possibilities waiting just around the corner in the world of crafts! Encourage your kids to explore different materials, techniques, and themes. Here are a few ideas to spark their creativity further:
- Animal Crafts: Try making other animals with similar techniques. Isn’t it fun to craft a whole zoo?
- Themed Decorations: Depending on the season or holidays, encourage them to create decorations, such as paper pumpkins for Halloween or paper hearts for Valentine’s Day.
- Mixed Media Art: Incorporate other materials like fabric, buttons, or recycled items to add depth and texture to their projects.
In conclusion, crafting is a beautiful journey, not just a destination. Celebrate their creativity and encourage them to think outside the box. Dive into more tutorials together, explore new mediums, and most importantly, have fun creating! Who knows, their next masterpiece could spark a lifelong passion for arts and crafts. So grab some paper, scissors, and glue, and let the adventures continue!
 admin
admin


