Have you ever found yourself scrambling to catch your favorite show only to discover it’s airing at the same time as something else? Well, with YouTube TV, you can kiss those worries goodbye! YouTube TV offers a fantastic cloud-based DVR feature that lets you record your favorite shows, sports events, and movies effortlessly. This means you can watch everything at your convenience. Let’s dive deeper into the recording capabilities
Getting Started with YouTube TV
Starting with YouTube TV is as easy as pie! Follow these simple steps to get going:
- Create a YouTube TV Account: If you don’t already have a Google account, the first step is to create one. If you do, simply go to the YouTube TV website and sign up for a subscription.
- Choose Your Package: YouTube TV offers a variety of channel packages. Take a moment to browse through them and choose the one that fits your entertainment needs best. Their packages typically include local channels, news networks, and popular cable channels.
- Set Up Your Preferences: Once you’ve signed up, you can customize your account settings, including selecting your favorite channels. This will make navigating through the service so much easier.
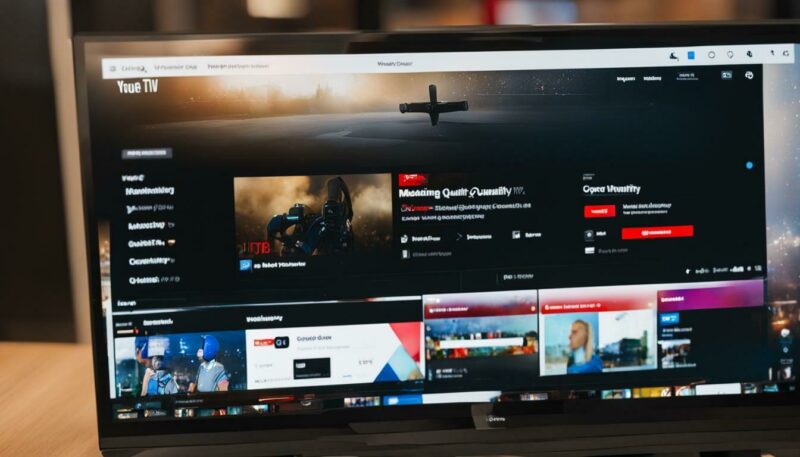
- Explore the Interface: Familiarize yourself with the YouTube TV interface. Whether you’re using a web browser or the mobile app, you’ll find options for live TV, your library, and recordings. It’s user-friendly and intuitive!
Now, let’s talk about the best part: the recording feature!
YouTube TV comes with a cloud DVR functionality that allows you to record up to Unlimited Hours of content! Yes, you read that right—unlimited! Here’s how to start recording:
- Finding Your Show: Use the search function to find your desired show or event. Whether it’s a weekly sitcom or a live sports match, you can type in the title and easily locate it.
- Click the Record Button: Once you’ve found your show, select it, and look for the record icon. It’s usually a simple plus (+) symbol. Click it, and you’ll be given options to record just the episode or all upcoming episodes.
- Manage Your Recordings: Head over to your library to see all your recorded shows. Here, you can play, delete, or manage your recordings as you wish. The interface allows you the flexibility to keep what you love and discard what you don’t.
One great feature of YouTube TV is that your recordings will be saved for a limited time (nine months), so if you happen to miss something, you’ll still have time to catch up. Just remember to keep track of what you’ve recorded because, with so much content available, the cloud storage can fill up quickly!
Getting started with YouTube TV is not only easy but also a game changer for those who love binge-watching or keeping up with ongoing series. Now that you know the basics, you’re ready to dive into the world of recorded entertainment!
Also Read This: Is There an Adults-Only YouTube TV Option? What You Should Know
3. Step-by-Step Guide to Recording Shows

Recording your favorite shows on YouTube TV is a straightforward process, and the platform makes it incredibly user-friendly. Whether you're a tech whiz or someone who struggles with new gadgets, you'll find this guide easy to follow. Here’s how to do it:
- Log into Your YouTube TV Account: Start by accessing your YouTube TV account on your preferred device. You can do this via the YouTube TV app or on a web browser.
- Browse for Your Show: Once you’re logged in, use the search bar at the top of the screen to find the show you want to record. You can type in the title, keywords, or simply browse through the categories.
- Select the Show: Click on the desired show to view its details. Here, you’ll see information like air times, episodes, and the option to record.
- Click on ‘+ Add to Library’: Look for the ‘+ Add to Library’ button or the record icon. This action signals YouTube TV that you want to record all future episodes of this series.
- Customize Your Recording Preferences: YouTube TV gives you the option to choose between recording just the new episodes or all episodes, including reruns. Select your preferred option.
- Confirm the Recording: After customizing your settings, click ‘Done’ or ‘Confirm’ to finalize the recording setup. You should see a notification indicating that the show has been successfully added to your library.
- Check Your Library: To see the shows you’ve recorded, navigate to your library section. All your recordings will be listed here, complete with episodes and air dates.
And voilà! You’re now equipped to record your favorite shows on YouTube TV. Remember, you can record multiple shows at the same time, as long as they’re on different channels. This flexibility is part of what makes YouTube TV such a popular choice for streaming!
Also Read This: What is the Most Viewed Live Stream on YouTube? Top Records Explained
4. Managing Your Recorded Content
Now that you’ve mastered the process of recording shows, let’s talk about managing your recorded content. YouTube TV offers robust options for organizing and handling your recordings efficiently. Here’s how to make the most of your recorded shows:
- Access Your Library: Head to the ‘Library’ section of YouTube TV to see all your recorded shows. This is where you can find a list of everything you’ve saved—easy and convenient!
- Play, Delete, or Rename: Each recorded show will have options next to it for playing, deleting, or renaming the recording. If you’ve finished watching a particular episode and no longer need it, simply hit the delete option to free up space. Want to give it a personal touch? Renaming is also a possibility!
- Organize by Series: YouTube TV allows you to group recordings by series. This means that all episodes of a particular show will be neatly collected in one spot. No more hunting through a long list!
- Storage Limit: Keep in mind that YouTube TV offers unlimited storage for recordings, but there is a catch! You can keep your recordings for up to *9 months*. After this period, any recordings will automatically expire and be removed from your library unless you’ve watched them.
- Sort Your Content: Use sorting options available in the library to arrange your recorded content by recent or alphabetical order, making it easier to locate what you want to watch next.
Managing your recorded content is a breeze with YouTube TV. By effectively organizing and utilizing these tools, you’ll never miss a show you love. Happy watching!
Also Read This: How to Get 1K Views on YouTube Fast
5. Tips for Optimizing Your YouTube TV Experience
YouTube TV has become a popular choice for cord-cutters, but like any streaming service, you’ll want to make the most out of it. Here are some handy tips for optimizing your YouTube TV experience, ensuring you enjoy your favorite shows without any hiccups.
1. Organize Your Library: With so many shows and movies available, it can get a bit overwhelming. Consider categorizing your recordings and favorites. YouTube TV allows you to create a list of your favorite channels, so you can easily access them without scrolling through endless options.
2. Take Advantage of the Cloud DVR: YouTube TV offers unlimited cloud DVR storage, but you want to manage it wisely. Regularly check your recordings and delete shows that you’ve already watched. This way, you won’t clutter your library with content you no longer want to keep.
3. Customize Your Notifications: Enable notifications for your favorite shows. YouTube TV can alert you when new episodes are available, helping you stay updated without having to check the app constantly. It’s a simple way to catch up without missing a beat!
4. Explore Add-Ons: YouTube TV offers a variety of add-ons, including movie channels and premium services. If you’re a fan of certain networks or genres, consider subscribing to these add-ons to expand your viewing options. Just be mindful of your budget!
5. Optimize Your Internet Connection: Streaming quality is heavily dependent on your internet speed. For the best experience—especially during peak hours—ensure you have a stable internet connection. Ideally, aim for at least 25 Mbps download speed for smooth streaming.
6. Use Multiple User Profiles: If you share your YouTube TV account with family or roommates, set up multiple user profiles. This allows everyone to have personalized recommendations and separate libraries, making it easier for everyone to enjoy their favorite content without interference.
By implementing these tips, you’ll enhance your YouTube TV experience and enjoy all the features this fantastic platform offers!
Also Read This: Do You Need YouTube Premium to Download Videos? The Answer
6. Troubleshooting Common Recording Issues
Even though YouTube TV is generally reliable, you might encounter some recording issues. Fortunately, most problems have straightforward solutions. Let’s go through some common recording issues and how to fix them.
1. Recording Not Showing Up: If your recording doesn’t appear in your library, first check if the show was indeed recorded. Double-check the scheduled recordings; maybe the broadcast was missed due to a scheduling conflict. To fix this, ensure you have successfully added the show to your library.
2. Missed Recordings: Sometimes, shows may not record as planned—this might be due to conflicts with other scheduled recordings or items in your DVR that exceed your storage limit. Check your settings to make sure you haven’t hit the maximum number of recordings allowed.
3. Poor Video Quality: If your recorded content is pixelated or buffering, it might be due to streaming quality issues. Confirm that your internet connection meets the recommended speed for streaming. You might also want to adjust your streaming quality settings in the app.
4. Audio Issues: If the audio is out of sync or muted in your recordings, first verify that the audio settings on your device are correctly configured. A quick power cycle of your device might also resolve minor glitches.
5. Deleted Recordings Reappearing: This can be frustrating! Sometimes, deletions don’t go through immediately due to a temporary glitch. If you notice recorded content you’ve deleted appears again, try refreshing your library or logging out and back into your account.
When troubleshooting, remember to check the YouTube TV support page for updates or information on outages. They regularly provide fixes for common issues you might encounter. In most cases, the solution is just a few clicks away, allowing you to get back to binge-watching your favorite shows in no time!
Conclusion: Enjoy Your Favorite Shows Anytime with YouTube TV
With YouTube TV, recording your favorite shows has never been easier, giving you the freedom to watch them at your convenience. Follow these simple steps to maximize your viewing experience:
- Set up your YouTube TV account: Make sure you have an active subscription.
- Search for your desired shows: Use the search function to find series or movies you love.
- Add to Library: Simply click on the "+" icon to add shows to your library for easy access.
- Access your recordings: Navigate to the Library section to find all your recorded content.
With unlimited DVR storage, YouTube TV allows you to record as many shows as you want without worrying about running out of space. Plus, recordings are kept for up to nine months, ensuring you have ample time to enjoy your favorite episodes.
In a world where schedules are often hectic, YouTube TV's recording feature provides a seamless solution. Whether you're catching up on the latest dramas or re-watching classic comedies, you can always find time to indulge in entertainment that suits your lifestyle.
So go ahead, savor the joy of binge-watching without the constraints of traditional TV schedules — enjoy your favorite shows anytime with YouTube TV!
 admin
admin


