Hey there, creative souls! If you're looking for a fun and unique way to express your style, why not try making your own hair pins? These little accessories can make a big statement and add a personal touch to any hairstyle. In this blog post, we will explore some easy DIY hair pin tutorials that you can whip up right at home. Whether you're getting ready for a night out or just want to feel a bit more fabulous during the day, customizing your hair pins is the perfect project for all skill levels!
Benefits of Making Your Own Hair Pins
Making your own hair pins comes with a bunch of exciting advantages! Let’s dive into some of the top reasons why this DIY project is worth your time and creativity.
- Personalization: One of the biggest perks of crafting your own hair pins is the ability to personalize them to your taste. You can choose colors, shapes, and embellishments that resonate with your style. Imagine creating a hair pin that perfectly coordinates with your favorite outfit!
- Cost-Effective: Buying unique hair accessories can get pricey, especially if you want high-quality pieces. By making your own hair pins, you can save a significant amount of money. Using materials you already have at home or inexpensive supplies can help keep your budget in check while still achieving a stunning look.
- Creative Outlet: Engaging in a DIY project like this is a fantastic way to express your creativity. It’s a relaxing activity where you can let your imagination run wild. Plus, experimenting with different materials and designs can inspire you to explore other crafts!
- Gift Potential: Handcrafted hair pins can make wonderful gifts for friends and family. They’re perfect for birthdays, holidays, or just because! A thoughtful, personalized hair pin can add a meaningful touch to your gifting.
- Skill Development: You’ll find that making hair pins can help enhance your crafting skills. Whether you're working with beads, fabric, or wire, you'll learn new techniques as you go. Who knows? You might discover a hidden talent for jewelry or accessory making!
So, whether you're a seasoned crafter or just starting, making your own hair pins is a fun and fulfilling experience. Remember, every hair pin you create is a reflection of your personality, so let your creativity shine!
Also Read This: How to Bowl a Googly: Tips and Techniques for Beginners on Dailymotion
3. Essential Materials Needed for Hair Pins
Before diving into the world of creative hair pin-making, it’s crucial to gather all the necessary materials. Don’t worry; you won’t need a magical wand or a treasure chest of supplies. Here’s a simple list to get you started:
- Hair pins or bobby pins: The base of your creations! You can use standard black pins or go for colored ones, depending on the look you want.
- Hot glue gun: This will be your best friend for sticking embellishments to your hair pins. Just be careful with it; it can get quite hot!
- Embellishments: Think outside the box! You can use:
- Beads
- Buttons
- Fabric flowers
- Ribbons
- Fake gems
- Scissors: A must-have for cutting ribbons and trimming any extra materials.
- Wire or string: This can be useful for adding a bit of flair or creating intricate designs.
- Paint (optional): If you want to customize your pins' color, a bit of paint or nail polish can do the trick!
There you have it! With these materials at hand, you'll be well-equipped to let your creativity shine. Remember, the most important thing is to have fun with it, so don’t be afraid to experiment with different combinations and styles. Hair pins are not just functional; they can become stunning accessories that reflect your personal style!
Also Read This: How to Make an Infinity Loom Band: Watch on Dailymotion
4. Step-by-Step Tutorial for Basic Hair Pins
Now that you’ve gathered your materials, it’s time to roll up your sleeves and start crafting some beautiful hair pins. This basic tutorial will guide you through the process of making simple embellished hair pins that are easy but oh-so-stylish!
What You'll Do:
- Choose Your Base: Start by selecting the type of hair pin you want to use. For beginners, a standard bobby pin is ideal.
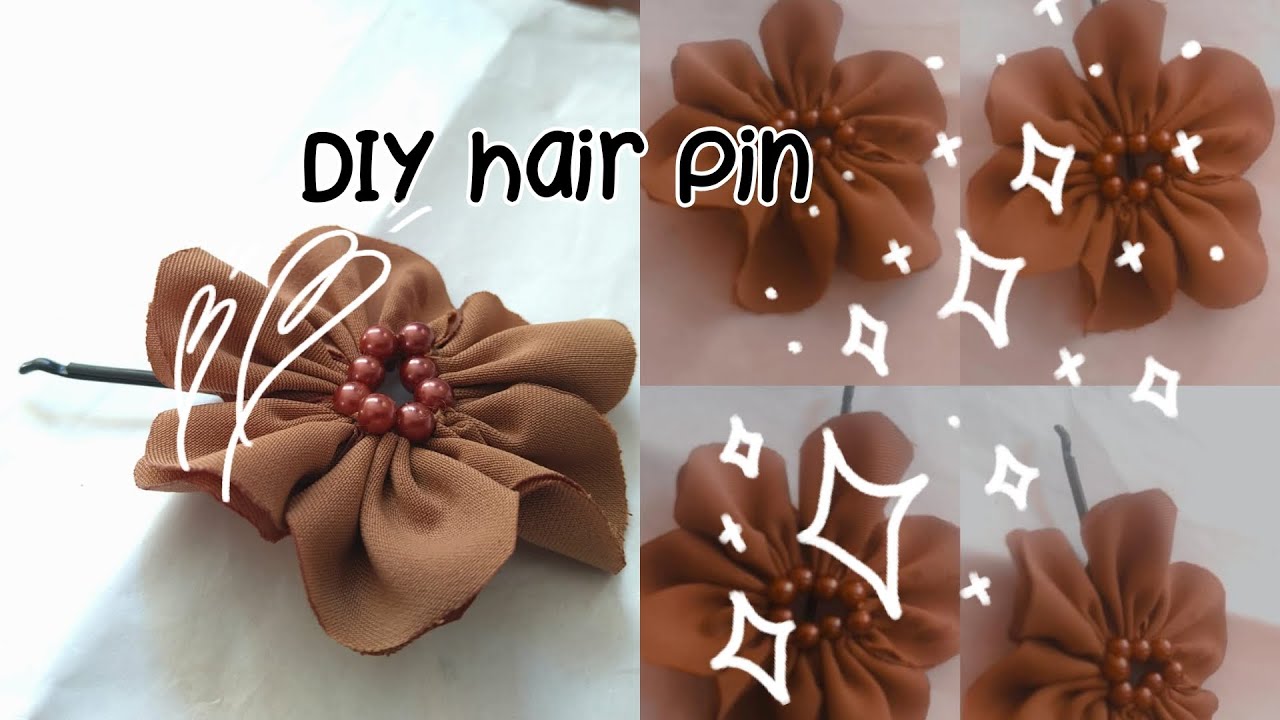
- Pick Your Embellishments: Decide which embellishments you want to attach. For this example, let's use a fabric flower and a bead.
- Prepare the Embellishments: If needed, trim your fabric flower or beads to the desired size. Use your scissors to cut any ribbon to your preferred length. Make sure everything looks proportionate!
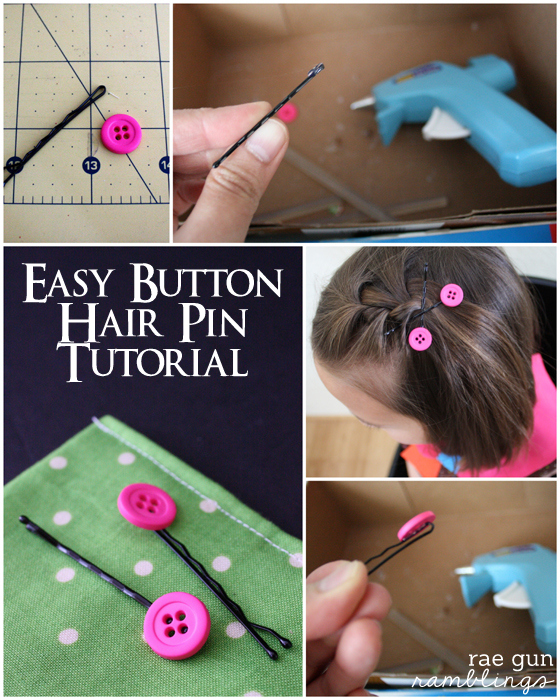
- Gun It! Plug in your hot glue gun and let it heat up. Once ready, apply a small amount of glue to the center of the flower or bead. Quickly place it onto the hair pin. Press down gently for a few seconds to ensure it sticks well.
- Add More Flair: If you want to make it even more decorative, you can attach additional embellishments by repeating the gluing process. Consider adding a few smaller beads around the larger flower for added depth!
- Let It Dry: Allow the glue to dry completely before handling your new hair pin. This usually only takes a few minutes, but patience can go a long way in ensuring durability!
- Style It Up: Now, your hair pin is ready to be worn! You can use it to pull back sections of hair, as a decorative accent, or in a bun. The possibilities are endless!
And there you have it—a simple yet stylish hair pin you made yourself! Feel free to create as many as you like in different colors and designs. The joy of DIY lies in the endless opportunities to express your creativity!
Happy crafting!
Also Read This: Mastering Monopoly Board Game with Dailymotion Video Lessons
5. Creative Designs for Stylish Hair Pins
Are you tired of the same old plain hair accessories? Let’s dive into some creative designs for stylish hair pins that you can easily whip up at home! These designs will not only elevate your hair game but also reflect your unique personality. The best part? They don’t require any previous crafting experience.
Here are a few fun and fashionable ideas:
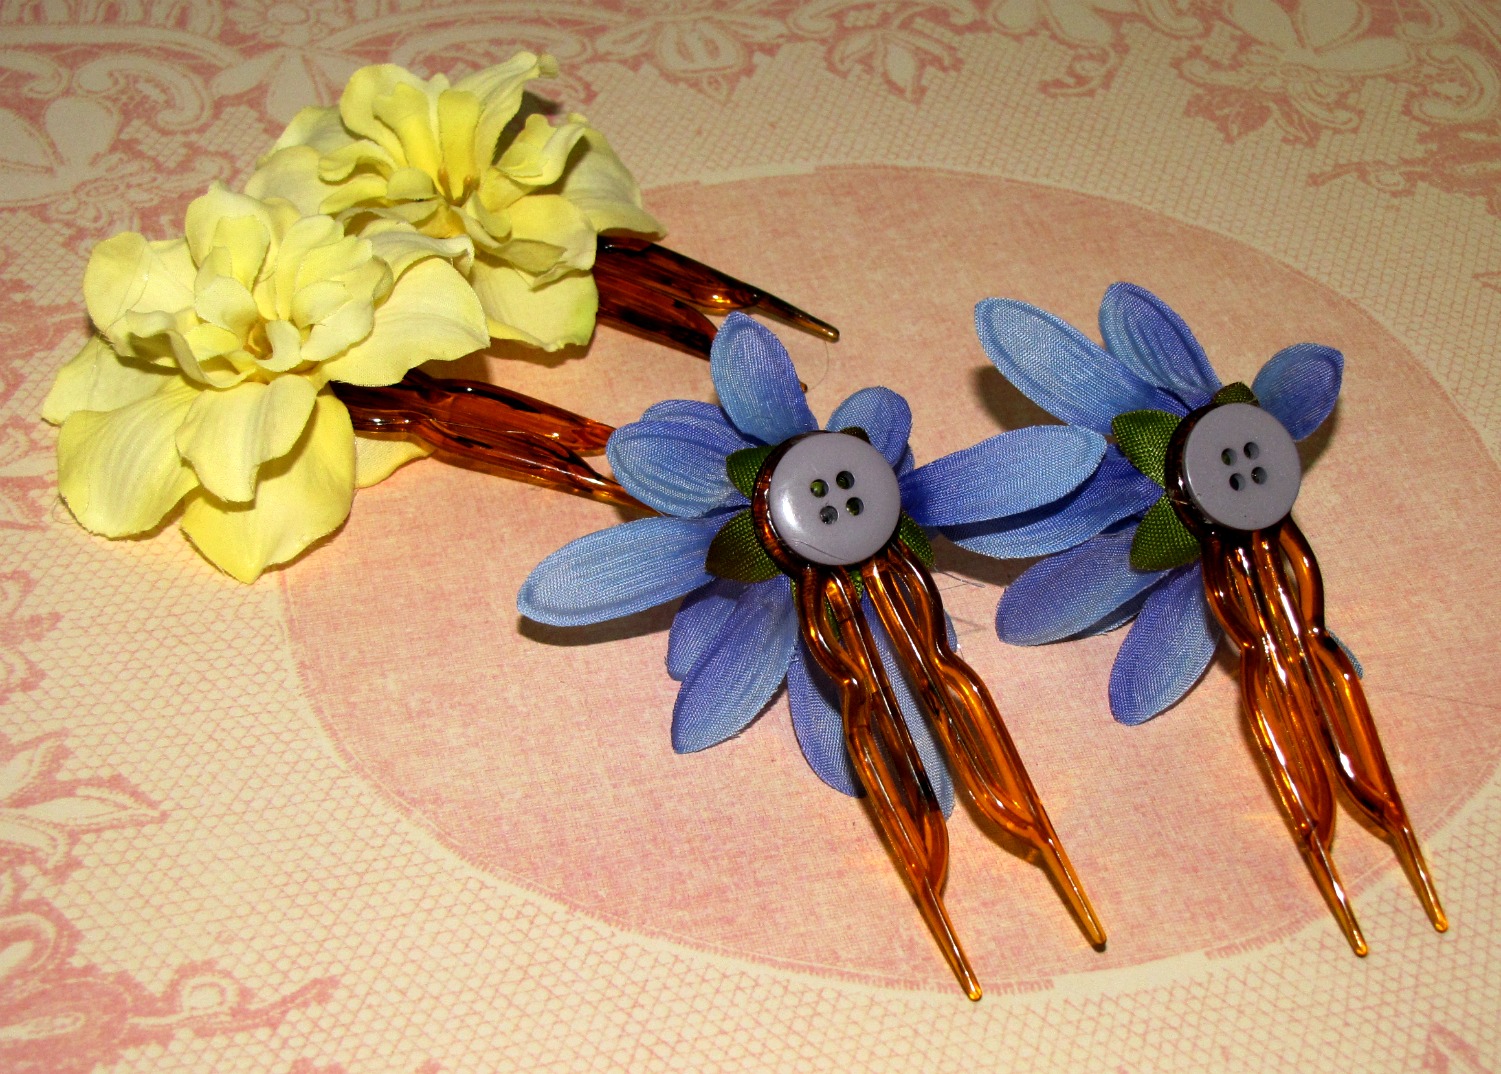
- Floral Embellishments: Take plain bobby pins and glue on some faux flowers for a charming touch. Choose from different sizes and colors to match your outfits!
- Beaded Beauty: String colorful beads onto a thin wire and twist it around your hair pins. This not only adds a splash of color but also a touch of sparkle.
- Metallic Accents: Use metallic spray paint to dress up wooden hairpins. You can also apply decorative stickers or washi tape for added flair.
- Fabric Covered Pins: Wrap fabric around bobby pins to create a soft, textured look. Just cut small strips of fabric and hot glue them down – it’s that simple!
- Geometric Shapes: Use polymer clay to create unique shapes like triangles or circles. After baking them, attach them to hair pins for a modern vibe.
Each of these designs is an opportunity to express your creativity, so don’t hesitate to mix and match! You can make sets that coordinate with your outfits or experiment with different styles for every mood. Plus, these DIY hair pins make great gifts for friends and family who love accessorizing.
Feeling inspired yet? Grab your supplies, put on some music, and let your imagination run wild. Trust me, when you wear something you’ve created yourself, it adds a special touch that store-bought items simply can’t match.
Also Read This: How to Download Videos in Bilibili App – Fast Method
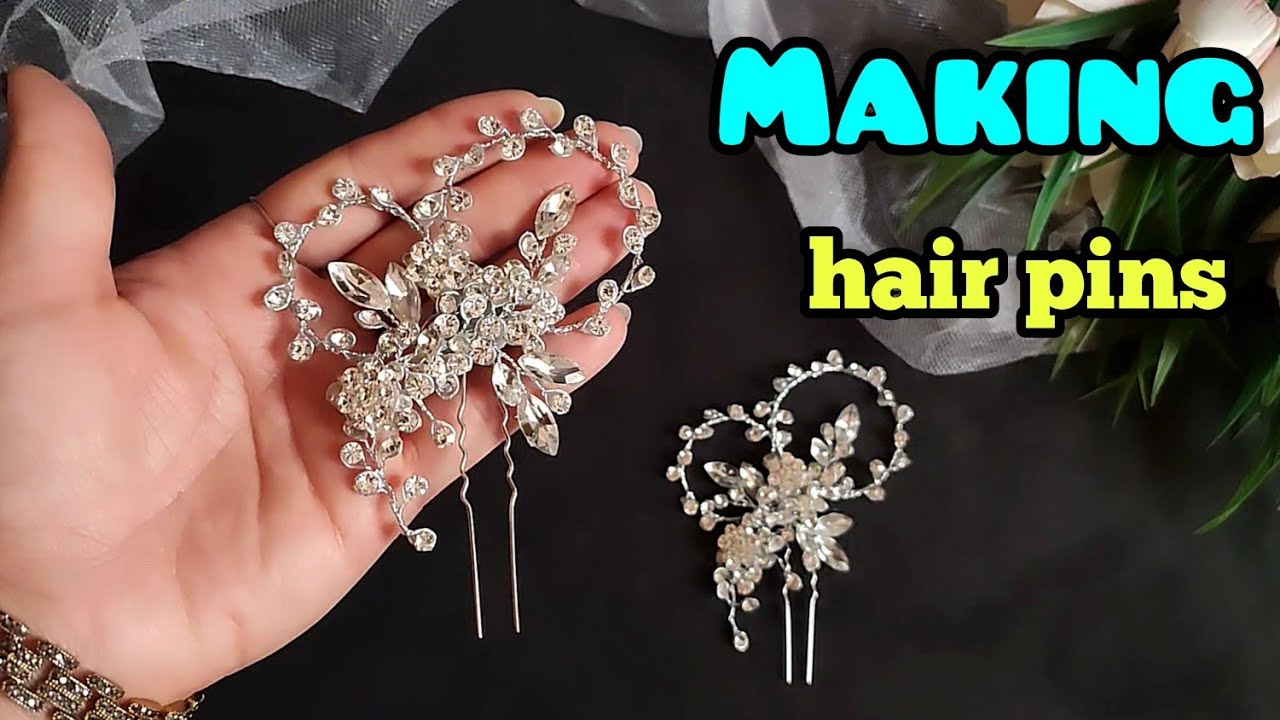
6. Using Dailymotion to Enhance Your DIY Experience
As you embark on your hair pin creating journey, wouldn’t it be fantastic to have visual aids to guide you? That’s where Dailymotion comes into play! This video-sharing platform is a treasure trove of DIY tutorials. It’s like having a crafting buddy right in your living room.
Here are some ways to utilize Dailymotion to supercharge your DIY experience:
- Search for Tutorials: Simply type “DIY Hair Pins” in the search bar and explore a variety of video tutorials. You’ll find everything from beginner guides to advanced techniques.
- Follow Creators: Once you find creators whose styles resonate with you, hit that follow button! You can keep up with their latest projects and get notified when new content is released.
- Take Notes: While watching, keep a notepad nearby to jot down any tips or tricks you come across. Dailymotion videos often feature unique methods that you might want to remember.
- Share and Collaborate: Find friends who are also into crafting and share your favorite Dailymotion videos. You can even host a crafting party using these tutorials as your guide!
Dailymotion makes learning new skills fun and engaging. You can pause, rewind, and rewatch sections of a video as needed, which is especially helpful if you're trying intricate designs. Not to mention, the creativity of various content creators can inspire you to put your spin on every hair pin you make!
So why not embrace the full DIY experience? Combine your crafting skills with the vibrant energy of Dailymotion tutorials, and you’ll find yourself making stunning creations in no time!
Also Read This: How to Do Facial Step by Step on Dailymotion: Easy Steps for Glowing Skin
7. Tips and Tricks for Successful Hair Pin Making
Creating your own hair pins can be a fun and fulfilling activity, but like any craft, there are a few things to keep in mind to ensure you achieve the best results possible. Here are some handy tips and tricks to help you on your hair pin-making journey!
- Choose the Right Materials: Start with high-quality materials. Whether you're using metal, wood, or plastic pins, make sure they're durable and suitable for your design. If you're incorporating embellishments, choose items that won’t fall off easily.
- Have the Right Tools: Use the right tools for the job. Pliers, glue guns, and wire cutters, along with a work surface that's easy to clean, can make your crafting process smoother and more enjoyable.
- Plan Your Design: Before you start assembling, sketch out a rough design of what you want your hair pin to look like. This can help you visualize the finished product and gather all necessary materials in advance.
- Practice Patience: Hair pin making can be a detailed process. Don’t rush! Take your time with each step, especially when it comes to placing embellishments or waiting for glue to dry.
- Get Creative With Color: Consider using a color palette that matches your wardrobe or mood. A cohesive color theme can elevate a simple pin into a statement piece!
- Use Strong Adhesives: For attaching charms or decorative pieces, opt for strong, reliable adhesives. E6000 or a heavy-duty hot glue gun can provide secure holding power.
- Experiment With Techniques: Don’t be afraid to try out different techniques such as beading, wire wrapping, or even fabric covering. The more you experiment, the more unique your designs will be!
By following these tips, you can maximize your chances of crafting beautiful hair pins that not only look amazing but also hold up well through wear and tear. Happy crafting!
8. Conclusion: Express Yourself with Homemade Hair Pins
In a world where fashion is an essential form of self-expression, homemade hair pins provide a wonderful avenue to showcase your creativity. Not only do they serve a practical purpose by keeping your hair tidy, but they also act as a personal statement piece that reflects who you are.
Whether you opt for the simplicity of a classic design or venture into more intricate styles with colorful beads and whimsical charms, the possibilities are endless. Plus, crafting your own hair pins can be incredibly rewarding. Here’s why you should give it a try:
- Uniqueness: Your designs will be one-of-a-kind, setting you apart from the crowd.
- Affordability: Creating hair pins at home can save money while allowing for more creativity than store-bought options.
- Personal Gift Ideas: Homemade hair pins make for thoughtful gifts for friends and loved ones. Consider personalizing them with their favorite colors or styles!
- Relaxing Hobby: Crafting can be a wonderful way to unwind and de-stress. Put on some music, get comfortable, and enjoy the satisfying process of making.
So, gather your materials, unleash your creativity, and dive into the world of hair pin crafting. Express yourself through your designs and let each hair pin you make be a tiny reflection of your inspired self. Whether you wear them or share them, your homemade hair pins are sure to bring joy and style to everyday hairdos!
 admin
admin


