Ever clicked on a YouTube video only to find it dim and hard to watch? You're not alone! Many users encounter brightness issues that can make the viewing experience frustrating. In this section, we’ll explore what brightness issues actually mean and how they can impact your enjoyment of video content.
YouTube videos can appear darker for several reasons, and understanding these factors can help you troubleshoot effectively. Sometimes, the problem isn't just the video itself; it could be related to your device settings or even lighting conditions in your environment.
Firstly, it's important to recognize that video brightness can be influenced by several layers:
- Your Device Settings: Adjusting your screen brightness or enabling night mode on devices can drastically alter how videos appear.
- YouTube's Settings: YouTube offers its own settings for playback quality that can affect how dark or light a video looks.
- Environmental Lighting: Watching videos in a dimly lit room can naturally make the screen seem darker, regardless of video quality.
Moreover, YouTube automatically adjusts video quality based on your internet speed. Sometimes, a lower resolution can lead to a darker appearance. As we dive deeper into this topic, we’ll uncover how to tweak these various settings to enhance your viewing experience!
Common Causes of Dark Videos

If you’ve been encountering dark videos on YouTube, it’s essential to get to the bottom of it. Here are some common reasons why you might be facing this issue:
- 1. Low Quality Uploads: Content creators sometimes upload videos with poor lighting, leading to dark visuals. This issue is more prevalent with user-generated content where lighting conditions during filming weren't ideal.
- 2. Compression Algorithms: YouTube uses compression to make videos load faster. Sometimes, compression can affect brightness levels, especially in videos that are inherently darker.
- 3. Playback Settings: In YouTube settings, if you are using a lower resolution or a specific playback mode, it can influence brightness. Videos often look different when set to 240p compared to 1080p.
- 4. HDR and Color Settings: Many modern displays support High Dynamic Range (HDR). If your video is in HDR but you’re not using an HDR-compatible device, the brightness might appear off.
- 5. Environmental Factors: As mentioned earlier, where and how you are watching content can significantly impact perception. Direct sunlight on the screen or dim lighting can both alter your experience.
Understanding these causes can help you address them effectively. If it’s content quality, perhaps find a different video or notify the creator. And regarding playback settings, make it a habit to check your configurations before diving into a video binge!
Now that we’ve outlined the potential dark video culprits, stay tuned as we continue to explore solutions to tweak brightness and enhance your overall viewing pleasure! You don’t have to settle for a dim viewing experience—it’s time to brighten things up.
Also Read This: Switching Channels on YouTube TV: A Beginner’s Guide
3. How to Adjust Brightness Before Uploading
So, you're ready to share your masterpiece on YouTube, but your video looks darker than a cave at midnight? Don't fret! There are plenty of ways to adjust the brightness before you hit that upload button. Here’s how you can ensure your videos shine bright like a diamond:
1. Use Video Editing Software: Before uploading your video to YouTube, consider using video editing software to make adjustments. Here are some popular tools:
- Adobe Premiere Pro: A professional tool that offers extensive features, including brightness and contrast adjustments. You can easily tweak the exposure settings to get the desired brightness.
- iMovie: If you're a Mac user, iMovie is user-friendly and offers a brightness adjustment feature. Just drag the slider to your liking!
- DaVinci Resolve: This powerful free tool is perfect for professional-grade edits, allowing you to adjust brightness, contrast, and overall lighting.
2. Adjust in Camera Settings: Before you even start recording, take a moment to adjust your camera settings. Most cameras have brightness or exposure settings that can be tweaked for optimal performance:
- Manual Exposure Control: If your camera allows it, try using manual settings. By adjusting the aperture, shutter speed, and ISO, you can prevent darker videos from the start.
- Lighting Conditions: Ensure you're filming in good lighting. Natural light works wonders, but if you’re inside, consider using softbox lights or ring lights to brighten the scene.
This little bit of extra prep can save you hours of editing later and ensure that viewers see your content as clearly as you envisioned it. Remember, a well-lit video not only enhances visual appeal but also keeps viewers engaged!
Also Read This: How to Upload YouTube Videos Faster: Speed Up Your Uploads
4. Editing Tools to Fix Video Brightness After Uploading
Okay, so you uploaded your video and realized it's looking a bit dim? Don’t panic! There are several editing tools available to help you adjust brightness and improve the overall quality, even after your video has been uploaded. Here are some of the best options:
YouTube Video Editor: Did you know YouTube has its own built-in editing tool? Here's how to use it:
- Go to YouTube Studio and select Content from the left menu.
- Click on the video you want to edit.
- Choose Editor in the left sidebar.
- From there, you can trim parts, blur sections, and adjust brightness using the color grading features available.
Third-Party Editing Software: If you’re looking for more features beyond what YouTube offers, consider these popular editing tools:
- Filmora: It’s a user-friendly software with easy-to-navigate options for adjusting brightness and color correction.
- Shotcut: A free and open-source software that provides essential tools to tweak brightness and enhance image quality.
- Final Cut Pro: For those using Mac, this software offers robust color grading tools that allow you to easily adjust the brightness after installing your video.
Using these editing tools, you can brighten up your videos and make them more appealing without having to start from scratch. After all, a few simple tweaks can take your video from dull to dazzling, making it more enjoyable for your audience.
So don’t hesitate to dive into those editing options, and remember, lighting plays a crucial role in video quality!
Also Read This: Can You Transfer Your YouTube Account to Another Email? Steps to Follow
5. Using YouTube Studio to Enhance Video Quality
If you’re finding that some of your YouTube videos are coming out darker than you’d like, the good news is that YouTube Studio has some helpful features to enhance video quality right from your dashboard. Let’s break down how you can use these tools to improve brightness and overall aesthetics of your videos!
First things first, log into your YouTube Studio. Once inside, follow these simple steps:
- Select the Video: Navigate to the Content section on the left-hand side of the dashboard. Here, you will see a list of all your uploaded videos. Click on the one you want to enhance.
- Access Editor: After selecting your video, look for the Edit thumbnail button. Just below, you will find an option labeled Editor. Click here.
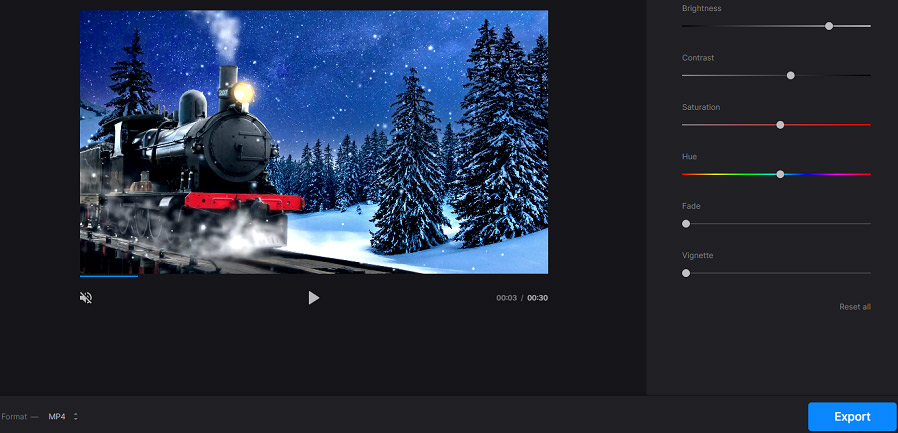
- Adjust Brightness and Contrast: Within the editor, you should see various options including Audio, Trim, and Enhancements. Click on Enhancements. Here, you can adjust brightness, contrast, and even saturation.
- Preview Changes: Don't forget to use the preview option to see how your adjustments will look before saving them.
- Publish Changes: Once satisfied, save your changes and hit publish!
Another beneficial tool found in YouTube Studio is the Filters option, which allows you to apply color effects and presets, giving your video a tailored flair. Just remember to keep the adjustments subtle to maintain a natural look.
One thing to keep in mind is that while these adjustments can improve the look of your video, they can't drastically change poor-quality footage. If a video is extremely dark to begin with, you might still see some limitations. However, utilizing the tools in YouTube Studio is a great way to enhance your work without needing advanced editing skills.
Also Read This: What Words Are Restricted on YouTube? Can You Say ‘Retard’ Without Penalty?
6. Tips for Filming Bright and High-Quality Videos
Now that we've discussed improving your existing videos, let’s shift gears and talk about how to film bright and high-quality videos right from the start. Quality filming is crucial, and it’ll make your editing process much easier!
Here are some essential tips to keep in mind:
- Natural Lighting is Key: Whenever possible, make use of natural light. Filming during the golden hour (just after sunrise or before sunset) can result in soft, flattering light.
- Invest in Lighting Equipment: If you’re frequently creating videos, consider investing in softboxes or ring lights. These tools can significantly enhance your video's brightness and overall mood.
- Choose Your Background Wisely: Avoid filming against dark or cluttered backgrounds. A well-lit, neutral background can make a big difference in how your subjects stand out.
- Check Your Camera Settings: Make sure you understand your camera's settings. Increase the ISO for low-light conditions, but be careful; too high an ISO can introduce graininess. Adjust your aperture and shutter speed as needed to capture as much light as possible without compromising quality.
- Use Reflectors: Reflectors can help bounce light onto your subject, brightening up any dark areas without harsh shadows. You can use a professional reflector or simply a white poster board!
Remember, the more effort you put into lighting your videos before you hit that record button, the less you’ll need to fuss with editing later on. Proper lighting not only improves brightness but also enhances the color and quality of your videos, appealing more to your audience and keeping them engaged.
By combining good filming practices with the enhancement tools available in YouTube Studio, you'll be well on your way to creating visually stunning, bright, and engaging videos that truly shine!
Conclusion and Best Practices for YouTube Video Quality
In conclusion, enhancing the brightness and overall quality of your YouTube videos is essential for maintaining viewer engagement and providing a better visual experience. By following the tips and techniques discussed, you can significantly improve the presentation of your content. Here are some best practices to keep in mind:
- Invest in Quality Equipment: Start with a good camera and lighting setup. Proper lighting can prevent dark videos from the outset.
- Utilize Editing Software: Use powerful video editing tools such as Adobe Premiere Pro or Final Cut Pro to adjust brightness and contrast effectively.
- Adjust YouTube Settings: Encourage viewers to check their playback settings, as sometimes lower quality settings may be the default.
- Use Thumbnails Wisely: Create bright and colorful thumbnails that attract viewers' attention and hint at a high-quality video.
- Regularly Test Your Content: Before uploading, always preview your videos on different devices to ensure consistent brightness and quality across platforms.
By adopting these practices, you can not only fix dark videos but also elevate your channel's overall quality, ensuring that your audience always receives engaging and visually appealing content. Remember, the effort you put into enhancing video quality will reflect in your viewership and audience loyalty!
 admin
admin