In today's digital age, video quality can make or break your content’s success on platforms like YouTube. High Definition (HD) quality not only enhances viewer engagement but also elevates your brand's professionalism. With millions of creators competing for attention, ensuring your videos are crystal clear and visually appealing is crucial. In this post, we'll explore the ins and outs of HD video quality on YouTube, helping you set your videos up for success right from the upload stage.
Understanding YouTube Video Resolution Options
When it comes to uploading videos to YouTube, resolution is a critical factor that affects the viewing experience. YouTube supports a variety of resolutions, each suited to different needs and audience preferences. Let’s break it down:
- 480p (SD): This is the standard-definition format. While it's not high definition, it’s still a common choice for viewers with slower internet connections.
- 720p (HD): This is the minimum resolution considered as HD. It offers a decent quality, especially for smaller screens.
- 1080p (Full HD): This format provides sharp images and is highly recommended for most types of content.
- 1440p (2K): Best suited for more detailed content, such as nature documentaries or cinematic experiences.
- 2160p (4K): 4K resolution delivers incredible detail and clarity, making your videos stand out significantly. However, it requires higher bandwidth for streaming.
Choosing the right resolution depends on various factors, including:
- Your Target Audience: Understanding the devices your audience uses can guide you in selecting the right resolution. For instance, mobile users might appreciate smaller files, while desktop users might prefer high-quality visuals.
- The Type of Content: If you're creating content that showcases intricate details, such as art tutorials or travel vlogs, higher resolutions like 4K can enhance the viewer's experience.
- Your Internet Connection: Higher resolutions typically require faster upload speeds and more stability. Ensure your internet can handle these requirements to avoid poor uploads.
Before you hit that upload button, keep in mind the YouTube compression process. When you upload a video, it undergoes compression, which can impact quality. To mitigate this:
- Export your video at the highest quality possible, using formats like MP4 with H.264 codec for optimal quality.
- Adjust your bitrate settings; higher bitrates yield better quality, just be cautious of file sizes.
- Check YouTube's recommended settings for specific resolutions to ensure you're optimizing video quality before uploading.
In summary, understanding and choosing the right video resolution is key to ensuring that your videos meet the expectations of your audience. Embracing HD formats can significantly enhance viewer satisfaction and encourage more engagement with your channel. So, before you jump in and upload that next masterpiece, take a moment to consider the quality and resolution settings, and your viewers will surely appreciate it!
Also Read This: Why YouTube Disables My Comments and How to Fix Comment Section Issues
3. Preparing Your Video for Upload
Alright, so you've shot your video, and now it’s time to get it ready for the big world of YouTube! Preparing your video for upload involves several key steps that will ensure you maintain top-notch HD quality. Let’s dive right in!
1. Editing Your Video
Before uploading, make sure to give your video some love in the editing room. Here’s what you can focus on:
- Trimming: Cut out any unnecessary scenes or mistakes. You want to keep your audience engaged, right?
- Color Correction: Adjust the colors to make your video pop! Use tools like Adobe Premiere, Final Cut Pro, or even free options like DaVinci Resolve for color grading.
- Audio Quality: Ensure your audio is crystal clear. Use background music or sound effects wisely to enhance the viewing experience without overpowering your voiceovers.
2. Resolution Matters
Ensure your video is recorded in at least 1080p (Full HD). While you're at it, using 4K will future-proof your uploads and offer your viewers the highest quality experience. Most cameras and smartphones now support these resolutions, so leverage that for the best results.
3. Bitrate Considerations
When exporting your video, you might encounter terms like bitrate. This is essentially the amount of data processed per second. A higher bitrate generally means better quality. For HD videos, aim for:
- 8-12 Mbps for 1080p
- 35-45 Mbps for 4K
Experiment with different settings to find the sweet spot that maintains quality while keeping file sizes manageable.
4. File Naming Conventions
Believe it or not, how you name your video file matters! Use clear, concise, and relevant names that describe your video content. Think of it as SEO for your video; you want it to be easily found and understood. Examples could be:
- “Travel_Vlog_Paris_2023_HD.mp4”
- “How_To_Bake_Cookies_HD.mp4”
Now that you’ve polished your video to perfection, it’s almost time to share it with the world. But hold on – before you hit that upload button, make sure you’re using the right video format!
Also Read This: How to Become a YouTube Influencer: A Step-by-Step Plan for Success
4. Choosing the Right Video Format
When it comes to uploading videos on YouTube, the format you choose can dramatically affect the final playback quality. So, let's go over the best formats to consider!
1. The Most Recommended Formats
YouTube supports a variety of formats, but the best choices to ensure your videos maintain high quality are:
- MP4 (MPEG-4 Part 14): This is by far the most widely recommended format. It strikes a balance between quality and file size, making it perfect for YouTube.
- AVI: While it offers great quality, the file sizes can be quite large, which can be a drawback.
- MOV: This format is great for maintaining quality but can also result in larger files, similar to AVI.
2. Avoid Uncommon Formats
It’s wise to steer clear of uncommon formats like FLV or WMV as they can lead to issues during the upload process. YouTube’s transcoding may not handle these well, which could impact quality.
3. Use the Right Codec
In addition to choosing the right format, selecting the right video codec can make a big difference. The most commonly recommended codec for MP4 files is H.264. This codec compresses video files efficiently while maintaining high quality, making it ideal for YouTube uploads.
4. Check YouTube’s Encoding Settings
YouTube also offers guidelines for uploading videos. They have specific settings for bitrate, resolution, and more based on your video’s details like FPS (frames per second). Taking a peek at those settings can help ensure you're starting with a strong foundation for your upload.
Now that you’ve prepped your video and figured out the best format, you're just about ready to share your masterpiece. But remember: uploading is just the beginning of your journey on YouTube!
Also Read This: How to Remove YouTube from Roku Devices: A Detailed Walkthrough
5. Editing Your Video for Quality
Ah, editing! This is where your video truly comes to life. Even if you captured stunning footage, how you edit can make or break the perceived quality. Here are some tips to consider:
- Choose the Right Editing Software: Depending on your experience level and needs, select software that can handle HD video formats. DaVinci Resolve, Adobe Premiere Pro, and Final Cut Pro are fantastic options!
- Work with High-Quality Footage: Always edit using the highest quality original footage you have. If your raw video is in 4K, edit in 4K! Editing in lower resolutions can lead to degradation and a loss of quality.
- Color Grading and Correction: Adjusting colors can significantly enhance the visual appeal. Use color grading tools to bring your footage to life while ensuring it remains true to the original lighting conditions.
- Audio Matters: Don’t forget about audio quality! Invest in good sound effects or background music. Clear audio enhances the overall experience and can make your video feel more professional.
- Export Settings: When exporting your video, always choose HD settings. Look for export options that allow you to maintain the original resolution and bitrate.
After editing, it’s a good idea to preview your video on different devices. Sometimes, the quality looks different on a phone compared to a laptop. By reviewing your video on various screens, you can ensure consistent HD quality across all platforms!
Also Read This: Can You Use Any Music in YouTube Shorts? Copyright Rules Explained
6. Uploading Videos with HD Quality Settings
Now that you've edited a stellar video, it’s time to upload it to YouTube. But wait! Make sure you’re keeping that glorious HD quality intact during the upload process. Here’s how:
- Choose the Right Format: YouTube recommends using formats like .MP4 or .MOV with H.264 codec for the best quality when uploading videos. These formats maintain a balance between high quality and file size!
- Set the Resolution: When uploading, select the highest possible resolution. If you edited in 4K, make sure your upload reflects that! YouTube will adjust your video for streaming, but starting with the best quality is key.
- Bitrate Settings: Pay attention to your video’s bitrate during the encoding process. A higher bitrate typically means better quality, but also a larger file size. Aim for a good balance to avoid both stuttering during playback and long upload times.
- Optimize Upload Speed: Upload your video during off-peak hours when your internet speed is optimal. If possible, use a wired connection for a more stable upload experience.
- Enable HD Playback: Make sure to check the settings on your upload settings while submitting. Enable HD playback options so that viewers have access to the best quality upon release.
Lastly, don’t rush the upload process. YouTube may take some time to process HD videos, especially if they're longer or in higher resolutions. Patience is key! Sit back, relax, and let YouTube handle the heavy lifting. Your viewers will appreciate the efforts, and your content will shine in all its HD glory!
Also Read This: How to Reach a Million Views on YouTube: Proven Growth Strategies
7. Adjusting Upload Settings on YouTube
When you upload a video to YouTube, you might think the magic happens automatically. However, taking a few moments to adjust your upload settings can significantly enhance the HD quality of your video. Here’s how to navigate this crucial part of the process:
First and foremost, make sure you're using the right video format. YouTube supports various formats, but for those pining for HD quality, MP4 is highly recommended. It provides a good balance of quality and file size. Always check that your video dimensions are at least 1280 x 720 pixels for HD resolution or 1920 x 1080 pixels for Full HD.
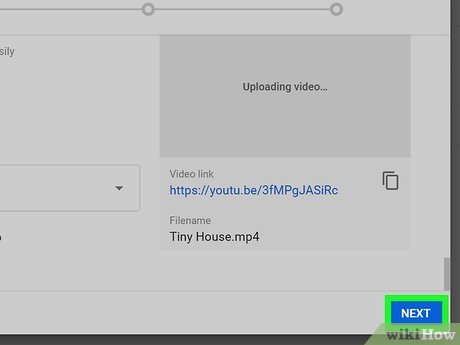
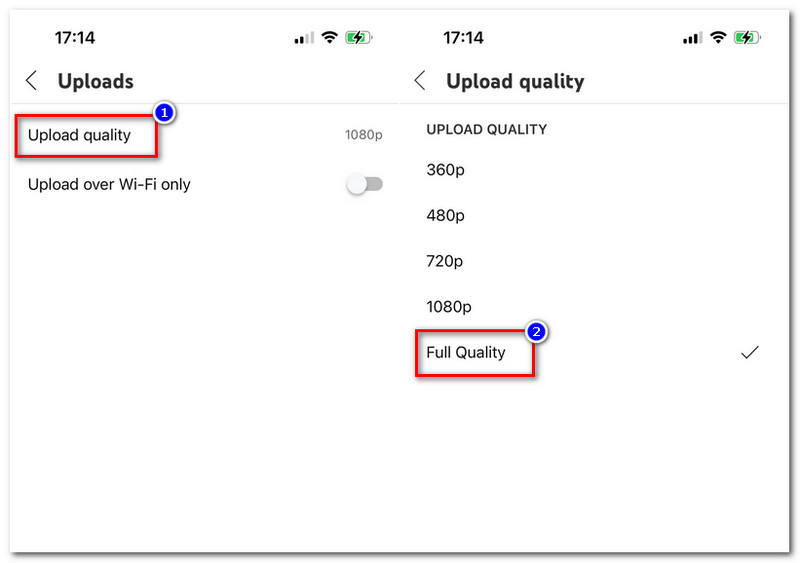
Next, during the upload process, you'll see an option related to video quality settings. It’s essential to choose the highest available resolution. YouTube automatically processes your video after uploading, and it may take a little while for the HD options to appear. So, be patient; your quality options will be there soon!
Aside from resolution, pay attention to the bitrate of your video. While uploading, a higher bitrate can improve the quality of your video significantly. For instance:
- For 720p (HD): Aim for around 5,000 kbps
- For 1080p (Full HD): Around 8,000–12,000 kbps is ideal
- For 4K: You might want to head into the realm of 35,000–45,000 kbps.
Lastly, don’t forget about audio quality. A video can be visually stunning, but poor audio will leave your viewers frustrated. Use formats like AAC and ensure your audio bitrate isn’t less than 192 kbps. This balance is key for a complete HD experience!
Also Read This: How to Find Out When You Subscribed to a YouTube Channel
8. Using the YouTube Studio for Quality Control
Once your video is uploaded, the journey to achieving perfect HD quality doesn't end there! YouTube Studio serves as your control center for managing and optimizing your videos. Let’s dive into how you can utilize it for maintaining and improving the quality of your uploads.
First off, after uploading, navigate to the YouTube Studio dashboard. Click on the video you want to manage. Here, you'll find metrics and options that allow you to assess your video’s performance and quality. The “Video Details” section offers insights into how viewers are experiencing your content – including playback quality.
Within YouTube Studio, you can also check if your video has been processed into HD quality. If not, you may notice lower resolutions available for viewers to select. Keep an eye on the stats; once the higher resolutions appear, you can confidently share your video. Remember, this can take time, so patience is key!
Another great feature is the ability to upgrade or enhance your video post-upload. YouTube offers tools for trimming, blurring, or enhancing your videos right in the studio. If you notice anything that needs changing, it’s easily manageable without the need to re-upload!
For those serious about quality, consider diving into the Analytics section in YouTube Studio. Here, you can track how audiences are responding to video quality. Are they leaving at certain points? Is the audio driving them away? Knowing this data is paramount in tweaking future uploads for optimal viewer retention.
Lastly, engage with your audience through the comments section. Their feedback can be a goldmine for discovering ways to improve future content. It’s all about collaboration - after all, you’re creating content for them!
Also Read This: How to Get the Audio from YouTube Videos for Your Projects
9. Common Mistakes to Avoid When Uploading
Uploading videos to YouTube should be a straightforward process, but there are several common pitfalls that many users encounter. Let’s explore some of these mistakes and how to avoid them to ensure your videos look their best.
- Forgetting to Optimize Video Settings: Many creators upload videos directly from their camera without tweaking video settings. Ensure you’re using the right resolution (1080p or higher) and frame rate (30 or 60 FPS) for the best quality.
- Ignoring the Video Format: YouTube recommends uploading videos in formats like MP4, MOV, or AVI. Using less compatible formats can lead to poor quality or even failed uploads.
- Neglecting Audio Quality: Don’t just focus on video; audio is crucial too! Poor audio can detract from your content significantly. Always check for sound clarity and consider using a good microphone.
- Skipping Thumbnails and Titles: An attractive thumbnail and engaging title go a long way in attracting viewers. Don’t overlook these elements—they can significantly affect your video's performance.
- Not Using Descriptions and Tags: Proper use of descriptions and tags can impact your video's searchability on YouTube. Be descriptive and relevant to help your audience find your content.
- Uploading Without Editing: Raw footage can reduce viewer engagement. Always edit your videos to remove unnecessary parts and keep them engaging. Consider adding transitions, graphics, or effects to enhance the final product.
- Overlooking the Internet Connection: A shaky or slow internet connection can interfere with uploads. Always ensure you have a stable connection to avoid interruptions or poor quality uploads.
By keeping these common mistakes in mind and being proactive in avoiding them, you can significantly enhance the quality and appeal of your videos on YouTube. Remember, preparation is key!
Also Read This: Why Is My YouTube Not Working on My iPhone? Solutions to YouTube App Issues on iOS
10. Post-Upload Quality Checks
Once your video is uploaded, it’s still essential to perform some quality checks to ensure everything is in order. This final step can make a significant difference in how your content is received. Here’s a handy checklist of quality checks you should consider after uploading your video:
- Watch the Entire Video: After uploading, watch your video in its entirety. Pay attention to the video itself, the audio, and any overlays. Are there any glitches or points where the quality dips? Spot-check for precision.
- Check the HD Playback Option: Ensure the HD option is available when viewing your video. Sometimes, it can default to a lower resolution. Select the highest quality setting to confirm everything looks as intended.
- Examine the Thumbnails and Metadata: Check if your thumbnail appears correctly. This is your first impression on viewers—make sure it's attractive! Also, ensure your title, description, and tags are accurate.
- Gather Feedback: Consider sharing your video with a few trusted friends or colleagues before promoting it broadly. Get their feedback on both content and quality, and be open to constructive criticism.
- Analyze Initial Engagement: After your video is live, monitor the initial engagement metrics. Look at views, likes, comments, and watch time information over the first few hours to gauge how well it's performing.
These post-upload quality checks can save you from potential issues and improve your overall content quality. Taking a few extra moments to review your work can significantly enhance how your audience experiences your videos. Happy uploading!
Conclusion: Achieving the Best HD Quality on YouTube
In summary, ensuring HD quality when uploading videos to YouTube is a multi-faceted process that involves attention to detail at every step. Here are some key takeaways to remember:
- Choose the Right Settings: When exporting your video, select formats like MP4 and codecs such as H.264 to maintain high quality.
- Optimize Resolution: Aim for resolutions of 1080p (1920x1080) or higher to meet HD standards.
- Maintain Bitrate: Higher bitrates can significantly enhance video quality—consider a bitrate of at least 10 Mbps for 1080p.
- Ensure Good Lighting: Quality lighting during filming not only reduces compression issues but also enhances overall clarity.
- Stable Internet Connection: A reliable and fast internet connection is crucial for uploading large files without interruptions.
Lastly, do not forget to preview your video after uploading. This ensures that the quality remains intact and allows you to make any final adjustments if necessary. By following these guidelines, you can confidently share your high-definition videos with the world, capturing your audience's attention with crisp, clear visuals.
 admin
admin


