Ever thought about crafting your own hookah at home? It's a fun and rewarding experience that not only gives you a unique smoking apparatus but also allows for customization to fit your style. Creating a homemade hookah can save you money, and it’s an excellent way to impress your friends. Plus, the process is relatively simple! In this blog post, we’ll guide you through the steps to create a homemade hookah and show you how to find helpful tutorials on Dailymotion.
What You'll Need to Create Your Hookah
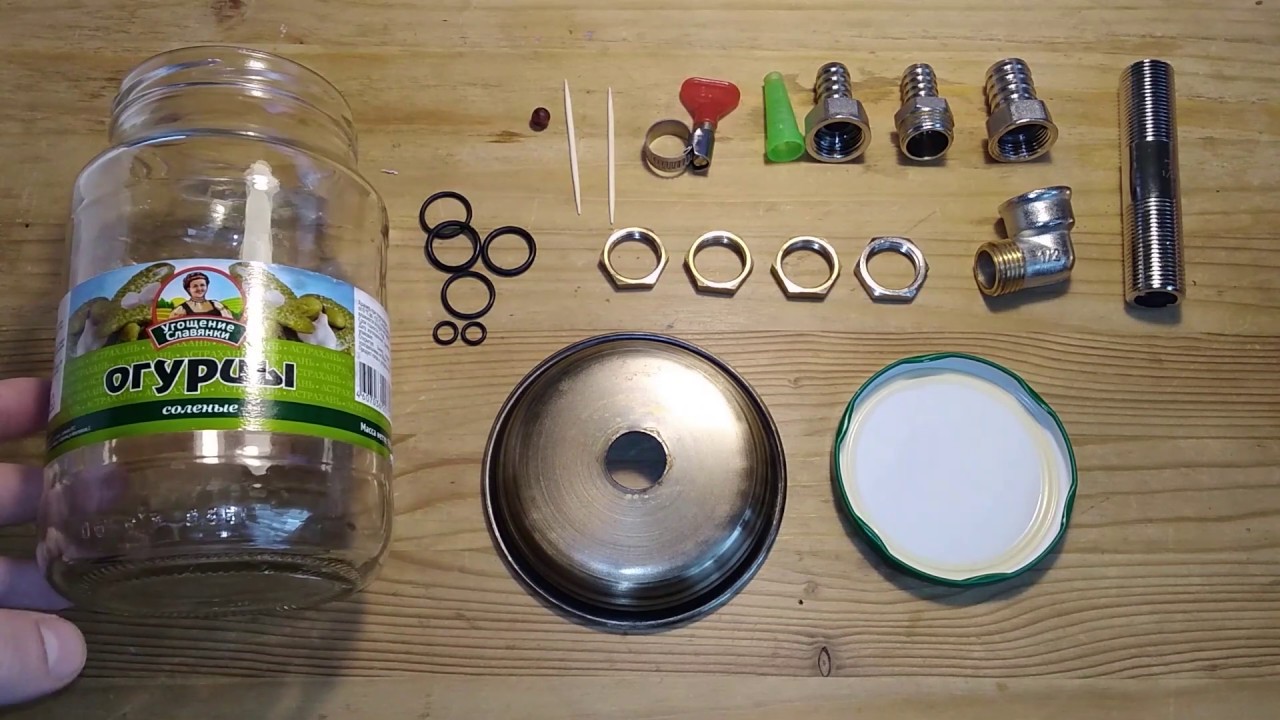
Before diving into the process, let’s gather all the materials you will need. Making a homemade hookah doesn’t require expensive tools or materials; what you need can likely be found around your house or at a local store. Here’s a handy list of the essentials:
- A base container: This could be a glass jar, a vase, or even a plastic bottle. Just make sure it’s sturdy and can hold water.
- A downstem: You can use a metal or plastic tube that fits snugly into the base. A simple hollow pen tube might work in a pinch!
- A bowl: For the tobacco or flavor, you can use a bowl from an old hookah if you have one, or you can fashion one from aluminum foil.
- Water: This is crucial! Fill your base with about 1-2 inches of water to help filter the smoke.
- Tobacco: Choose your favorite flavor of shisha or hookah tobacco to enjoy.
- Charcoal: Natural coconut coals are preferred, but quick-light charcoal works too.
- Aluminum foil: This will help create a makeshift bowl cover. Make sure it’s strong enough to hold the charcoal without ripping.
- Using a drill or sharp tool: For making holes in your base or crafting the downstem.
With these materials in hand, you’re on your way to creating a functional and stylish homemade hookah! As you gather your resources, don’t hesitate to tap into the wealth of tutorials available on Dailymotion. Just search for "homemade hookah" or "DIY hookah tutorial," and you’ll find plenty of step-by-step guides that can visually walk you through the process. Watching someone else construct a hookah can really help solidify your confidence before you tackle the project yourself.
In our next section, we’ll delve into the actual construction, so stay tuned and get ready to impress your friends with your new DIY skills!
Also Read This: Creative Techniques for Crafting Wind Chimes at Home with Dailymotion
3. Step-by-Step Guide to Making Your Hookah
Ready to dive into the world of homemade hookahs? Follow these simple steps and you'll be puffing away in no time!
Step 1: Gather Your Materials
Before we start, it’s essential to have all your materials ready. Here’s what you’ll need:
- A clean plastic bottle (like a 1-liter soda bottle)
- A hose (silicone works best, but any flexible tubing will do)
- A bowl (can use a small ceramic bowl or even an apple)
- Aluminium foil (optional, but helps with heat management)
- Shisha (flavored tobacco)
- Water
- A lighter or matches
Step 2: Prepare the Bottle
Start by cleaning your plastic bottle thoroughly. Remove any labels, and rinse it out to get rid of any residual flavors. Next, poke a small hole about a third of the way from the bottom. This will serve as the air intake for the hose. The hole should be just large enough for the tubing to fit snugly.
Step 3: Insert the Hose
Take your tubing and insert one end into the hole you made in the bottle. Make sure it reaches close to the bottom of the bottle to ensure maximum smoke. Seal the hole around the tubing with tape or putty if necessary to create an airtight seal. You don’t want any air escaping while you’re smoking!
Step 4: Create the Bowl
If you're using a bowl, that's great! If not, slice the top off an apple and hollow it out a bit to hold your shisha. Place your bowl on top of the bottle's neck. If using a traditional bowl, you may need to add a layer of foil to cover it. Poke small holes in the foil to allow the heat through.
Step 5: Add Water
Fill the bottle with enough water to cover the end of the hose but not so much that it spills into the hose. About 1-2 inches from the bottom will generally do the trick. The water will cool and filter the smoke, making for a smoother experience.
Step 6: Pack Your Shisha
Now, pack your shisha into the bowl (or apple) loosely. Make sure not to overpack it; you want the smoke to flow easily. If using foil, place it gently on top to avoid crushing the tobacco.
Step 7: Light It Up!
Now comes the fun part! Light your coals and place them on top of the bowl. Take your first few puffs to draw the smoke through the water, and enjoy your homemade hookah!
Also Read This: How to Make Earrings at Home: DIY Jewelry Tutorial on Dailymotion
4. Choosing the Right Materials for a Better Experience

When it comes to creating a fantastic hookah experience, the materials you choose can make all the difference. Here are some tips on selecting the right components.
Hookah Base
Your base doesn’t have to be fancy, but it should be airtight. Glass bases are traditionally preferred because they don’t absorb flavors and are easier to clean. However, plastic can work if you're going for a budget-friendly option!
Hose Selection
A good kick should come from a quality hose. Silicone hoses are popular because they’re easy to clean, durable, and resistant to odors. Stainless steel hoses are also a great choice since they provide a clean taste. Avoid cheap plastic hoses as they may impart flavors to your smoke.
Bowl Type
Your choice of bowl can affect the taste and intensity of your smoke. Clay bowls are great at holding heat, but they can be heavy and fragile. Try using a metal bowl, which is durable and distributes heat evenly, or go for a rubber bowl for a lighter alternative.
Tobacco Choices
When it comes to shisha, flavors are endless! Try different brands and flavors to find what you like best. Some popular ones include:
- Mint – refreshing and cool
- Double Apple – a classic choice
- Blueberry – sweet and fruity
Always check for quality; fresh shisha will provide a better flavor and smoking experience.
Water Temperature
Don't underestimate the water! Using ice-cold water will provide a cooler smoke, making it less harsh on your throat. Experiment with adding ice cubes or even flavored liquids like fruit juices for a unique taste.
Now, with this guide in hand, you’re well on your way to crafting the perfect homemade hookah experience. Happy smoking!
Also Read This: How to Save Dailymotion Videos: Quick Solutions
5. Understanding the Hookah Components
Before diving into the world of homemade hookahs, it’s essential to know the different components that make up this traditional smoking device. Each part plays a critical role in ensuring that your hookah experience is enjoyable and smooth. Let’s break down the primary components:
- Base: This is the bottom part of the hookah, usually filled with water. It cools and filters the smoke before it reaches your lungs. The base can be made of glass, plastic, or even metal, depending on your preference.
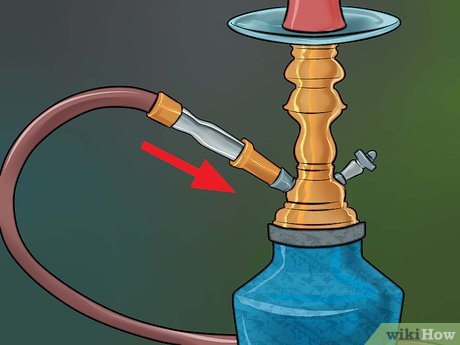
- Stem: The stem is the central tube that connects the base to the bowl. It transports the smoke from the bowl down into the water. Stems can vary in length and material, and some come with built-in purge valves for an enhanced smoking experience.
- Bowl: This is where the tobacco is placed. Bowls come in various shapes and sizes, impacting how the tobacco burns and how smoke is produced. The best bowls may even allow for better airflow, giving you a smoother draw.
- Hose: The hose is how you inhale the smoke. Good hoses are usually made from materials that prevent overheating and ensure a comfortable smoking experience. Look for hoses that can be easily cleaned; this will help maintain the flavor of your session.
- Heat Source: You'll need a reliable heat source, typically natural coconut coals or quick-light coals. Natural coals provide a cleaner taste, while quick lights are more convenient but can impart a chemical flavor.
Now that you know the individual components of your hookah, it’s important to understand how they work together. When you start your session, heat from the coals warms the tobacco in the bowl. As the tobacco heats up, it releases smoke, which travels down the stem and into the base, getting cooled by the water before it reaches your lungs through the hose. Understanding this process helps you troubleshoot any issues, like if your smoke isn’t as thick as you’d like it to be—maybe it’s time to check if your tobacco is moist enough or if your coals are burning properly.
Also Read This: DIY Loom Band Bracelets Watch on Dailymotion
6. How to Prepare Tobacco for Your Hookah
Once you’ve got your hookah assembled, the next step is preparing your tobacco. This part is crucial, as the quality of your tobacco and how you prepare it can dramatically influence your smoking experience. Here’s a step-by-step guide to help you get it just right:
- Choosing the Right Tobacco: Start with good-quality shisha tobacco. Look for something that is suitable for hookah smoking, as it’s usually moistened and flavored. Popular brands include Starbuzz, Al Fakher, and Fumari.
- Mise en Place: Gather all your supplies. You’ll need your tobacco, a bowl, your fingers or a fork, and some scissors for cutting if necessary. Having everything ready makes the process smoother.
- Fluffing the Tobacco: Take the desired amount of tobacco, usually about a bowl's worth, and gently fluff it up with your fingers. This step ensures that the tobacco breathes and allows for better airflow.
- Packing the Bowl: Place the fluffed tobacco into the bowl. Avoid packing it too tight; you want it to be loosely packed for optimal airflow. The top should be about a millimeter below the rim to make space for your foil or screens.
- Adding Flavor (Optional): If you’re feeling creative, you can create a mix or enhance flavor by adding things like dried fruits or mint leaves. Just make sure any additions don’t clog the airflow!
- Covering the Bowl: Finally, take a piece of aluminum foil, poke small holes in it, and cover the bowl tightly. This will keep the tobacco from burning too fast while allowing smoke to pass through.
Once your tobacco is prepared, you’re ready to light your coals and start your session! Properly preparing the tobacco not only ensures a great smoke but also enhances the flavor and overall experience. If you ever feel weary about the process, don't hesitate to check out tutorials on Dailymotion for visual guidance!
Also Read This: How to Change Your Dailymotion Bio: Personalizing Your Account
7. Safety Tips When Using a Homemade Hookah
Creating a homemade hookah can be a fun and rewarding experience, but it’s crucial to prioritize safety. Here are some essential safety tips to ensure you enjoy your hookah sessions without any hazards:
- Choose the Right Location: Always smoke in a well-ventilated area. Whether you’re indoors or outdoors, good airflow will help dissipate smoke and prevent buildup of harmful substances.
- Use Non-Flammable Materials: When crafting your homemade hookah, ensure that all materials you use—like the pipe and bowl—are heat-resistant and non-flammable. Avoid plastic items that can melt.
- Mind Your Coals: When using charcoal for heating your tobacco, handle coals with care. Always use tongs to prevent burns, and never leave lit coals unattended.
- Monitor Your Smoke: Pay attention to how your body reacts. If you start feeling lightheaded or dizzy, it’s time to take a break. Always stay hydrated as hookah can lead to dehydration.
- Keep It Clean: Regularly clean your homemade hookah to prevent nasty bacteria and ensure a smooth smoke. This is especially important if you use fruit or other non-traditional items in your setup.
- Avoid Overcrowding: If you’re smoking with friends, make sure everyone is comfortable and spaced out. Overcrowding can lead to insufficient airflow and enhance the risks of inhalation issues.
- Be Mindful of Your Tobacco: Only use tobacco products meant for hookah, and beware of how much you consume. Flavored tobaccos may tempt you, but they still contain nicotine.
Following these guidelines will help you enjoy your homemade hookah safely and responsibly. Remember, moderation is key!
Also Read This: How to Upload Photos to Google Images via Dailymotion
8. Watch Tutorials on Dailymotion for Visual Guidance
If you’re a visual learner, there’s no better way to grasp the nuances of making a homemade hookah than by watching video tutorials. Dailymotion offers a plethora of videos that can guide you through the entire process, step by step.
Here’s why you should consider checking out Dailymotion for your hookah tutorials:
- Diverse Content: From simple DIY setups to intricate designs, you’ll find a variety of content suited for all skill levels. Whether you’re just starting or you want to try advanced techniques, there’s something for everyone.
- Visual Instructions: Videos provide a visual representation of each step, making it easier to understand how to assemble and use your homemade hookah correctly.
- Community Feedback: Many videos come with comments from other users who share tips, tricks, and their personal experiences. This community aspect can enhance your learning process.
- Expert Advice: Look for tutorials uploaded by seasoned hookah enthusiasts. They often share insights that you might not find in written guides, including troubleshooting common problems.
To get started, simply search for “homemade hookah tutorial” on Dailymotion. Don’t be afraid to explore different techniques and styles, and find what works best for you. Watching someone else put the entire assembly together can boost your confidence in taking on the project yourself!
With the right resources and some creativity, you’ll be well on your way to enjoying your homemade hookah in no time!
Conclusion and Final Thoughts
Creating your own homemade hookah can be a rewarding and enjoyable experience, allowing you to customize your smoking sessions to your personal preferences. As we've outlined through the steps above, the process can be broken down into simple actions:
- Gathering the materials you need.
- Assembling the hookah components.
- Preparing the shisha for a great smoking experience.
Utilizing resources like Dailymotion tutorials can significantly enhance your DIY experience. Watching experienced users can provide you with valuable techniques and tips that may not be covered in written guides. Here are some benefits of checking out these tutorials:
- Visual Guidance: Seeing the process in action can clarify steps that might be confusing when described only in text.
- Tips and Tricks: Many content creators share unique insights that help you improve your hookah experience.
- Community Engagement: Engaging with the comments and discussions can lead to useful advice and recommendations.
Remember to keep experimenting with different flavors and tools to find what suits your taste best. Your homemade hookah can be as unique as you are, and the journey of discovery can lead to a deeper appreciation of this ancient tradition.
In conclusion, by following these easy steps and taking advantage of online resources like Dailymotion, you can create a satisfying and customized hookah experience right in your home. Happy smoking!
 admin
admin


