Baking a cake can be one of the most enjoyable and satisfying experiences in the kitchen. Whether you’re celebrating a special occasion or just craving something sweet, knowing how to bake a cake opens a world of possibilities. With a little bit of practice and some helpful tips, you can create a cake that's not only delicious but also a feast for the eyes. So, let’s dive into the essentials that make cake baking fun and rewarding!
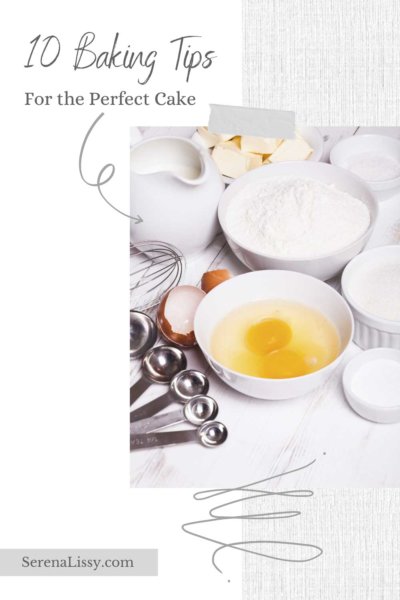
Essential Ingredients for Baking a Cake
Before you start mixing and baking, it’s crucial to understand the *essential ingredients needed for a successful cake. Each ingredient plays an important role in building flavor, texture, and structure. Here’s a rundown of the key components that you’ll need:
- Flour: The backbone of any cake, flour provides structure. All-purpose flour is a versatile choice, but cake flour can yield a lighter, softer texture.
- Sugar: This sweetener not only adds sweetness but also affects the cake's moisture and texture. Granulated sugar is common, but brown sugar can add a hint of molasses flavor.
- Eggs: Eggs are essential for binding ingredients and adding richness. They also help with leavening, giving the cake a light and airy texture.
- Butter: This creamy ingredient adds flavor and moisture, making your cake tender. You can also substitute oil or use a combination depending on the recipe.
- Baking Powder or Baking Soda: These leavening agents are crucial for making your cake rise. Make sure they’re fresh for the best results!
- Milk or Other Liquids: Liquids hydrate the dry ingredients and help the cake batter achieve the right consistency. Buttermilk, yogurt, or even fruit juices can be great alternatives.
- Flavorings: Vanilla extract is a must-have for many cakes, but feel free to experiment with other extracts or spices like almond, lemon zest, or cocoa powder if you’re feeling adventurous!
Having the right ingredients on hand is just the first step. The quality of these ingredients matters too. For example, using fresh eggs and good-quality vanilla extract can make a noticeable difference in your cake’s taste.
To give you a clearer picture of how these ingredients come together, here’s a simple breakdown of how a basic vanilla cake can be made from these essentials:
| Ingredient | Amount |
|---|---|
| All-Purpose Flour | 2 cups |
| Sugar | 1 ½ cups |
| Eggs | 3 large |
| Butter (softened) | 1 cup |
| Baking Powder | 2 ½ teaspoons |
| Milk | 1 cup |
| Vanilla Extract | 2 teaspoons |
By ensuring that you have these essentials ready, you’ll set yourself up for success* in the kitchen. So, gather your ingredients, and let’s get ready to make something delicious!
Also Read This: How the Universe Works Asteroids Watch the Video on Dailymotion
3. Choosing the Right Baking Tools
When it comes to baking a cake, having the right tools can make all the difference. You don't need a kitchen filled with fancy gadgets, but there are some essentials that will help you achieve that perfect bake. Let’s break down the must-have tools for your cake-baking adventure!
1. Mixing Bowls: Invest in a set of mixing bowls, ideally made from stainless steel or glass. These materials are durable and easy to clean. You’ll find that having various sizes handy allows you to tackle different tasks, from mixing batter to whipping cream.
2. Measuring Cups and Spoons: Accurate measurements are crucial in baking. You’ll want both dry measuring cups (for flour, sugar, etc.) and liquid measuring cups (for milk, oil, etc.). A set of measuring spoons is also vital for teaspoon and tablespoon measurements. Always use these to ensure consistent results!
3. Electric Mixer: While you can whisk by hand, a good electric mixer saves time and energy. Stand mixers are fantastic for larger batches, while handheld mixers are portable and perfect for smaller tasks. Look for one with multiple speed settings for versatility.
4. Cake Pans: Choose the right size and shape for the cakes you want to bake. Round pans are common, but don’t shy away from square or rectangular pans for different designs. Make sure to use non-stick pans or line them with parchment paper for easy release.
5. Cooling Rack: After baking, your cake needs to cool down, and a cooling rack is perfect for this. It allows air to circulate around the cake, preventing it from getting soggy. Plus, it makes frosting much easier when the cake is cool.
6. Spatulas: A good spatula is essential for mixing batter and spreading frosting. Silicone spatulas are great because they’re heat-resistant and easy to clean. Don’t forget a metal offset spatula; it's perfect for smoothing frosting!
7. Oven Thermometer: Did you know that the temperature inside your oven might not be what it says on the dial? An oven thermometer ensures your oven is at the right temperature for consistent baking results.
With these tools in hand, you're well on your way to baking success. Investing in quality equipment not only makes the process easier but also enhances the quality of your cakes. Now that we have the essentials down, let’s dive into the next exciting part!
Also Read This: The Ultimate Guide to Downloading Videos on Dailymotion in Simple Steps
4. Step-by-Step Instructions for Baking a Cake
Having the right tools is just the beginning. Now that we've got everything set up, let’s go through the step-by-step process for baking a delicious cake. Follow these steps, and you’ll be a baking pro in no time!
Step 1: Preheat the Oven
Before you start mixing your ingredients, make sure to preheat your oven to the required temperature, typically around 350°F (175°C). This ensures your cake bakes evenly.
Step 2: Prepare Your Baking Pans
Grease your cake pans with butter or cooking spray. You can also line the bottoms with parchment paper for extra assurance that your cake won’t stick. Make sure to flour the pans after greasing, especially if you’re using darker pans.
Step 3: Gather Your Ingredients
Collect all your ingredients. Common ingredients include flour, sugar, eggs, butter, baking powder, milk, and vanilla. Measure everything out before you start—trust me, it makes the process smoother!
Step 4: Mix the Dry Ingredients
In a bowl, combine your dry ingredients like flour, baking powder, and salt. Whisk them together to ensure even distribution. This step is crucial for a light, fluffy cake.
Step 5: Cream the Butter and Sugar
In another bowl, beat the butter and sugar together until it’s light and fluffy. This process incorporates air into the butter, leading to a fluffy texture in the final cake.
Step 6: Add Eggs and Vanilla
Add your eggs one at a time, mixing well after each addition. Then, stir in the vanilla extract. This not only enhances flavor but also adds moisture.
Step 7: Combine Wet and Dry Ingredients
Gradually add your dry ingredients to the butter mixture, alternating with the milk. Start and end with the dry ingredients, mixing just until combined. Overmixing can lead to a dense cake.
Step 8: Pour Batter into Pans
Divide your batter evenly between the prepared pans. You can use a kitchen scale for precise measurements if you want perfectly even layers.
Step 9: Bake
Place the pans in the preheated oven and bake for about 25-30 minutes, or until a toothpick inserted into the center comes out clean. Keep an eye on the cake as baking times may vary, depending on your oven.
Step 10: Cool and Frost
Once baked, remove the cakes from the oven and let them cool in the pans for about 10 minutes. Then, turn them out onto a cooling rack to cool completely before frosting your creation.
And there you have it! Follow these steps, and soon you’ll have a delicious homemade cake ready to impress your family and friends. Remember, practice makes perfect, so don’t be discouraged if your first one isn’t perfect. Enjoy the process and have fun!
Also Read This: Exploring the Holiday Spirit with A Very Vintage Christmas on Dailymotion
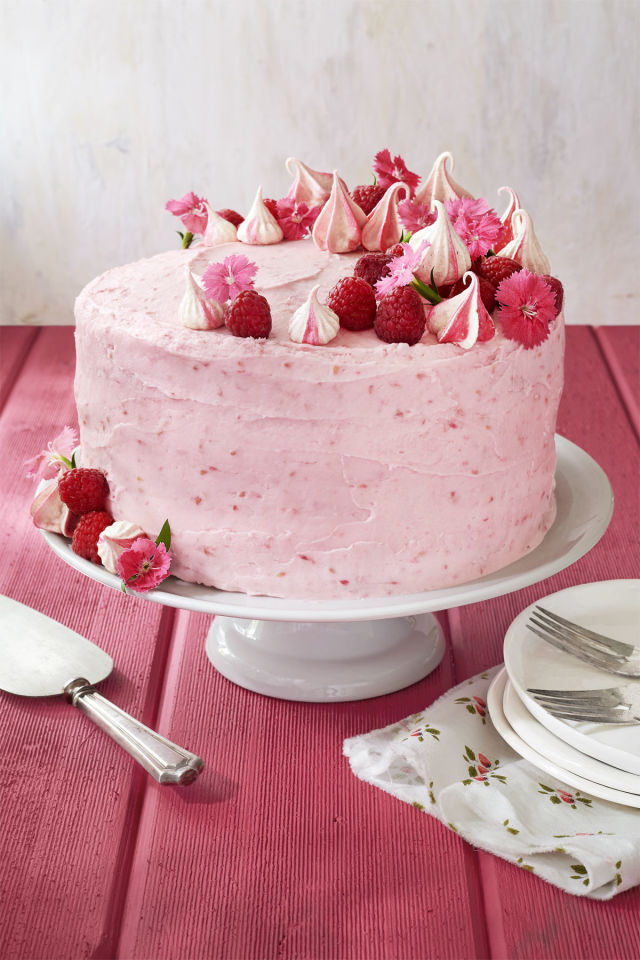
5. Fun Decorating Ideas to Enhance Your Cake
Once your cake is baked and cooled, it’s time for the fun part: decorating! This is where you can truly unleash your creativity. Whether you're aiming for a simple look or something over-the-top, there are plenty of ways to enhance your cake. Here are some exciting decorating ideas to elevate your baking game:
- Buttercream Swirls: A classic for a reason! Use a piping bag fitted with a star tip to create beautiful buttercream swirls. You can mix colors for a rainbow effect or stick to a monochromatic palette for elegance.
- Fresh Fruit: Top your cake with fresh fruits like strawberries, blueberries, or kiwi slices. They not only add a pop of color but also provide a refreshing taste that complements the sweetness of the cake.
- Edible Flowers: Go for a beautiful and natural touch with edible flowers. Lavender, pansies, and nasturtiums can make your cake look like a work of art. Just ensure that the flowers you use are indeed edible!
- Chocolate Ganache: A rich chocolate ganache can be poured over the cake for a luscious finish. It’s simple to make with just chocolate and heavy cream, and it adds a decadent touch.
- Sprinkles Galore: You can never go wrong with sprinkles! Whether it’s classic rainbow or themed colors, they add a festive element. Just sprinkle them on top or along the edges for a cheerful look.
- Fondant Designs: If you're feeling adventurous, try decorating with fondant. It allows you to create smooth surfaces and intricate designs. Just remember to roll it thinly and keep it lightly dusted with cornstarch to prevent sticking!
Don’t forget that your cake doesn’t have to be perfect—embrace the imperfections! Sometimes, those little quirks make your cake unique and personal. Just have fun with it!
Also Read This: How to Download Dailymotion Videos with Armorfly: A Quick and Easy Tutorial
6. Common Baking Mistakes and How to Avoid Them
Baking can sometimes feel like a science experiment, and even the most experienced bakers can make mistakes. But fear not! Here are some common missteps and how you can avoid them:
| Mistake | Solution |
|---|---|
| Not Prepping Your Pans | Always grease and flour your cake pans or use parchment paper to prevent sticking. This will save you from the disappointment of a broken cake. |
| Measuring Ingredients Improperly | Use the right measuring cups for dry and wet ingredients. Remember, spoon flour into the cup and level it off instead of scooping directly. |
| Overmixing Batter | Mix just until combined. Overmixing can lead to a dense cake. This is especially crucial when incorporating flour; mix with a gentle hand! |
| Incorrect Oven Temperature | Always preheat your oven and use an oven thermometer to ensure accurate temperatures. An oven that’s too hot or too cold can drastically affect baking times and results. |
| Skipping the Cooling Time | Let your cake cool in the pan for a short while before transferring it to a wire rack. This will help maintain its structure and prevent a soggy bottom. |
Learning from mistakes is part of the journey, so don’t let a mishap discourage you. Every cake you bake is an opportunity to learn and improve your skills. Happy baking!
Also Read This: Accessing YouTube on Your Echo Show
7. Tips for Storing and Serving Your Cake
So, you've put in the effort and baked a scrumptious cake! Now, how do you store it to keep it fresh and ensure it's served in the best way possible? Here are some tips to keep your cake delicious and presentable:
- Cool it Down: Always allow your cake to cool completely before storing it. If you store it while it's still warm, moisture can build up, making it soggy.
- Wrap It Up: If you’re not serving the cake immediately, wrap it in plastic wrap or aluminum foil. This will help retain moisture and prevent it from absorbing any odors from the fridge.
- Airtight Containers: For longer storage, consider placing the cake in an airtight container. This can help keep it fresh for a few days.
- Freezing for Later: If you’d like to enjoy your cake later, consider freezing it. Slice the cake first, wrap each piece individually, and place them in a freezer-safe container. Cakes can generally be frozen for up to three months.
- Serving Suggestions: When it's time to serve, get a clean serrated knife to cut the cake. Wipe the knife with a damp cloth between each cut for clean slices. It'll make your cake look even more appetizing!
- Garnishing: Consider garnishing your cake for added flair. Fresh fruits, chocolate shavings, or a dusting of powdered sugar can elevate its appearance.
- Room Temperature is Best: If your cake has been refrigerated, let it sit out for about 30 minutes to an hour before serving. This will enhance the flavors and texture.
By following these simple tips, you'll ensure that your cake stays fresh and tastes amazing when it’s time to dig in. Whether it's for a special occasion or simply a treat for yourself, proper storage and presentation make all the difference!
8. Conclusion and Encouragement to Enjoy Baking
Baking can be an incredibly rewarding experience, and a cake made from scratch tastes far superior to anything store-bought. As you embark on this delicious journey, remember that the key ingredients are not just flour and sugar but also patience and creativity.
Here's a little encouragement for you:
- Embrace Mistakes: Remember, not every cake will come out perfectly, and that’s completely okay! Some of the best baking lessons come from our blunders. Even a slightly wonky cake can taste divine.
- Experiment: Feel free to mix and match flavors, decorations, and toppings. One of the best parts of baking is trying new things, so don’t hesitate to experiment!
- Share the Joy: Don’t forget the joy of sharing your creations. Bake cakes for birthdays, anniversaries, or just because. You'll not only brighten someone’s day but also create memories through your cooking.
- Join a Community: Consider connecting with other baking enthusiasts online or in your area. Sharing tips, recipes, and experiences can enrich your baking journey.
- Have Fun: Remember, baking should be fun! Turn on some music, invite a friend over, and enjoy the process. It’s not just about the end result but also about the joy of creating.
So grab your apron, preheat that oven, and get baking! With practice, you’ll develop your style and find endless joy in crafting delicious cakes that not only taste great but also bring smiles to the faces of those you love.
 admin
admin


