Have you ever felt the need for a quick and easy way to cool off on a warm day? Look no further! Creating a paper wind fan is a fun and simple project that doesn’t just keep you refreshed but also sparks creativity. Whether you’re planning a summer gathering, a themed party, or simply want to indulge in an enjoyable crafting session, these fans are perfect for you. With just a few materials and some easy steps, you can create your very own personalized wind fan that adds a splash of color and a touch of flair to your day!
Materials Needed for Your Paper Wind Fan
Getting started is half the fun, and gathering your materials is the first step toward creating your very own paper wind fan. Here's a quick list of what you’ll need:
- Colored Paper: Choose vibrant colors or patterned paper to make your fan stand out. Cardstock works well for durability.
- Scissors: A sharp pair will help you cut the paper easily and accurately.
- Wooden Craft Stick or Straw: This will serve as the handle for your fan. Pick one that feels comfortable to hold.
- Glue or Tape: You'll need this to attach the paper to the handle securely.
- Ruler: Optional, but it can help you create neat, even folds.
- Pencil: Use it to mark where you’d like to cut or fold if precision is important to you.
- Decorative Items (optional): Stickers, washi tape, or glitter can add a personal touch to your fan.
Once you've gathered your materials, you're ready to dive into the fun part: crafting! Don't worry if you don’t have all the materials listed; you can get creative and substitute with items you have available. Let's unleash your inner artist and create a masterpiece that will keep you cool during those hot summer days!
Also Read This: How to Download Dailymotion Videos to an iPhone Without Using Apps
3. Step-by-Step Instructions to Make a Paper Wind Fan
Creating your very own paper wind fan is not only a fun project but also an excellent way to beat the heat in style! Let’s break it down into simple, easy-to-follow steps. Grab your materials, and let’s get started!
- Gather Your Materials: You’ll need the following items:
- Colored or patterned paper (construction paper works well)
- A pair of scissors
- A wooden craft stick or a straw (to use as the handle)
- A pencil
- Glue or tape
- A ruler (optional, for precise folding)
Ready? Let’s go!
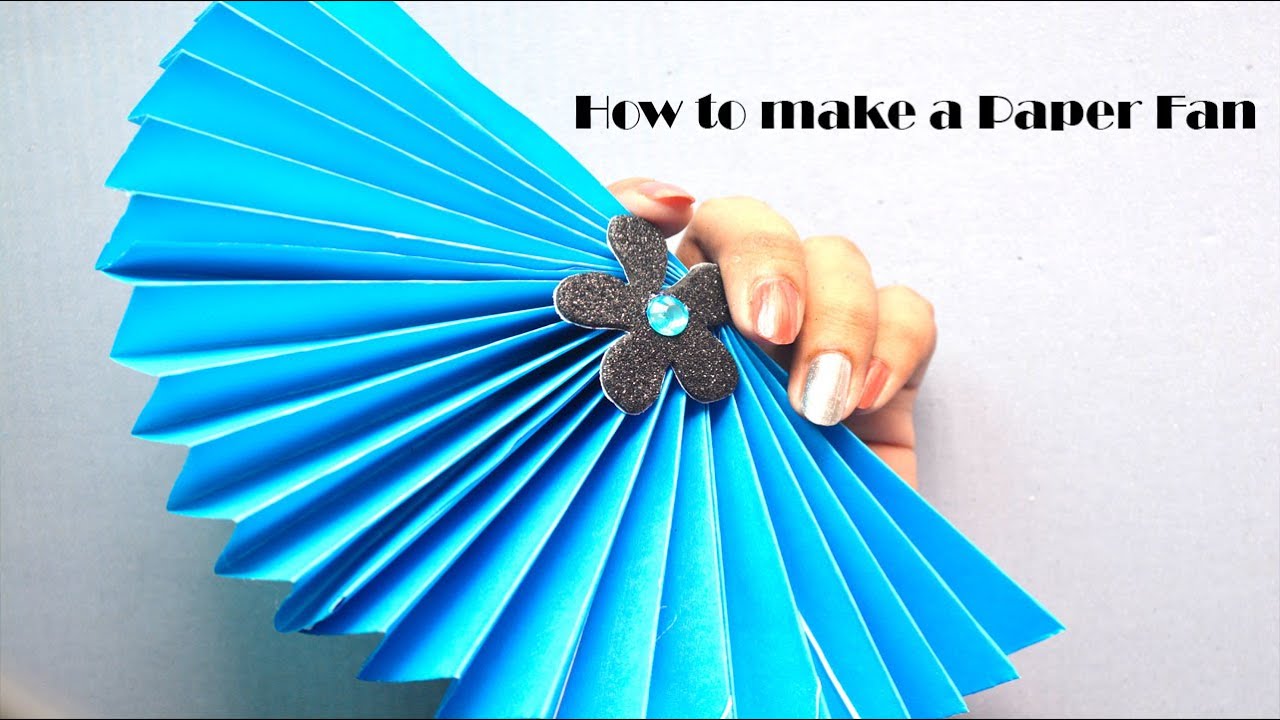
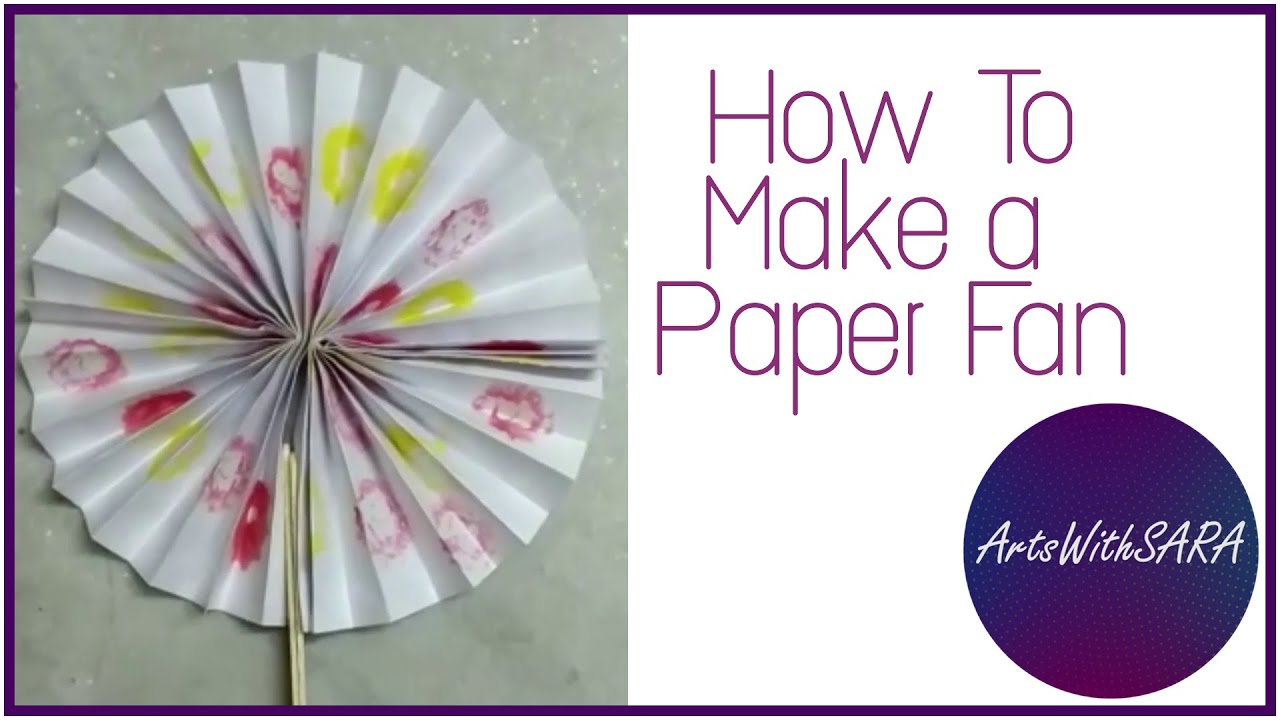
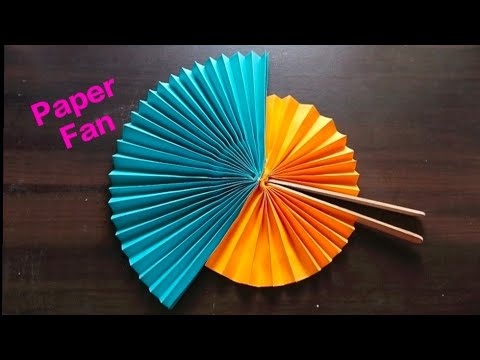
- Cut the Paper: Start by cutting your paper into a rectangle. A size of about 8 inches by 10 inches works well, but feel free to adjust based on your preferences.
- Create Folds: With the longer side facing you, begin folding the paper in an accordion style. Make folds that are about one inch apart. This will give your fan its fluted appearance.
- Secure One End: Once you’ve reached the end of the paper, fold the entire piece in half. Be sure to align the edges properly. Now, take one end of the folded paper and apply a little glue or tape to hold it together.
- Create the Handle: Take your wooden stick or straw and attach it to the bottom of the fan. You can glue or tape this securely. If you're using glue, make sure to hold it for a few seconds until it bonds well.
- Open It Up! Gently spread out the folds of the paper to form your wind fan. Adjust the folds so they look even and fan-like.
- Final Touches: Ensure everything is glued and secure. If you have any decorative items like stickers, pom-poms, or glitter, now’s the time to add those for a personalized touch!
And there you have it! Your very own paper wind fan is ready to help keep you cool. Wave it around and enjoy your handiwork!
Also Read This: How to Download Dailymotion Videos to Your Mac Without Additional Software
4. Tips for Customizing Your Paper Wind Fan
Now that you know how to create a basic paper wind fan, let’s explore some fun ways to customize it! Personalizing your fan can make it uniquely yours, and it can also be a great opportunity to get creative.
- Use Different Paper Types: Experiment with various types of paper. Consider patterned scrapbook paper, origami paper, or even recycled newspaper for a unique texture.
- Add Color: Use markers, crayons, or paint to add vibrant designs on your paper before folding it. Doodle or draw fun patterns, or even incorporate your favorite quotes!
- Incorporate Shapes: Before you fold your paper, cut shapes out of the edges or create a wave-like design. This will give your fan a distinctive look when opened.
- Stickers and Embellishments: Stickers, washi tape, and other embellishments can add flair. Ooh, maybe some sequins for a little sparkle on sunny days!
- Personalized Handles: Instead of a plain wooden stick, consider wrapping it with colorful yarn, or using decorative tape to make it stand out.
- Layering: Create a double-layered fan by making two fans and attaching them back-to-back. This not only adds thickness but allows for multiple designs.
With these tips, you can ensure your paper wind fan is as unique as you are. Let your imagination run wild—after all, DIY projects are all about enjoying the process! Get ready to flaunt your customized creation and keep cool all summer long!
Also Read This: Logo Design in Illustrator Tutorials on Dailymotion
5. How to Use Your Paper Wind Fan Effectively

Now that you’ve created your very own paper wind fan, you might be wondering how to maximize its use. Whether you’re fanning yourself on a hot summer day, spicing up a party, or even using it for a fun project, knowing how to use your fan effectively can enhance the experience. Here are some practical tips:
- Hold it Right: For maximum airflow, grip the handle firmly but comfortably. Depending on the design you chose, hold the fan at its base, allowing the blades to catch the air efficiently.
- Find the Right Technique: Experiment with different fanning techniques. A gentle, consistent motion can create a nice breeze, while quick flicks can produce stronger gusts when needed.
- Personal vs. Group Use: If you’re using the fan for yourself, hold it close to your face for immediate relief. In a group setting, hold it high and swing it back and forth for everyone to enjoy a cool breeze.
- Combine with Movement: While you can stand still and fan yourself, adding some movement can increase airflow. Try walking or dancing while fanning to create a refreshing breeze for yourself and those around you.
- Use in Pairs: To make it more fun, consider using two fans at once. This not only provides more airflow but also adds a playful element to any gathering.
- Accessorize: Consider pairing your fan with other fun items, like colorful sunglasses or hats, to create a festive look at parties or picnics.
In essence, the best way to use your paper wind fan is to be creative and enjoy the process. The more you play around with it, the more ways you’ll find to effectively cool down or entertain yourself and others!
Also Read This: Ultimate Guide to Downloading Videos from Dailymotion on iPad
6. Creative Ideas and Variations for Paper Wind Fans
Creating a paper wind fan is just the beginning! There are endless opportunities to get creative and personalize your fans to make them truly unique. Here are some exciting ideas and variations you can try:
- Colorful Patterns: Use patterned paper, scrapbook materials, or even paint to design your fan. The result is not only functional but a work of art!
- Themed Fans: Tailor your fans to specific themes. For example, during a sports event, use your team’s colors and logo to boost team spirit. For a beach day, use seashell patterns.
- Personalized Gifts: Handmade fans make great gifts! Personalize them by writing sweet messages or adding photos. Perfect for birthdays, anniversaries, or even just to say "I'm thinking of you!"
- DIY Fan Kits for Kids: Create a DIY kit for kids including colorful paper, handles, and decorative stickers. This not only entertains them but also encourages creativity and fine motor skills.
- Add Mechanics: For a more advanced project, attempt to add a simple mechanical element. A small motor can power a fan, transforming your paper creation into a cool gadget!
- Seasonal Designs: Celebrate the seasons with themed fans! For spring, use floral designs; for fall, choose warm colors like orange and brown; and for winter, think frosty or snowy aesthetics.
With these creative ideas, your paper wind fans can go from simple cooling devices to personalized, fun, and artistic pieces. Enjoy the process, and let your imagination run wild! Happy crafting!
Conclusion: Enjoy Your DIY Paper Wind Fan
Congratulations on creating your very own paper wind fan! This fun and easy project not only enhances your crafting skills but also provides you with a unique, personalized fan that you can proudly show off. Here are a few final tips to make the most out of your DIY creation:
- Decorate Your Fan: Feel free to add stickers, drawings, or colorful designs to make your fan a true reflection of your style.
- Stay Cool: Use your wind fan on hot days or during relaxing activities like reading outside or picnicking.
- Gift It: Consider making additional fans as gifts for friends and family. A handmade gift adds a personal touch that many will appreciate.
Additionally, remember to share your creation on social media! You can inspire others to get crafty and create their own paper wind fans. Don’t forget to use eco-friendly materials whenever possible to make your project sustainable.
Enjoy the fruits of your labor while keeping cool, and let your imagination soar as you experiment with different designs and colors for future fans!
 admin
admin


