Welcome to the world of Getty Images! If you're a photographer, videographer, or artist looking to share your work, you've come to the right place. Getty Images is a leading platform that connects creative content with those who need it. Whether you're an established professional or just starting, Getty provides a vast audience eager to discover your unique images. In this guide, we’ll walk you through everything you need to know about uploading your images to this fantastic platform.
Why Upload Your Images to Getty Images?
Uploading your images to Getty Images can be a game-changer for your creative career. Let’s dive into some compelling reasons why you should consider this opportunity.
1. Global Exposure: Getty Images boasts a vast network of customers, including major media outlets, advertising agencies, and businesses worldwide. When you upload your images, you’re not just sharing them with a few friends or followers—you’re putting your work in front of a global audience that includes brands looking for professional, high-quality content.
2. Monetization of Your Work: One of the primary benefits of being a contributor to Getty Images is the potential for earnings. As a contributor, you earn royalties every time someone licenses your images. Depending on the type of license, you could receive different percentages of the sale price. This means your passion for photography can also become a source of income!
3. Professional Credibility: Being associated with a reputable brand like Getty Images adds a layer of credibility to your work. Customers recognize Getty as a leading provider of visual content, which can enhance your reputation as a photographer. This is especially valuable if you’re just starting, as it can lead to more opportunities and collaborations.
4. Easy-to-Use Platform: Getty Images provides a user-friendly interface for uploading and managing your images. The process is straightforward, making it accessible for beginners. Once you understand the steps, you can easily navigate the platform to showcase your portfolio.
5. Industry Insights: Once you become a contributor, you may also gain access to valuable information regarding industry trends, popular content types, and customer preferences. This kind of insight can help you refine your skills and produce content that meets the demands of the market.
In conclusion, uploading your images to Getty Images is more than just sharing your creativity; it’s an investment in your career. With the potential for income, global exposure, and the chance to build your professional reputation, Getty is a fantastic platform for visual artists. So let’s get started on how to upload your images effectively!
Also Read This: How to Caption Getty Images Correctly
3. Creating a Getty Images Account

So, you’re ready to dive into the world of Getty Images? That’s fantastic! Before you can start uploading your images, you'll need to create an account. This process is quick and straightforward. Let’s break it down step-by-step!
First, head over to the Getty Images website. You can do this by typing gettyimages.com into your browser. Once you’re on the homepage, look for the “Sign In” button in the top right corner. Yes, that’s right – you’re not logged in yet!
Now, instead of signing in, look for the “Join” button. This is where the magic happens. Click it, and you’ll be directed to a registration page. Here’s what you need to do:
- Provide Your Information: Fill out the required fields, including your name, email address, and a password. Make sure to choose a secure password that you can remember!
- Select Your Role: Getty Images offers several options like contributor, buyer, etc. For uploading images, select “Contributor.”
- Agree to Terms: Read through Getty’s terms and conditions (we know it’s long, but it’s important!) and the privacy policy. Once you're comfortable, check the box indicating your agreement. You can never be too careful!
Once you’ve completed all the fields, hit that glowing “Join” button. You’ll likely receive an email to verify your account – go ahead and click the link in that email to activate your account. Easy peasy, right?
Now that your account is set up, take a moment to explore the site. Familiarize yourself with the dashboard and settings; this will make your uploading process smoother later on. You’ve taken the first step into the exciting world of stock photography!
Also Read This: Why Designers Are Drawn to Imago Images for Premium Stock Visuals
4. Preparing Your Images for Upload
Congratulations on creating your Getty Images account! Now it’s time to prepare your images for upload. This is a crucial step because high-quality images attract buyers, and proper preparation can save you time during the uploading process. Let’s get started!
Here are some best practices to follow:
- Resolution Matters: Ensure your images are at least 300 DPI for print quality, which is vital for buyers. For web use, 72 DPI is acceptable, but higher resolutions will benefit you in the long run.
- Image Format: Use accepted file formats like JPEG or TIFF. JPEG is best for photography, while TIFF can be used for illustrations or graphics.
- Editing Your Images: Before uploading, consider editing your images. Adjust the brightness, contrast, and saturation to make your photos pop while staying true to reality. Tools like Adobe Lightroom or Photoshop can be very handy here.
- Organize Your Files: It’s a good idea to keep your files organized. Create folders on your computer for different categories of images. This will make uploading easier, especially if you have a large portfolio.
Don’t forget about the importance of metadata. This includes titles, descriptions, and keywords that describe your images. Properly tagging your images makes it easier for buyers to find what they’re looking for. Here’s how to do it:
| Metadata Type | Tips for Optimization |
|---|---|
| Title | Be concise but descriptive. Capture the essence of the image in a few words. |
| Description | Explain what the image depicts, its context, and any relevant details. |
| Keywords | Use relevant keywords that potential buyers might use to search for your image. Aim for 5-15 keywords. |
Finally, double-check your images for any flaws. Look out for noise, blurriness, or any distractions that could detract from the overall quality. If you adhere to these guidelines, you'll be well on your way to successfully uploading and selling your images on Getty Images. Happy uploading!
Also Read This: Understanding Contributor Earnings for Selling Photos on Alamy
5. How to Upload Images to Getty Images
Now that you're ready to share your fantastic images with the world, let’s dive into the actual uploading process on Getty Images. Don't worry; it’s straightforward! Just follow these steps, and you'll have your work online in no time.
Step 1: Log In to Your Contributor Account
First things first—head over to the Getty Images Contributor website and log in to your account. If you haven't created your account yet, make sure to complete that step before proceeding! Once logged in, you’ll be directed to your dashboard, where you’ll find various options.
Step 2: Click on 'Upload'
In your dashboard, look for the 'Upload' button. It’s typically prominently displayed, so you shouldn’t miss it. Click that, and get ready to start the magic of uploading your images!
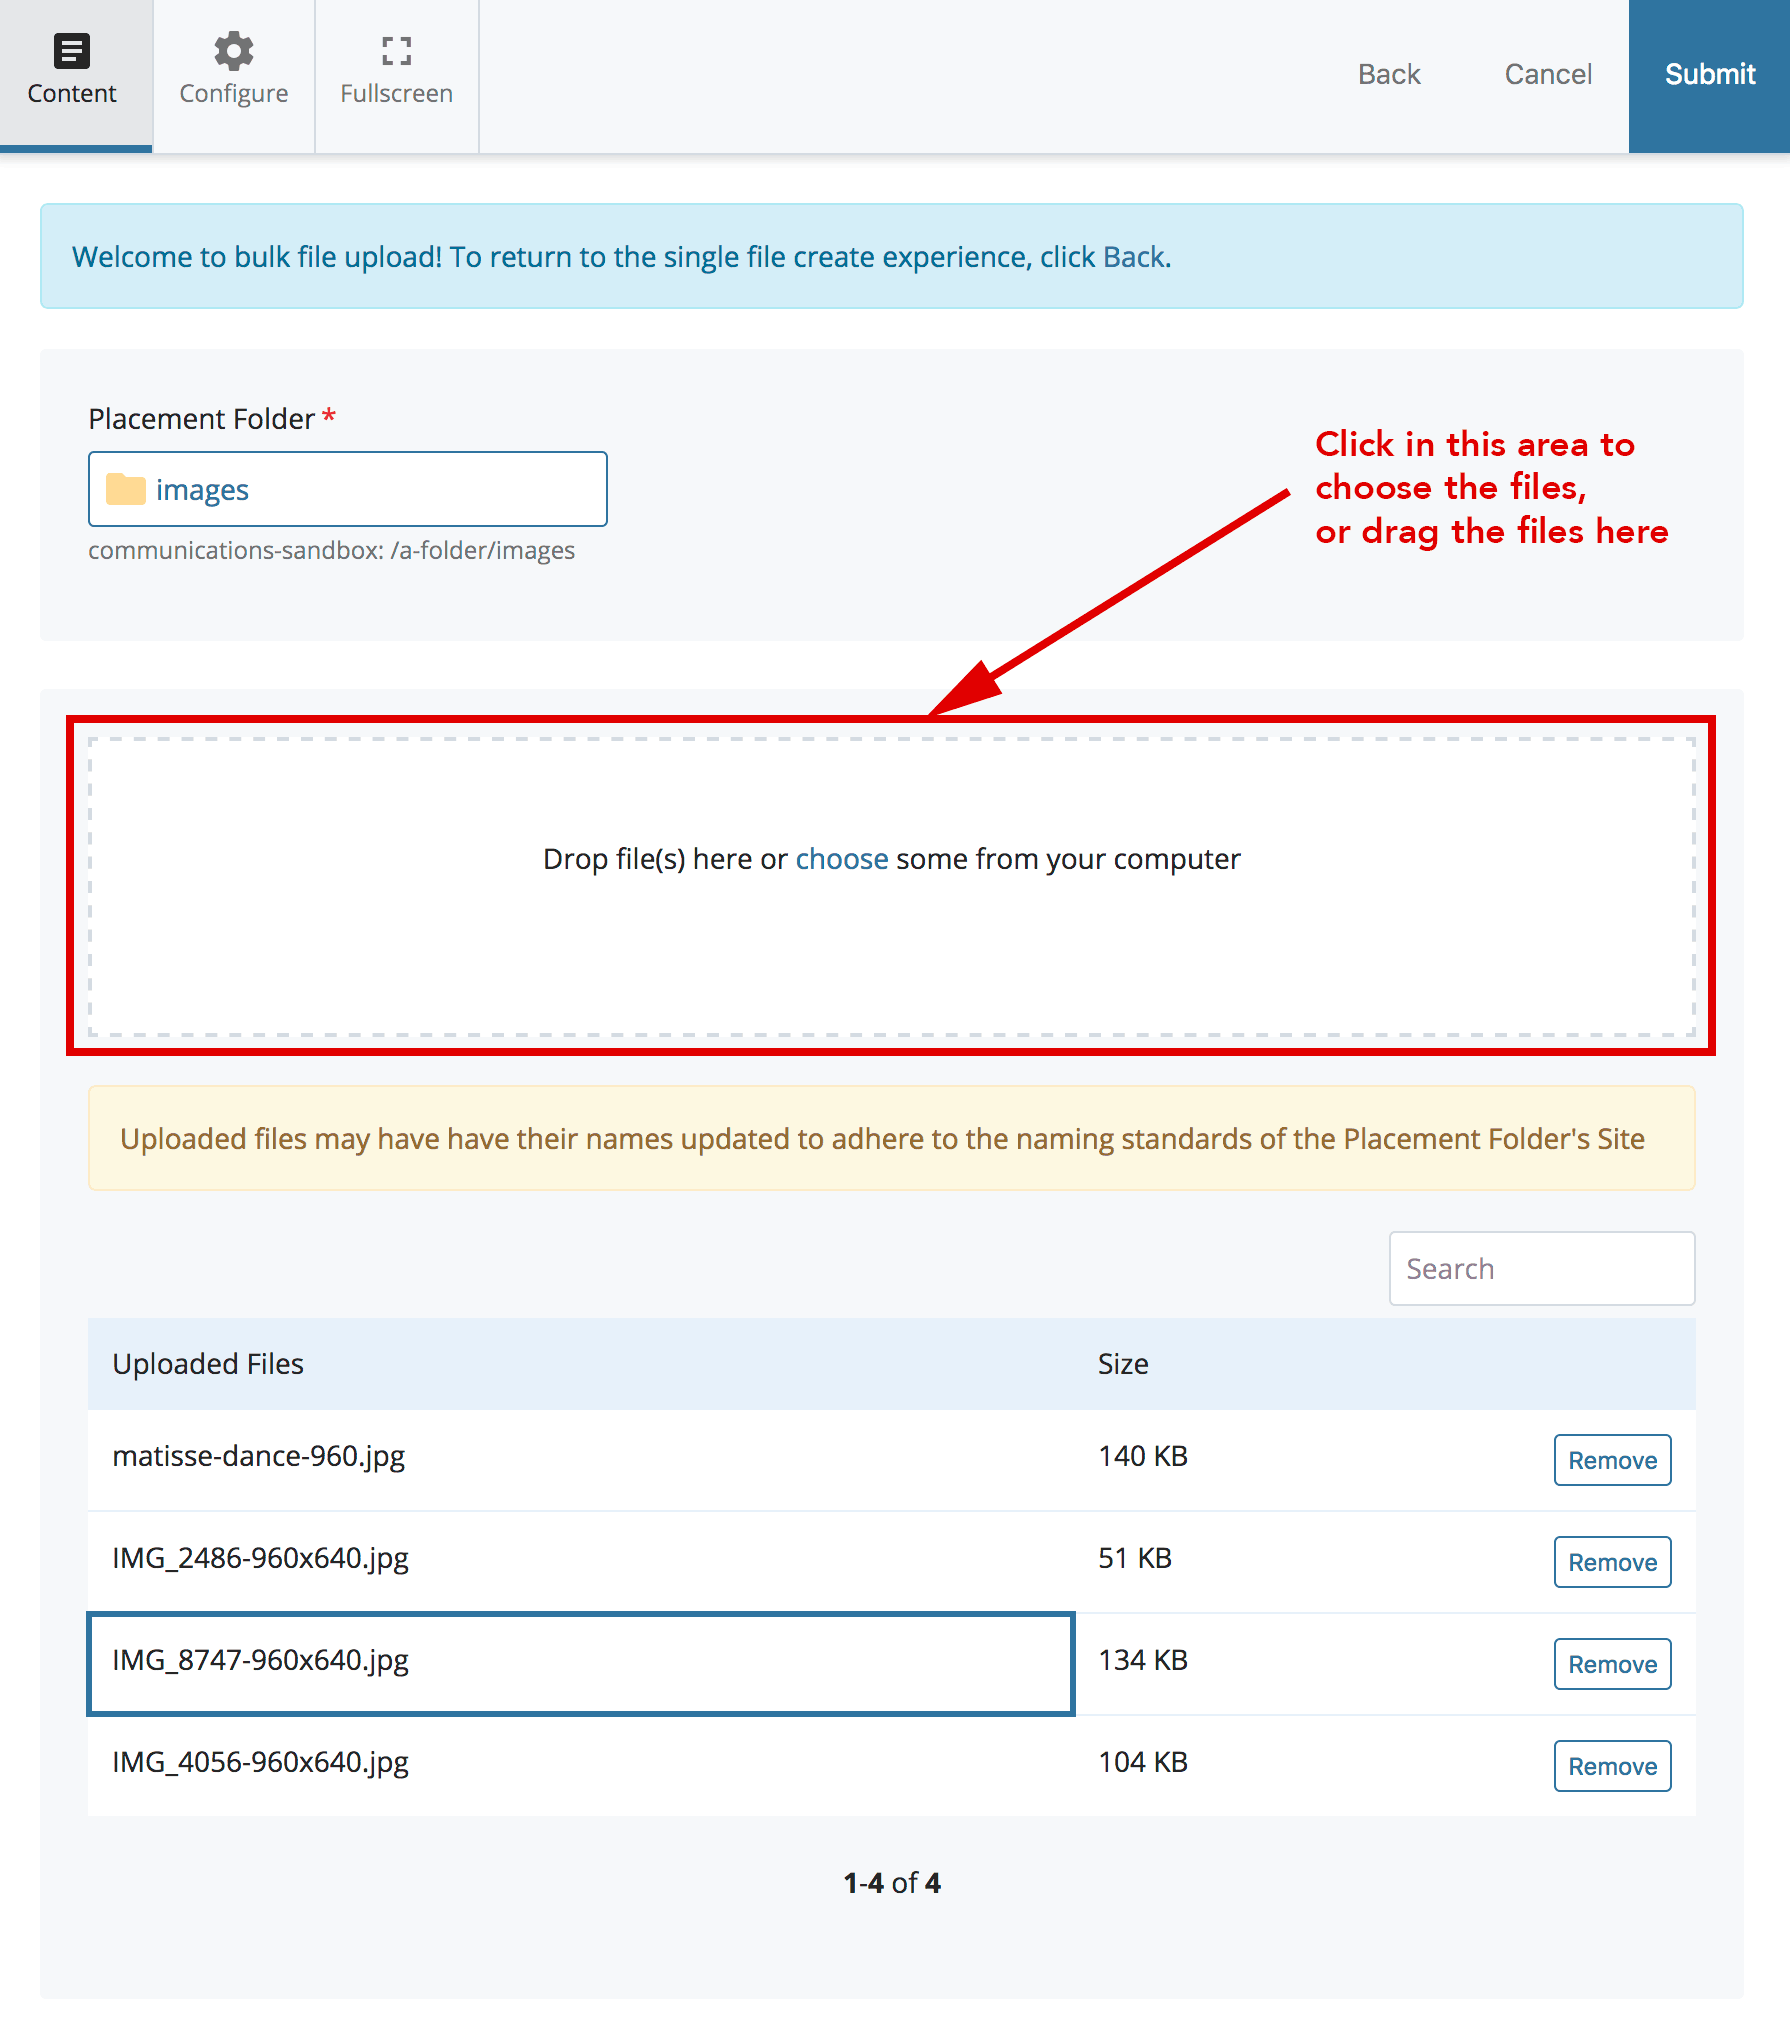
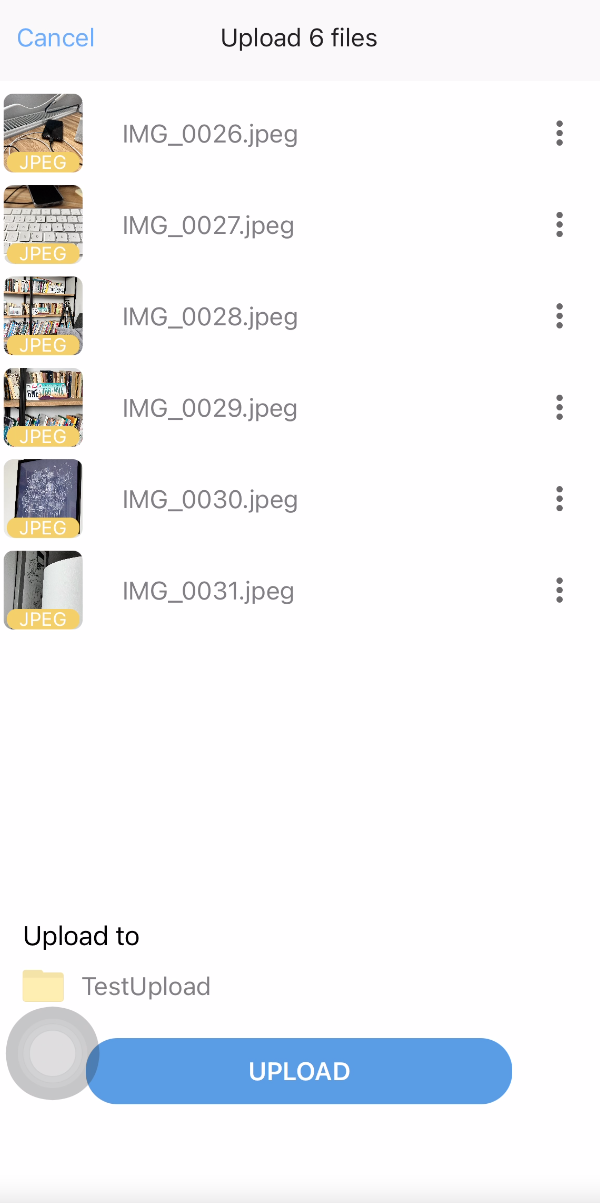
Step 3: Select Your Images
You can upload multiple images at once, which is super convenient. Simply drag and drop your images into the designated area, or click to browse your computer files. Make sure your images meet the required specifications—high resolution is key!
Step 4: Add Essential Information
Once your images are added, you’ll need to fill in some important details:
- Title: A catchy title that describes your image.
- Keywords: Tags that help potential buyers find your images easily.
- Description: A brief overview of the image, what it depicts, and any other relevant details.
Taking your time here can pay off in the long run. Good metadata makes your images more discoverable!
Step 5: Review Copyright and Model Releases
If your images contain recognizable people or private property, ensure that you have the necessary model and property releases. Getty may require these documents for your images to be accepted, so double-check that everything is in order.
Step 6: Submit Your Images
After completing the necessary uploads and filling in the details, it’s time for the final step—hit that “Submit” button! Your images will then be sent to the Getty Images team for review.
Also Read This: Selecting Images in Procreate
6. Understanding the Submission Process
So, you’ve just submitted your images. What happens now? Understanding the submission and review process can help ease any anxiety over waiting for feedback. Let’s break it down!
What Happens After Submission?
Once you submit your images, they enter Getty’s review queue. This can take anywhere from a few days to a couple of weeks, depending on their workload. During this time, your images are reviewed for quality, relevance, and adherence to guidelines.
Review Criteria
Getty Images looks at several factors before approving submissions:
- Image Quality: Is the photo sharp, well-composed, and properly exposed?
- Relevance: Does the image fit within the context of what Getty offers?
- Metadata Quality: Are your keywords and descriptions accurate and informative?
What Happens if Your Submission is Rejected?
If an image is rejected, dont panic! You’ll receive feedback explaining the reasons. This can range from technical issues to copyright concerns. Use this information to improve your future submissions. Remember, even the pros face rejections now and then!
Acceptances and Sales
When your images are accepted, they’ll be available for licensing on the Getty Images platform. The cool part? You’ll earn royalties every time someone uses your work, so keep an eye on your sales reports and celebrate those wins!
With this knowledge in hand, you're all set to upload your images and understand the submission process, making your journey with Getty Images smoother and more rewarding. Happy uploading!
Also Read This: Getty Images vs Alamy: Choosing the Right Platform for Selling Photos
7. Tagging and Categorizing Your Images
Once you've uploaded your images to Getty Images, the next crucial step is tagging and categorizing your images. This is essential not just for organization, but also for ensuring that potential buyers can find your work easily. Here’s how to make the most out of this process:
Why Tags Matter: Tags are keywords that describe the content of your image. They help in optimizing searchability, making it easier for customers to discover your photos. Think of tags as a way to connect your images to the right audiences.
Best Practices for Tagging:
- Be Specific: Use precise tags that describe what’s in the image. For example, instead of just tagging “dog”, consider “Golden Retriever playing fetch in a park.”
- Think Like a Buyer: Put yourself in the buyer's shoes. What keywords would they use when searching for an image like yours?
- Use Relevant Terms: Include terms related to emotions or themes your photo evokes. For instance, if your image conveys joy, use “happiness” or “celebration” as tags.
- Include Variations: Don’t hesitate to add variations of keywords. For instance, use both “landscape” and “nature scenery” to capture all potential searches.
Categorizing Your Images: Besides tagging, categorization plays a pivotal role in letting potential buyers know what they’re viewing. Getty Images offers various categories like:
- Editorial
- Creative
- Conceptual
- Food & Drink
- Travel
Choose the category that best fits your image. If your photo falls under multiple categories, select the most appropriate one initially to avoid confusion. Remember, a well-tagged and categorized image stands a much better chance of being sold!
Also Read This: How to Submit and Sell Images on Getty: A Complete Guide
8. Tips for Successful Image Uploads
Congratulations on reaching this stage! Now that you have uploaded and tagged your images, here are some tips to ensure your uploads stand out on Getty Images:
1. Quality Over Quantity: While it can be tempting to upload as many images as possible, focus on quality instead. High-resolution images that showcase your unique style will earn more attention than numerous mediocre shots.
2. Follow the Guidelines: Getty Images has specific guidelines regarding image resolutions, file formats, and content. Familiarize yourself with these rules to maximize your chances of acceptance. Always double-check file dimensions and other specifications before uploading.
3. Keep Current Trends in Mind: Pay attention to what types of photos are trending in the market. Use resources like Getty’s own blog or their social media platforms to understand what buyers are on the lookout for.
4. Use a Consistent Style: Developing a recognizable style can be a great asset. Whether it's through your choice of colors, subjects, or editing techniques, consistency helps in brand recognition.
5. Promote Your Work: Don’t underestimate the power of social media. Share your uploads on platforms like Instagram, Pinterest, and Facebook. Engage with your audience to create a buzz around your images.
6. Stay Inspired: Keep learning and improving your photography skills. Attend workshops, follow other photographers, and always be on the lookout for inspiration. The more you grow, the more your work will reflect that growth.
By incorporating these tips into your uploading strategy, you'll be setting your images up for greater success on Getty Images. Remember, patience is key! Monetizing your photography takes time, but with dedication and effort, you’ll get there!
Also Read This: How to Publish Photos on Getty Images: A Guide to Getting Your Work on the Platform
9. What Happens After You Upload Your Images?
So, you've successfully uploaded your stunning images to Getty Images—congratulations! But what happens next? It's important to understand the steps that follow your upload to set your expectations and ensure that your images get the exposure they deserve.
After you hit that upload button, here's a quick rundown of the process:
- Review by Getty: The first thing that happens is that your images undergo a review process. Getty's team of experts looks at the quality and content of your submissions to ensure they meet the platform's high standards.
- Metadata Tagging: Once accepted, your images will be tagged with relevant metadata. This includes details like keywords, descriptions, and categories. Proper tagging is crucial for improving discoverability, so it's beneficial if you’ve done the tagging accurately during your upload.
- Licensing Options: Getty Images offers various licensing options for users to buy your images. It’s handy to understand these, as it can influence how you price your content.
- Image Availability: After the review process, your images will be listed in Getty's extensive library. However, they might not become immediately visible to customers, as there can be a processing period.
- Sales Tracking: Once your images are live, you can monitor their performance through the Getty Images contributor portal. Here, you’ll find important metrics, including how many times your images have been viewed and how many sales have been made.
It's worth noting that uploading images to Getty isn’t just a one-time task. Regularly contributing new content improves your visibility on the platform. The more diverse and high-quality imagery you can provide, the better your chances of making a sale!
Lastly, don't be disheartened if you don't see immediate success. The stock photo market can be quite competitive. Keep an eye on industry trends, and remember that persistence is key.
10. Conclusion and Further Resources
And there you have it—a comprehensive step-by-step guide for new users on uploading images to Getty Images! By now, you should feel more confident in navigating the upload process and understanding what takes place once your images are on the platform.
Before we wrap things up, here are a few key takeaways:
- High-Quality Content is King: Always focus on uploading high-resolution, compelling images that follow Getty's guidelines.
- Metadata Matters: Properly tagging your images can significantly improve their visibility and usability.
- Stay Informed: The stock photography landscape is always evolving. Following trends can give you an edge!
If you want to explore more about stock photography and grow your skills, check out these resources:
- Getty Images Contributor Portal: Your one-stop shop for managing your uploads and sales.
- Stock Photography Blog: Read articles and tips from industry experts.
- Creative Bloq - Selling Photos Online: A beginner’s guide to photography sales channels beyond Getty Images.
So, go ahead, start that journey with Getty Images, and get your work out there. Practice makes perfect, and the more you shoot and upload, the better your chances of success. Happy photographing!
 admin
admin


