Have you ever wanted to enhance your Google Slides presentations by making images transparent? It’s a fantastic way to add depth and visual interest to your slides. Transparency can soften an image, highlight other elements, or make text overlay more readable. In this guide, I’ll walk you through the process of making images transparent in Google Slides, exploring both the how and the why behind this effective technique. Let’s dive in!
Why Use Transparent Images in Your Presentations?
Using transparent images in your presentations is more than just a stylistic choice—it's a powerful tool that can significantly enhance your visual storytelling. Here are some reasons why incorporating transparency can be a game changer:
- Improved Readability: Text overlays can often get lost in busy images. By making the background images transparent, you can create a clear hierarchy where your text stands out.
- Subtle Backgrounds: Transparent images can serve as subtle backgrounds that complement your content without overpowering it. This is especially helpful in maintaining focus on the main message of your slide.
- Visual Harmony: Achieving balance in design is essential. By adjusting the transparency of images, you can create a more cohesive look across your slides, ensuring that elements feel connected.
- Creative Effects: Transparency allows you to get creative! You can layer images, combine them, or even use them as textures. The possibilities are endless when you play with transparency.
- User-Friendly Design: Whether you're preparing a presentation for school, work, or personal projects, using transparent images makes your slides more visually appealing and user-friendly.
When it comes to creating impactful presentations, less can often be more. Transparent images are an effective way to declutter your slides while adding depth and dimension. They help communicate your message more effectively and keep your audience engaged.
So, if you’re looking to elevate your Google Slides presentations and ensure that every element works harmoniously together, consider incorporating transparency into your images. It’s a simple yet effective technique that can transform your slides from ordinary to extraordinary!
Also Read This: how to change color of an image in illustrator
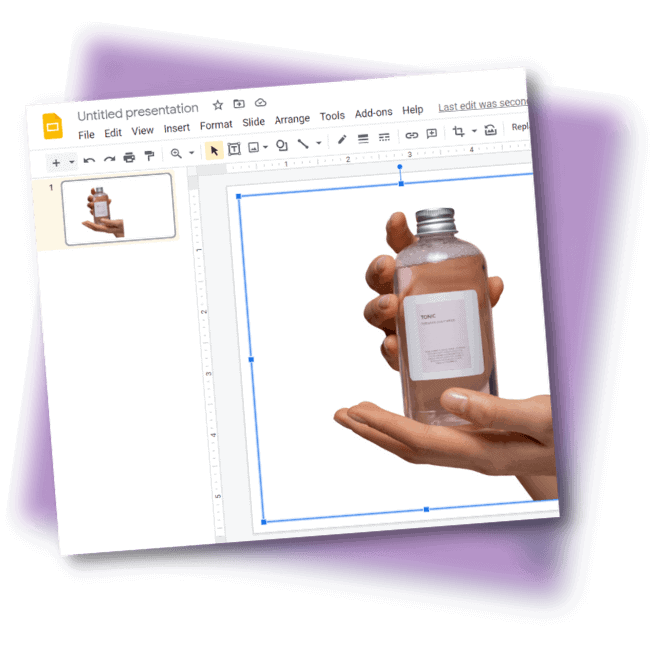
3. Step-by-Step Guide to Making an Image Transparent
Making an image transparent in Google Slides is super easy, and once you get the hang of it, you can give your presentations a polished and professional look. Let’s dive into the steps to make an image transparent:
- Open Your Google Slide: Start by launching Google Slides and opening the presentation where you want to add or edit an image.
- Add an Image: Click on the “Insert” tab in the top menu, then select “Image.” You can choose to upload from your computer, take a snapshot, or insert from the web. Once you find the image you want, click “Open” or “Select.”
- Select the Image: After adding the image, click on it to select it. You should see small blue boxes around the edges, indicating that it’s active.
- Go to Format Options: With the image selected, right-click on it and choose “Format options.” A panel will appear on the right side of your screen.
- Find the Transparency Slider: In the Format options sidebar, look for “Adjustments.” This section contains various settings, including “Transparency.”
- Adjust the Transparency: You’ll see a slider labeled “Transparency.” Move this slider left or right to increase or decrease the transparency of your image. As you adjust it, keep an eye on the image to see how it changes in real-time.
- Finalize Your Image: Once you’re happy with the transparency level, click anywhere outside the Format options panel to close it. Your image will now be part of your slide with the desired transparency.
And voilà! You’ve successfully made an image transparent in Google Slides! This technique is especially useful for creating backgrounds that don’t distract from your text or other elements. Use it wisely, and your presentations will stand out!
Also Read This: Identifying Valuable Editorial Photos on Imago Images
4. Adjusting Image Transparency with Format Options

Now that you know how to make an image transparent, let’s talk about some additional adjustments you can make using the Format Options panel. Understanding how to tweak these settings will help you create even more visually appealing slides.
Besides transparency, the Format Options panel in Google Slides offers several other image adjustments, including:
- Brightness: Change how light or dark your image appears. This can help your image blend better with the overall design of your slide.
- Contrast: Adjust the difference between the lightest and darkest parts of your image. Increasing contrast can make images pop, while decreasing it can create a softer look.
- Saturation: Modify the intensity of colors in your image. Lower saturation can give your image a muted look, while increasing it can enhance vibrant colors.
Here’s how to adjust these settings:
- Access the Format Options: After selecting your image, right-click and choose “Format options” as mentioned earlier.
- Experiment with Adjustments: Under the “Adjustments” section, you’ll see sliders for Brightness, Contrast, and Saturation. Play around with these sliders to see how they affect your image.
It's all about finding a balance that aligns with your slide's theme and keeps your audience focused on the important content. Don’t hesitate to try different combinations of adjustments until you achieve the look you want!
Remember, good presentations balance aesthetics and functionality. With a little experimentation, you can make your images work harder for you without cluttering your slides. Happy presenting!
Also Read This: Comprehensive Guide to Extracting Subtitles from Dailymotion Videos
5. Using the Color Tool for Custom Transparency Settings
If you're looking for more control over your image transparency in Google Slides, the Color tool is your new best friend. This handy option not only allows you to adjust transparency but also gives you the chance to play with color settings, helping your transparent images blend seamlessly into your slide's background.
Here’s how to get started:
- Select Your Image: Click on the image you want to modify. Once selected, the image will show a border, indicating that it is active.
- Open the Format Options: Right-click on the image and choose Format options from the context menu. This will open up a sidebar on the right of your screen.
- Navigating to Transparency: In the sidebar, find the Adjustments section, where you'll notice an option for Transparency.
- Adjusting Transparency: Use the slider to increase or decrease the transparency level of your image. Sliding to the right will make your image more transparent, while sliding to the left will make it more opaque. You can see the changes in real time, which is super helpful for assessing how it looks against your background.
Along with transparency, you might also want to explore other options here in the Color tool. For example, you can:
- Adjust Brightness: Enhance or dampen the brightness of the image to make it pop or blend.
- Modify Contrast: Increase or decrease the contrast to focus attention on certain elements within the image.
- Apply Color Filters: Change the hue or saturation to match your branding or theme better.
These adjustments can create a visually cohesive slide, making your presentation not just informative but also stunningly appealing. Experimenting with these features will give you a deeper understanding of how your pictures can serve the message you want to convey!
Also Read This: How to Download Resume from Linkedin
6. Tips for Creating Visually Appealing Slides with Transparent Images
Now that you’ve grasped how to make images transparent in Google Slides, let’s dive into some tips that will help you create visually striking slides that grab attention and hold it!
Here are some pointers to consider:
- Consistency is Key: When using transparent images, make sure they align with your overall theme. Use similar transparency levels and styles throughout your presentation to maintain a professional look.
- Contrast Matters: Ensure there’s enough contrast between your background and your transparent images. If a picture is too faded, it may become lost in the background. Use colors that complement your transparency levels.
- Focus on the Message: Always ask yourself what the primary takeaway from each slide is. Use transparency to highlight key points rather than distract from them. A subtle background image can enhance your message without overwhelming it.
- Simple Layouts Work Best: Cluttered presentations can confuse your audience. Keep your slides clean by limiting the number of images and text. Transparent images work best when they’re part of a streamlined design.
- Test Your Presentation: Before finalizing, run through your slides in presentation mode. This allows you to see exactly how your transparency adjustments look in context and make any necessary tweaks.
With these tips, you’ll be on your way to crafting presentations that are not only informative but visually attractive as well. Remember, the goal is to keep your audience engaged while effectively communicating your message. Happy presenting!
Also Read This: How to Sell on 123RF: A Step-by-Step Guide for Photographers
7. Common Issues and Troubleshooting Transparency in Google Slides
If you’ve ever tried making an image transparent in Google Slides and encountered issues, don’t worry—you’re not alone! Here are some common problems you might face, along with simple solutions to troubleshoot them:
- Image or Shape Not Responding: Sometimes, you might find that the image doesn’t seem to get more transparent, no matter how low you set the transparency level. This typically happens when the image is locked or grouped with other elements. Make sure to ungroup or unlock the image first before trying again.
- Too Much or Too Little Transparency: It’s easy to misjudge how transparent an image should be. If it’s too transparent, you may lose the detail. Conversely, if it’s not enough, it can look out of place in your design. Try adjusting the transparency incrementally and previewing the overall slide to find the perfect balance.
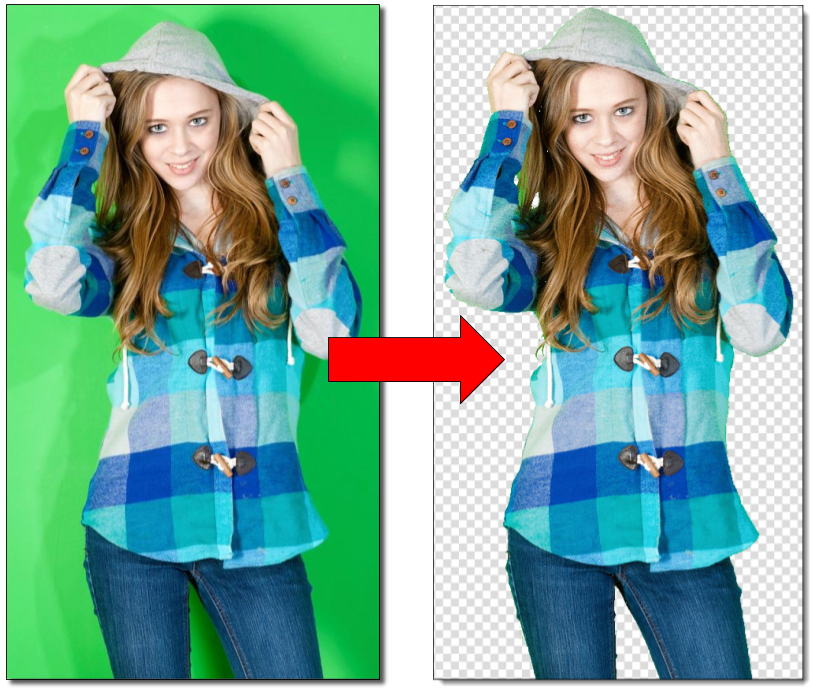
- Image Format Issues: Certain image formats may not work well when trying to adjust transparency, especially if they contain a solid background. If you notice this issue, consider using images with a transparent background (like PNGs) or editing your image in a photo-editing tool to remove non-transparent sections.
- Browser Compatibility: Occasionally, browser issues can interfere with Google Slides’ functions. If you experience glitches, try refreshing the page or switching to a different browser. Google Chrome and Firefox usually offer the best compatibility with Google applications.
- Missing Transparency Option: If you can’t find the transparency setting, ensure your image is selected. Click on the image, and then look for the “Format options” which should be available in the toolbar or menu. It’s easy to overlook this step if you’re new to Google Slides.
By keeping these troubleshooting tips in mind, you can swiftly address any problems that arise and continue enhancing your Google Slides presentations with beautiful transparent images. Don’t hesitate to experiment with different images and transparency levels until you find what works best for your design!
8. Conclusion: Enhancing Your Presentations with Transparency
In conclusion, mastering the art of transparency in Google Slides can truly elevate your presentations to the next level. It’s not just a nifty trick; it’s a powerful design tool that can help create a layered and professional look. Here are a few final thoughts on integrating transparency into your slides:
- Visual Storytelling: Transparency can help highlight key messages and create a visual narrative. By using transparency thoughtfully, you can ensure that your audience’s focus remains on important content.
- Brand Consistency: If you’re representing a brand, consider using brand colors and images with a consistent level of transparency. This helps reinforce brand identity while maintaining a sleek look.
- Experimentation is Key: Don’t be afraid to play around with different images and transparency levels. Some of the best designs come from trying things out and seeing what feels right. Just remember to keep it harmonious with your overall slide design.
- Seek Feedback: Once you’ve applied transparency to your images, share your slides with a friend or colleague. Fresh eyes can offer valuable feedback on whether the transparency enhances or detracts from your presentation.
- Regular Updates: Lastly, remember that Google Slides is a continually evolving platform. Stay updated with new features and improvements that Google adds, as they may provide even better tools for enhancing transparency.
Ultimately, being able to incorporate and manipulate transparency in your slides can lead to more dynamic and visually interesting presentations. As you grow more comfortable using this feature, your capacity for creativity will expand, allowing you to engage and captivate your audience even more effectively. Happy presenting!
 admin
admin


