Uploading videos to YouTube using your iPhone is easier than ever! Whether you're sharing your latest adventure, a tutorial, or a vlog, you can do it all from your device. In this guide, we'll walk you through the simple steps to get your videos online quickly and efficiently. Let’s dive in and get your content out there for the world to see!
Preparing Your Video for Upload
Before you hit that upload button, it's essential to prepare your video to ensure it looks great and reaches your audience effectively. Here are some straightforward steps to help you get ready:
- Choose the Right Video: Make sure your video is edited and ready to go. You can use the built-in Photos app on your iPhone to trim, crop, or enhance your video.
- Resolution and Quality: YouTube supports various resolutions, but for the best user experience, aim for at least 1080p HD quality. To check your video’s resolution in the Photos app, tap on the video, then swipe up to see information about it.
- Video Format: You should have your video in an accepted format. The most common formats for YouTube uploads include MP4, MOV, and AVI. The iPhone typically saves videos as MOV or HEVC, which are compatible.
After ensuring your video meets these criteria, think about the following enhancements:
- Thumbnails: Thumbnails are essential for attracting viewers. Although YouTube generates a default thumbnail, you might want to create a custom one. You can use apps like Canva or Adobe Spark on your iPhone to design a catchy thumbnail that represents your video.
- Titles and Descriptions: Prepare a clear and engaging title for your video, as well as a description to give viewers context. Think about keywords that relate to your content so that it's easier to find through search.
- Tags: Tags help YouTube understand the content of your video better. Including relevant tags can improve your video's discoverability on the platform.
Lastly, consider the audio quality. If your video contains dialogue, ensure that it's clear and easy to understand. If needed, you can enhance audio using editing apps like iMovie or GarageBand to boost clarity or background music.
By following these steps, you’ll ensure that your video is upload-ready and set for maximum engagement. Now, it’s time to move on to the actual uploading process once you’ve polished your content!
Also Read This: How Many Viewers Does Dr Disrespect Get on YouTube and What’s His Audience Size?
3. How to Access the YouTube App on Your iPhone
Before you can upload your amazing video to YouTube, you first need to make sure the YouTube app is installed on your iPhone. Luckily, accessing it is a breeze! Here’s how you can get started:
- If You Don’t Have the YouTube App: Open the App Store on your iPhone. In the search bar, type “YouTube” and press search. You’ll see the official YouTube app listed.
- Download the App: Tap on the “Get” button next to the app icon. Depending on your settings, you may need to enter your Apple ID password or use Face ID/Touch ID to confirm the download.
- Open the App: Once the app has been installed, tap “Open”, or simply find the YouTube icon on your home screen and click it to launch the app.
After you’ve successfully opened the app, you’ll be welcomed by a vibrant interface where you can explore videos, subscribe to your favorite channels, and most importantly, upload your own content!
Don’t forget to sign in with your Google account. If you don’t have one, you’ll need to create one in order to upload videos! Just tap on the user icon at the top right corner of the app and follow the prompts to log in or create a new account. This is crucial because your video will need to be linked to your account.
And there you have it! You’re now ready to dive into the uploading process. It's as simple as getting comfortable with your app — so let’s get moving!
Also Read This: A Beginner’s Guide to Splicing Videos on YouTube
4. Steps to Upload Your Video to YouTube
Ready to share your creativity with the world? Here are the easy steps to upload your video to YouTube using your iPhone!
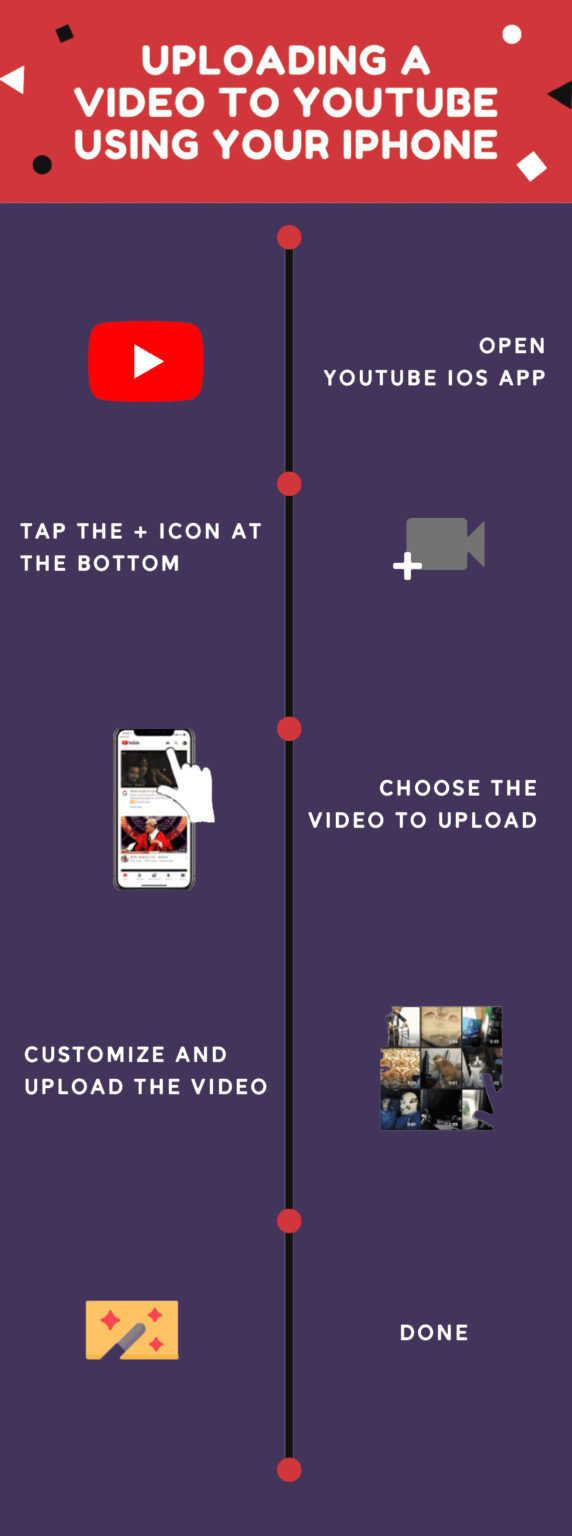
- Open the YouTube App: If you’ve just followed the steps to access the app, you should still have it open. If not, go ahead and tap on the icon to open it.
- Tap the + Button: Look for the “+” icon, usually located at the bottom center of your screen. This is your gateway to uploading content.
- Select Upload Video: After tapping the “+” icon, you’ll see options like “Create a Short,” “Go Live,” and “Upload a Video.” Select “Upload a Video.”
- Choose Your Video: You’ll be directed to your camera roll. Here, you can either select a pre-recorded video or take a new video by tapping the camera icon. Once you’ve made your choice, tap “Next.”
- Add Details: This is where the fun begins! Enter a catchy title, description, and tags to help your video get discovered. You can also select your video’s privacy settings—public, unlisted, or private.
- Thumbnail Selection: You can choose a thumbnail image from the provided options or upload a custom one that reflects your video best. First impressions matter! A good thumbnail can increase your video's views.
- Advanced Settings: If you want to set comments or age restrictions, tap on “Advanced Settings.” Otherwise, you can skip this step.
- Hit Upload: Once everything looks good, tap the “Upload” button. Your video will start processing and uploading. Depending on the size, this might take a few moments. Don't worry; you can keep using your iPhone while it uploads!
- Celebrate Your Achievement: Once the upload is complete, you’ll receive a notification, and your video will now be live for all to see!
That’s it! You’ve just uploaded your first video to YouTube using your iPhone. Now, sit back, relax, and watch those views roll in. Don’t forget to share the video with friends and followers!
Also Read This: How to Hide Likes on YouTube for a More Private Viewing Experience
5. Tips for Optimizing Your Video for YouTube
Okay, so you've successfully recorded and uploaded your video. But hold on—just because it’s on YouTube doesn’t mean it will automatically get views. To really make your content shine and attract viewers, you’ll want to optimize your video. Here are some easy and effective tips to consider:
- Create an Eye-Catching Thumbnail: Your video’s thumbnail is like its storefront. A vibrant, appealing thumbnail can significantly increase your click-through rate. Use bold text and dynamic imagery. Consider using tools like Canva to design one if you’re not a pro at graphic design!
- Write a Compelling Title: Make sure your video title is catchy yet informative. It shouldn’t just be appealing; it should also include relevant keywords that people are searching for. For example, instead of “My Fun Day Out,” try “Top 10 Places to Visit in NYC – A Fun Day Out!”
- Include Relevant Tags: Tags help YouTube understand the context of your video. Use a mix of broad and specific tags related to your content. For instance, if you uploaded a cooking video, tags like “cooking,” “easy recipes,” and “quick meals” would be beneficial.
- Craft a Detailed Description: The description is your chance to give viewers more context about your video. Include keywords naturally but remember to write in a conversational tone. Add links to your social media, website, or related videos to keep viewers engaged.
- Engage with Your Audience: Don’t forget about your audience! Ask viewers to like, comment, and subscribe to encourage engagement. Also, respond to comments and questions, which can foster a community around your channel.
- Use End Screens and Cards: These tools allow you to promote other videos or link to your website. They can keep viewers on your channel longer, so utilize them to guide your audience’s next steps.
- Consider Your Video Length: While YouTube supports long content, aim for a balanced length. Focus on quality over quantity. Shorter videos (around 5-10 minutes) perform well, but make sure you maintain viewer interest throughout.
Optimizing your video may take some extra time, but it’s worth it! With better visibility and engagement, you’ll boost your chances of reaching a wider audience. So, roll up your sleeves and get to work on making that video a hit!
Also Read This: How Long It Takes to Upload a YouTube Video and Time Factors Explained
6. Checking the Upload Status and Settings
Now that you've uploaded your video, it’s essential to keep an eye on the upload status and settings. You want to ensure everything is set up just right for your audience. Here’s how to do it:
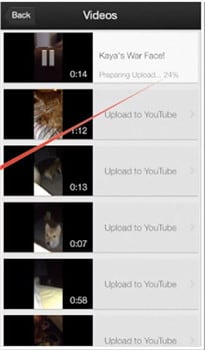
- Check the Upload Status: After uploading, you’ll see a progress bar indicating how much of the video has been uploaded. If you’re using the YouTube app on your iPhone, you can stay on the app or even get notifications to let you know when it’s done.
- Review Video Settings: Once the video is uploaded, tap on the video to check its settings. Head to the “Edit” option where you can adjust the title, description, and tags. Make sure everything looks good before going live!
- Set Privacy Settings: Decide if you want your video to be public, unlisted, or private. If you’re not quite ready to share it with everyone yet, setting it to unlisted can be a good option. This way, you can share the link with friends or colleagues while keeping it away from the broader audience.
- Ensure Monetization Settings (if applicable): If you're part of the YouTube Partner Program, check your monetization settings. Make sure that ads are allowed on your video, so you can start making some money!
- Schedule for Later (Optional): If you want to build anticipation, consider scheduling your video for a later time. This is especially useful if you want to coordinate a launch or event.
Finally, take a deep breath and give yourself a pat on the back! You've done the hard work of creating, editing, and uploading your video. Now, sit back and wait to see how your creation will perform. You might just be surprised by the response!
Conclusion
In conclusion, uploading videos to YouTube using your iPhone is a straightforward process that can be accomplished in just a few easy steps. Whether you're sharing precious moments, tutorials, or creative content, the YouTube mobile app makes it accessible and user-friendly. By following the outlined steps:
- Open the YouTube app and sign into your account.
- Tap the camera icon to start uploading your video.
- Select the video you wish to upload from your camera roll.
- Edit your video by adding titles, descriptions, and tags.
- Choose your privacy settings to control who can view your video.
- Tap 'Upload' to share your creation with the world.
These simple steps can help you quickly share your content and connect with a larger audience. Remember to engage with your viewers by responding to comments and updating your channel regularly. Happy uploading!
 admin
admin


