Welcome to the enchanting world of butterfly crafts! If you’ve ever been captivated by the delicate beauty of butterflies, then crafting your very own cloth butterflies is a delightful way to channel that admiration. Not only are these crafts a fantastic way to express your creativity, but they also make for wonderful decorations, gifts, or even educational tools for kids. So, whether you're a seasoned crafter or a complete novice, you’ll find joy in shaping these colorful creatures. Let’s spread our wings and take the first fluttering steps into this creative adventure!
Materials Needed for Your Cloth Butterflies
Before we dive into creating our charming cloth butterflies, let’s gather the essential materials. Having everything on hand not only makes the crafting process smoother but also more enjoyable. Here’s what you'll need:
- Fabric: Choose colorful cotton or felt. Fabric scraps work perfectly for this project!
- Scissors: A good pair of fabric scissors will make cutting easier and cleaner.
- Fabric Glue or Hot Glue Gun: For securing the layers and details.
- Embroidery Thread and Needle: Great for adding decorative stitches or embellishments.
- Pencil or Fabric Marker: Useful for tracing your butterfly design onto the fabric.
- Wire or Pipe Cleaners: Perfect for creating the butterfly's body and antennae.
- Beads, sequins, or buttons: To add a touch of sparkle and personality to your butterflies.
- Cardboard or Stiff Paper: For making butterfly templates or adding structure.
Optional but recommended items include:
- Iron: To smooth out any fabric wrinkles before you begin.
- Fabric Paints or Markers: If you want to add personalized designs or patterns on your butterflies.
Once you’ve collected your materials, you’ll be ready to embark on this fun and creative journey. Remember, crafting is all about experimentation and fun, so don’t stress too much about perfection. Let your imagination take flight!
Also Read This: How to Make a Projector at Home with This Easy DIY Guide
3. Step-by-Step Instructions for Making Cloth Butterflies
Ready to dive into crafting? Making cloth butterflies is not only a delightful activity for adults but also a fantastic project for kids. Let’s get started with our step-by-step guide to help you create your very own fluttering friends!
What You’ll Need:
- Fabric scraps (cotton works best)
- Scissors
- Fabric glue or a hot glue gun
- Wire (floral wire or thin gauge wire)
- Buttons, beads, or sequins (for decoration)
- Markers or fabric paint (optional)
- Thread and needle (optional)
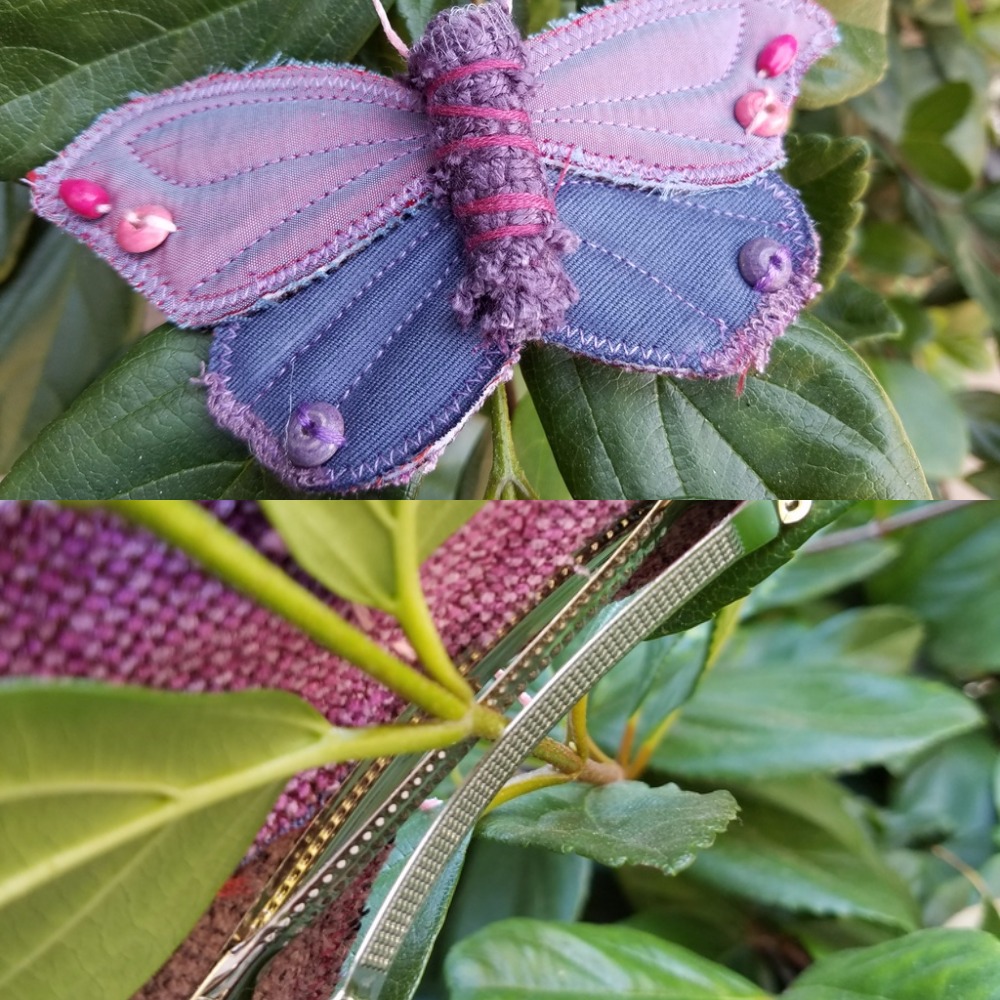
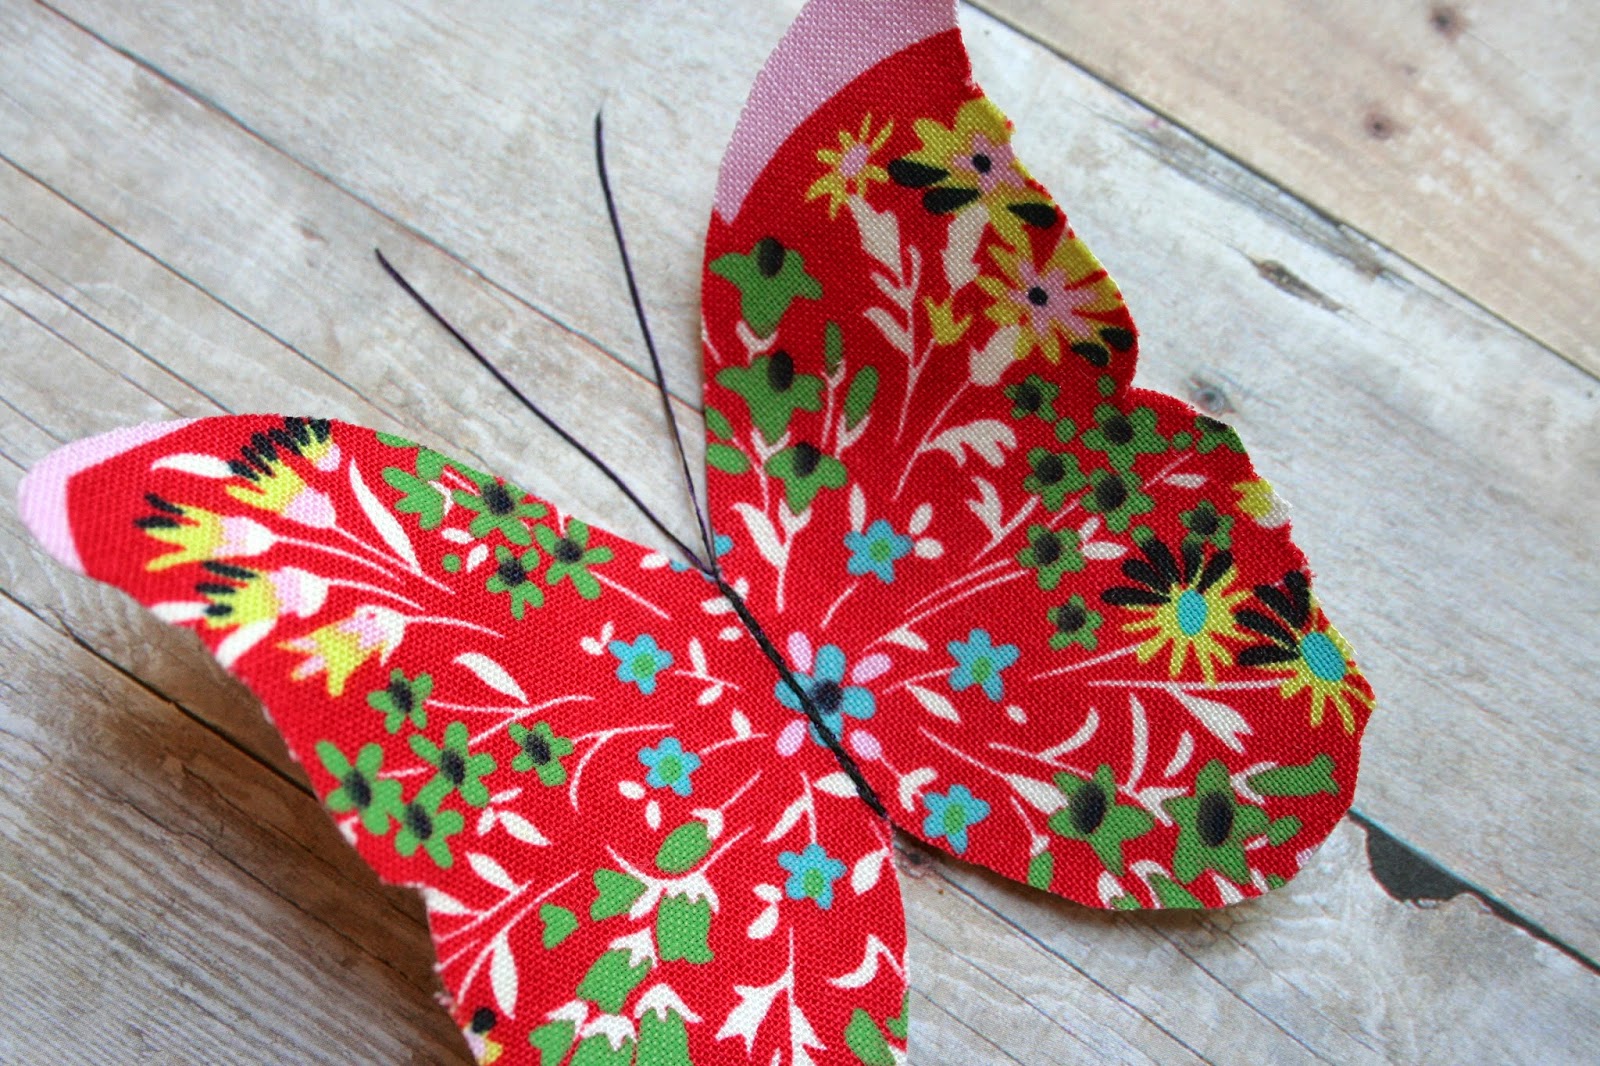
Step 1: Cutting Out the Fabric
Start by cutting out the fabric into two butterfly wing shapes. Each wing should be a bit larger than the desired final butterfly size since we'll be folding it over later. Aim for shapes that resemble traditional butterfly wings, which are typically wider at the tops and narrower at the bottom.
Step 2: Create the Butterfly Body
Using the wire, cut a piece that is about 4-6 inches long for the butterfly body. This will be the central support for your wings.
Step 3: Assembling the Wings
Now, take one wing and lay it out flat. Place the wire in the center, then fold the fabric over the wire, pinching it together to create the body of the butterfly. Secure this fold using fabric glue or a hot glue gun, allowing it to dry completely for a sturdy structure.
Step 4: Adding the Second Wing
Repeat the previous step with the second wing, ensuring that it mirrors the first one. Pinch it around the wire and glue it in place. Don’t worry about making it perfect; each butterfly will have its own character!
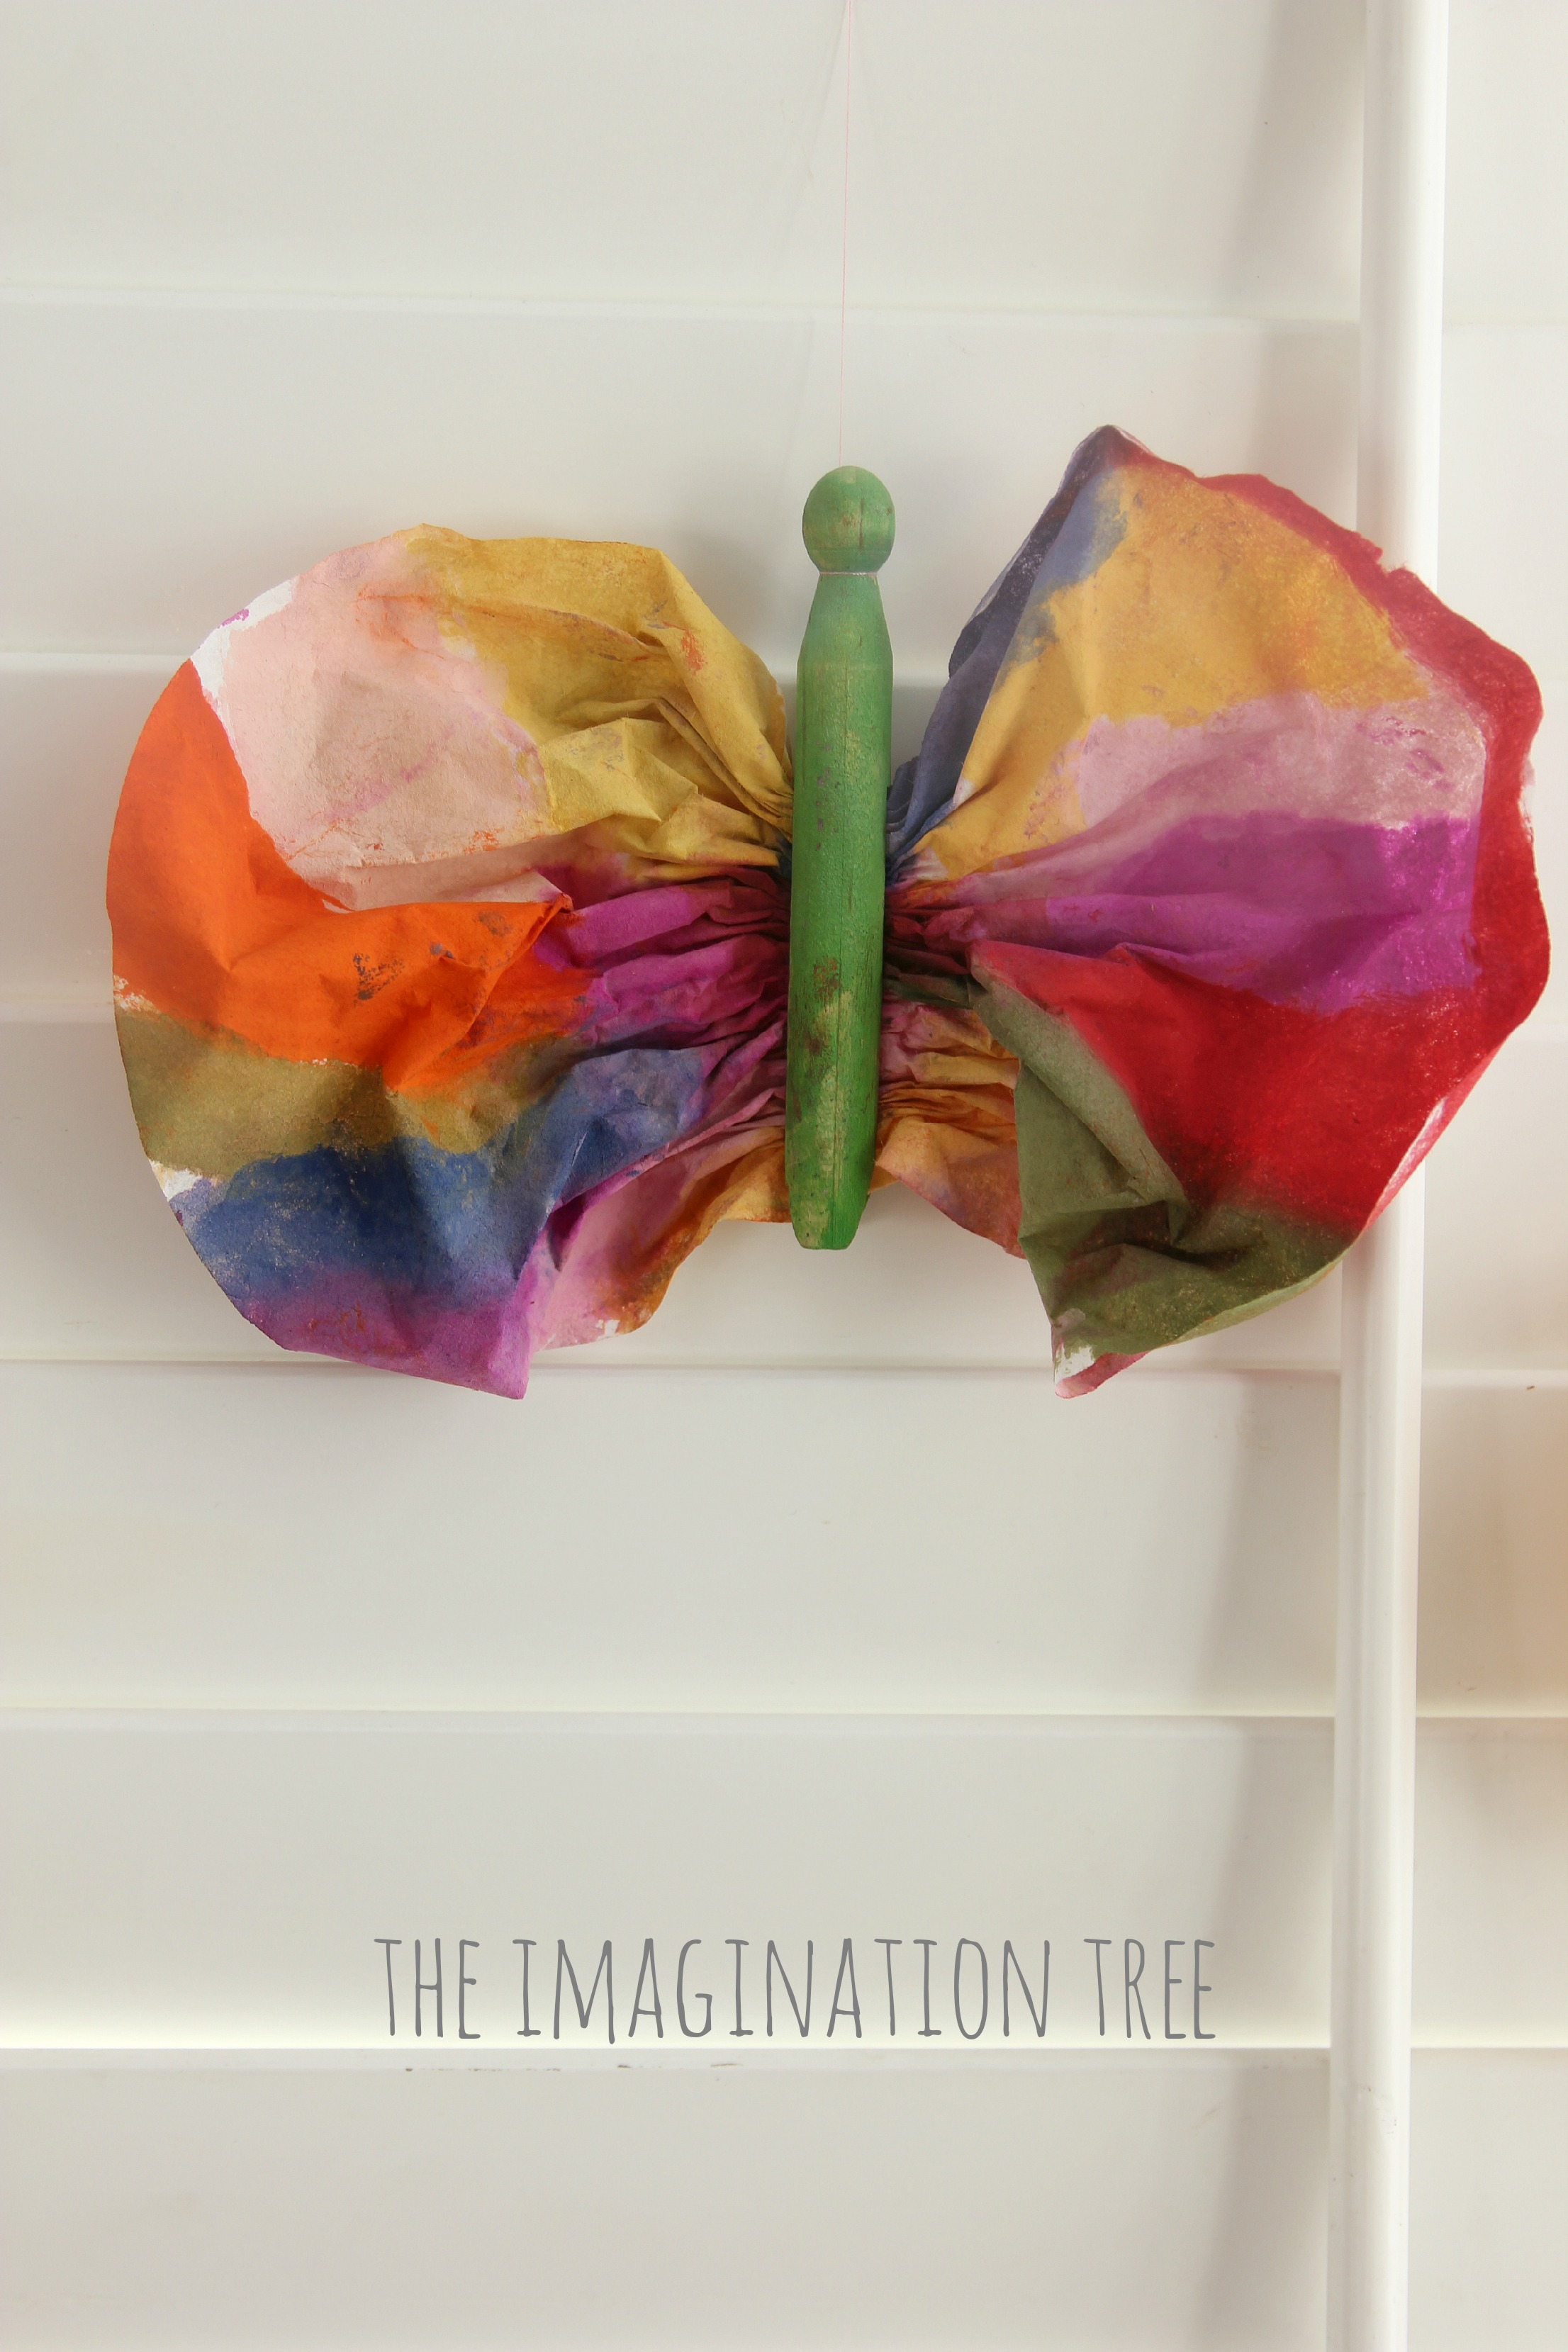
Step 5: Decorate Your Butterfly
Here comes the fun part—decorating! You can add buttons for eyes, use markers to draw patterns, or glue on some beads or sequins to give your butterfly extra sparkle. Let your imagination soar!
Step 6: Final Touches
Once the glue is dry, you can gently bend the wings to give your butterfly a more dynamic shape. Consider creating a loop at the top of the wire so you can hang your butterfly as a decoration or use it as a fun hair accessory!
Congratulations! You’ve now crafted your very own cloth butterfly. Let’s move on to a world of creativity and customization!
Also Read This: Watch Pizza Videos on Dailymotion: Step-by-Step Recipes
4. Creative Ideas for Customizing Your Butterflies
Now that you’ve got the basics of cloth butterfly crafting down, it’s time to let your creativity take flight! Here are some fun ideas to make your butterflies truly unique:
1. Fabric Variety
Experiment with different fabric types! Try using patterns, like polka dots or floral prints, to give your butterflies individuality. Textured fabrics like felt or tulle can add depth and interest to your creations.
2. Add Personal Touches
Make your butterflies even more special by personalizing them. Write names, initials, or short messages with fabric markers or paint. This is especially great for gifts!
3. Themed Butterflies
Set a theme for your butterflies based on seasons or holidays. Here are a few suggestions:
- Spring: Pastel colors and floral prints.
- Summer: Bright colors and fun patterns like fruits and beach scenes.
- Autumn: Earthy tones and leaf patterns.
- Winter: Cool colors and snowflake designs.
4. Unique Shapes and Sizes
Don’t limit yourself to traditional butterfly shapes! Try out different wing configurations, like rounded edges, elongated wings, or even stylized versions that don't conform to realistic anatomy.
5. Incorporate Mixed Media
Combine your cloth butterflies with other materials. Use lace, ribbons, or embroidery to embellish them. Add a beaded string to hang them, or attach magnets for displaying on the fridge!
6. Group Projects
If you’re crafting with friends or family, consider making a whole flock of butterflies. Each person can create their designs, and together, you can create an art piece or decoration for any special occasion.
Remember, there are no wrong ways to make cloth butterflies. The goal is to have fun and express yourself through your creativity. So grab those supplies, let your imagination run wild, and enjoy the crafting process!
Also Read This: How to Download Audio from Dailymotion: A Step-by-Step Audio Download Guide
5. Where to Share Your Finished Butterfly Crafts
After putting in the time and effort to craft your delightful cloth butterflies, you must share your creations with the world! There’s something immensely gratifying about showcasing your artistic endeavors, and there are plenty of platforms where you can do just that. Here are some fantastic places to share your finished butterfly crafts:
- Social Media: Platforms like Instagram, Facebook, and Pinterest are perfect for showcasing visual arts. You can post pictures of your butterflies, use appropriate hashtags like #Crafting or #DIYButterflies, and connect with other crafters.
- Crafters’ Forums and Communities: Websites like Reddit have dedicated subreddits for crafting (e.g., r/crafts, r/DIY). Here, you can share your butterflies, gather feedback, and get inspiration from fellow enthusiasts.
- Blogs and Online Articles: If you enjoy writing, consider starting your blog or contributing to existing crafting blogs. Share your process through tutorials or photo essays to inspire others.
- YouTube: Create a video showcasing your butterflies and the process behind crafting them. People love seeing the 'how-to' live in action, and video tutorials can generate lots of engagement.
- Local Craft Fairs or Community Events: Look for local events where you can set up a booth or a display. It's a great way to meet people, receive immediate feedback, and sell (or gift) your creations!
Don’t forget to include your crafting story! Tell your audience what inspired you, what challenges you faced, and what you learned along the way. This personal touch resonates and encourages others to join you on your crafting journey.
Also Read This: How to Make Coconut Milk at Home: Simple Recipe on Dailymotion
6. FAQs About Crafting Cloth Butterflies
Curious about crafting cloth butterflies? You’re not alone! Here are some frequently asked questions that can help you along your butterfly-making adventure:
| Question | Answer |
|---|---|
| Can I use any fabric for crafting cloth butterflies? | Absolutely! Cotton, felt, and even lightweight denim work beautifully. Just ensure the fabric is flexible enough for folding and stitching. |
| What tools and materials will I need? | You’ll need fabric, scissors, a sewing kit (or glue if you prefer no-sew methods), and embellishments like beads or sequins if you want to add some flair! |
| How do I keep my butterflies from fraying? | Using fabric glue around the edges can help prevent fraying, or you can zigzag stitch along the fabric edges if you're sewing. |
| Can children join in the crafting fun? | Definitely! Ensure kids have supervision when using scissors and needles, but they can help with tracing, cutting, and decorating! |
| What are some creative ways to use my cloth butterflies? | You can use them as decorations for parties, embellishments on clothing, or even as unique gifts. The possibilities are endless! |
Feel free to ask more questions in the comments below! Crafting should be a fun and relaxed experience, so don’t hesitate to seek guidance or share your own tips with the community.
Conclusion and Final Thoughts on Crafting
Crafting cloth butterflies is more than just a delightful pastime; it's an opportunity for creativity and relaxation. Throughout this tutorial, we’ve explored various steps to create beautiful and colorful butterflies that can brighten up any space. Here are some final thoughts to keep in mind:
- Embrace Creativity: Don’t be afraid to experiment with colors, patterns, and sizes!
- Use Upcycle Materials: Old clothing or fabric scraps are perfect for your butterfly projects.
- Make it a Group Activity: Invite friends or family members to join in the fun for a crafting session.
- Display Your Art: Consider mounting your butterflies on a canvas or hanging them as decor.
As you gain confidence in your crafting skills, think about exploring new projects that build on your butterfly-making experiences. Whether it’s creating a mobile, embellishing a bag, or designing seasonal decorations, the possibilities are endless!
So gather your materials, let your creativity soar, and enjoy every moment of this rewarding craft. Happy crafting!
 admin
admin


