If you've ever wanted to share your creative videos on YouTube directly from your iPhone, you're in luck! Uploading videos from your mobile device is quicker and easier than you might think. In this post, we'll walk you through a simple method to upload your videos right from your iPhone, making it a breeze to connect with your audience. So, let’s dive into the reasons why using your iPhone for YouTube uploads is a fantastic choice!
Why Use Your iPhone for YouTube Uploads
Your iPhone is not just a powerful communication tool; it's also a fantastic device for creating and uploading videos to YouTube. Here are several compelling reasons to consider using your iPhone for your next upload:
- High-Quality Camera: Modern iPhones come equipped with impressive cameras that support 4K video recording. This means the quality of your uploads can be outstanding without needing professional equipment.
- Editing on the Go: With various apps available, you can edit your videos directly on your iPhone. Apps like iMovie and Adobe Premiere Rush allow you to cut, trim, and enhance your footage easily.
- Convenience: Your iPhone is always with you, making it easy to capture spontaneous moments that you can share with your audience. No more lugging heavy camera equipment around!
- Easy Uploading: The YouTube app on your iPhone offers a straightforward upload process. Just a few taps, and your video can be live for the world to see.
- Instant Access to Social Media: Once your video is uploaded, you can easily share it across your social media platforms. This helps drive more traffic to your YouTube channel.
- Built-in Storage: iPhones come with substantial storage options, allowing you to save multiple videos and easily manage your content before and after uploading.
- Staying Connected: You can respond to comments, check analytics, and engage with your audience at any time—all from your iPhone.
In summary, using your iPhone for YouTube uploads not only simplifies the entire process but also enhances the quality and impact of your videos. Whether you are a budding YouTuber or simply want to share moments from your life, your iPhone can be a remarkable tool. So get ready—your next video could be just a tap away!
Also Read This: How to Turn Off Auto Pause on YouTube
3. Preparing Your Video for Upload
Before you dive into uploading your video to YouTube from your iPhone, it’s essential to ensure that it's ready for public viewing! Think of this step as your pre-upload checklist. Preparing your video not only improves its quality but also increases the likelihood of attracting viewers. Here’s what you need to do:
- Edit Your Video: Use an editing app if needed to trim any unnecessary footage. Popular choices include iMovie, InShot, and Adobe Premiere Rush. Editing can enhance exposure to your content!
- Choose the Right Resolution: Aim for at least 1080p for clear quality. YouTube supports various resolutions, so ensure your settings on your iPhone are adjusted correctly for optimal output.
- Add a Catchy Thumbnail: Thumbnails are the first impression viewers have of your video. A bright, eye-catching thumbnail, with a text overlay about the video, can make a big difference. You can use apps like Canva or Photoshop Mix to create stunning thumbnails right from your iPhone.
- Craft a Compelling Title: Your title should be engaging and relevant. Keep it concise yet descriptive to make it easy for potential viewers to understand what your video is about.
- Write a Clear Description: This is your chance to explain what viewers can expect. Include relevant keywords that make your content discoverable. For example, if you're doing a cooking video, terms like “easy recipe,” “quick meals,” or “healthy cooking” can help.
- Add Tags: YouTube allows you to add tags to help categorize your content. Think of key phrases that relate to your video—like cooking techniques or specific ingredients if you’re showcasing a recipe.
Once you’ve checked all these boxes, you’ll be ready to upload! It will also help establish your brand and create a better experience for your audience. Remember, preparation is key to making your video stand out.
Also Read This: What Did Master Oogway Do on YouTube? Exploring His Iconic Moments
4. Step-by-Step Guide to Upload Your Video on YouTube
Now that your video is all prepped and polished, it’s time to upload it to YouTube from your iPhone. The process is pretty straightforward, and I’ll guide you through each step. So, grab your iPhone and let’s get started!
- Open the YouTube App: Ensure you have the YouTube app installed on your iPhone. If you don’t have it yet, you can download it from the App Store. Once it’s installed, open the app.
- Sign In: If you aren’t already signed in, tap on the icon typically located at the top right corner and enter your credentials. If you don’t have an account yet, you can create one directly through the app.
- Tap on the Camera Icon: You’ll see a camera icon with a + sign at the bottom center of your screen. Tap on it to begin the upload process.
- Select Your Video: Your camera roll will appear. Navigate through your videos and select the one you’ve prepared. Remember, you can also record a new video at this step if you decide to do so!
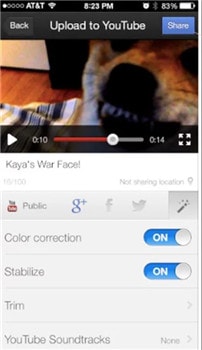
- Confirm Video Details: You’ll be prompted to add a title, description, and thumbnail, just like we discussed in the previous section. Take the time to fill these out carefully.
- Adjust Privacy Settings: Before finishing up, choose whether you want your video to be public, unlisted, or private. This is crucial for controlling who can see your content.
- Tap “Upload”: Once everything looks good, tap on the “Upload” button. Your video will start uploading to YouTube’s servers. You can continue using the app while it uploads.
- Check Your Upload: After the upload is complete, check your video. You can find it in your channel’s video section. Play it through to ensure everything looks and sounds right!
And voilà! Your video is now live on YouTube for the world to see! Share the link on your social media and let your friends and followers know about your latest creation. Uploading videos from your iPhone has never been easier, so keep those cameras rolling!
Also Read This: How Much Is 4 Million Views on YouTube? Estimating YouTube Earnings from Views
5. Tips for Optimizing Your Video Upload
Now that you know how to upload your videos on YouTube, let’s talk about some practical tips to optimize your uploads. Optimizing isn’t just about getting your video on the platform; it’s about ensuring it gets seen by as many people as possible. Here are some strategies to make your video shine:
- Create an Eye-Catching Thumbnail: Your thumbnail is the first thing viewers see, and it can make or break their decision to click on your video. Use vibrant colors, bold fonts, and interesting images to grab attention.
- Craft a Compelling Title: Your video title should be clear, concise, and relevant to the content. Incorporate keywords that people are likely to search for, but keep it catchy!
- Add a Detailed Description: In the video description, provide a brief overview of the video content. Include important keywords, links to your social media, and any relevant information that can enhance viewer experience.
- Use Tags Wisely: Tags help YouTube understand the content of your video. Use a mix of broad and specific tags to broaden your reach and target the right audience.
- Engage with Viewers: Ask questions in your video to encourage comments, and make it a point to respond. Engagement is a key factor in how YouTube ranks and recommends content.
- Encourage Subscriptions: At the end of your video, remind viewers to like, share, and subscribe to your channel if they enjoyed your content. Building your subscriber base is crucial for long-term success!
By taking these extra steps, you can significantly influence how your video performs on YouTube. Remember, the more engagement your video gets, the better its chances are of being promoted on the platform!
Also Read This: Ideal Length for YouTube Outros Tips for Creating an Impactful Ending
6. Troubleshooting Common Upload Issues
Sometimes, despite our best efforts, uploading videos to YouTube can be a bit bumpy. Don’t fret! Here are some common issues you may face while uploading videos from your iPhone, along with tips to troubleshoot them:
- Slow Internet Connection: A poor connection can stall your upload. Check your Wi-Fi signal or try switching to a stronger network. If you’re using cellular data, ensure you have a good signal strength.
- Video Format Incompatibility: Ensure your video is in a compatible format. YouTube supports formats like MP4, MOV, AVI, and more. If your video isn’t uploading, check its format and convert it if necessary.
- Storage Space Issues: If your iPhone is running low on storage, it may hinder the upload process. Clear up some space by deleting unnecessary apps or files that you no longer need.
- App Glitches: Sometimes, the YouTube app may act up. Try closing the app completely and restarting your iPhone. Reopen the app and try uploading again.
- Error Messages: Pay attention to any error messages that pop up during the upload process. They can provide clues on what might be going wrong. Research the specific error message for targeted solutions.
- Account Issues: Ensure your YouTube account is in good standing. If you’ve violated any community guidelines, you may face restrictions on uploading. Check your account notifications for any alerts.
Remember, if you hit a snag, take a deep breath and troubleshoot step by step. With a little patience, you’ll be uploading videos smoothly in no time!
Conclusion
Uploading videos to YouTube from your iPhone doesn't have to be a cumbersome process. By following the simple steps outlined above, you can quickly and easily share your content with the world. Remember to:
- Prepare Your Video: Ensure your video is edited and ready for upload.
- Use the YouTube App: Leverage the app for a more seamless uploading experience.
- Select the Right Settings: Pay attention to video quality and privacy settings before publishing.
Whether you’re a seasoned content creator or just starting out, utilizing these tips will help streamline your video uploading process. Don’t forget to engage with your audience after uploading, and monitor your video's performance to improve future uploads.
 admin
admin


