Have you ever tried using a large image in your Cricut projects, only to be met with frustration when it doesn't fit? You're not alone! Many crafters face this issue, especially when working with intricate designs or larger files. Fear not! In this post, we're going to explore how to split large images into manageable pieces for your Cricut, making your crafting experience smoother and more enjoyable. Let's dive in and see how you can turn those big images into small, Cricut-friendly sections!
Understanding Cricut's Limitations with Large Images
Cricut machines are incredible tools for crafters, but they do come with certain limitations, particularly when it comes to image sizes. Here are some key points to consider:
- Maximum Cutting Size: Each Cricut model has a specific cutting area, usually around 12" x 24" for the larger machines. Images larger than this cannot be cut in a single go, often leading to the need for splitting.
- File Size:** The software used with Cricut, Design Space, can also struggle with extremely large file sizes, which can cause slow processing times or even crashes. It’s essential to work with files that are optimized for the software.
- Complex Designs: Intricate patterns with numerous details can overwhelm the machine. Splitting these images can help maintain clarity and precision in your final product.
Understanding these limitations can save you a lot of headache when prepping your projects. Let’s delve deeper into each of these areas.
1. Maximum Cutting Size Explained
The cutting maximum is particularly important because if your image exceeds the cutting area, no matter how beautiful it is, it won't be a part of your project if you can’t fit it within the size constraints. To avoid disappointment, consider resizing images before uploading them to Design Space or breaking them down into smaller parts that fit within the dimensions of your machine’s cutting mat.
For example, if you want to create a sign that is 24 inches wide and 18 inches tall, but your image is designed for a much larger canvas, splitting it into sections of 12 inches or less in width would allow you to manage the image better.
2. File Size Limitations
Working with very large files can be a double-edged sword. While higher resolution images often yield better results, they can also cause the Cricut software to lag. When designing in programs like Adobe Illustrator or Photoshop before bringing images into Design Space, consider saving your images in formats that balance quality and file size—opt for SVG or PNG over JPG whenever possible.
3. Keeping Complexity in Check
Another common issue with large images is complexity—too many layers and details can lead to a challenging cutting process. Not only can it slow down the machine, but it can also increase the likelihood of cutting errors. By simplifying your design or breaking it down into several parts, you allow your Cricut to focus on fewer details at once, ensuring a more seamless cutting experience.
Ultimately, being mindful of Cricut’s limitations helps create a more productive and enjoyable crafting session. So, before jumping headfirst into your next big project, take a moment to consider these constraints and plan accordingly. Your future self will thank you!
Also Read This: How to Get Hired as a Getty Images Editorial Photographer
3. Tools You Need to Split a Large Image
Before you dive into splitting your large image for your Cricut projects, it’s essential to gather the right tools. The right tools will make the process smoother and more straightforward, allowing you to focus on unleashing your creativity. Here’s a handy list of everything you’ll need:
- Image Editing Software: You can use various software options depending on your comfort level. Popular choices include:
- Adobe Illustrator: A professional tool that’s perfect for advanced users. It offers powerful vector editing and is great for detailed designs.
- Inkscape: A free, open-source vector graphic editor that’s packed with features. It’s a fantastic option if you're looking for robust capabilities without the price tag.
- Pixlr or Canva: These online tools are user-friendly and ideal for beginners. They may not have as many vector options, but they’re perfect for raster images.
- Cricut Design Space: Your go-to platform for all things Cricut. It allows you to upload images and manipulate them to get the ideal cut files.
- A Good Computer or Tablet: A device with ample processing power helps to handle large image files without crashing. You’ll want a reliable internet connection if you’re using online tools.
- External Storage (Optional): If your image files are large, consider having external storage devices, like USB drives, to save your work and free up your computer’s memory.
Once you have these tools ready, you’re all set to start splitting that large image. It’s exciting to think about how your creativity will come to life with just a few simple steps!
Also Read This: How to Add Subtitles to YouTube Shorts and Make Your Videos Accessible
4. Step-by-Step Guide to Splitting Your Image
Now that you have your tools ready, let’s get to the fun part—splitting your image! Follow these straightforward steps to break down your large image into manageable parts for your Cricut projects.
- Open Your Image Editing Software: Launch the software of your choice. For this example, let’s say you’re using Inkscape.
- Import Your Image: Go to File > Import and select your large image. Ensure it’s placed at the desired size on your canvas.
- Unlock the Dimensions (if necessary): Depending on your software, you may need to unlock the image dimensions. This allows you to resize the image without maintaining the original proportions.
- Use the Rectangle Tool: Select the rectangle tool from the toolbar and draw boxes over the sections of the image you’d like to split. Make sure each rectangle covers a distinct part of the image.
- Cut Out the Sections: Select your rectangle and the image, then use the cut function by going to Path > Difference (for vector images) or simply cut the selection (for raster images) to create distinct pieces.
- Export Each Section: After cutting, you'll need to export each section to a file. Go to File > Export PNG Image or the equivalent option in your software to save each part separately.
- Upload to Cricut Design Space: Open Cricut Design Space, and upload each of the split images one by one. Make sure they’re placed correctly and sized appropriately for your project.
- Check and Adjust: Before cutting, check each image for any adjustments needed. Ensure that every detail is clear and ready for your Cricut!
And voila! You’ve successfully split a large image for your Cricut projects. With your images now segmented, you can create stunning designs that capture all the details you love. Happy crafting!
Also Read This: Removing Getty Images Watermarks: What to Know
5. Using Design Space for Image Splitting
If you're diving into the world of Cricut projects, you might be surprised to learn that Cricut Design Space offers some handy features for splitting large images. This is particularly useful when you want your design to fit snugly onto your cutting mat or work better with your material. Here’s a step-by-step guide to using Design Space for image splitting:
- Upload Your Image: Start by uploading your large image into Design Space. Click on the “Upload” button on the left sidebar, and select your image file. Make sure to follow any prompts for background removal if needed.
- Insert the Image onto Your Canvas: Once your image is uploaded, select it and insert it onto your canvas. Here’s where the magic begins!
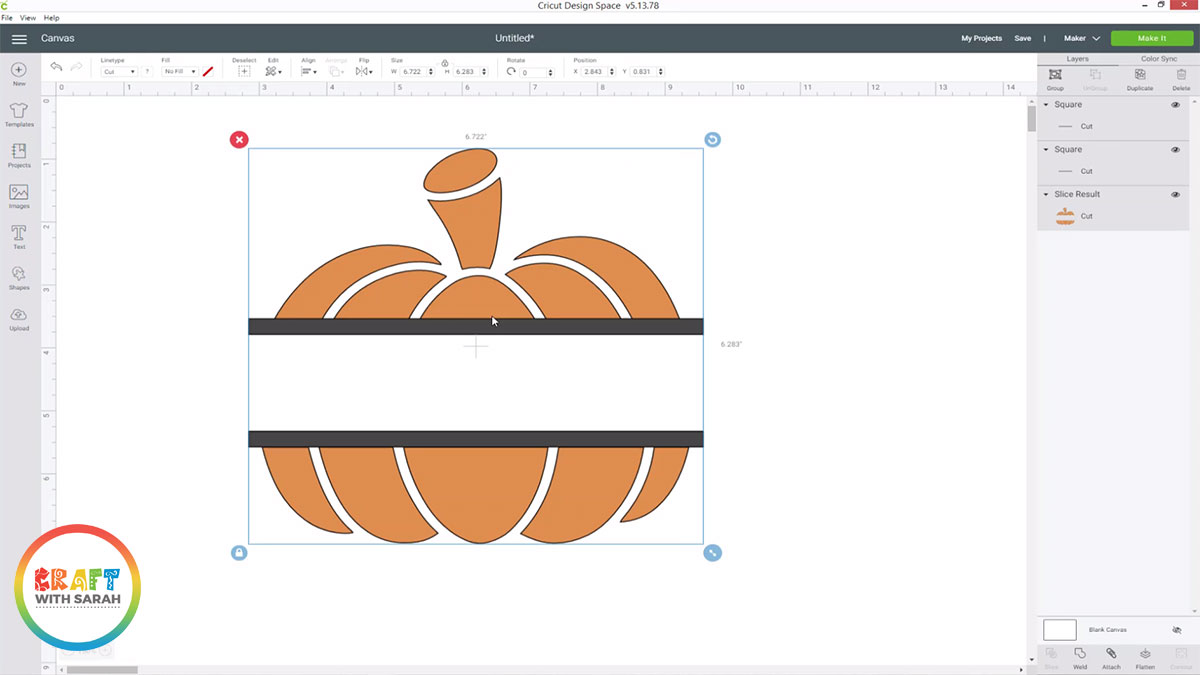
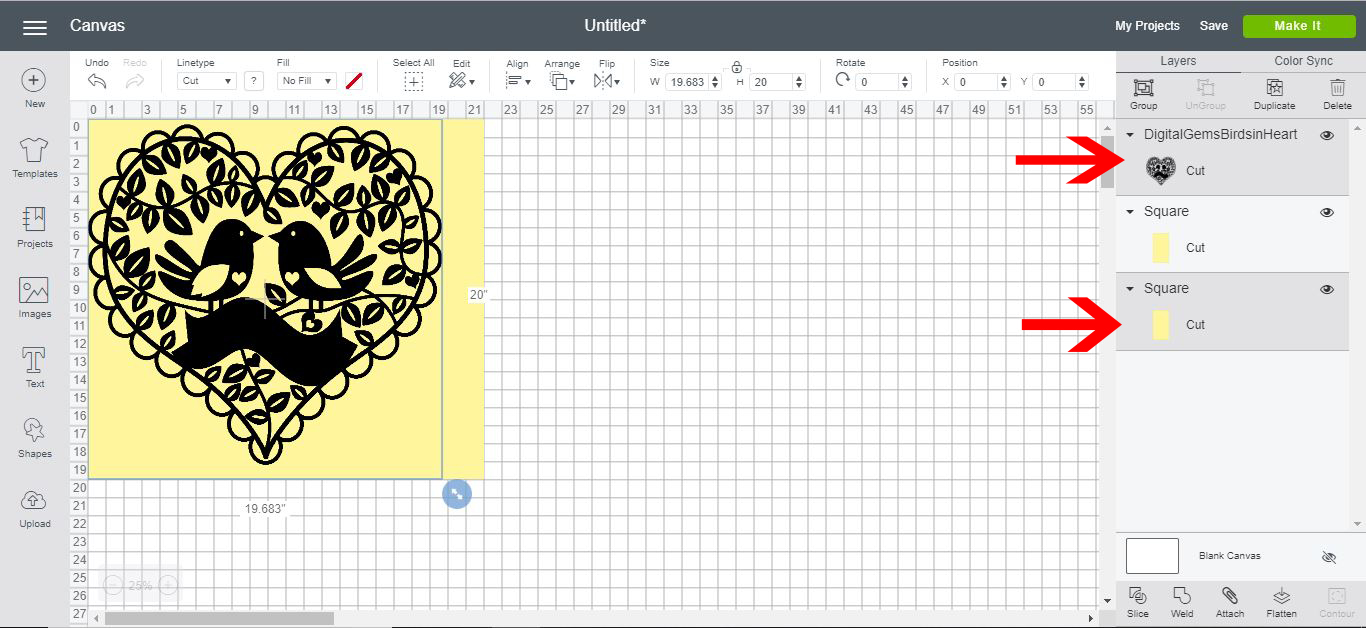
- Access the Slice Tool: To split the image, you’ll need to layer it with a shape. Create a rectangle or any shape you want to use to split the image. Make sure this shape is positioned over the area of the image you want to cut.
- Select Both Layers: Click on the shape and then hold down the “Shift” key while you click on the image. This ensures that both items are selected.
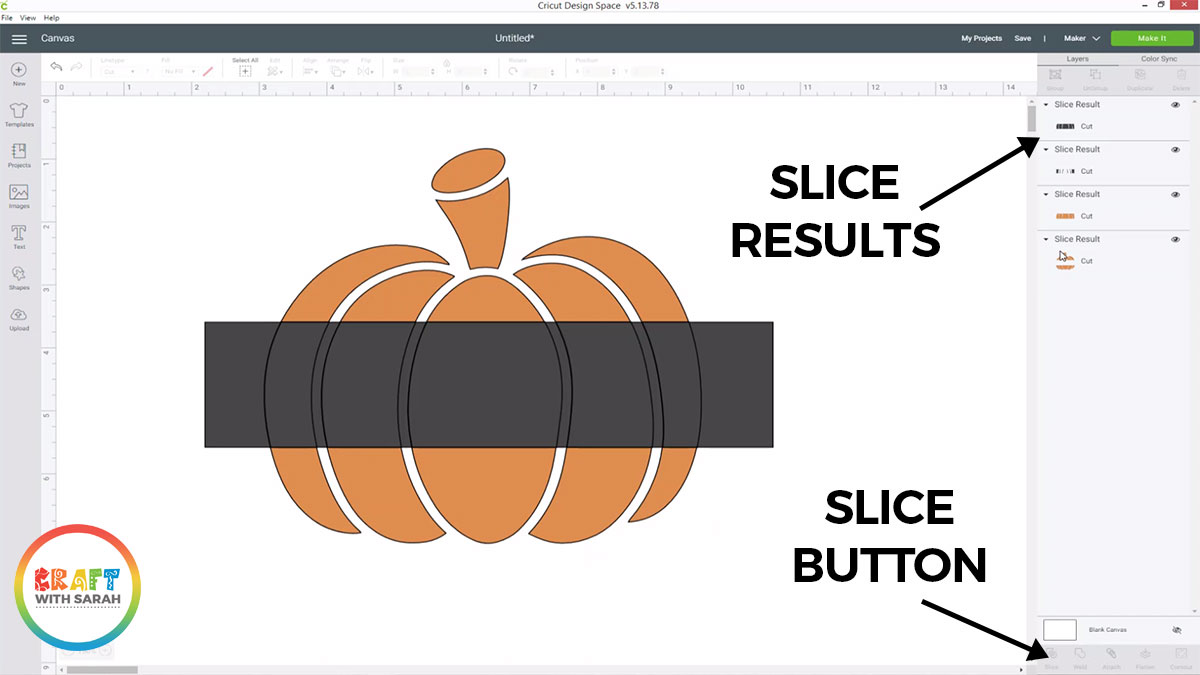
- Slice the Image: Now find the “Slice” button that appears in the right-hand menu and click it. Design Space will divide your image into two parts: the piece intersecting with your shape and a piece outside of it.
- Remove Unwanted Parts: After slicing, you'll see three new layers in your layer panel. You can click on and delete any parts of the image you don't need, leaving you with a perfectly sized piece for your project.
- Repeat as Needed: If your image is still too large, repeat the process with additional shapes until you have split the image into the desired sizes.
And there you have it! Slicing images in Design Space is a straightforward process that empowers you to customize your designs effectively.
Also Read This: Listing Tweaks: How to Edit an eBay Listing Like a Pro
6. Alternative Software Options for Advanced Image Editing
While Cricut Design Space is user-friendly and efficient for many tasks, there are times when you might need a bit more control over your images. If you're looking for alternative software options for advanced image editing, here are some great tools to consider:
- Adobe Illustrator: A powerhouse for vector graphics, Illustrator allows you to precisely manipulate images and shapes. With the “Slice” and “Crop” tools, you can break apart and adjust large images easily.
- Inkscape: This free vector graphic software is a fantastic alternative to Adobe Illustrator. It provides similar tools for slicing and dicing your images. Plus, it’s open-source, making it accessible for everyone!
- Affinity Designer: An affordable option compared to Adobe, Affinity Designer has robust vector editing tools. It’s great for splitting images because of its seamless blending of raster and vector graphics.
- CorelDRAW: Another established player in the graphic design space, CorelDRAW offers extensive tools for editing and slicing images efficiently. Its user-friendly interface can make image splitting a breeze!
- GIMP: If you prefer working with raster graphics, GIMP is a free and powerful image editor. You can manually select and cut parts of your images, although it may require a bit more effort than vector editing software.
Each of these programs has its unique strengths, so the best choice depends on your personal preference and the complexity of your projects. Remember, mastering these tools can take time, so be patient and don’t hesitate to check out online tutorials!
By exploring these options, you can maximize your creativity and tackle any Cricut project with confidence. Happy crafting!
Also Read This: Activating Adobe Stock in Lightroom
7. Tips for Ensuring a Smooth Cutting Process
When you're ready to bring your creative vision to life with your Cricut, ensuring a smooth cutting process is essential. Here are some handy tips to help you achieve that perfect cut, every time.
- Use Quality Materials: Always choose high-quality vinyl, cardstock, or whatever material you're using. Subpar materials can lead to issues with cutting, like tearing or peeling.
- Blade Maintenance: Regularly check your blade for wear and tear. If you notice any dullness, it's time for a replacement. A sharp blade makes all the difference in achieving clean cuts.
- Test Cuts: Before committing to a large project, do a test cut on a scrap piece. This helps you fine-tune your settings, ensuring your main piece turns out just right.
- Correct Settings: Always set your machine parameters based on the material's thickness and type. Using the right pressure and speed settings can prevent cutting through too deep or not deep enough.
- Secure the Material: Use a strong grip mat to hold your material firmly in place. Additionally, some people find that using extra tape along the edges can prevent any slipping.
With these tips in mind, you’ll not only save time but also reduce frustration during the cutting process. Remember, prepping your workspace and materials is as important as your design!
Also Read This: How to Download YouTube Audio to PC
8. Common Mistakes to Avoid When Splitting Images
Splitting images for your Cricut projects can be a bit tricky, especially for beginners. It's easy to make mistakes that could derail your project or waste materials. Here are some common pitfalls to avoid:
- Not Planning Your Cuts: Diving straight into splitting without planning can result in misaligned pieces. Take a moment to visualize how the parts will come together after cutting.
- Ignoring Image Resolution: Using low-resolution images can lead to pixelation when the image is enlarged. Always start with high-resolution files to maintain clarity after splitting.
- Overlapping Cuts: If your split sections overlap, you might end up with uncut areas or pieces that don’t fit together. Ensure each section is clearly defined.
- Forgetting to Save Your Work: It may seem trivial, but always save your progress as you split the image. You won't want to lose your changes due to an unexpected software crash!
- Neglecting to Preview: Before sending your design to cut, always preview it in the software. This allows you to catch any mistakes or misaligned pieces.
By staying aware of these common mistakes, you'll save yourself a lot of time and materials in the long run. The goal is to make your Cricut experience as enjoyable and efficient as possible, so keep these tips in mind as you create your designs!
Conclusion and Final Thoughts on Image Splitting for Cricut
In conclusion, splitting large images for Cricut projects can greatly enhance your crafting experience. By taking the time to prepare your images carefully, you can ensure that your designs are not only manageable but also maintain their quality when printed or cut. Here are some key takeaways:
- Image Preparation: Make sure your images are high resolution to avoid pixelation during the cutting process.
- Software Options: Utilize tools like Adobe Illustrator, Inkscape, or even Cricut Design Space to facilitate the splitting process.
- Testing: Before cutting the entire design, conduct test cuts to ensure everything fits well and looks as expected.
- Creative Opportunities: Splitting images opens up possibilities for layering colors and designs, providing a more dynamic effect in your projects.
Remember to be patient and precise. As you gain experience, you’ll develop your own techniques and preferences that can further streamline your workflow. Whether you’re crafting for fun or creating professional projects, mastering the art of image splitting will ultimately enhance your Cricut experience and lead to stunning results.
 admin
admin


