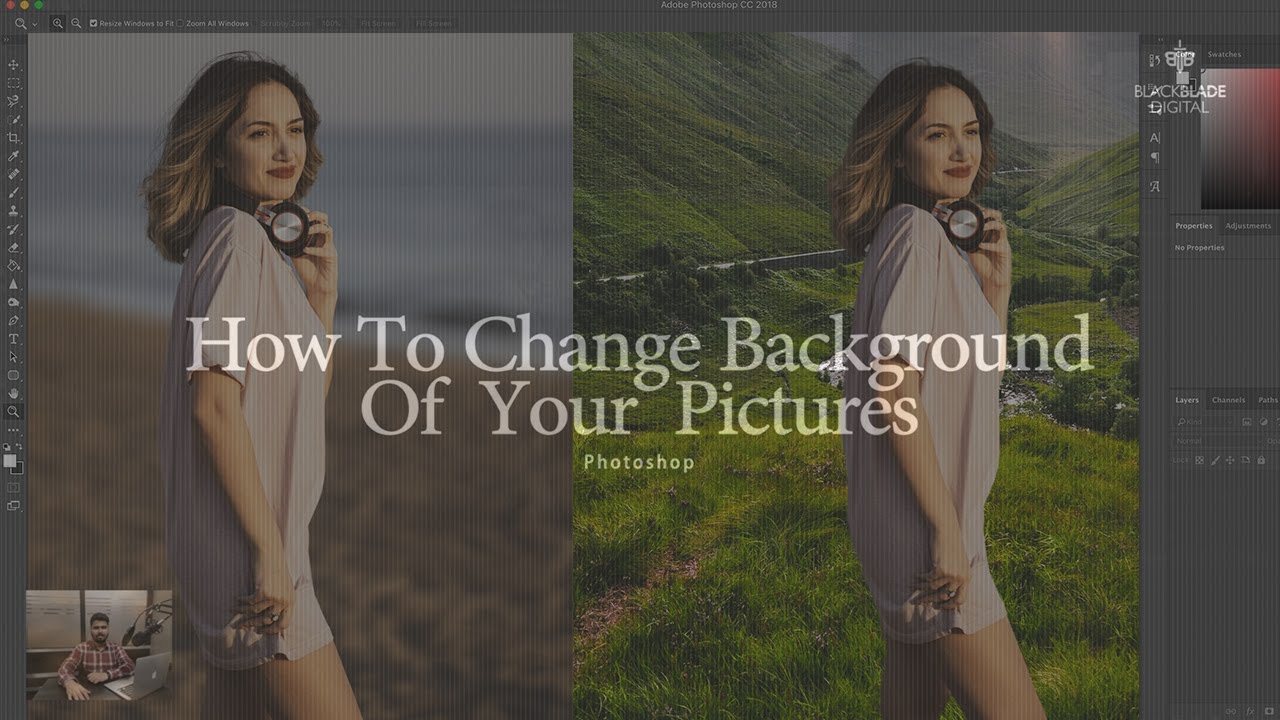
Welcome to the world of Adobe Photoshop CS4! If you're looking to spice up your images by changing the background, you’re in the right place. Whether it’s for a personal project, social media post, or a professional presentation, knowing how to change a background effectively can make all the difference. In this quick tutorial, you’ll learn the essentials of changing the background with style and ease. Let's dive in!
Understanding the Tools You'll Need
Before jumping into the steps, let’s familiarize ourselves with the tools and features of Photoshop CS4 that you’ll be using. Adobe Photoshop is a powerful graphic design tool, and knowing your way around it will save you time and effort. Here’s what you’ll need:
1. Selection Tools
The first step in changing a background is selecting the area you want to keep. Photoshop provides several selection tools:
- Marquee Tool: Ideal for selecting rectangular or elliptical areas.
- Lasso Tool: Great for freehand selections. You can draw around the subject to define the area to keep.
- Magic Wand Tool: Perfect for selecting contiguous areas of similar color with just one click.
Using these tools effectively will help you isolate the subject you want to retain in the foreground.
2. Layers
Understanding layers is crucial when working in Photoshop. They allow you to work non-destructively, meaning you can make changes without altering your original image. Here are key points about layers:
- Background Layer: Your original image is usually locked as the background layer. You’ll need to unlock this layer to make edits.
- New Layer: Create a new layer for your background. This will let you easily manage and change the background separately from your subject.
- Layer Masks: Great for blending the edges of your selections to create a more natural look.
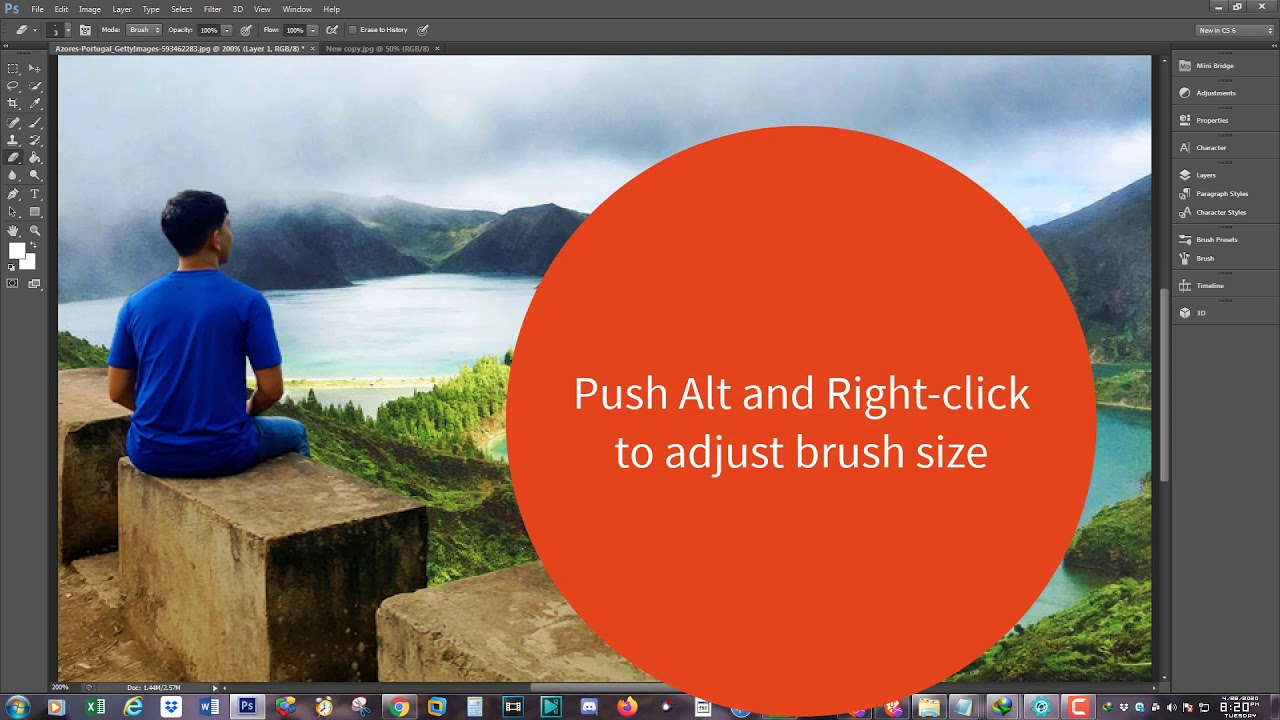
3. The Eraser Tool
This is another handy tool for precise editing. Once you've made a selection, you can erase unwanted parts of your image or the background. Here’s how you can utilize it:
- Brush Size: Adjust the size of the eraser for details or larger areas.
- Opacity: Play with the opacity to create softer edges, allowing the background to blend better.
4. Background Images
Lastly, you’ll need a background image to replace the existing one. Make sure to choose a high-resolution image to ensure your finished product looks sharp and professional. Look for images online or use your own photos. Make sure they complement the subject of your original photo.
Now that you're familiar with the main tools you'll be using, you’re ready to put your knowledge to work. In the following sections, we'll explore the steps to change your background in Adobe Photoshop CS4 more thoroughly. So, let’s get ready to transform your images!
Also Read This: Your Go-To Platform for DIY and Educational Content: Dailymotion
3. Step-by-Step Guide to Changing the Background
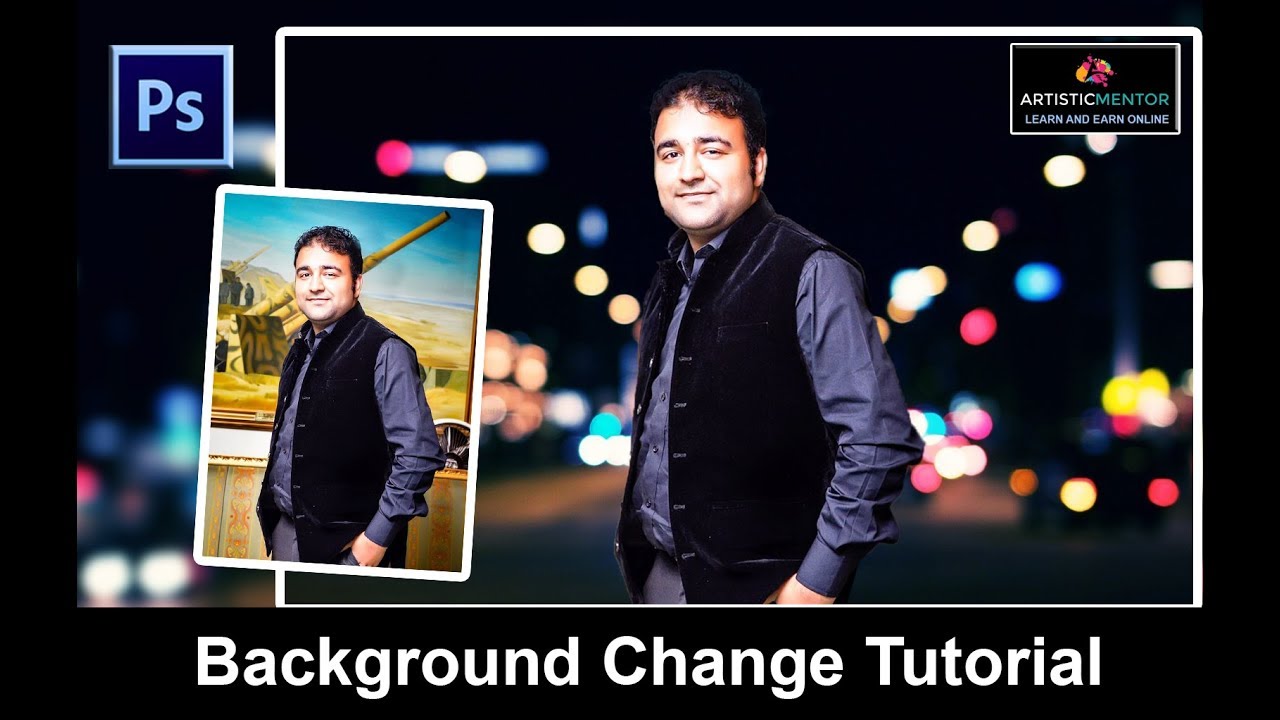
Changing the background in Adobe Photoshop CS4 might feel daunting at first, but once you get the hang of it, you'll find it's a simple process that can really elevate your images. Let’s dive into a straightforward step-by-step guide that will walk you through the process.
Step 1: Open Your Image
Begin by opening Adobe Photoshop CS4 and selecting the image you'd like to edit. You can do this by going to File > Open and choosing your desired photo.
Step 2: Unlock the Background Layer
By default, your image will be locked as a background layer. To unlock it, simply double-click on the Background layer in the Layers panel. A dialog box will pop up—just hit OK. Your background layer is now editable.
Step 3: Select the Subject
This is the fun part! You’ll want to select the subject of your image that you wish to keep. You can use various selection tools, which we'll explore more in the next section, but for now, let’s go with the Quick Selection Tool:
- Select the Quick Selection Tool from the toolbox (or press W).
- Click and drag over your subject to select it. Don’t worry if it’s not perfect; you can refine it later.
Step 4: Refine Your Selection
After making your initial selection, check for any areas that need adjustment. For example, if you added too much or too little, you can hold the Alt key (Windows) or Option key (Mac) to subtract from the selection. Use the Select and Mask option to get even more precise, particularly around edges like hair.
Step 5: Invert the Selection
Once you are satisfied with your selection, you'll want to invert it to select the background. Go to Select > Inverse. Now, your background area is selected instead of your main subject.
Step 6: Delete the Background
Simply press the Delete key on your keyboard to erase the background. You'll see a transparent grid appear, indicating that the background has been removed.
Step 7: Add a New Background
Now comes the fun part! To add a new background, open a new image or create a solid color layer. Drag this new layer beneath your subject layer in the Layers panel. You can resize or edit this background as needed.
And voila! You've successfully changed the background of your image in Adobe Photoshop CS4.
Also Read This: Styling Hijabs: Tutorials for Beautiful Hijab Styles on Dailymotion
4. Using Selection Tools Effectively
Mastering selection tools in Photoshop is key to achieving excellent results when changing backgrounds. Each tool has its strengths and ideal use-cases, so let’s break down the most commonly used selection tools and how to use them effectively.
- Quick Selection Tool: Perfect for selecting subjects relatively quickly by painting over them. Use this tool when you have clear contrasts between the subject and the background.
- Magic Wand Tool: Best for selecting areas of similar color. Click on the background area, and it will select everything of similar color. Adjust the Tolerance setting in the options bar for more or less sensitivity.
- Lasso Tool: Great for manual selections! You can draw freehand around the subject. Use the Polygonal Lasso Tool for straight-edged selections, which is excellent for geometric subjects.
- Pen Tool: Ideal for precision! It may take longer to select the subject but offers unrivaled control, especially for images with complex or curved edges. Click to create anchor points and curves around your subject.
Tips for Using Selection Tools:
- Use the Refine Edge option for smoother selections, especially near fringed areas like hair.
- Zoom in on your subject when making selections to ensure accuracy.
- Don’t be afraid to combine different selection tools to achieve the best results.
By familiarizing yourself with these tools and techniques, you'll find that changing backgrounds becomes a breeze. Practice makes perfect, so keep experimenting to discover which methods you prefer!
Also Read This: Understanding Dailymotion Video Format Essentials
5. Adjusting the New Background
Once you've successfully added your new background in Adobe Photoshop CS4, it's time to make adjustments to ensure everything looks seamless and professional. Here are some tips to help you get the most out of your new background:
Match Colors and Tones: One of the first things to consider when adjusting your new background is matching the colors and tones with the subject in the foreground. Use the following tools:
- Adjustments Layer: Go to Layer > New Adjustment Layer and choose from options like Brightness/Contrast, Color Balance, or Hue/Saturation. This allows you to tweak the colors without permanently altering your original layers.
- Curves: Utilize the Curves tool found under Image > Adjustments. It provides precise control over the brightness and contrast, letting you match the background perfectly with the subject.
Blending Modes: Sometimes, using blending modes can help integrate the background with your foreground. Select the background layer and try different blending modes from the dropdown in the Layers panel. Some effective modes include Soft Light and Multiply, which can create a more harmonious look.
Using Layer Masks: If parts of your subject look too harsh against the new background, consider using a layer mask. This allows you to selectively hide or reveal portions of the background. Here’s how:
- Click on the background layer in the Layers panel.
- Click on the Add Layer Mask button at the bottom of the panel.
- Use a soft brush with black color to paint over the areas you want to mask. Switch to white to restore any parts if you go too far.
This technique will help create a more natural transition between your subject and the new background.
Final Touches: Once you’re happy with the integration, don’t forget to zoom in and check for any rough edges or inconsistencies. You can use the Smoothing Tool or simply manually soften the edges for a polished look.
Also Read This: How to Grow Long Nails in a Week with Proven Techniques
6. Common Issues and Troubleshooting Tips
Even seasoned Photoshop users can run into issues while changing backgrounds. Here are some common problems and friendly solutions that can save your day:
1. Background Doesn’t Fit: If your new background doesn’t fit well with the subject, try resizing or transforming it. Select the background layer and use Ctrl + T (Cmd + T on Mac) to enable the Free Transform tool. Remember to hold Shift while resizing to maintain the aspect ratio.
2. Harsh Edges: One of the most visible signs that a background change hasn’t gone well is harsh edges around the subject. This can often be fixed by feathering the selection before copying and pasting. Simply right-click on your selection before proceeding and choose Feather. A value of 1-3 pixels usually does wonders.
3. Color Mismatch: If the background colors clash with the subject, revisit the adjustments tools mentioned earlier. Playing with the color balance or using adjustment layers can significantly improve the flow and harmony of your image.
4. Shadows Missing: Adding shadows can create a sense of depth in your image. If your subject casts a shadow that’s not visible, consider creating one by duplicating the subject layer, filling it with black, and moving it behind your subject. Apply a Gaussian Blur for that realistic shadow effect!
Remember, practice makes perfect! With these steps and troubleshooting tips, you’ll be changing backgrounds like a pro in no time. Happy Photoshopping!
Conclusion and Additional Resources
In conclusion, changing the background in Adobe Photoshop CS4 is a valuable skill that can significantly enhance your graphic design projects. By following the steps outlined in the previous sections, you can effectively create stunning images that stand out. Remember, practice is key to mastering these techniques, so don't hesitate to experiment with different images and effects.
For further learning and to expand your skills, here are some additional resources that you might find helpful:
- Adobe Official Tutorials: Explore the extensive collection of tutorials provided by Adobe for users at all skill levels.
- YouTube Channels: Follow channels dedicated to Photoshop tutorials, such as Phlearn and Blue Lightning TV, for step-by-step instructions.
- Books: Consider reading books like Adobe Photoshop CS4 for Dummies for comprehensive guides and tips.
- Online Courses: Websites like Udemy and Skillshare offer courses that cover everything from basics to advanced techniques.
By utilizing these resources, you can deepen your understanding of Photoshop and enhance your ability to change backgrounds effectively and creatively. Happy editing!
 admin
admin


