Welcome to the world of iStock, where creativity meets convenience! iStock is a vibrant marketplace filled with high-quality images, videos, and audio tracks that cater to professionals and enthusiasts alike. If you’re looking to elevate your projects with stunning visuals, you've come to the right place. In this post, we’ll explore Photoshop button and enhance your design workflow.
Overview of Interface Changes on iStock
Over the years, iStock has undergone various updates to improve user experience, and the latest interface changes are designed with accessibility and functionality in mind. Whether you’re a seasoned designer or a newbie, understanding these changes is essential for a smooth experience. Let’s break down the significant updates:
- Simplified Navigation: The new layout offers a cleaner, more intuitive navigation bar. Key sections are now more accessible, allowing you to find images, videos, and audio tracks at a glance.
- Enhanced Search Functionality: The search feature has been revamped! You can now filter your results by categories, orientation, color, and more. This means less time hunting for the perfect asset and more time creating.
- Personalized Account Dashboard: Your dashboard is now customized to showcase your recent activities, downloads, and favorite assets. This makes it easier to keep track of your projects and streamline your workflow.
- Quick Access to Downloads: Finding your downloaded files used to be a chore. Now, with the new quick access feature, your most recent downloads are just a click away—no more digging through countless folders!
- Integrated Editing Tools: One of the most exciting changes is the integration of editing tools that work seamlessly with Adobe Photoshop. The “Photoshop button” makes it straightforward to open your downloaded assets directly in Photoshop, eliminating the need for manual uploads.
With these updates, iStock aims to make the process of sourcing and using visual content as seamless as possible. By understanding these changes, you can maximize your productivity and unleash your creativity without any hiccups! So next time you log in to iStock, you’ll navigate the platform with confidence, ready to find that perfect asset for your next big project.
Also Read This: Can I Use iStock Images for Commercial Projects
3. Locating the Photoshop Button in the iStock Interface
If you're diving into the world of design and graphics, you might find yourself gravitating towards iStock for high-quality images, vectors, and videos. One of the features that stands out is its integration with Photoshop, allowing you to streamline your design workflow. But where is that elusive Photoshop button hiding in the iStock interface? Let’s break it down!
The iStock interface has undergone some changes recently, which might leave you scratching your head if you’re a longtime user. The Photoshop button is typically part of the download options for assets that can be edited directly in Photoshop. Here’s how you can locate it:
- Login to Your iStock Account: Start by logging in to your iStock account. If you don’t have an account yet, you’ll need to create one. It’s a quick process, and having an account opens up many features.
- Search for Content: Use the search bar to find the image, video, or vector that fits your project’s needs. Remember, not all assets are compatible with the Photoshop feature, so look for those that specifically mention Photoshop compatibility.
- View Asset Details: Click on a thumbnail to open the asset details page. This is where you’ll find all the essential information about the asset, including its resolution and license type.
- Look for the Download Options: Once you’re on the asset details page, scroll down to find the download options. Here, you’ll see various formats available for download. If the Photoshop button is applicable, it will be listed among these options.
- Check for the Photoshop Icon: Usually, the Photoshop button is clearly marked with the recognizable Photoshop logo. If it's available for your selected asset, clicking on this option will allow you to download the file in a format optimized for Photoshop.
Don’t worry if you can’t find it right away! iStock is continuously updating their user interface, so exploring the site and familiarizing yourself with its layout will help you become a pro at locating the Photoshop button in no time.
Also Read This: How to Sell Your Photographs on iStock: A Beginner-Friendly Guide
4. Steps to Access the Photoshop Button
Now that you know where to find the Photoshop button in the iStock interface, let’s walk through the steps to access it seamlessly. Here’s a straightforward guide to ensure you don’t miss out on downloading assets ready for Photoshop integration:
- Sign In: First things first, make sure you are signed into your iStock account. This will unlock all the features you need for your downloads. If you’re not a member yet, signing up is free and takes just a few minutes.
- Search for Your Desired Asset: Use keywords relevant to what you're looking for in the search bar. Be specific to find the best matches quickly. Explore the categories if you're not sure exactly what you want.
- Click on the Asset: Once you’ve found the image or asset that resonates with your project, click on the thumbnail to go to the detail page.
- Review Asset Information: Check the details, licensing, and compatibility for Photoshop. This will ensure you understand all the information surrounding your purchase.
- Select Download: In the download options, look for the Photoshop button or icon. Click on it. Make sure you've chosen the file size or resolution that fits your project requirements.
- Download and Open in Photoshop: Once you click the button, your file will start downloading. After it downloads, simply open it in Photoshop, and you’re ready to start editing!
Following these steps should make the process smooth and straightforward. If you encounter any issues or the Photoshop button seems to be missing, don't hesitate to reach out to iStock's support team for assistance. They're there to help you make the most of your creative experience!
Also Read This: Does iStock Offer Free Images? How to Find Cost-Free Content Legally
5. Troubleshooting Common Issues
When diving into the world of iStock and Photoshop integration, it's not uncommon to encounter a few bumps in the road. But don’t worry, I’m here to help you troubleshoot those common issues that might pop up while you’re trying to find the Photoshop button on iStock. Here are some typical problems and how to solve them:
- Photoshop Plugin Not Detected: Sometimes, the iStock plugin doesn’t show up in Photoshop. This can be due to the plugin not being installed properly or an outdated version of Photoshop. To fix this, ensure you’ve downloaded the latest plugin version from iStock and check that it's installed in the correct Photoshop plugin folder.
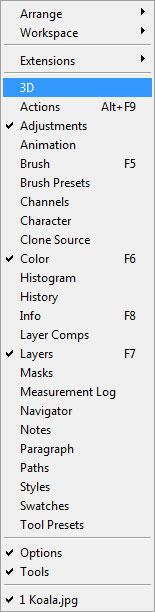
- Your Account Isn’t Connected: If you’ve yet to connect your iStock account to Photoshop, you’ll need to log in. Navigate to the “Window” menu within Photoshop, select “Extensions,” and then choose the iStock panel. If prompted, enter your iStock account details to link the two services.
- Image Import Issues: If you’re trying to import images from iStock and nothing is happening, double-check your internet connection. A weak or unstable connection can hinder your ability to access the iStock library. If that’s not the problem, try restarting both Photoshop and your computer.
- Search Function Not Working: It’s frustrating when you can't find that perfect image! If your search bar feels more like a dead end, consider checking your keywords. Ensure that you’re using relevant terms. Also, try clearing your search history to refresh your results.
- Incompatible File Types: Remember, not all file types downloaded from iStock are compatible with Photoshop. Make sure you are working with formats like PNG or JPEG for seamless editing.
If you encounter an issue beyond these common hiccups, reach out to iStock’s customer support or search their community forums. Often, other users may have experienced similar problems and can provide helpful solutions!
Also Read This: Does iStock Track Photo Usage and What Contributors and Buyers Should Know
6. Tips for Navigating iStock Effectively
Navigating iStock can feel like wandering through a vast ocean of images, vectors, and videos. But with the right strategies, you can sail smoothly and find the content that meets your needs efficiently. Here are some tips to make your experience as seamless as possible:
- Utilize Advanced Search Features: Instead of relying solely on basic keywords, take advantage of iStock's advanced search options. This allows you to refine your search by orientation, color scheme, file type, and more.
- Create Collections: If you frequently find images that appeal to you, why not create collections? This feature lets you save and categorize your favorite images for easy access later. It’s like having your personalized library that you can refer back to anytime!
- Keep an Eye on Trends: iStock regularly updates its offerings based on current design trends. Check out their “New & Trending” section frequently to inspire your projects with the latest visual styles.
- Use Filters Wisely: Filters can drastically alter your search results and make it easier to find what you need. Experiment with different filter settings to uncover hidden gems that fit your project perfectly.
- Download Image Previews: Before finalizing your purchase, use the preview feature to see how the image looks in your project (you can place it temporarily in Photoshop to visualize it). This will help you decide if it’s the right fit without spending any credits.
By keeping these tips in mind, you can streamline your experience on iStock and make the most out of their extensive library. Happy searching, and may you find the perfect visuals for all your creative endeavors!
Conclusion and Final Thoughts
Finding the Photoshop button on iStock may initially seem challenging due to recent interface changes. However, with a little exploration and familiarity with the updated layout, you can easily navigate to the tools you need. Here are some key takeaways:
- Familiarize Yourself: Take time to explore the new interface. Understanding the layout helps you locate tools quicker.
- Use Search Functions: Utilize search options to find the Photoshop button or any relevant tools efficiently.
- Stay Updated: Keep an eye on any tutorials or updates from iStock that can offer insights into new features and layout changes.
Remember, user interfaces often evolve, and being adaptable will enhance your experience. If you encounter difficulties, don't hesitate to reach out to iStock's support or community forums for assistance.
In conclusion, while changes in the iStock interface may momentarily confuse users, embracing these updates can significantly streamline your workflow and enhance your creative projects. With practice, you'll find the Photoshop button in no time and maximize your iStock experience.
 admin
admin


