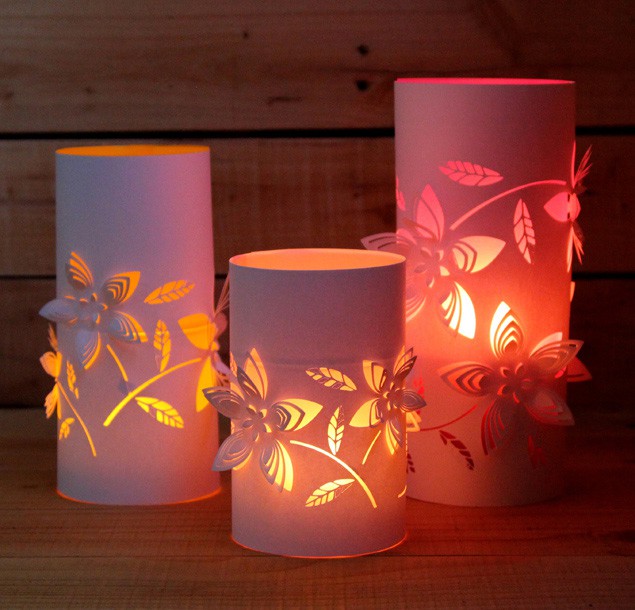
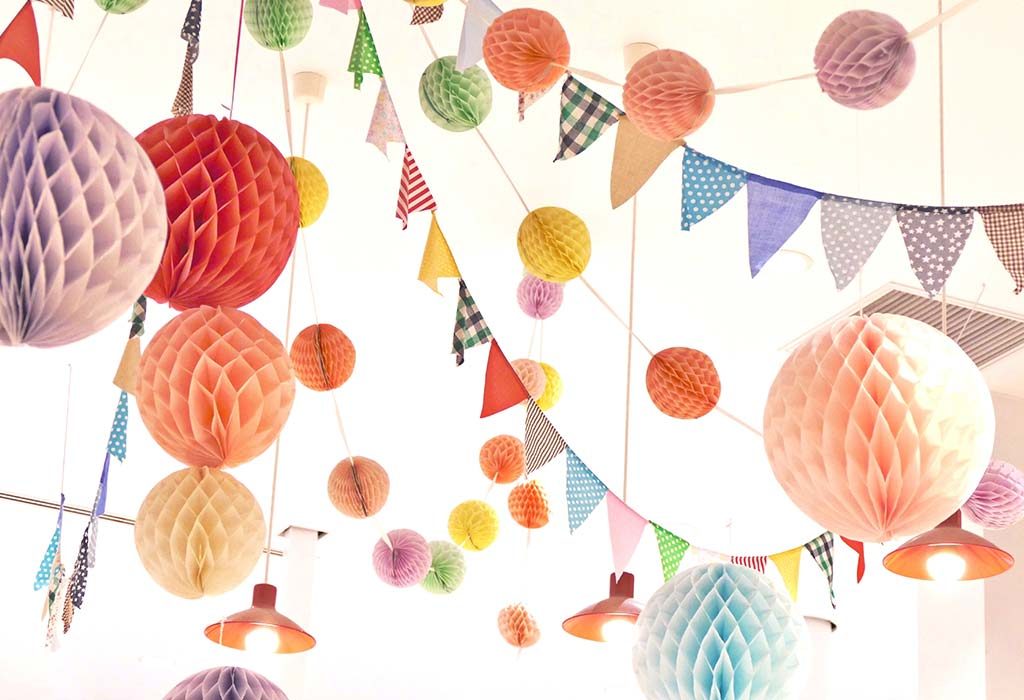
Creating beautiful round paper lanterns is a fun and rewarding craft project! Whether you want to light up your home for a special occasion or simply brighten up your space, these charming lanterns can add a touch of whimsy and elegance. They come in various colors and sizes, allowing for endless creativity. Plus, making them is simpler than you might think! In this guide, we'll walk you through the easy steps to craft your own stunning round paper lanterns.
Materials Needed for Crafting Round Paper Lanterns
Before we dive into the crafting process, let’s gather all the materials you will need to create your round paper lanterns. Having everything ready will make the crafting experience smoother and more enjoyable.
- Colored Paper: Choose your favorite colors or patterns. Tissue paper, scrapbook paper, or craft paper works well.
- Scissors: A good pair of scissors is essential for cutting your paper.
- Glue or Tape: You can use glue sticks or double-sided tape to secure your lanterns.
- String or Wire: This will serve as a handle or a way to hang your lanterns.
- LED Tealight Candles: For safety, especially if you're hanging them indoors.
- Pencil: To mark measurements and designs on your paper before cutting.
- Ruler: For measuring and ensuring straight lines when cutting.
- Optional Decorations: Stickers, glitter, or markers can be used to embellish your lanterns further.
Having these materials at hand will make your crafting session efficient and enjoyable. It’s always good to have some extras, especially if you plan on making several lanterns or if you want to experiment with different designs. Once everything is ready, you can let your creativity flow and start making those beautiful round paper lanterns!
Also Read This: How to Download Dailymotion Videos Using the App Quick Steps
3. Step-by-Step Instructions for Making Round Paper Lanterns
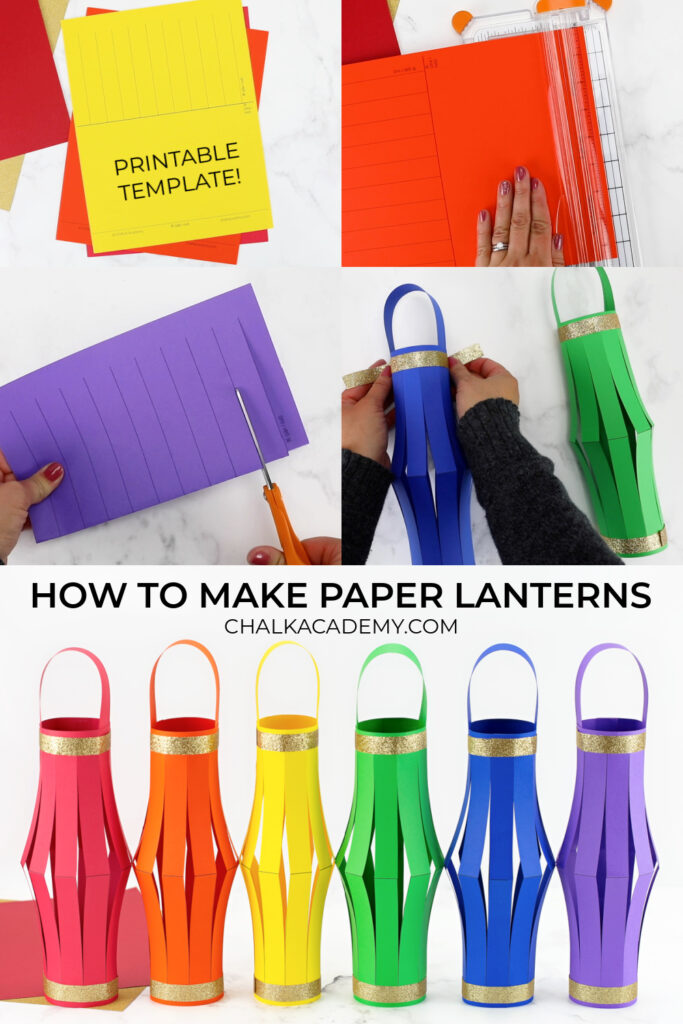
Creating beautiful round paper lanterns can be an enjoyable project, and the steps are easier than you might think! Here’s a straightforward guide to help you craft your own lanterns:
- Gather Your Materials:
- Large sheets of colored paper or tissue paper
- Scissors
- Glue or double-sided tape
- String or wire for hanging
- A round balloon (optional, for shaping)
- Pencil
- Ruler
- Prepare Your Paper:
Start by cutting your colored paper into a rectangle. Common sizes are 12" x 18", but feel free to adjust depending on how large you want your lantern. If you’re using tissue paper, remember that it’s delicate, so handle it gently!
- Forming the Shape:
If you are using a balloon, inflate it to the desired size and set it on a surface. This will be your guide. If not, you can skip to the next step.
Now, take your rectangle of paper and wrap it around the balloon. It should overlap a bit. Use glue or tape to secure the edges. Once it's set, carefully pop the balloon and remove it, leaving a hollow paper sphere.
- Adding the Base:
To make your lantern stable, cut a circle from a piece of paper and glue it to one end of your paper sphere. This acts as a base and prevents the lantern from tipping over.
- Punching Holes for Hanging:
Using a hole punch, create a couple of holes at the top of your lantern where you’ll later attach your string or wire. Make sure they are evenly spaced.
- Finishing Touches:
At this point, your basic lantern is complete! But don’t rush off yet. There’s still plenty of room for creativity!
Also Read This: How to Download Dailymotion Video in Chrome
4. Decorating Your Paper Lanterns
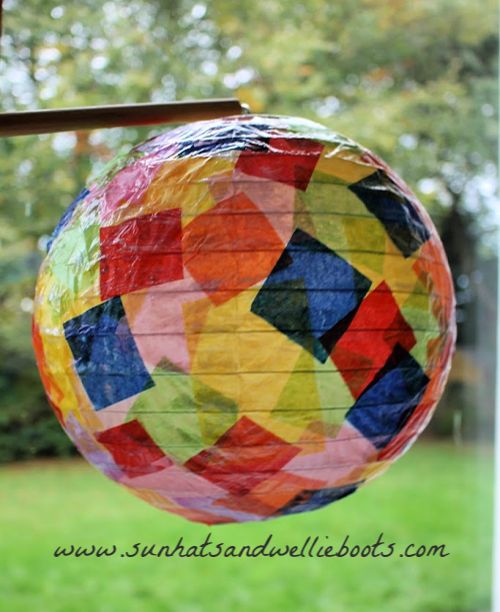
Now that you’ve created your rounded paper lanterns, it’s time to let your creative spirit shine through! Decorating your lanterns can be the most fun part of the process. Here are some ideas to get you started:
- Paint or Marker Designs:
Use acrylic paints or permanent markers to draw patterns, shapes, or even inspirational quotes on your lantern. Stripes, polka dots, or floral designs can add a lovely artistic touch!
- Adding Accents:
Glue on some embellishments like sequins, ribbons, or beads. Metallic or glitter items can really make your lanterns sparkle when the light shines through.
- Lighting:
For a magical glow, consider placing a battery-operated LED tea light inside the lantern. Make sure the light is safe and doesn’t get too hot, especially if your lantern is made from delicate paper.
- Using Different Textures:
Add layers with different materials—felt, lace, or fabric can be glued to the outside. This creates a stunning contrast in texture and enhances the visual appeal.
- Themed Lanterns:
If you’re preparing for a specific celebration, tailor your decorations accordingly! Use colors that match your event or create shapes that reflect the theme. For example, a beach theme could include seashells and blue tones, while a fall celebration could incorporate leaves and warm reds and oranges.
Get together with friends or family, and make it a fun group craft project! You'll not only enjoy creating these beautiful round paper lanterns but also get to personalize them in ways that are meaningful to you.
Also Read This: Uploading Videos to Dailymotion on the Website in 2018
5. Ideas for Using Your Round Paper Lanterns
Now that you've created your stunning round paper lanterns, you might be wondering how to incorporate them into your space or celebrations. Here are some creative ideas to get your imagination rolling:
- Garden Party Ambiance: Hang your lanterns from tree branches or hooks around your garden. They create a magical atmosphere during evening gatherings and make your outdoor space feel enchanting.
- Birthday Celebrations: Use your paper lanterns as colorful décor for birthday parties. Mix and match colors that match the party theme, and don’t forget to place a few on tables with flickering tea lights to create a cozy vibe.
- Festive Occasions: For holidays like Diwali, Lunar New Year, or even Christmas, you can decorate your home with lanterns reflecting the festivity's colors. Hang them in windows or create a focal point around an entrance.
- Indoor Decor: Incorporate your lanterns into your everyday decor. Cluster a few together in different sizes and hang them in your living room or bedroom for a chic and artistic touch.
- Wedding Decorations: If you’re planning a wedding, use the lanterns to decorate both the ceremony and reception areas. They can be strung along the aisle or hung from ceilings, adding a soft, romantic glow.
- DIY Light Sources: For those rainy days when you want to be inside, consider placing battery-operated fairy lights inside your lanterns. This can transform them into charming table lamps or soft night lights.
These are just a few ideas to get you started. The beauty of round paper lanterns is their versatility; you can use them virtually anywhere! Let your creativity guide you, and feel free to personalize them with colors or designs that speak to you.
Also Read This: How to Make a Simple Braid with Easy Dailymotion Hairstyling Tips
6. Tips and Tricks for Successful Lantern Crafting
Creating beautiful round paper lanterns can be a rewarding experience, especially when you know a few tips and tricks to ensure everything goes smoothly. Here are some handy hints to elevate your lantern crafting:
- Choose Quality Materials: The type of paper you use can significantly impact the outcome. Opt for thicker craft paper or rice paper for a more durable and elegant finish. This also enhances light diffusion if you plan to use them as light sources.
- Use a Template: If you’re not confident in your free-hand cutting, use templates. You can easily find printable templates online for various sizes and styles of round lanterns. Just trace, cut, and assemble!
- Secure Your Lantern: Make sure to use a reliable adhesive, like glue dots or double-sided tape, to hold the lantern together. This prevents it from collapsing or falling apart when you hang it.
- Consider Your Lighting: If you plan to place lights inside your lanterns, be mindful of the light source. Battery-operated lights or LED candles are safe options that minimize fire risk. Plus, they give a charming glow!
- Experiment with Designs: Don't hesitate to play with different designs! Use paint, markers, or stencils to add intricate patterns or motifs to your lanterns, making each one unique.
- Practice Patience: Lantern crafting can be tedious, especially when getting all the folds and cuts right. Take your time, and don’t rush the process. Enjoy the journey of creation!
With these tips, your crafting journey should be even more enjoyable. Remember, practice makes perfect—so don’t be afraid to make a few before your big event. Happy crafting!
Conclusion: Enjoy Your Handmade Round Paper Lanterns
Creating beautiful round paper lanterns can be a rewarding and enjoyable experience. After putting in the time and effort to craft your lanterns, it's time to appreciate the fruits of your labor. Here are a few tips to enhance your enjoyment:
- Display Your Lanterns: Find the perfect spot for your lanterns to shine. Whether indoors or outdoors, they can add charm and ambiance to any setting.
- Host a Lantern Lighting Ceremony: Gather friends and family to celebrate your creations. Share the process you followed and the materials you used.
- Experiment with New Designs: Don’t stop at just one style! Try different colors, patterns, and sizes to create a unique lantern collection.
- Incorporate Lighting: Enhance the atmosphere by using LED lights or candles (if safe) to illuminate your lanterns, adding a magical glow.
By following these steps, you not only beautify your space but also enrich your crafting skills. Enjoy the beauty of your handmade round paper lanterns and let them bring joy to your home or event!
 admin
admin