Welcome to your go-to guide for all things related to recording content on YouTube TV! Whether you're a sports enthusiast, a binge-watcher, or just someone who enjoys catching up on the latest shows, YouTube TV has something for everyone. With a wide array of channels, live sports, and an impressive cloud DVR feature, it’s an amazing platform for cord-cutters. Let's dive into what makes
Key Features of YouTube TV
- Live TV Streaming: Enjoy live broadcasting from over 85 channels, including major networks and popular cable channels.
- User-Friendly Interface: The interface is intuitive and easy to navigate, making it simple to find what you want to watch.
- No Cable Required: As a streaming service, there’s no need for traditional cable setup and equipment!
- Multiple Profiles: Create personalized viewing experiences for family members with separate profiles and preferences.
- Unlimited Cloud DVR: Store lots of your favorite shows and movies for future viewing.
YouTube TV also includes a range of add-ons, such as premium channels and movie rentals, allowing you to tailor your package to suit your preferences. Seamlessly shift between devices, whether it’s a smart TV, mobile device, or computer, and enjoy the flexibility of watching anywhere, anytime!
Also Read This: How to Get the Longhorn Network on YouTube TV: A Step-by-Step Guide
Understanding YouTube TV's Cloud DVR
One of the standout features of YouTube TV is its Cloud DVR. If you’ve ever struggled with running out of storage space on a physical DVR, you’ll love this solution. The Cloud DVR makes it easy to record and store your favorite shows without the hassle of managing hard drives. But let’s break down exactly how it works and why it’s beneficial!
Also Read This: Is YouTube Down? How to Check if YouTube Is Facing Issues
What is Cloud DVR?
The Cloud DVR allows you to record programs and store them on YouTube TV's servers instead of a physical device. This means you can access your recordings from any device connected to your YouTube TV account. How cool is that? Here’s what you need to know:
Key features of Cloud DVR:
- Unlimited Storage: With YouTube TV’s Cloud DVR, you have unlimited storage space! Record as many shows and movies as you like.
- Save for Nine Months: Keep your recorded content for up to nine months. Plenty of time to get around to those titles on your list!
- Fast Forward: You can easily fast forward through commercials when you watch your recordings.
- Scheduled Recordings: Set it and forget it! Easily schedule recordings for your favorite shows, movies, and sports events with just a few clicks.
Also Read This: How Do You Get YouTube on DirecTV and How to Set Up the Service?
How to Use Cloud DVR
Getting started with YouTube TV's Cloud DVR is easy:
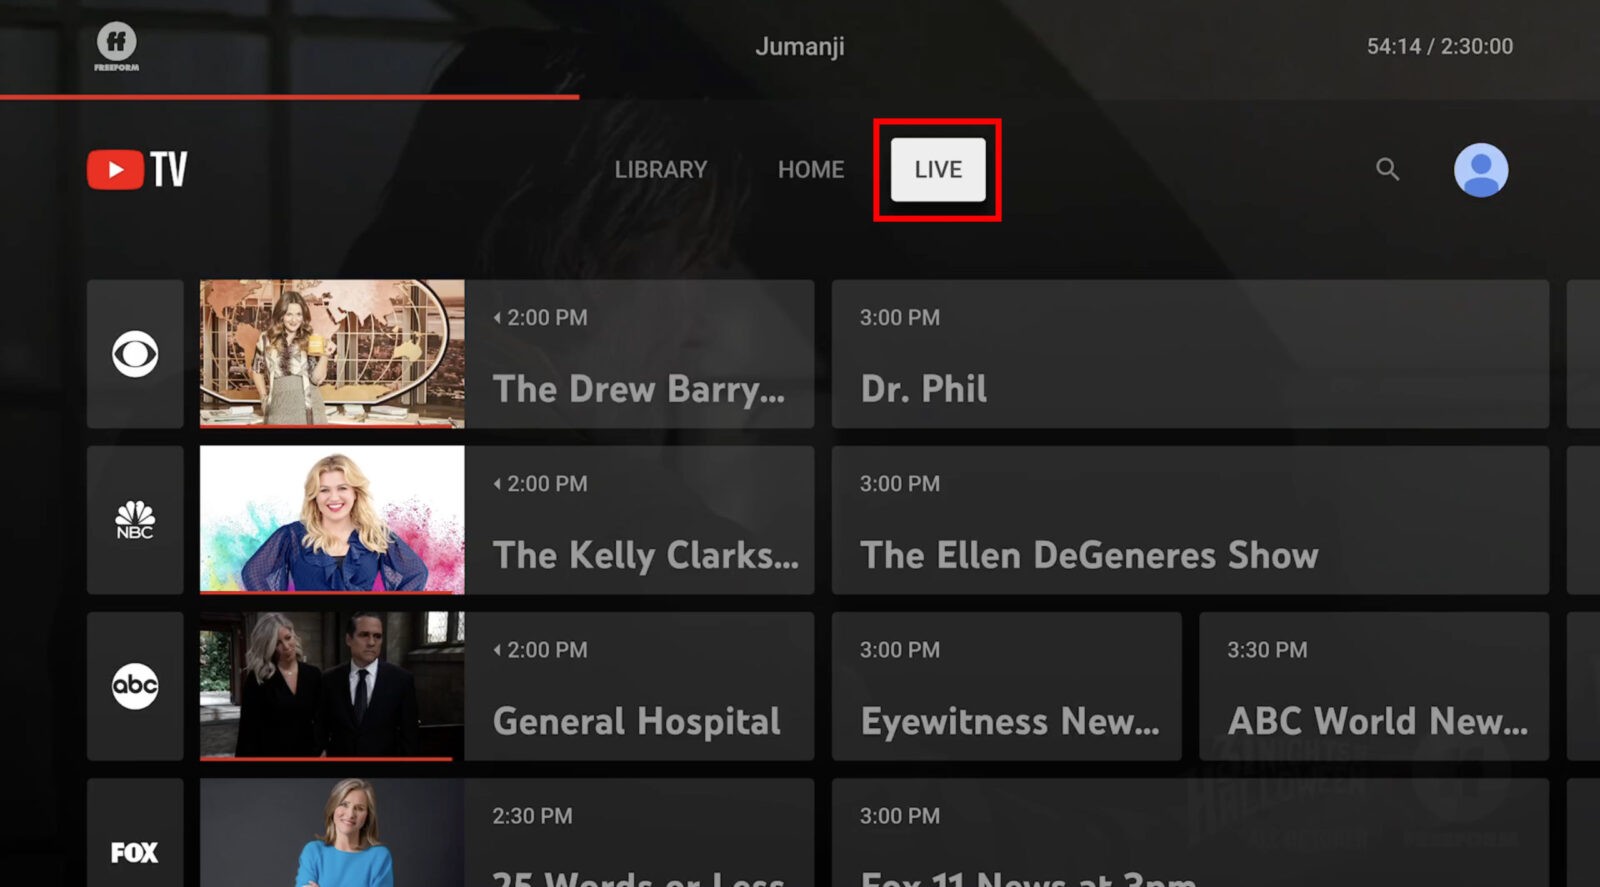
- Navigate to the Live TV section and find the program you want to record.
- Click on the program, and you’ll see an option to “Record.” Just toggle it on.
- Your recorded content will automatically be saved to your library for future viewing.
And if you’re ever worried about forgetting to record a show, YouTube TV allows you to set recurring recordings, so you won't miss a single episode!
In summary, YouTube TV’s Cloud DVR offers flexibility and convenience that enhances the overall viewing experience. It brings the power of traditional DVR technology into the modern streaming era, allowing you to watch what you want, when you want. Happy recording!
Also Read This: How to Avoid Copyright Issues on YouTube: Protecting Your Content
3. How to Set Up Your YouTube TV Account for Recording
Getting started with YouTube TV is a breeze, especially when you're keen on recording your favorite shows and live events. First things first, you need to set up your account. Here’s how you can do that:
- Create Your YouTube TV Account: If you don’t already have a YouTube TV account, navigate to the YouTube TV website or download the app from your device's app store. Click on the "Try it Free" or "Sign Up" button and follow the prompts to enter your information.
- Select Your Subscription: You’ll choose a subscription that best fits your needs. YouTube TV offers a variety of channels, and depending on the package you choose, you can have access to a multitude of content, including live sports, news, and entertainment.
- Set Up Payment: Input your payment information to finalize the subscription. Keep in mind YouTube TV typically offers a trial period; make sure to check for any promotional pricing.
- Customize Your Preferences: Once your account is set up, you can customize your experience. This includes selecting your preferred channels and adjusting your settings for recording.
- Understanding Cloud DVR: YouTube TV comes with a Cloud DVR feature that’s automatically activated. This means that you’ll have unlimited storage space for recordings for up to 9 months. You can access these recordings anytime, anywhere.
With your YouTube TV account successfully set up, you’re ready to dive into the world of TV recording. Just don’t forget to ensure you have a reliable internet connection for the best streaming experience!
Also Read This: Can You Use YouTube TV While Traveling? A Comprehensive Guide
4. Steps to Record Live TV on YouTube TV
Now that your account is ready, recording live TV couldn’t be easier! Here’s a step-by-step guide to help you make sure you capture all your favorite moments:
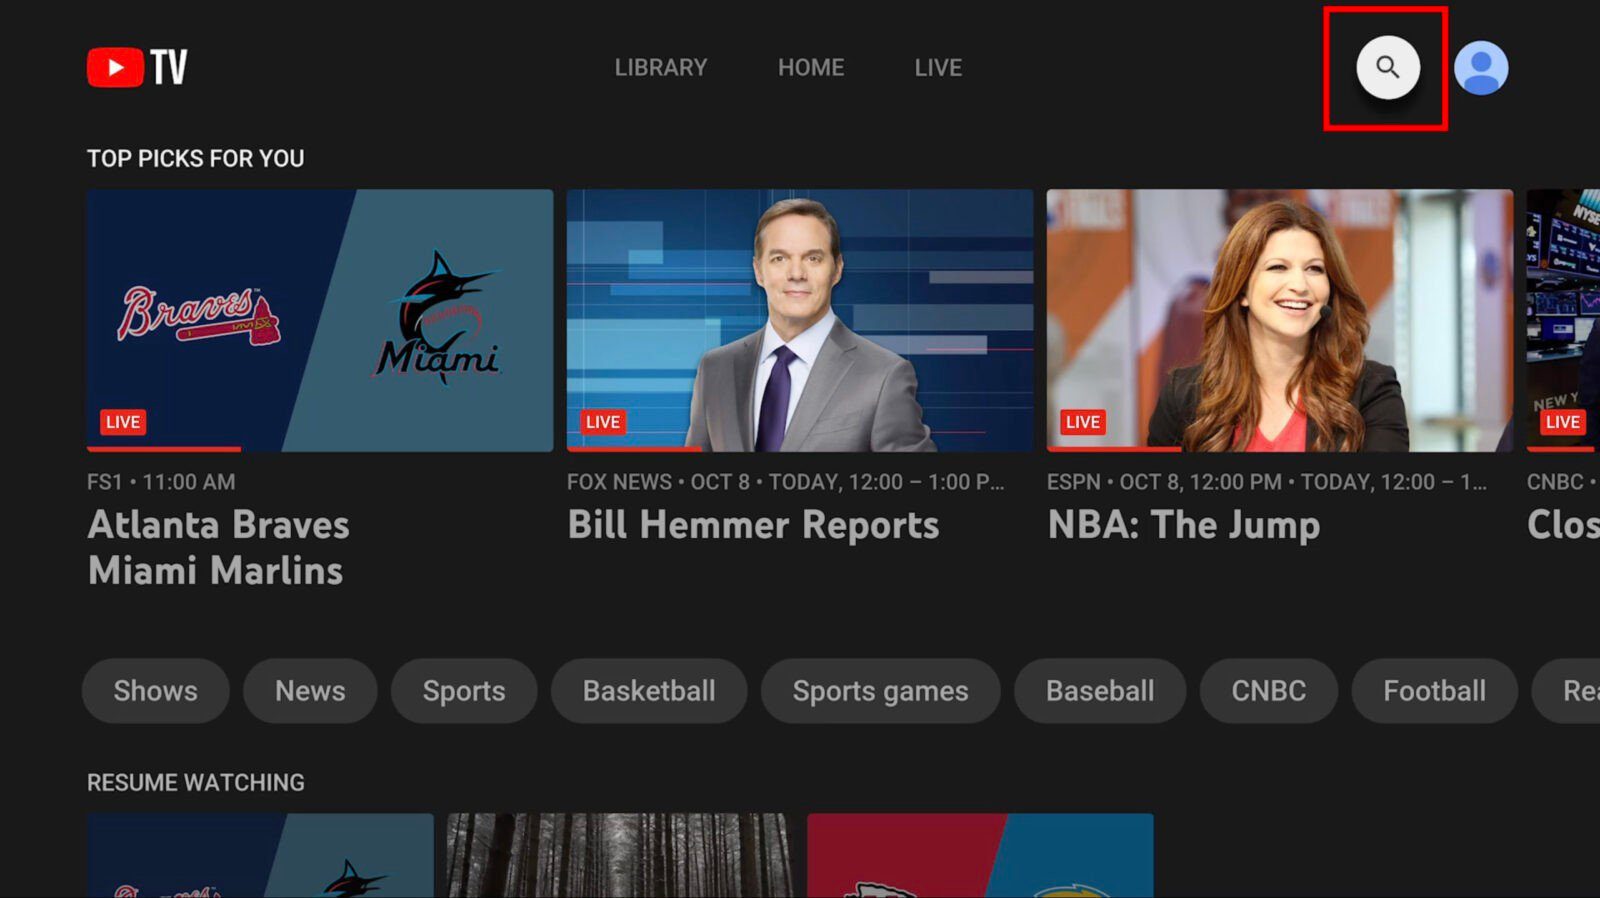
- Find Something to Watch: Browse through the guide or the home screen to find the show or event you want to record. You can use the search bar to look for specific content.
- Select the Show: Once you’ve found the show, click on it, and you’ll see a screen that provides more details, including the option to record.
- Hit the “Record” Button: Look for a red “Record” button typically found near the play options. Click it, and you’ll see a confirmation popup letting you know that the recording is queued.
- Choose Options (if available): Depending on your preferences, you might have options like recording just that episode or all future episodes of the series. This is perfect for keeping up with shows you love!
- Confirm the Recording: After selecting the desired options, confirm your recording. You should receive a notification that the recording has been successfully created.
- Accessing Your Recordings: To watch what you’ve recorded, head to the "Library" section of the YouTube TV app or website. All your recorded content will be available there, neatly organized and ready for viewing!
And voila, you’re all set! Recording on YouTube TV not only allows you to never miss your favorite shows but also gives you the flexibility to watch them whenever you want. So go ahead, set those reminders, and enjoy your binge-watching sessions!
Also Read This: How Much YouTube Shorts Pay for 100k Views? Understanding Earnings from YouTube Shorts Content
5. Managing Your Recorded Content
Once you've started recording shows on YouTube TV, the next step is efficiently managing that content. After all, it’s easy to get overwhelmed by the number of recordings you may accumulate over time! Here are some tips to help you keep everything organized and accessible.
Accessing Your Library: When you log in to YouTube TV, navigating to your library is a breeze. Simply click on the “Library” tab located at the bottom of the screen. Here, you’ll find all your recorded content neatly organized for your viewing pleasure.
Sorting and Filtering: YouTube TV provides options to sort your recordings by date, title, or show. This feature can be a lifesaver when you're trying to find that one episode you love. You can also filter content by categories, such as live recordings or shows you’ve saved for later, making it easier to manage your time and choices.
Deleting Old Recordings: We all know that space can be limited since YouTube TV offers unlimited storage for recordings, but it’s essential to keep things tidy. To delete a specific recording, go into your library, select the show, and click on the trash icon. Confirm the deletion, and it’s gone! Regularly cleaning out old content ensures your library only contains what you love and want to keep.
Organizing by Shows and Events: Another handy feature is that YouTube TV automatically organizes your recordings by show or series. If you've recorded multiple episodes of a series, you’ll see them bundled together, which makes navigation much easier. Want to binge-watch your favorite show? Just select the series and start watching!
Managing Series Recordings: You can even set preferences for series recordings. Want to only record new episodes or every episode? You can easily adjust these settings while viewing the show in your library. This means less clutter and ensures you’re only saving what you really want to watch!
With these tools, managing your recorded content on YouTube TV becomes a seamless experience, allowing you to focus more on enjoyment than on organization!
Also Read This: Simple Steps to Change the Thumbnail Image on Your YouTube Channel
6. Tips for Optimizing Your YouTube TV Recording Experience
Now that you know how to manage your recorded content, let’s explore some savvy tips to enhance your overall recording experience on YouTube TV.
- Schedule Recordings in Advance: Planning ahead is key! If you know a show is coming up, schedule your recordings as early as possible. Click on the show in the guide and hit the record button. This way, you won’t have to worry about missing an episode.
- Explore Cloud DVR Features: YouTube TV offers cloud DVR capabilities, which means you can record shows without worrying about storage space on your devices. This is incredibly helpful for binge-watchers who love to keep several series on hand.
- Keep Track of Your Favorite Shows: Use the “Add to Library” feature for your favorite shows, ensuring they’re recorded automatically as new episodes air. This saves time and guarantees you never miss an episode!
- Utilize Playback Features: Ever miss a critical moment in a show? Utilize the rewind feature during live playback. It lets you catch up on what you might have missed, seamlessly blending live viewing with recorded content.
- Regularly Check for Recording Conflicts: If you’re a heavy recorder, there might be times when two shows overlap in airing times. Keep an eye out for these conflicts in your library and adjust settings if needed.
Implementing these tips can lead to a significantly better experience while you indulge in your favorite content. Whether you’re an occasional viewer or a die-hard binge-watcher, optimizing your recording strategy on YouTube TV can truly elevate your binge-watching game!
Also Read This: What Is YouTube Mountain View? A Look at YouTubes Headquarters Location
Troubleshooting Common Recording Issues
So, you’ve set up your recordings on YouTube TV, but things haven't gone as smoothly as you expected? Don’t worry! It’s not uncommon to encounter a few hiccups along the way. Here are some common recording issues users face and how you can troubleshoot them effectively:
1. Recording Not Starting
This can be frustrating, especially if you wait all week for that one episode! If your recording doesn’t start:
- Check the Schedule: Make sure the program is scheduled correctly. Sometimes, there might be time zone issues or changes in the programming schedule.
- Verify Storage Space: Ensure you have enough space in your cloud DVR. YouTube TV comes with unlimited storage, but you could reach the limit if you have too many recordings.
- Check Your Wi-Fi: A poor internet connection can affect the start of your recording. Make sure your device is connected to a stable Wi-Fi network.
2. Missing Recorded Content
If you’ve confirmed that the show aired but can’t find your recording, try the following:
- Revisit the Library: Sometimes, recordings may take a moment to show up in your library. Refresh the app or website.
- Check for Conflicts: If you’re recording multiple shows at the same time, there might be conflicts. YouTube TV can only record two streams simultaneously unless you have a compatible device.
- Look in "Expired" Section: Recordings stay for a limited time. If they expire, they might not show in your current library. Check the expired section just in case.
3. Poor Quality of Recordings
If your recorded content looks pixelated or skips, here are quick solutions:
- Adjust Streaming Quality: Check your streaming quality settings. You may need to lower the quality for better performance, especially on devices with slower internet connections.
- Device Update: Make sure your device or app is updated to the latest version. Sometimes, updates can resolve performance issues.
If these steps don’t resolve your issue, head to the YouTube TV Help Center for more assistance. Their team can help tackle any more obscure problems!
Conclusion and Final Thoughts on YouTube TV Recording
All in all, using YouTube TV’s recording features can significantly enhance your viewing experience. It allows you to create a personalized library of shows and movies that match your interests. However, you might face challenges along your recording journey, as we covered earlier. Let’s recap a few key takeaways:
- Create Strategic Recordings: Use the auto-record feature when possible. It saves you the hassle of repeatedly scheduling shows, especially with series.
- Stay Aware of Storage Limits: While YouTube TV offers unlimited storage, remember that recordings do expire. Be mindful to manage your library effectively.
- Familiarize Yourself with Troubleshooting: Knowing how to address common issues will save you lots of time and frustration down the line.
In conclusion, YouTube TV makes recording content easy and flexible, keeping you in charge of your viewing schedule. As you navigate its features, be sure to explore and utilize everything it offers. After all, it’s all about enjoying your favorite shows without the constraints of traditional TV schedules. Happy watching, and enjoy recording all your must-see content on YouTube TV!
 admin
admin


