Friendship bracelets have been a cherished way to express affection and bond with friends for generations. These colorful pieces of art symbolize friendship, loyalty, and love. With a simple twist of your wrist and a dash of creativity, you can create beautiful bracelets that not only look great but also hold deep meaning. In this guide, we’ll explore how to make friendship bracelets using rubber bands, an easy and fun way to get started, whether you’re an experienced crafter or a complete beginner!
Materials Needed for Rubber Band Bracelets
Before diving into the fun of making your own rubber band friendship bracelets, you'll need to gather a few materials. Thankfully, you won’t need much to get started. Here's a simple list of what you'll need:
- Rubber Bands: Choose a variety of colors to make your bracelet vibrant and eye-catching. You can opt for standard rubber bands or specific loom bands designed for bracelet-making.
- Bracelet Loom (Optional): While not necessary, a loom can make the process easier and help create more intricate designs.
- Scissors: You’ll need these to cut the rubber bands to your desired length, especially if you're working with longer pieces.
- S-clips or C-clips: These small clips are essential for securing the ends of your bracelet so it doesn’t fall apart. Choose a comfortable size for your wrist.
- Workspace: Make sure to have a clean, flat surface where you can work without distractions. A table or desk is ideal.
Now that you have your materials, it’s essential to understand how each item works together. The rubber bands will form the core of your bracelet, and the loom (if used) will help you organize and weave them in a systematic way. Whether you’re creating simple patterns or more complex designs, having a clear workspace will help you keep track of your progress.
Don't be afraid to experiment with different colors and band sizes! There's no wrong way to make a bracelet, and one of the most enjoyable aspects is finding a combination that resonates with you personally. As you get more comfortable with the basic techniques, feel free to branch out and explore additional tools and materials.
With your materials in hand, you're now ready to start crafting some beautiful friendship bracelets. The next steps will guide you through the making process, helping you create unique pieces that you and your friends will treasure for years to come!
Also Read This: Master the Art of Opening Dailymotion in Floating Mode with Step-by-Step Video Tips
3. Step-by-Step Instructions for Making Rubber Band Friendship Bracelets
Alright, let’s dive into the fun part! Making friendship bracelets with rubber bands is not only easy but also such a delightful way to express your creativity. Here’s a straightforward step-by-step guide to help you create your very own bracelet.
-
Gather Your Supplies:
You’ll need:
- Colored rubber bands (make sure to choose your favorite colors!)
- A loom or a simple peg board (if you don’t have these, your fingers will work just fine)
- A hook (a crochet hook works well) or even your fingers
-
Choose Your Design:
Decide on a design pattern before you start. You can stick with a simple braid or go for something more intricate like a fishtail or a zig-zag pattern. Either way, it’s all about what feels right for you!
-
Start with the Base:
Take one rubber band and twist it into an 8 shape. This will be the starting point for your bracelet.
-
Add More Bands:
Now, pick another rubber band and loop it through the first one, then add another rubber band and pull it through the loop. Ensure to keep adding bands to the previous ones and always pull them tightly.
-
Continue to Weave:
Keep adding rubber bands, alternating colors for a vibrant look, until you reach your desired length. This could be around 6 to 7 inches depending on your wrist size!
-
Finish Off:
Once you're happy with the length, take your last loop and pull it through the very first band on the end. Pull it tight!
-
Secure the Ends:
To secure the ends of your bracelet, take another band and loop it through the last band to create a knot. Trim any excess rubber bands if necessary.
-
Show It Off:
Your bracelet is done! Slip it onto your wrist or share it with a friend as a token of your friendship. You could even make a matching one for them!
Also Read This: How to Wear Hijab Videos on Dailymotion
4. Different Techniques for Unique Designs
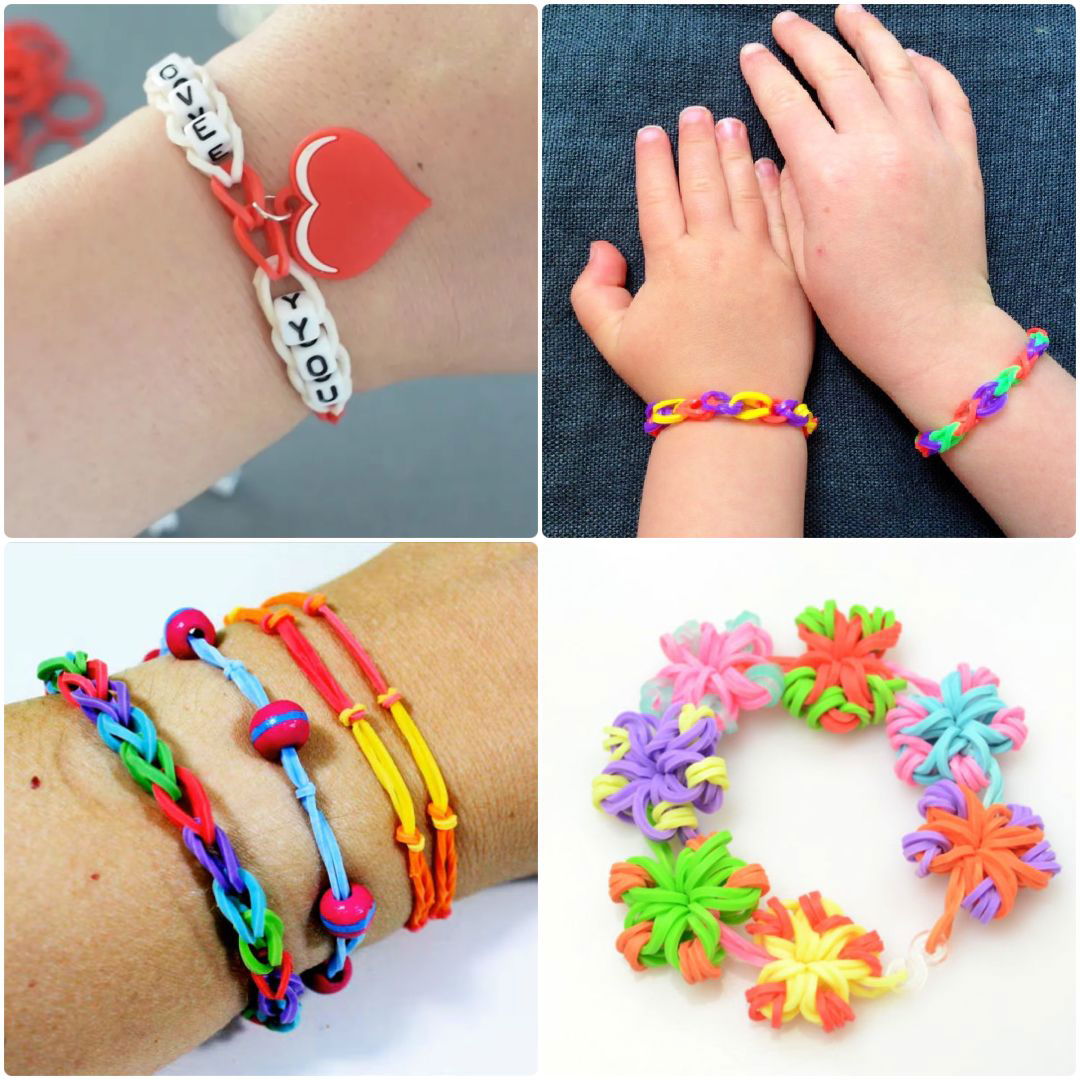
Now that you know how to create a basic friendship bracelet, let’s explore some techniques to take your crafting game up a notch and make unique designs that truly stand out!
-
Fishtail Technique:
This classic style involves weaving the bands in a pattern that resembles a fishtail. Start with two rubber bands; place them side by side and grab the outside band to cross over into the center. Alternate sides to create the fishtail effect. It’s simple yet stunning!
-
Chevron Pattern:
The chevron pattern is another favorite. It consists of a series of V shapes. To create this, you can use three to four colors. Each rubber band loops in a way to shape a 'V', alternating between colors as you go. This technique can add a fun twist to your bracelets!
-
Twisted Bracelets:
For a more intricate look, try twisting multiple bands together as you go. Start by holding two bands together and twisting them as you add new colored bands. This technique gives off a braided effect and adds depth to your design.
-
Bead Accents:
Add a personal touch by incorporating beads into your designs! Simply thread beads onto the rubber bands before you weave them together. It's a great way to customize your bracelet with letters or charms that represent you or your friend.
-
Gradient Effect:
Create a beautiful gradient by transitioning from one color to another. Start with one color and gradually add bands of a different color to create a seamless blend. This technique creates a visually striking appearance.
Experiment with these techniques, mix and match them, and most importantly, have fun! There are no limits when it comes to designing friendship bracelets that are as unique as your relationships!
Also Read This: Is Dailymotion Upgrading Its Platform from Flash?
5. Tips and Tricks for Successful Bracelet Making
Friendship bracelet making with rubber bands is not only fun, but it can also be super rewarding! To ensure your bracelet-making experience is smooth sailing, here are some essential tips and tricks that every beginner should know:
- Choose the Right Rubber Bands: Not all rubber bands are created equal! Select high-quality, stretchy bands that won’t break easily. Look for vibrant colors that will make your bracelet pop!
- Start with Simple Patterns: If you’re new to bracelet making, stick to basic designs. Simple patterns like the twist or the spiral are great for beginners. As you gain confidence, you can gradually try more complex designs!
- Use a Loom or a Clip Board: While it’s possible to make bracelets by hand, using a loom or a clipboard can make your job easier. These tools help keep your bands in place, making it simpler to create uniform patterns.
- Keep Your Work Area Organized: A cluttered workspace can lead to frustration! Find a small, dedicated area to keep your materials. Having everything within reach will keep you focused and motivated.
- Practice Patience: Making bracelets can take time, especially if you're trying intricate patterns. Don’t rush the process! Enjoy the journey, and take breaks if you feel stuck.
Remember, practice makes perfect! The more you make, the better you’ll become. Don’t hesitate to experiment with different patterns and colors. Let your creativity shine!
Also Read This: How to Connect WiFi on Windows XP – A Comprehensive Guide for Users on Dailymotion
6. How to Customize Your Friendship Bracelets
Your friendship bracelets are a reflection of your unique style, so why not personalize them? Customizing your bracelets can make them even more special for you and your friends. Here are some creative ways to add your personal touch:
- Color Combinations: Choose colors that represent you or the friend you’re making it for. You could go with their favorite colors or even colors that symbolize certain meanings. For example, blue for calmness, red for love, or yellow for happiness!
- Different Patterns: Once you’ve mastered the basics, explore a variety of patterns! The chevron, fishtail, and diamond designs can be easily created with rubber bands. Don’t hesitate to mix and match patterns for a truly unique look!
- Add Charms: Personalize your bracelets with small charms or beads. They can represent something significant to you or your friendship, like symbols of shared interests or inside jokes.
- Adjust Length and Size: Feel free to adjust the size of your bracelet according to your wrist or your friend’s. You could incorporate a clasp to make it adjustable or create a longer bracelet that can be wrapped around the wrist multiple times.
- Incorporate Letters or Initials: You can use lettered rubber bands or beads to incorporate initials or names into your friendship bracelet. This simple addition adds a personal touch and makes the bracelet even more meaningful.
Customization is all about showing your personality and creativity. Don’t be afraid to experiment and let your imagination run wild. After all, the best part about making friendship bracelets is creating something that tells a story about you and your relationships!
Also Read This: Master Fluent English Speaking in 10 Days with Dailymotion Videos
7. Ideas for Gifting Friendship Bracelets
Friendship bracelets are more than just colorful accessories; they symbolize connection, love, and camaraderie. When thinking about gifting these DIY creations, consider the following ideas to make your bracelet gifting experience even more meaningful:
- Personal Touch: Customize the bracelet for the recipient. Choose colors that represent their personality or beads that reflect their interests. This shows that you've put thought into their gift.
- Occasions Matter: Gift your friendship bracelet on special occasions. Whether it’s a birthday, a graduation, or just because, the gesture will always be appreciated.
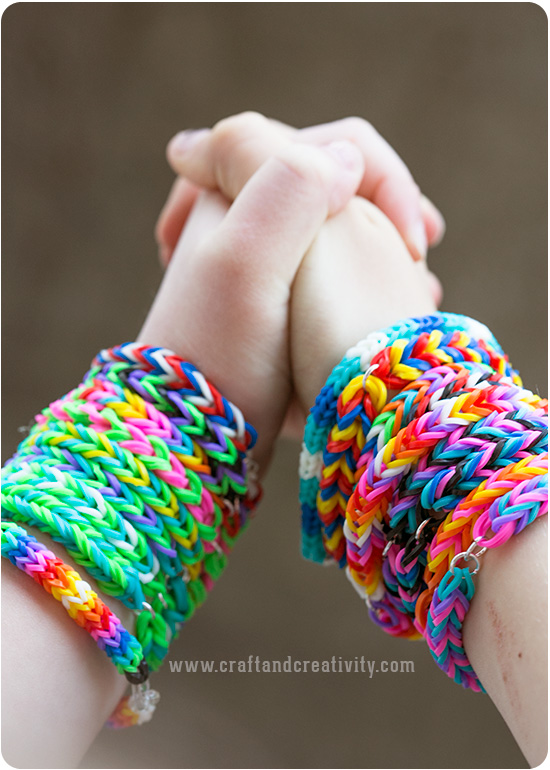
- Bracelet Sets: Create a set of matching bracelets for you and your friend. This not only strengthens your bond but also serves as a trendy accessory duo!
- Include a Note: Pair your bracelet with a heartfelt note expressing your feelings. You can share a favorite memory or why you appreciate your friendship. It adds an emotional touch to the gift.
- Wrap It Up: Presentation counts! Consider wrapping your bracelet in fun gift wrap or putting it in a small decorative box. This little effort can elevate the excitement of receiving a gift.
- Group Gifting: If you have a close-knit group of friends, consider organizing a friendship bracelet exchange. Everyone can create and gift their unique designs to one another, making it a memorable event.
Gifting a friendship bracelet isn’t just about the bracelet itself. It’s about the connection, the shared experiences, and the memories you create together. So, whether you're giving it to a best friend, a family member, or even a new friend, these bracelets can carry a lot of meaning!
Also Read This: How Pregnancy Happens Educational Videos on Dailymotion
8. Where to Find More Tutorials and Inspiration
As you dive deeper into the world of friendship bracelets made with rubber bands, you might find yourself looking for new patterns, techniques, and creative ideas. Here are some excellent resources to keep your inspiration flowing:
- YouTube: This platform is a goldmine for visual learners. Search for "rubber band friendship bracelets," and you’ll find countless tutorials ranging from beginner to advanced levels. Watching someone demonstrate can make the process a lot easier to follow!
- Pinterest: This site is perfect for visual inspiration! Create a board dedicated to your friendship bracelets, pinning intriguing designs, color combinations, and tutorials.
- Instagram: Check out hashtags like #FriendshipBracelets or #RubberBandBracelets. You’ll find myriad posts showcasing unique designs and ideas from fellow bracelet enthusiasts.
- Craft Blogs: There are many craft bloggers who focus entirely on DIY projects. Look for blogs that specialize in friendship bracelets or rubber band crafts; they often provide step-by-step guides, tips, and tricks.
- Online Craft Stores: Browsing online stores like Etsy can inspire you with various artistic styles. You might even find ready-made options that spark your creativity and help you decorate your own projects!
Don't be shy about exploring these resources. The world of friendship bracelets is bursting with creativity and inspiration. Plus, as you gather ideas and tutorials, you’ll be on your way to creating beautiful and heartwarming pieces that will surely make your friends smile!
Conclusion and Encouragement to Start Crafting
In conclusion, making friendship bracelets with rubber bands is not only a fun and creative activity but also a wonderful way to strengthen bonds with friends. By investing time in crafting these charming accessories, you can express your love and appreciation in a meaningful way. Here are a few key points to remember as you embark on your bracelet-making adventure:
- Start Simple: Begin with basic patterns to build your skills and confidence.
- Be Creative: Don't hesitate to experiment with colors and designs. Your unique style will make each bracelet special.
- Personal Touch: Consider incorporating initials or symbols that represent your friendship.
Remember, crafting is about enjoyment, so allow yourself to be playful with your creations. Here are some tips to enhance your experience:
| Tip | Description |
|---|---|
| Set Up a Crafting Space | Organize your materials in a comfortable area where you can focus on making your bracelets. |
| Invite Friends | Craft together! Sharing the experience with friends can spark new ideas and make it even more fun. |
| Share Online | Showcase your finished bracelets on social media to inspire others and connect with fellow crafters! |
Embrace the joy of crafting and start making your friendship bracelets today! You'll not only create beautiful pieces but also lasting memories with those you care about most.
 admin
admin


