Resizing images in Google Docs on your iPad is a straightforward process that can enhance your documents significantly. Whether you’re creating a presentation, a report, or simply adding visuals to your notes, adjusting image size allows for better alignment and presentation. In this guide, we’ll break down how to resize images effortlessly while using Google Docs on your iPad. Let’s dive into it!
Step-by-Step Guide to Insert an Image in Google Docs
Before resizing an image, you'll need to insert it into your Google Docs document. Here’s a simple step-by-step process to get your images loaded:
- Open Google Docs App: Start by launching the Google Docs app on your iPad. Make sure you're signed in to your Google account.
- Open Your Document: Select an existing document to edit or create a new one by tapping the "+" icon.
- Access the Insertion Menu: Tap on the "+" icon or the "Insert" option typically located in the upper right corner of the screen.
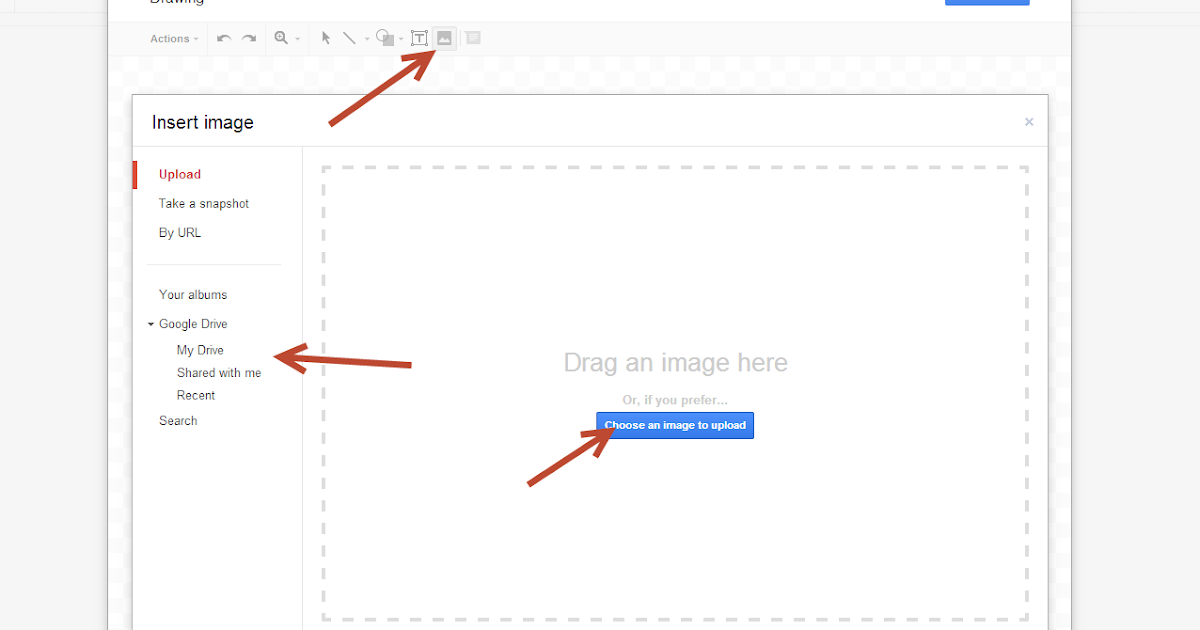
- Select "Image": Choose the "Image" option from the dropdown menu. You’ll have several choices where to source your image:
- From Photos: Use images saved on your device.
- From Camera: Take a new photo directly.
- From Drive: Import images from your Google Drive.
- By URL: Add an image from the web using its URL.
- Google Images: Search and insert an image directly from Google.
Now that you’ve successfully inserted an image into your Google Docs file, let's go over how to resize it.
To resize the image:
- Tap on the Image: Click on the inserted image. You’ll see blue selection handles appear around the edges.
- Resize Using Handles: Drag one of the corner handles inward to resize the image proportionally or drag the side handles to stretch the image as needed.
- Position Your Image: After resizing, you can also move the image around by tapping and dragging it to your desired location in the document.
And that’s it! You’ve not only inserted but also resized your image in Google Docs on your iPad. This skill is perfect for making your documents visually appealing and reader-friendly. Don't hesitate to experiment with different images and sizes to see what works best for your project!
Also Read This: How to Insert an Image into Blender for Advanced 3D Projects
3. Methods to Resize Images in Google Docs on iPad
If you're using Google Docs on your iPad, resizing images is a straightforward task, but it’s important to know that there are several methods to achieve it. Each method has its own perks and could be preferable depending on your specific needs. Let’s explore the different ways you can resize images in your documents.
1. Dragging the Corners
The easiest way to resize an image in Google Docs on your iPad is by simply dragging. Here’s how:
- Open your Google Docs document containing the image.
- Tap on the image you want to resize.
- You'll see blue squares (handles) appear at the corners and sides of the image.
- To resize, touch and drag one of the blue corners inwards or outwards to adjust the size while maintaining the image’s aspect ratio.
This method is super intuitive, and you can easily visualize how your image changes as you adjust it.
2. Using the Image Options Menu
If you prefer to have more control over the exact size of the image, the Image Options menu is your friend. Here’s how to use it:
- Select the image by tapping on it.
- Look for the “Format” icon (paint roller) at the top menu bar.
- Once you tap on it, scroll down to find “Size & Rotation.”
- In this section, you can enter specific dimensions for height and width.
This method is fantastic if you need to fit the image to specific measurements, such as when preparing a document for printing or ensuring your images are uniform in size.
3. Resizing by Aspect Ratio
Sometimes, you might want to maintain the aspect ratio while still resizing the image. This is especially useful when you want to avoid stretching or distorting the image:
- Select the image you want to modify.
- Use the corner handles to resize it.
- Hold down the “Shift” key (if you have a keyboard) while dragging a corner handle to lock in the aspect ratio.
- If you're just tapping, make sure to resize from a corner to maintain the proportions.
This approach ensures your images look their best no matter how big or small you make them!
Also Read This: Guidelines for Legal and Ethical Use of Getty Images
4. Using the Toolbar to Resize Your Image
Google Docs on iPad offers some handy features right in the toolbar for quick access to image resizing options. Knowing how to use the toolbar can save you time and help you edit your images efficiently. Here’s a step-by-step guide on how to use the toolbar to resize your images:
Step 1: Select the Image
First things first, tap on the image you want to resize. Once selected, you should see a bounding box around it, confirming that the image is ready for editing.
Step 2: Access the Toolbar
Next, take a look at the toolbar at the top of the Google Docs interface. You’ll see various icons, and one of them is the “Format” option, represented by a paint roller icon. Tap on it!
Step 3: Adjust the Size
As mentioned earlier, once you tap on the Format icon, scroll down to find “Size & Rotation.” Here, you can:
- Set a specific height and width for your image
- Rotate your image if necessary
Simply enter your desired dimensions in the respective fields. This is a perfect way to ensure your images fit exactly how you want them to in the document layout.
Step 4: Fine-Tuning
After resizing, take a moment to check if the image placement looks good. Is it aligned correctly with your text? If not, you can adjust the positioning directly on the canvas, ensuring everything looks pristine.
Resizing images using the toolbar not only provides precision but also allows for a seamless integration of images with surrounding text—making your document visually appealing.
With these handy methods at your disposal, resizing images in Google Docs on your iPad will be a breeze. You’ll be crafting professional-looking documents in no time!
Also Read This: How to Make a Photo Exclusive on Getty to Maximize Your Earnings
5. Adjusting Image Size with Touch and Drag on iPad
When you're working on your Google Docs project on an iPad, adjusting the size of an image is a breeze! One of the simplest methods involves using your fingertips to touch and drag. This hands-on approach gives you a lot of control and allows for quick adjustments. Here’s how to do it:
- Insert the Image: First things first, you need to have your image in the document. You can easily insert an image by tapping the "+" icon in the upper right corner, selecting "Image," and choosing where to source your image from.
- Select the Image: Tap on the image you want to resize. You'll see a blue border appear around it, indicating that it’s selected.
- Initiate the Resize: Once your image is selected, you’ll notice small circles appearing at the corners of the image. These are your resize handles.
- Touch and Drag: Place one finger on one of the corner handles. Now, gently drag your finger toward the outside of the image to make it larger, or toward the center to make it smaller. Watching the image change size is quite satisfying!
It’s worth noting that you should always use the corner handles for resizing. This method ensures you keep the proportions intact – we’ll discuss that in the next section!
This touch-and-drag technique is especially handy for making quick adjustments on the go. Whether you’re hoping to emphasize a particular part of an image or just need it to fit into your document better, using your fingers can be both intuitive and efficient. Just remember to take your time, as loosely dragging can sometimes lead to unexpected sizes. If you’re unhappy with the results, no big deal—just adjust it again!
Also Read This: How to Edit Your Behance Portfolio for Optimal Project Presentation
6. Maintaining Aspect Ratio While Resizing
While resizing images in Google Docs on your iPad, it's crucial to maintain the aspect ratio for a polished look. The aspect ratio is the relationship between the width and height of an image, and keeping this ratio intact prevents your image from becoming distorted.
Here's a quick guide on how to ensure your images stay beautifully proportioned:
- Use Corner Handles: As we mentioned before, always resize your images using the corner handles rather than the side handles. This method automatically maintains the aspect ratio as you scale the image larger or smaller.
- Double-Tap for Options: If you accidentally use the side handles and your image gets distorted, simply double-tap the image to restore it to its original size or to display options that might help you fix the aspect ratio.
- Set Dimensions Explicitly: If you're the type who likes things precise, you can also set specific dimensions for your image. Tap on the image, select the format options, and look for the dimensions field. Enter your desired width or height, and the other dimension will adjust accordingly, keeping the aspect ratio intact.
Maintaining the aspect ratio is especially important for professional documents or presentations—nobody wants to see a stretched-out image that looks comically wrong! Plus, it just looks better and ensures that your images communicate the right message.
So, next time you're resizing your images in Google Docs on your iPad, remember these tips. Keep it simple, drag those corners, and your images will look great every time!
Also Read This: How to Edit Text in a JPEG Image Online with Free Tools
Saving and Exporting Your Resized Image
Once you’ve successfully resized your image in Google Docs on your iPad, it’s crucial to know how to save and export that document properly. Fortunately, Google Docs makes this process pretty straightforward!
Here are the steps you'll want to follow:
- Check Your Document: Before saving, take a moment to review your document. Ensure that the image looks exactly how you want it to appear. Double-check the alignment, size, and any other elements you’ve adjusted.
- Save Changes: Google Docs usually autosaves your work. However, it’s a good practice to manually save changes. Tap the three dots in the upper right corner, and select “Save” if it’s available.
- Export Options: If you need to share or utilize your document outside of Google Docs, you can export it. Tap on the three dots, select “Share & export”, then choose “Download”. You can get different formats like PDF, Microsoft Word, or plain text.
- Image Preservation: Keep in mind that when you export your document, the sizes and formats of the images should remain intact. If you’re looking to just save the image separately, you will need to take a screenshot or use an image-saving app.
Resizing images in Google Docs on your iPad is beneficial for creating presentations, reports, or any document that requires visual elements. Make sure to keep your images clear and in line with the document’s overall aesthetic!
Also Read This: Is TikTok Superior to YouTube Shorts in the Arena of Short-Form Video Content
Troubleshooting Common Issues When Resizing Images
While resizing images in Google Docs on your iPad is typically a smooth process, you might run into a few hiccups along the way. Don’t worry! Here are some common issues and tips on how to troubleshoot them:
- Image Doesn’t Resize: If you find that your image isn’t resizing properly, it might be because it’s locked or grouped with other objects. Make sure you've selected the image and try to unlock it. You can do this by tapping on the image and checking for options to ungroup or unlock.
- Quality Loss: Sometimes resizing can lead to a decrease in image quality, especially if you’re trying to stretch a small image. To avoid this, always start with high-resolution images whenever possible.
- Not Enough Space: If Google Docs isn’t allowing you to resize an image, you may be running into restrictions due to document layout. Make sure there’s enough room on the page and that the image isn’t constrained by text wrapping settings.
- Image Doesn’t Align: After resizing, your image may not align as you'd like. Use the alignment tools (usually found in the toolbar) to adjust where you want the image positioned within your document.
If you continue to face issues despite these tips, consider restarting the app or your iPad. Sometimes a simple restart can resolve unexpected glitches. And remember, Google Docs has an extensive help feature — don’t hesitate to use it!
With a bit of patience and practice, you'll be resizing images like a pro in no time!
Conclusion and Best Practices for Resizing Images
Resizing images in Google Docs on your iPad can greatly enhance the visual appeal of your documents. By following the steps outlined in this guide, you can ensure your images appear just how you want them. Here are some best practices to keep in mind:
- Maintain Proportions: When resizing, always hold down the shift key to keep the aspect ratio intact, preventing distortion.
- Use High-Quality Images: Start with high-resolution images to avoid pixelation when enlarging them.
- Crop Before Resizing: If you only need a portion of the image, crop it first to improve focus and reduce file size.
- Optimize for Formatting: Ensure images fit well within the page layout and don’t disrupt text flow.
- Preview Changes: Always preview your document after resizing to see how the images look in the overall design.
Ultimately, resizing images effectively can enhance your document's aesthetics and readability. By applying these best practices, you can create polished and professional-looking Google Docs right from your iPad. Remember, a well-structured document with appropriately sized images can help convey your message more clearly and keep your audience engaged.
 admin
admin


