Mehndi, also known as henna, is a beautiful art form that has captured the hearts of many. From weddings to festivals, this intricate practice adorns the hands and feet of people across various cultures. Applying mehndi is not just about beautifying one’s appearance; it’s a way to express creativity and celebrate special moments. If you’ve ever been mesmerized by those stunning designs, you’re in the right place! Let’s dive into the fascinating world of mehndi and learn how to apply it seamlessly.
Understanding the History and Cultural Significance of Mehndi
Mehndi has a rich history that dates back thousands of years. While its precise origins are hard to pinpoint, it is widely believed that this art form began in the ancient civilizations of the Middle East, specifically in regions like Egypt and India. It was used by royals and the elite, not only as a fashion statement but also for its cooling properties. During the scorching heat, the application of henna on the skin helped to relieve discomfort.
But why is mehndi so significant in various cultures? Each application of mehndi carries deep cultural meanings and traditions:
- Celebration of Life: Mehndi is commonly used during joyous occasions, such as weddings and festivals. It symbolizes happiness, good luck, and the blessings of fertility.
- Rituals and Customs: In many cultures, intricate mehndi designs are applied to brides before their wedding day. The darker the henna, the stronger the love between the couple is believed to be.
- Connection to Spirituality: In some traditions, it is believed that mehndi has the ability to ward off evil spirits. By adorning oneself with henna, it acts as a protective barrier.
- Artistic Expression: Mehndi isn’t just a trend; it’s an art form. Artists spend years honing their skills to create stunning patterns that reflect personal stories, history, and artistry.
As mehndi traveled across regions, it morphed into various styles reflective of local customs and beliefs. From the detailed and fine lines of Indian mehndi to the more geometric patterns of Moroccan designs, each style tells a story of its own. Whether it’s a simple floral pattern or an elaborate design covering the entire hand, every mehndi art holds significance.
Today, mehndi is celebrated globally. Many people, irrespective of their cultural backgrounds, have embraced this beautiful tradition. It invites people to connect with one another, fostering a sense of community through shared experiences of joy and celebration. When you sit down to apply mehndi, you’re not just beautifying your hands; you’re participating in a rich legacy that unites generations.
In conclusion, the cultural depth and artistic beauty of mehndi make it more than just a decoration. It’s a beautiful blend of art and tradition, enriched through centuries of practice and love. Now that we understand its significance, let’s roll up our sleeves and get ready to apply some stunning designs!
Also Read This: How to Create a Frozen Hairstyle on Dailymotion
3. Essential Tools and Materials for Mehndi Application
Before you dive into the beautiful world of mehndi application, it's crucial to gather the right tools and materials. Having everything ready not only makes the process smoother but also enhances the quality of your designs. Let’s go through the essentials you’ll need.
- Mehndi Cone: The primary tool for applying mehndi. You can buy pre-filled cones or make your own. If you’re making your own, ensure the consistency of the paste is perfect—neither too runny nor too thick.
- Mehndi Powder: Quality matters here! Look for 100% natural henna powder for the best results. It's rich in color and gives a golden-brown stain. You can also find various shades, so choose based on your preference.
- Essential Oils: Oils like eucalyptus or tea tree oil can enhance the color of your mehndi. A few drops mixed into your paste can produce richer tones and also help with the application.
- Disposable Gloves: These are optional but can be helpful if you want to keep your hands clean while applying mehndi. Plus, they keep your designs neat by preventing smudging.
- Wipes or Napkins: Keep these handy for any spills or to wipe off excess mehndi as you go along. Trust me, it’s better to be prepared!
- Small Brush or Toothpick: For fine detailing, a small brush or a toothpick can work wonders. It allows you to create intricate designs with precision that a cone may not easily provide.
- Design Stencil: If you’re a beginner or want some extra help, stencils can be a great way to guide your design. You can place them on your hand and fill them in with mehndi for uniform patterns.
With these tools in hand, you’re all set to create stunning mehndi designs. Remember, practice makes perfect, so don’t hesitate to start on your own hands or even on paper before applying it live!
Also Read This: Discovering Classic Tales and Islamic Teachings on Dailymotion
4. Choosing the Right Mehndi Design for Your Occasion
The beauty of mehndi lies in its versatility. From simple patterns to intricate artwork, the design you choose can express your personality and suit the occasion. So how do you decide what style is right for you? Here are a few things to consider:
- Event Type: The occasion largely influences your design choice. For weddings, opt for more elaborate designs with dense fills and intricate motifs. For casual gatherings, a light floral or geometric pattern would be perfect!
- Your Personal Style: Think about what reflects your personality. Do you love bold statements or prefer subtle accents? Choose designs that resonate with you. It’s your hands, after all!
- Skin Tone: Different designs may stand out differently on various skin tones. If you have fair skin, you might want to go with bolder and darker designs, while darker skin tones can get away with lighter, more intricate patterns that will pop beautifully.
- Longevity: Consider how long you want your design to last. For long events, like weddings, opt for styles that cover more area as they will fade nicely over time. If it’s a one-day event, a smaller design will do just fine!
- Comfort Level: If you’re new to mehndi or not very skilled, keep it simple. There's no need to overwhelm yourself with complicated patterns that may take hours to perfect.
Ultimately, choosing the right mehndi design should feel exciting and fun! Explore various styles, gather inspiration from different cultures, and let your creativity flow. Enjoy the process, and your beautiful mehndi will surely showcase it!
Also Read This: Enhance Your Appearance by Growing Strong Nails Naturally
5. Step-by-Step Guide to Applying Mehndi on Hands
Applying mehndi is both an art and a joyous activity! Whether you’re preparing for a special occasion or simply indulging in a creative hobby, applying mehndi can be a soothing experience. Let’s walk through a simple, step-by-step guide to get you started on your mehndi journey!
Step 1: Gather Your Supplies
- Freshly prepared mehndi paste (you can buy ready-made or make your own from mehndi powder)
- Applicator cone or a brush (for more control)
- Cotton balls or tissue (to clean up any mess)
- Access to a clean, flat surface (like a table)
- Oil (like coconut or olive oil, to apply before the mehndi)
- Lemon juice and sugar (to mix and create a sealing solution)
Step 2: Prepare Your Hands
Start by washing your hands thoroughly to remove any oils or dirt. This helps the mehndi to stain better. Gently blot your hands dry, then apply a thin layer of oil. This step isn’t mandatory, but it can help your designs show up more vibrantly and last longer.
Step 3: Fill the Applicator Cone
If you’re using a cone, fill it with the mehndi paste, making sure it’s not too full to avoid leaks. Cut a tiny hole at the tip of the cone; this will control the flow of the mehndi as you draw. If you’re using a brush, dip it into the paste, picking up a generous amount but not so much that it drips.
Step 4: Start Designing!
Begin applying the mehndi to your hands. Start with the palm or the back of your hand, depending on your preference. Here are a few pointers:
- Use gentle and steady pressure on the cone or brush to create lines.
- Start with simple shapes like flowers, leaves, or swirls if you’re a beginner.
- Gradually build up designs with layers, adding more intricate patterns as you gain confidence.
Step 5: Let It Dry
Allow your mehndi to dry completely. This can take from 30 minutes to a few hours, depending on the paste’s thickness and the ambient conditions. The longer you leave it, the darker the stain will be!
Step 6: Sealing the Mehndi
To enhance the stain, you can mix some lemon juice with sugar and dab it over the dried mehndi. This will give your designs a nice glossy finish and help it stain deeper.
Step 7: Remove the Mehndi
When the mehndi is dry (and ideally, left on for several hours), gently scrape it off rather than washing it with water. The more careful you are, the better the stain will develop!
Also Read This: Step-by-Step Guide to Making a Tutu Dress Using Dailymotion Tutorials
6. Tips for Achieving Stunning Mehndi Designs
Now that you’ve mastered the basic application, let’s talk about how to elevate your mehndi game with some handy tips! These insights will help you design stunning mehndi that will make heads turn.
Tip 1: Practice Makes Perfect
Just like any art, practice is key! Experiment on paper or with a practice hand before trying on yourself or others. The more you draw, the better your control and design will become.
Tip 2: Study Different Patterns
Look for inspiration everywhere! Traditional Indian, Arabic, or contemporary designs—all have their unique flair. You can even mix styles to create something uniquely yours. Check out online platforms or books for ideas!
Tip 3: Consistency is Key
When creating patterns, try to maintain a consistent thickness in your lines. This uniformity will make your designs look smoother and more professional. Practice drawing circles and clear lines to build your confidence.
Tip 4: Use Contrasting Backgrounds
If you’re applying mehndi on dark skin, the designs will naturally pop. Conversely, if you’re on light skin, consider adding some color or contrasting accessories to make your mehndi stand out. Don’t hesitate to experiment!
Tip 5: Don't Rush the Drying Process
It can be tempting to move on after a quick drying period, but allowing your mehndi to dry completely and sealing it well brings out the best results. Consider covering your hands with a clean cloth to protect your designs while they dry.
Tip 6: Maintain Hydration
After removing the mehndi, keep your hands moisturized to maintain the richness of the stain. Apply coconut oil or any hydrating lotion to give your skin some TLC.
With these tips and a little practice, you’ll be on your way to creating beautiful mehndi designs that everyone will admire! So, grab your supplies, get comfortable, and let your creativity flow!
Also Read This: Mastering Elegant Updo Hairstyles with Dailymotion Tutorials
7. Aftercare for Long-Lasting Mehndi Stains
So, you've just adorned your hands with beautiful mehndi designs, and now you want to ensure those intricate patterns last as long as possible. Aftercare is key, and it’s easier than you think! Here are some *essential tips* to take care of your mehndi and enjoy those beautiful stains:
- Avoid Water: Right after applying mehndi, try to keep your hands away from water. This means avoiding washing your hands for at least 6 to 8 hours. If you do need to wash them, be gentle and use minimal water.
- Warmth is Your Friend: Applying some heat can help develop a darker stain. To do this, you might wrap your mehndi designs with tissue paper and lightly heat your hands with a fan or a heater. Just be careful not to burn yourself!
- Oils are Magic: Once the mehndi dries, applying natural oils, like coconut oil or olive oil, can enhance the color. Just dab a little on a cotton ball and gently rub it over your mehndi.
- Stay Away from Lotions: For the first couple of days, avoid using scented lotions or creams that can cause the design to fade faster. Stick to natural oils for the best results.
- Keep It Dry: Avoid activities that may cause excessive sweating or moisture on your hands. This will help maintain the integrity of the mehndi for a longer time.
- Limit Exposure to Sunlight: Direct sunlight can cause mehndi stains to fade quicker, so try to keep your hands shaded.
By following these steps, your mehndi design can stay vivid and beautiful for days, or even weeks. Just remember, a little bit of care goes a long way in preserving the art that you love!
Also Read This: Master the Art of Stitching Perfect Saree Pleats Using Dailymotion
8. Removing Mehndi Safely and Effectively
Eventually, the time will come when you want to remove your mehndi. Whether it's faded after a week or you're simply ready for a change, here’s how you can safely and effectively remove it without damaging your skin:
- Patience is Key: Mehndi typically fades away on its own over time, especially as your skin naturally exfoliates. If you can, allow it to fade naturally—this is the gentlest option.
- Natural Exfoliation: To speed up the process, you can use a gentle scrub. A mixture of sugar and lemon juice works wonders! Simply mix equal parts, apply it to the stained area, and scrub gently in circular motions.
- Oil Rinse: Applying oil can help dissolve mehndi colors quicker. Almond oil or olive oil works great. Just soak a cotton ball in oil and rub the area gently.
- Avoid Harsh Chemicals: Stay away from bleach or aggressive skin products. These can irritate your skin and should definitely be avoided.
- Soak and Scrub: If there's still residual stain, soaking your hands in warm water may help. After soaking, use a mild scrub or a pumice stone to gently exfoliate the stain away.
Once removed, it’s essential to hydrate your skin! Apply some nourishing lotion or cream to keep your skin happy and healthy.
And there you have it! Whether you want to extend the life of your mehndi or safely remove it, following these tips will keep your hands looking beautiful and well cared for.
Also Read This: How to Effectively Search for Videos on Dailymotion
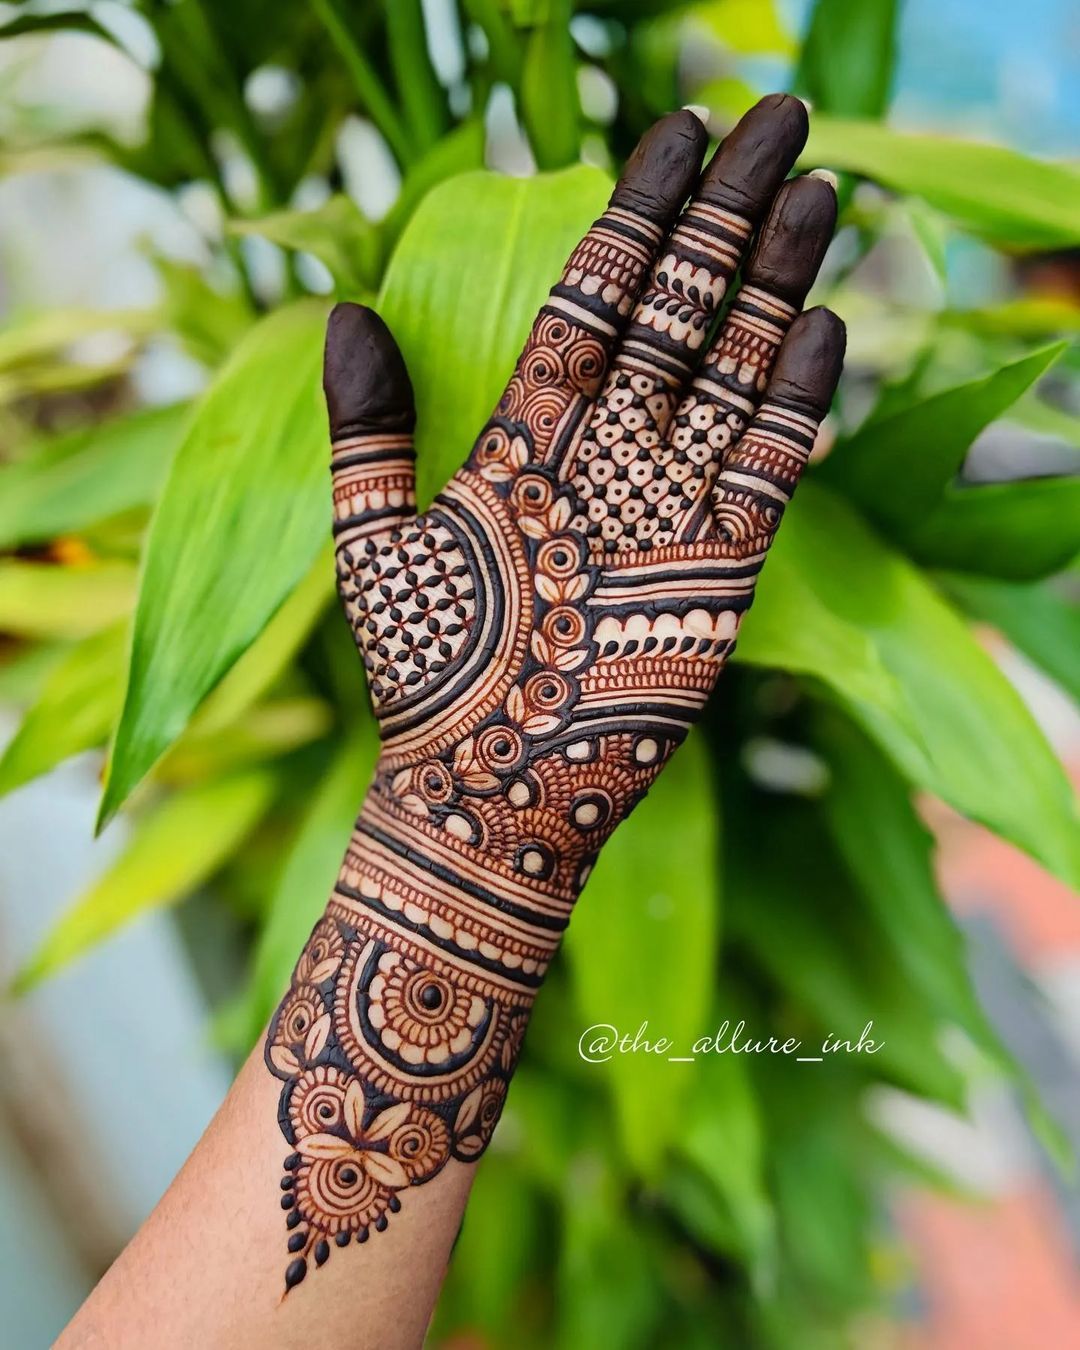
9. Exploring Mehndi Design Ideas and Inspirations
When it comes to applying mehndi, the beauty lies in the creativity and variety of designs available. Whether you are preparing for a special occasion or just want to adorn your hands with some elegant patterns, the options are endless! Here are some popular mehndi design ideas along with inspirations to help you get started:
- Traditional Indian Designs: These often include intricate floral patterns, peacocks, and paisleys. They are widely used for weddings and festivals, capturing the essence of cultural heritage.
- Arabic Mehndi: Known for its bold lines and flowing patterns, Arabic mehndi usually features large, spacious designs that create a dramatic effect. Think of delicate vines, leaves, and geometric shapes.
- Moroccan Patterns: These designs often contain geometric shapes and edgy motifs that add a contemporary twist to traditional mehndi. They are perfect for those looking to make a statement.
- Minimalist Designs: If you prefer something subtle, minimalist mehndi art is the way to go. Simple dots, small motifs, or a single flower can look incredibly chic and modern.
- Custom Designs: Consider incorporating personal elements into your mehndi, like initials, significant dates, or symbols that represent important moments in your life.
As you explore different designs, think about the occasion. A wedding may call for more elaborate and detailed work, while a casual event can be perfect for a simpler look. It's also fun to mix and match different styles to create something uniquely yours!
Here are some additional sources of inspiration:
- Social media platforms like Instagram and Pinterest are brimming with visuals. Try searching for hashtags like #MehndiArt or #HennaDesigns.
- Follow mehndi artists and enthusiasts to discover new techniques, updates on popular trends, and personal stories behind the designs.
- Participate in workshops or classes to learn directly from professionals who can share tips and tricks for creating stunning mehndi.
Don't hesitate to experiment. Feel free to adjust existing designs to fit the contours of your hands or to reflect your personal style. Remember, practicing on paper or plastic sheets can build your confidence before you finally go for it on your skin!
10. Conclusion: Embracing Mehndi for Elegance and Style
In conclusion, applying mehndi is so much more than just a decorative art form; it's a beautiful expression of culture, creativity, and elegance. From traditional designs that evoke a sense of history to modern styles that reflect contemporary aesthetics, mehndi has something to offer everyone.
As you embark on your mehndi journey, remember the following:
- Practice Makes Perfect: Don't be discouraged if your first attempts don’t turn out as planned. Mehndi application is a skill that improves with practice.
- Stay Inspired: Always look for new ideas and designs to keep your mehndi game exciting. Follow trends but also trust your instincts to create personalized designs.
- Enjoy the Process: The experience of applying mehndi should be enjoyable and relaxing. Take your time, and celebrate small victories along the way!
By embracing mehndi as a part of your life, you're not just decorating your hands; you're celebrating an art form that's been cherished for generations. It's a great way to express your individuality, enhance your style, and connect with traditions while making lasting memories, whether it's for a festival, wedding, or just a fun get-together.
So, gather your mehndi cones, let your creativity flow, and enjoy the journey of creating stunning designs that will leave everyone in awe!
 admin
admin


