Have you ever wanted to create a simple fan using a motor right at home? It’s not only a fun DIY project but also a great way to understand the basics of electronics and mechanics. In this guide, we’ll walk you through the steps to make your very own fan, which you can even showcase on platforms like Dailymotion. So, gather your materials and let’s get started!
Materials Needed for the Project

Before we dive into the assembly, let’s make sure you have everything you need. Here’s a comprehensive list of materials required for building your fan:
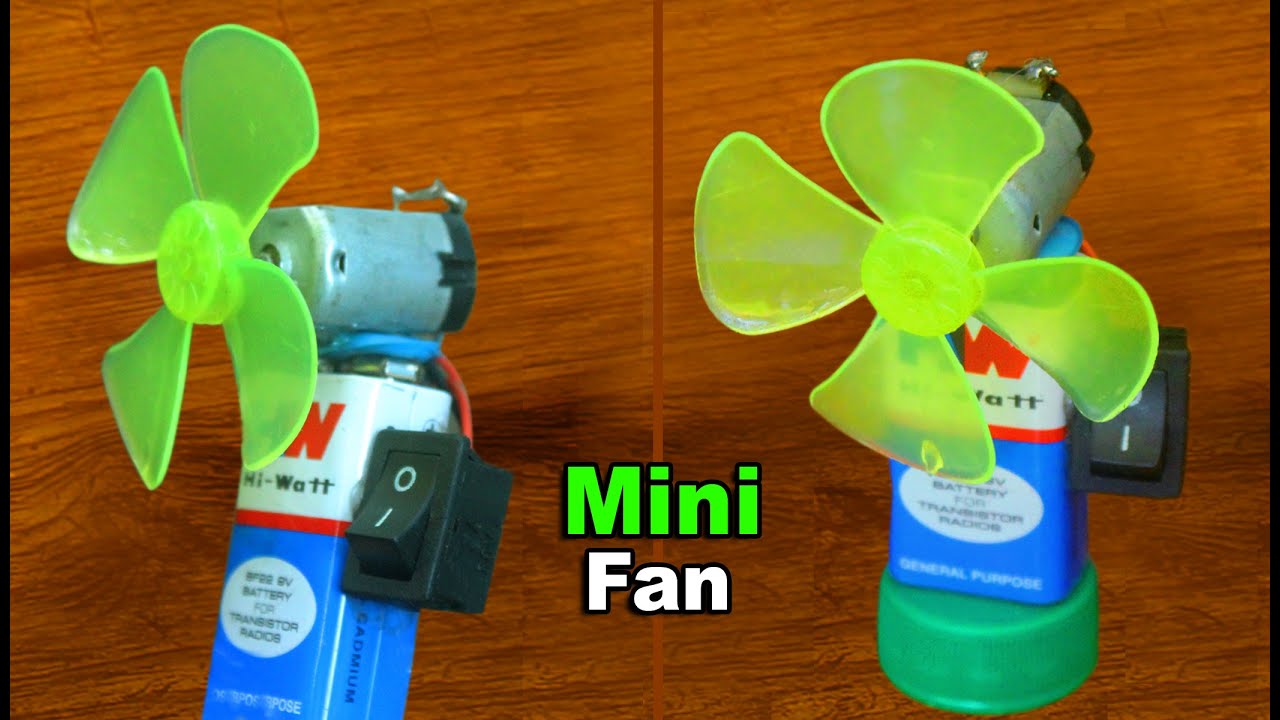
- DC Motor: A small 12V or 5V DC motor works best. You can find these online or at your local electronics store.
- Fan Blades: You can either purchase fan blades or create your own from lightweight materials like cardboard or plastic. If you decide to make your own, cut out a circle and attach blades at equal intervals.
- Power Supply: A battery pack that matches your motor’s voltage. For a 12V motor, you’ll need 8 AA batteries; for a 5V motor, a USB power bank works great.
- Switch: A simple toggle switch or push button to turn your fan on and off.
- Wires: Various lengths of insulated wire to connect your components.
- Base: A sturdy base to mount your motor and fan. This could be a small piece of wood or a plastic board.
- Adhesive: Hot glue or super glue for attaching your fan blades to the motor and securing other components.
- Tools: You'll need scissors, a screwdriver, and possibly a soldering iron if you want to make more permanent connections.
Once you have gathered all these materials, you’ll be ready to start building your fan. Each item plays a crucial role in the functionality and durability of your project, so make sure you have everything on hand before proceeding. With your materials set, you're one step closer to enjoying the cool breeze of your homemade fan!
Also Read This: How to Properly Cite Dailymotion Content
3. Step-by-Step Instructions for Building the Fan
Building a fan with a motor is a fun and educational project! Whether you're a DIY enthusiast or just looking to learn something new, this step-by-step guide will walk you through the process. Let's get started!
Materials Needed:
- DC motor (usually 12V)
- Plastic or cardboard base
- Fan blades (can be made from plastic or cardboard)
- Power source (battery or adapter)
- Wires
- Switch (optional)
- Hot glue gun or tape
- Safety goggles
Steps:
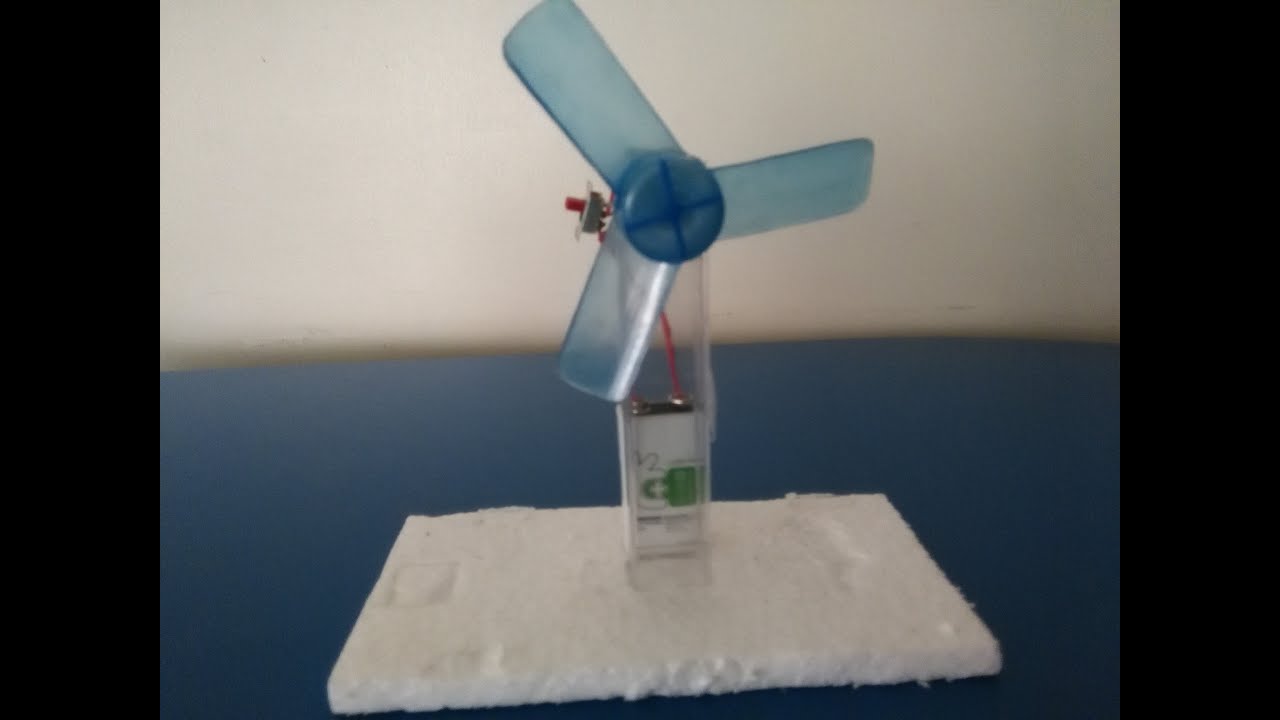
- Prepare the Base: Start with a sturdy base. If you're using cardboard, cut it into a circular or rectangular shape that will support the motor and fan blades. Ensure it’s stable enough to hold everything in place.
- Attach the Motor: Secure the DC motor to the center of the base using a hot glue gun or sturdy tape. Make sure it’s fixed tightly so it doesn’t wobble during operation.
- Create Fan Blades: If you’re making blades from cardboard, cut them into a simple fan shape—think of a classic propeller design. You’ll want to create at least three blades for optimal airflow.
- Attach the Blades to the Motor: Once your blades are ready, attach them to the motor shaft. You can use glue or tape, ensuring they are evenly spaced around the shaft to maintain balance.
- Connect the Wires: Now, it’s time to connect the motor to the power source. If you’re using a battery, connect the positive wire from the battery to the positive terminal of the motor and the negative wire to the negative terminal. If you opted for a switch, connect it in between for an easy on/off function.
- Testing: Before powering up, double-check all connections. Once satisfied, turn on the switch or connect the battery. Watch your fan spin and enjoy the cool breeze!
And there you have it! Your homemade fan with a motor is complete. This simple project not only cools your space but also teaches you about basic electronics.
Also Read This: Creative DIY Net Flower Craft Ideas
4. Tips for Ensuring Safety While Working
Safety is paramount when working on any DIY project, especially when it involves electrical components. Here are some essential safety tips to keep in mind:
- Wear Safety Goggles: Protect your eyes from any debris or materials that may fly off while cutting or assembling your fan.
- Work in a Well-Ventilated Area: Ensure you have plenty of fresh air, especially if you’re using adhesives like hot glue or any paints.
- Handle Tools with Care: If you’re using scissors or a craft knife, always cut away from your body and keep your fingers clear of the blade.
- Check Electrical Components: Verify that all connections are secure and match the voltage specifications of your motor and power source to avoid short circuits.
- Don’t Overload the Motor: Ensure that the motor is designed to handle the fan blades you’ve constructed. Too heavy blades can lead to motor burnout.
- Have a Fire Extinguisher Nearby: While it’s not common, it’s always a good idea to have a fire extinguisher on hand when working with electrical projects.
By following these safety tips, you can enjoy your project and feel confident in your DIY skills. Remember, safety first!
Also Read This: Effortless Methods to Save Dailymotion Videos on Your iPhone
5. How to Upload Your Project Video to Dailymotion
So, you've created your amazing fan project video, and now you're excited to share it with the world on Dailymotion! Uploading your video is a straightforward process, but let's walk through it step by step to make sure everything goes smoothly.
Step 1: Create an Account
If you haven't already, you'll need to create a Dailymotion account. It’s quick and simple! Just visit their website and click on the 'Sign Up' button. Fill in your details, and voilà—you’re ready to go!
Step 2: Prepare Your Video
Before uploading, ensure your video is in a compatible format. Dailymotion supports several formats, including MP4, AVI, and MOV. Make sure your video is high quality and edited to showcase your fan project effectively. If you used software like Adobe Premiere Pro or iMovie, you should be fine!
Step 3: Start the Upload
Once you're logged into your account, look for the 'Upload' button, usually located at the top right corner of the screen. Click it! You’ll be directed to a page where you can drag and drop your video file or select it from your device.
Step 4: Add Details
While your video is uploading, you can add essential details:
- Title: Make it catchy and relevant. Something like “DIY Fan Project: How to Make a Fan with a Motor” works well!
- Description: Describe what viewers can expect in your video. Include the steps you took, materials needed, and any tips you want to share.
- Tags: Use relevant tags to help people find your video. Think of terms like “DIY,” “fan project,” and “motor fan.”
Step 5: Choose a Thumbnail
Dailymotion allows you to select a thumbnail that represents your video. Choose an eye-catching image that shows off your project! If you can, create a custom thumbnail with text overlay, as this can attract more viewers.
Step 6: Set Privacy and Publish
Decide on the privacy settings for your video. You can make it public, private, or unlisted. Once you’ve reviewed everything and are happy with your choices, hit the 'Publish' button!
After your video is uploaded, take a moment to share it on social media platforms and encourage friends and family to check it out. The more exposure, the better!
6. Conclusion and Final Thoughts
Congratulations on successfully uploading your fan project video to Dailymotion! Sharing your creativity with others is a fantastic way to inspire and connect with fellow DIY enthusiasts. Remember, the journey doesn’t end here!
As you continue to make projects, consider engaging with your viewers. Respond to comments, ask for feedback, and maybe even create follow-up videos based on suggestions. Here are a few final thoughts:
- Consistency is Key: Regular uploads can help grow your audience. Think about a content schedule that works for you.
- Learn and Adapt: Pay attention to which videos perform well. Use this insight to refine your future projects and video styles.
- Join the Community: Dailymotion has a vibrant community of creators. Interact with others, share ideas, and collaborate on new projects!
In conclusion, making a fan with a motor is not just a fun project; it’s also a fantastic opportunity to hone your skills and share your creativity. So grab that motor, get crafty, and don’t forget to showcase your work. Happy creating!
 admin
admin


