Origami, the ancient art of paper folding, brings joy and creativity to many. Among the delightful projects you can tackle, making an origami basket stands out as a practical and charming option. These baskets are not only visually appealing but also serve various purposes—from gift wrapping to organizing small items. In this guide, we’ll explore the beautiful process of creating your very own origami basket with a handle. Ready to dive in? Let’s get started!
Materials Needed for Your Origami Basket
Before you unfold your creativity, it’s essential to gather your materials. Here’s a list of what you’ll need:
- Origami paper: Choose paper that is square-shaped, ideally 6x6 inches or 8x8 inches. Colorful or patterned paper can add extra flair!
- Scissors: While traditional origami doesn’t require cutting, you may want scissors for initial adjustments or to create a handle.
- Ruler: A ruler will help you measure and create precise folds.
- Pencil: Use this for marking any measurements if needed.
- Bone folder (optional): This tool helps make crisp, clean folds, ensuring your basket looks professional.
Additionally, you might want to have:
- Glue (optional): For added stability, especially if you want to secure certain parts of the basket.
- Decorative items: Think about embellishments like ribbons or stickers to personalize your basket.
Gathering these materials will set you up for a smooth crafting experience. Now that you’re ready, let’s move on to the exciting part—folding your origami basket!
Also Read This: How to Make a Pancake at Home: Quick and Easy Dailymotion Recipe
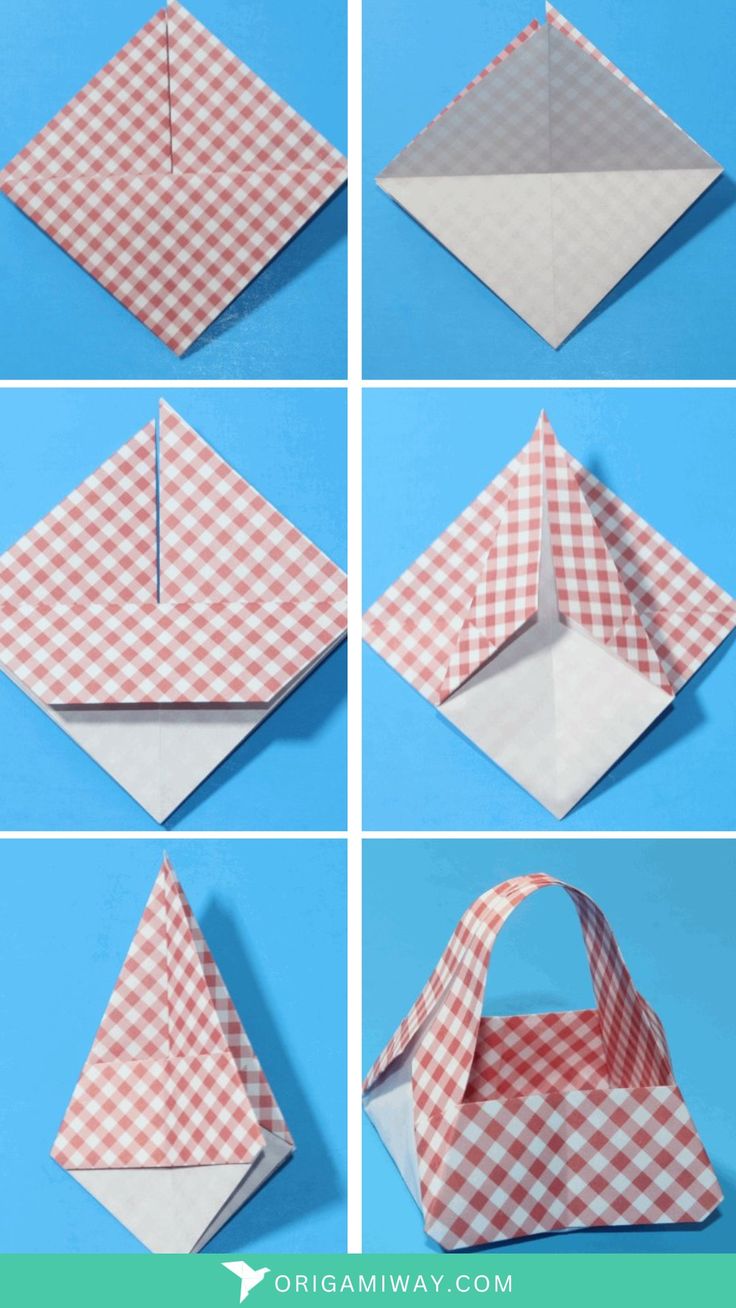
3. Step-by-Step Instructions for Folding the Basket

Ready to dive into the art of folding? Let’s break down the process of making your origami basket step-by-step. Grab a square piece of paper; it can be any size, but a 6-inch square works wonderfully for beginners!
Step 1: Start with the Base Fold
Begin with your paper colored side down. Fold the paper in half diagonally to form a triangle, then unfold it. Next, fold the paper in half diagonally in the opposite direction and unfold again. You should see an “X” crease on your paper.
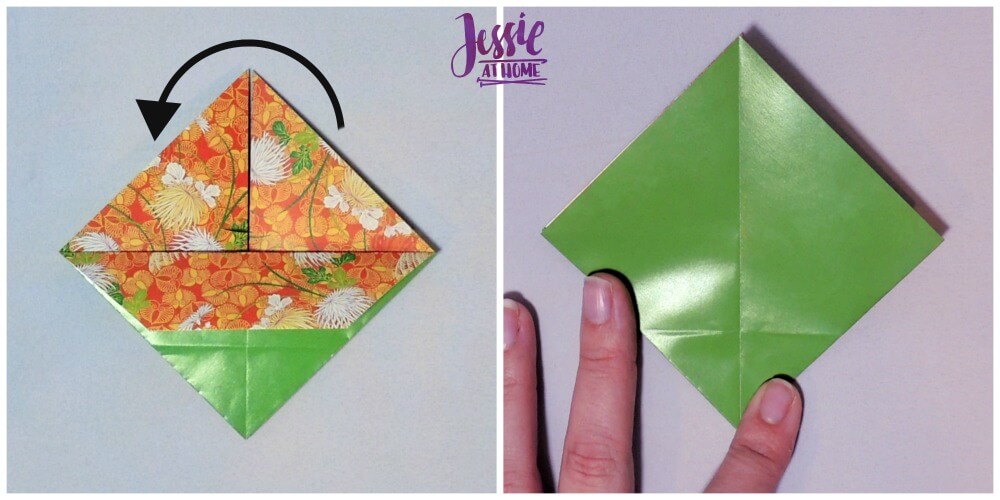
Step 2: Create the Square Base
Now, fold the four corners of the square into the center point of the “X” crease. This will create a smaller square in the middle, which is your base.
Step 3: Forming the Sides
Take the bottom edge of the square and fold it up to meet the top edge. Crease well and then unfold. This crease will help shape the sides of your basket.
Step 4: Folding the Corners In
Now, take the left and right corners of the square and fold them in towards the center, aligning them with the crease you just made. You’ll notice the shape starts to look more like a basket!
Step 5: Raise the Sides
Here’s where the magic happens! Lift the bottom section of the paper upwards to form the sides of the basket. As you do this, you might need to gently push out the corners to give your basket a nice shape.
Step 6: Secure the Shape
To hold your basket together, make sure to pinch the corners at the base and flatten any creases. You want a nice, sturdy shape that stands tall. Adjust as needed, and voilà! You have the body of your origami basket.
Also Read This: Proven Methods to Earn Money on Dailymotion Without Any Investments
4. Creating the Handle of the Origami Basket
Now that your basket is all shaped up, it’s time to add that charming handle! A handle makes your basket not only functional but also prettier. Follow these simple steps:
Step 1: Preparing the Handle Paper
Cut a strip of paper that’s about 1 inch wide and 6 to 8 inches long. You can use the same color as your basket or a contrasting color for a fun effect!
Step 2: Folding the Handle
Take your strip of paper and fold it in half lengthwise. This will give it some sturdiness. Unfold it, and then fold the two outer edges into the center crease, creating a thinner strip.
Step 3: Forming the Handle Shape
Fold the entire strip in half again, but this time with the folded edges facing out. You now have a nice, smooth strip that’s perfect for your handle.
Step 4: Attaching the Handle
To attach the handle, you’ll need to make two small slits on opposite sides of the basket’s top. Carefully push the ends of your handle through these slits and secure it by folding the ends back inside the basket.
Step 5: Final Adjustments
Give your handle a little tug to make sure it’s secure. Adjust the position to your liking, and if needed, you can even add a dab of glue to keep the handle from slipping out.
And there you have it! Your origami basket with a handle is complete! Feel free to decorate it with stickers, drawings, or other embellishments to make it truly yours.
Also Read This: Master the Art of Creating Hair Rollers at Home with Dailymotion Tutorials
5. Tips for Perfecting Your Origami Basket
Creating the perfect origami basket takes practice, but with these handy tips, you'll be well on your way to mastering this delightful craft. Let’s dive into ways to refine your technique!
1. Choose the Right Paper: Not all paper is created equal when it comes to origami. Opt for origami paper, which is usually thinner and comes in vibrant colors. If you're feeling adventurous, try patterned or textured paper for a unique look.
2. Keep Your Creases Sharp: The quality of your folds can make or break your basket. Use a bone folder or the edge of a ruler to sharpen those creases. This will help the structure hold its shape better, making your basket look crisp and neat.
3. Take Your Time: Rushing through the steps will only lead to mistakes. Slow down, especially when folding intricate sections. If you feel overwhelmed, it’s perfectly okay to take a break and come back to it with fresh eyes.
4. Follow Diagrams Carefully: Visual aids can be a lifesaver! If you’re using a tutorial or diagram, ensure you study each step before proceeding. It’s usually easier to fold along the lines shown than to guess how to make each fold.
5. Practice, Practice, Practice: Like any skill, origami improves with practice. Don’t be discouraged by initial failures. Try making several baskets out of scrap paper to build your confidence and skill before using your favorite sheets.
By incorporating these tips, you’ll find that each basket you make becomes a little easier and a lot more enjoyable. Now, let’s explore how to make your baskets even more exciting!
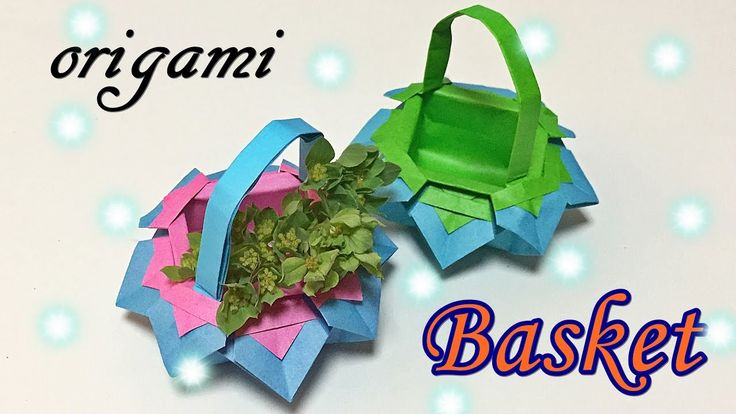
6. Variations and Creative Ideas for Origami Baskets
Origami baskets offer a wonderful canvas for creativity! Once you have the basics down, why not explore some fun variations and creative ideas? Here are some exciting ways to spice up your origami basket game:
- Colorful Combinations: Use multiple colors of paper for different parts of the basket. This could mean having a contrasting handle or a patterned interior that peeks out.
- Different Sizes: Experiment with varying sizes by adjusting the dimensions of your square paper. A larger basket is perfect for holding goodies, while mini baskets can be used for party favors!
- Decorative Elements: Add embellishments like washi tape, stickers, or even hand-drawn designs on your paper before folding. This personal touch can turn a simple basket into a unique piece of art.
- Layered Baskets: Create a set of nesting baskets by making several in decreasing sizes. This not only looks charming but also serves as a functional storage solution!
- Seasonal Themes: Tailor your baskets to fit seasonal themes. For instance, use pastel colors for spring, warm tones for fall, or festive patterns for the holidays.
Remember, the sky's the limit with your creativity! Don’t hesitate to try new ideas and make the origami basket your own. Each twist and turn adds to the fun, and soon enough, you’ll have a collection of baskets that reflect your personality and style.
 admin
admin


