Welcome to our complete guide on recording videos using YouTube TV! One of the standout features of YouTube TV is its powerful cloud DVR functionality, making it easy to record your favorite shows, movies, and live events. With no storage limits on recordings, you can keep your favorite content for up to nine months! Ready to dive into the details? Let’s explore how this feature works and what you need to know to make the most of it.
Setting Up Your YouTube TV Account

Getting started with YouTube TV is a breeze, and setting up your account is the first step to enjoying all those recording features. Here’s a quick guide to help you through the process:
- Visit the YouTube TV Website: Start by going to the official YouTube TV website or download the YouTube TV app on your preferred device.
- Sign Up: Click on the "Try it Free" button. Here, you'll be prompted to sign in with your Google account. If you don’t have one, you can create it on the spot.
- Select Your Plan: YouTube TV typically offers a single plan that includes a wide array of channels. Review the list and make sure it fits your viewing preferences.
- Enter Payment Information: You’ll need to provide a payment method to start your free trial. Don’t worry; you can cancel anytime before the trial ends if YouTube TV isn’t the right fit for you.
- Customize Your Experience: Once your account is set up, take a moment to customize your profile. You can add family members, set preferences, and choose which channels you want to feature prominently.
Once you’re all set up, you’ll notice that navigating through YouTube TV is intuitive. The interface is user-friendly, with a guide that allows you to browse live channels and upcoming shows effortlessly. You can also utilize the search function to find specific content quickly.
In addition to setting up your account, consider downloading the YouTube TV app on your smartphones and tablets. This mobility allows you to record and watch on the go, ensuring you never miss a moment of your favorite shows!
Now that your account is up and running, you’re just a few clicks away from recording everything you love. So grab your remote, and let’s get recording!
Also Read This: Reliving ‘Survivor’ Moments on YouTube: A Guide for Fans
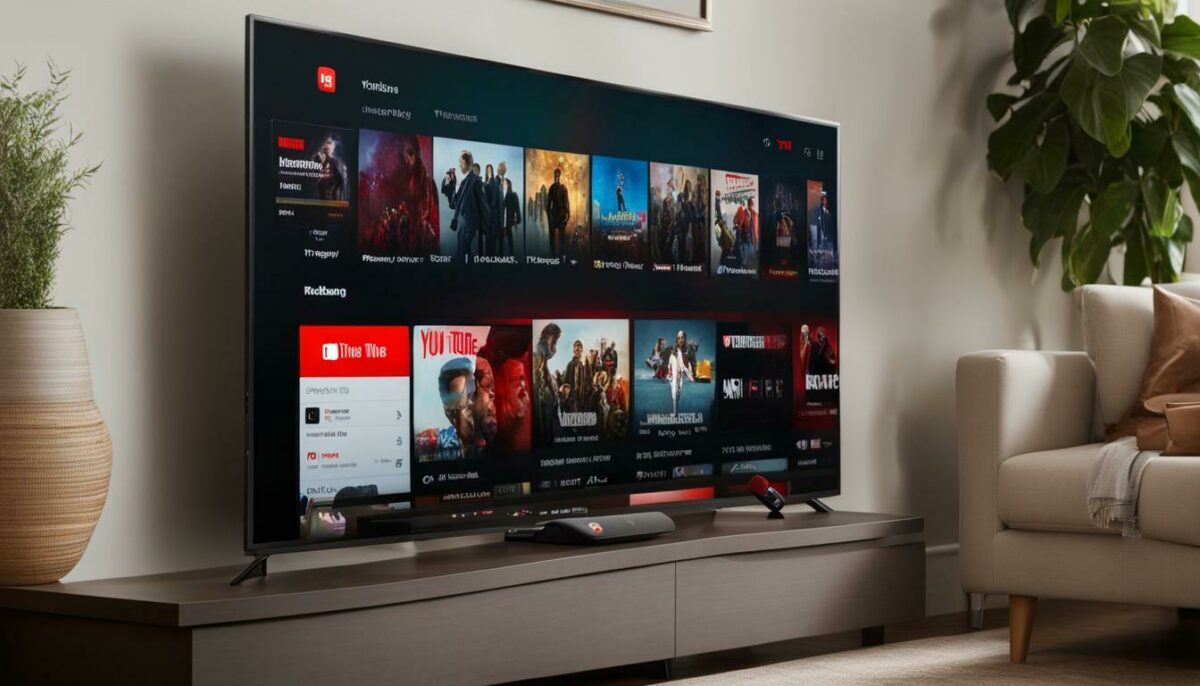
3. How to Navigate the YouTube TV Interface

Alright, let’s dive into the YouTube TV interface! When you first log in, you’ll notice it’s designed to be user-friendly and intuitive. The layout is clean, making it easy to find what you’re looking for. Here’s a quick rundown of the main features:
- Home Screen: This is your starting point. You’ll find recommended shows and movies based on your viewing habits. It’s like your own personal assistant suggesting what to watch next!
- Live Tab: Click here to see what’s currently airing. It displays channels in real-time, so you can decide on-the-fly what to watch or record.
- Library: This is where your recorded content lives. You can easily access anything you've recorded along with your favorite shows and movies.
- Search Function: The search bar is a lifesaver. Just type in the name of the show, movie, or channel, and voilà! You’ll find exactly what you’re looking for.
Once you get the hang of it, navigating the YouTube TV interface will feel second nature. You can customize your profile, manage your recordings, and even adjust your viewing preferences all from the main screen. Don’t hesitate to explore the settings; there are tons of options to enhance your viewing experience!
Also Read This: How to Clear YouTube Cache on iPhone: Speeding Up Your App
4. Step-by-Step Instructions for Recording Videos
Ready to start recording? Great! Here’s a simple, step-by-step guide to help you record your favorite shows and movies on YouTube TV:
- Sign In to Your Account: First things first, log in to your YouTube TV account. Make sure you have a subscription active to access all features.
- Find Your Show: Use the search bar to find the show you want to record. You can type in the title or browse through the categories on the home screen.
- Select the Show: Click on the show’s title to go to its dedicated page. Here, you’ll see a synopsis, upcoming episodes, and more.
- Click on the “Record” Button: Look for the red record button. It’s usually located near the episode list. Clicking this will allow you to set up the recording.
- Choose Your Preferences: You’ll have options like recording all episodes or just new ones. Select what works best for you. This is especially useful for long-running shows!
- Confirm the Recording: After setting your preferences, confirm the recording. You should see a notification that your recording has been scheduled!
- Check Your Library: After your show airs, it’ll be saved in your Library. You can access it anytime to watch at your convenience.
And there you have it! Recording on YouTube TV is that simple. Whether it’s a live sporting event or the latest episode of your favorite series, you’ll never miss out on the action. Just remember to keep an eye on your Library to manage your recorded content!
Also Read This: Why Are There So Many Ads on YouTube TV
5. Managing Your Recorded Videos
Once you've started recording your favorite shows on YouTube TV, the next step is managing those recordings effectively. Keeping your library organized can enhance your viewing experience and ensure you never miss an episode. Here are some handy tips to help you manage your recorded videos:
- Accessing Your Library: To find your recorded videos, simply navigate to the library section of YouTube TV. Here, you'll see a list of all your recordings sorted by most recent first.
- Categorizing Your Content: You can create playlists or categories based on genres or themes. For example, you might have a folder for “Documentaries,” “Sports,” or “Comedy Series.” This makes it easier to find what you want to watch when you're in the mood for something specific.
- Deleting Unwanted Recordings: To free up space, regularly review your recordings. If you find shows you no longer wish to keep, simply click on the three dots next to the title and select “Delete.” It’s a quick way to keep your library tidy.
- Renaming Your Recordings: You might want to rename your recordings for better organization. For instance, you can include the season and episode number in the title, making it easier to keep track of where you are in a series.
Pro Tip: YouTube TV allows you to record an entire season of a show with just one click. Look for the "Record Series" option next to the show title, and you’ll never have to worry about missing an episode again!
Also Read This: Is YouTube Considered Social Media? A Deep Dive Into YouTube’s Role in Online Communities
6. Troubleshooting Common Recording Issues
Even the most user-friendly platforms can encounter hiccups now and then. If you run into issues with your recordings on YouTube TV, don’t fret! Here are some common problems and their solutions to help you get back to binge-watching:
- Recording Not Starting: If a scheduled recording doesn’t start, check if you have enough storage space. YouTube TV provides unlimited cloud DVR storage, but it can become full if you have an excessive number of recordings. Also, ensure that the show is set to record and that your device is connected to the internet.
- Missing Recordings: Sometimes, you might find that a recording is missing. This could be due to a network issue or the program not being available for recording. Ensure your internet connection is stable, and check if the show originally aired during the scheduled recording time.
- Quality Issues: If your recorded videos appear pixelated or choppy, it may be due to your internet speed. YouTube TV recommends a minimum of 3 Mbps for HD quality. Consider upgrading your internet plan or resetting your router for a better streaming experience.
- Playback Problems: If you can’t play a recording, try clearing the app cache or restarting the app. Sometimes, a simple refresh can solve playback glitches.
Quick Fix: If problems persist, consider logging out and logging back into your YouTube TV account. This can refresh your settings and often resolves lingering issues.
Remember, if all else fails, YouTube TV’s help center is just a click away! They have a wealth of resources and user guides that can assist you in troubleshooting specific issues.
Also Read This: How Old Is Audrey from That YouTube Family? The Truth Behind Her Age
7. Tips for Optimizing Your Recording Experience
Recording shows on YouTube TV can be a game-changer for binge-watchers and casual viewers alike. But to truly make the most of your recording experience, it’s essential to optimize your settings and strategies. Here are some savvy tips that can enhance your journey:
- Prioritize Your Recordings: With a limited amount of cloud storage, it’s important to prioritize what you want to record. Use the “Record Series” option for shows you can’t miss, and manually add movies or specials that are time-sensitive.
- Set Up Automatic Deletion: YouTube TV automatically deletes recordings after nine months, but you can manage this manually too. By regularly reviewing your library, you’ll free up space for new content and ensure you’re not hoarding recordings you’ll never watch.
- Check for Series Links: When you record series, make sure to check if there are multiple versions (like episodic vs. specials). You only want to record the episodes that are relevant to you.
- Utilize the “Add to Library” Feature: For shows that might return in future seasons, use the “Add to Library” function. This ensures you’ll get notifications about new episodes and can plan your recordings ahead of time.
- Monitor Your Internet Speed: A strong internet connection is crucial when recording. If you're experiencing slow speeds, it might affect the quality of your recordings. Consider upgrading your internet plan or connecting via Ethernet for a more reliable connection.
- Use the Search Function: To quickly find shows or movies you want to record, use the search bar. This saves time and helps you find the specific content you want, rather than scrolling endlessly.
- Explore Playback Features: Familiarize yourself with playback options like fast-forward and rewind. YouTube TV allows you to skip commercials on many recordings, so knowing how to use this can enhance your viewing experience.
By following these tips, you’ll not only ensure that you don’t miss out on your favorite content but also streamline your recording process for a seamless experience!
8. Conclusion and Next Steps
You’ve now reached the end of our comprehensive guide to recording videos on YouTube TV! From setting up your account to optimizing your recordings, you’re equipped with the knowledge to make the most out of your viewing experience. But before you dive headfirst into your recording binge, let’s summarize and outline your next steps:
- Review Your Account Settings: Take a moment to revisit your YouTube TV settings. Make sure your payment options are up to date and customize your preferences for notifications and recordings.
- Test Your Setup: Do a trial run by recording a few different shows. This will help you get familiar with the interface and understand how to access your content easily.
- Create a Viewing Schedule: With so many options available, planning your viewing schedule can be helpful. Consider what to watch when and set reminders for new episodes of your favorite series.
- Engage with the Community: Join online forums or social media groups focused on YouTube TV. Sharing experiences and tips with others can provide you with new insights and enhance your enjoyment.
- Explore YouTube TV’s Additional Features: Don’t forget to explore features like live TV options, add-ons, and premium channels that can enrich your viewing experience.
As you set off to explore the vast content available on YouTube TV, remember that recording isn’t just about capturing moments; it’s about making your viewing experience more enjoyable and tailored to your preferences. Happy watching!
 admin
admin


