Taking screenshots on your computer is a handy skill that can save you time and help you capture essential information quickly. Whether you're sharing funny memes, saving important documents, or creating tutorials, knowing the right methods to screenshot can make your life easier. In this post, we'll explore easy techniques for capturing those vital moments on your screen, along with helpful guides from Dailymotion to enhance your skills.
Understanding Different Screenshot Methods

There’s more than one way to take a screenshot on your computer, and the method you choose can depend on your operating system and the specific needs of the moment. Let’s dive into some popular screenshot techniques!
1. Windows Snipping Tool
The Snipping Tool is a built-in feature on Windows that allows you to take screenshots in several ways:
- Free-form Snip: Draw any shape around your subject.
- Rectangular Snip: Drag the cursor to create a rectangle around what you want to capture.
- Window Snip: Capture a specific window on your screen.
- Full-screen Snip: Take a screenshot of your entire screen.
To access the Snipping Tool, simply type “Snipping Tool” in the Start menu search bar. Once open, select the type of snip you want and follow the prompts. It also allows you to annotate and save your screenshots directly!
2. Keyboard Shortcuts
If you're looking for speed, keyboard shortcuts can be your best friend. Here are some useful combinations:
- Windows + Print Screen: Captures the entire screen and saves it automatically in the "Screenshots" folder within your "Pictures" library.
- Alt + Print Screen: Captures the active window and copies it to your clipboard for easy pasting into any application.
- Windows + Shift + S: Opens the Snip & Sketch tool, allowing you to select a portion of your screen to capture.
These shortcuts can save you precious seconds, especially when you're in the middle of a project!
3. Mac Screenshot Tools
For Mac users, taking screenshots is equally straightforward. Here are some quick methods:
- Command + Shift + 3: Captures the entire screen and saves it to your desktop.
- Command + Shift + 4: Lets you select a portion of the screen to capture.
- Command + Shift + 5: Opens a screenshot toolbar with options for capturing the entire screen, a selected window, or a portion of the screen.
MacOS also provides options to record your screen, which can be particularly useful for creating video tutorials or walkthroughs.
4. Third-Party Software
If you’re looking for advanced features, consider using third-party applications like:
- Greenshot: A free tool with robust editing features.
- Snagit: A paid tool that allows for extensive editing and video recording capabilities.
These applications often provide additional features, like annotations, image editing, and cloud storage options, making them great for professionals and casual users alike.
With these methods in your toolkit, you can take screenshots on your computer with confidence and ease. Whether you're creating a tutorial for Dailymotion or saving your favorite web pages, you now have the knowledge to capture every important moment on your screen!
Also Read This: Guide to Downloading Videos from the Dailymotion Android App
3. Using Dailymotion Guides for Screen Captures

Have you ever found yourself watching a fantastic video tutorial on Dailymotion and thought, "I wish I could capture this moment!"? Well, you're in luck! Dailymotion guides can be incredibly helpful resources not only for learning but also for capturing those valuable bits of information. Here’s how you can effectively use these guides to take screenshots.
Firstly, Dailymotion itself doesn't have a built-in screenshot feature, but the beauty is that you can pair it with various external tools and methods. Many guides on Dailymotion cover topics that can be beneficial when you want to take screenshots, whether it's about using software or hardware features of your computer.
For instance, some Dailymotion channels offer video tutorials that walk you through the process of using screenshot tools like Snipping Tool, Greenshot, or even built-in functionalities in your operating system. Here’s a quick summary of how to utilize these guides:
- Search for Relevant Tutorials: Use keywords like "screenshot tutorial" or "capture screen on Windows" in the Dailymotion search bar. This will help you find videos that explain the process.
- Watch and Learn: As you watch, take notes on the specific tools the guide recommends. This can help you remember shortcuts or specific steps you need to follow.
- Practice Along: Follow along with the tutorial. Pause the video whenever you need to catch up or repeat steps.
Plus, some guides might even showcase unique software that can enhance your screenshot-taking experience. For example, tools that allow you to annotate or edit screenshots immediately after capturing them. It’s like having a mini photo editor right at your fingertips!
Also Read This: Natural Tips to Enhance the Length of Your Eyelashes from Dailymotion
4. Step-by-Step Tutorial for Taking Screenshots on Windows

Taking screenshots on Windows is easier than you might think! Whether you want to capture a full screen, a specific window, or just a portion of your screen, Windows has got you covered. Here’s a simple, step-by-step tutorial to guide you through the process.
Method 1: Using the Print Screen Key
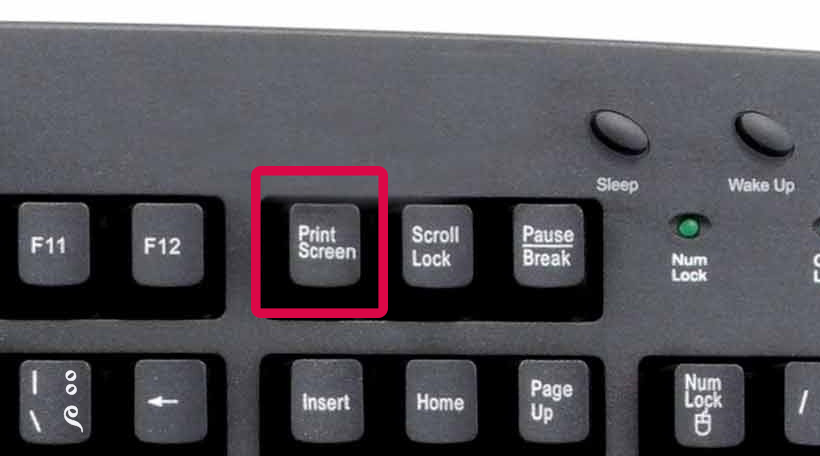
- Step 1: Locate the Print Screen (PrtScn) key on your keyboard. It’s usually found in the top row, near the function keys.
- Step 2: To capture the whole screen, simply press the PrtScn key. This will take a snapshot of everything on your display.
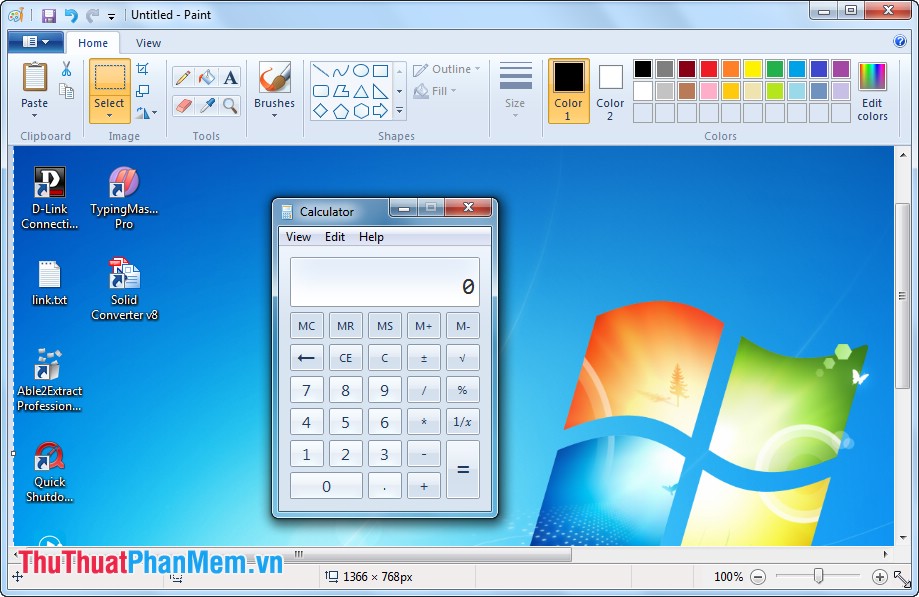
- Step 3: Open an image editing program, like Paint or Photoshop, and paste your screenshot (Ctrl + V). Save it as a file.
Method 2: Using Windows + Print Screen
- Step 1: Press Windows + PrtScn simultaneously. This will dim the screen momentarily to indicate the screenshot has been taken.
- Step 2: Your screenshot will be automatically saved in the Pictures folder under a subfolder named Screenshots.
Method 3: Snipping Tool
- Step 1: Search for Snipping Tool in the Windows search bar and open it.
- Step 2: Click on New to start a new snip. You can choose from different snip types like free-form, rectangular, window, or full-screen.
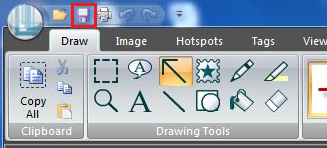
- Step 3: Capture the desired area, annotate if needed, and then save it using File > Save As.
And there you have it! A few easy methods to capture your screen on Windows. Whether you're using Dailymotion guides or just need some snacks of your work, these steps will have you screenshotting like a pro in no time!
Also Read This: A Complete Guide to Watching Educational and Inspirational Content on Dailymotion
5. Step-by-Step Tutorial for Taking Screenshots on Mac

Taking screenshots on a Mac is a breeze! Whether you need to capture the entire screen, a specific window, or just a section of your screen, macOS has built-in tools that make it super simple. Let’s walk through the various methods step-by-step.
1. Capture the Entire Screen:
Press Command (⌘) + Shift + 3. You’ll hear a camera shutter sound (if your sound is on), and the screenshot will be saved directly to your desktop. Easy, right?
2. Capture a Selected Portion of the Screen:
For some more control over what you capture, use Command (⌘) + Shift + 4. Your cursor will turn into a crosshair. Click and drag to select the area you want to capture. Release the mouse button, and voila! The screenshot is saved to your desktop.
3. Capture a Specific Window:
If you only want to grab a specific window, press Command (⌘) + Shift + 4 followed by the Spacebar. Your cursor will change to a camera. Hover over the window you want to capture and click. This method is excellent for creating clean screenshots without any distractions from your desktop.
4. Use the Screenshot App:
Starting from macOS Mojave, you can access a built-in Screenshot app. Press Command (⌘) + Shift + 5. This opens a toolbar at the bottom of your screen where you can choose to capture the entire screen, a selected window, or a selected portion. You can even record your screen from this toolbar!
5. Customize Your Screenshot Options:
When using the Screenshot app, you can click on 'Options' to choose where to save your screenshots, set a timer, or even enable or disable the floating thumbnail feature. This means you can customize your screenshot experience based on your preferences.
Now that you know how to take screenshots on a Mac, you can easily share important information, design concepts, or funny memes with friends! It’s all about capturing what matters most to you in just a few clicks.
Also Read This: How to Make a Playlist on Dailymotion: Simple Tutorial
6. Best Tools and Software for Enhanced Screenshotting
If you’re looking to take your screenshot game to the next level, there are several tools and software options available that can enhance your capturing experience beyond the basic functions provided by your OS. Here are some of the best ones:
- Snagit: This powerful tool allows you to capture images, videos, and even scrolling screenshots. It includes a robust suite of editing tools to annotate your captures, making it perfect for professional use.
- Lightshot: A free, simple screenshot tool that lets you capture any area of your screen quickly. You can edit your screenshots directly after capturing and share them via a unique URL.
- Greenshot: An open-source tool for Windows that offers multiple screenshot modes, including full screen, window, or region capture. Plus, it has excellent annotation capabilities.
- Snip & Sketch: For Windows 10 users, this built-in tool is a great way to take quick screenshots and annotate them. You can access it via
Windows Key + Shift + S. - Monosnap: A versatile tool that allows you to capture screenshots, record your screen, and even upload directly to the cloud. Ideal for those who need to share their work efficiently.
Using these tools can significantly enhance your screenshotting experience. Whether you need advanced editing features or simple sharing capabilities, there’s a solution out there for you. So go ahead, explore these options, and find the perfect tool that fits your screenshotting needs!
Also Read This: How to Download Dailymotion Videos to Your Android
7. Common Issues and Troubleshooting Tips
Taking screenshots is generally a straightforward task, but sometimes things can go awry. Here are some common issues you might encounter and simple troubleshooting tips to help you out.
1. Screenshot Not Saving
If your screenshots aren’t saving, check your settings. On Windows, ensure the destination folder is correct, typically the Pictures or Desktop. On Mac, you can check this by opening the Screenshot app and going to Options to see where your files are being saved.
2. Black Screens
Sometimes, your screenshots might turn out to be just a black screen, especially when capturing content from video players or certain applications like Dailymotion. This occurs due to hardware acceleration. To fix this, try:
- Disabling hardware acceleration in your browser or application settings.
- Using a dedicated screenshot tool instead of the built-in options.
3. Missing Keyboard Shortcuts
If the keyboard shortcuts for taking screenshots aren't working, it might be due to conflicting software or settings. Check:
- Your keyboard settings to ensure the shortcuts are enabled.
- Any third-party applications that may be intercepting those key commands.
4. Screenshots Are Blurry
For blurry screenshots, make sure you’re zoomed in appropriately on the content you want to capture. Also, ensure that your screen resolution is set to a high quality for clearer images. If you continue to have issues, consider using a dedicated screenshot tool that allows for better image quality control.
5. Application Freezes
Occasionally, the application you’re using can freeze while trying to take a screenshot. If this happens, try the following:
- Force quit the application and restart it.
- Update the application to the latest version, as bugs are often fixed in updates.
By keeping these tips in mind, you can troubleshoot and enjoy a seamless screenshot-taking experience!
8. Conclusion and Additional Resources
Taking screenshots on your computer can be incredibly useful, whether you’re capturing a funny moment from a video on Dailymotion or saving important documents. With the methods outlined in this guide, you should be well-equipped to use your system's built-in tools or third-party applications effectively.
Recap of Key Points:
- Understand the methods available for your operating system—Windows, Mac, or Linux.
- Familiarize yourself with keyboard shortcuts for quick access.
- Utilize third-party applications when built-in tools don't meet your needs.
- Follow troubleshooting tips when you encounter common issues.
For more detailed guides and tutorials on screenshot methods and troubleshooting, consider checking out the following resources:
- TechRadar’s Guide to Taking Screenshots on Windows 10
- Apple's Official Guide for Mac Users
- LifeWire’s Overview for Linux Screenshots
Happy screenshotting! Whether it's for work, play, or sharing moments, now you're ready to capture whatever you need with ease.
 admin
admin


