Creating videos with iMovie can be a fun and rewarding experience, especially when it comes to adding music that enhances the emotional impact of your project. One of the best sources for quality tracks is YouTube Music. In this guide, we’ll walk you through the steps to seamlessly incorporate YouTube Music into your iMovie projects while ensuring you’re on the right side of copyright laws. Let’s get started!
Understanding Copyright and YouTube Music
Before diving into the technical details, it's crucial to grasp the concept of copyright, particularly when using music from platforms like YouTube. Copyright laws protect the rights of creators, meaning that using someone else's music without permission can lead to serious consequences.
Now, let’s break this down:
- Copyright Basics: Copyright gives the creator exclusive rights to their work, including music. This means you can't just take a song and use it in your video without permission.
- YouTube Music Licensing: YouTube Music offers a variety of tracks, but not all of them are free to use. Some songs are protected by copyright, requiring you to obtain a license.
- Royalty-Free Options: Consider using royalty-free music or tracks that are labeled as “Creative Commons.” These can often be used without needing to pay royalties, as long as you follow the attribution guidelines.
Here are key points to keep in mind:
| Type of Music | Usage Rights |
|---|---|
| Copyrighted Music | Requires permission or a license |
| Royalty-Free Music | Can be used with minimal restrictions |
| Creative Commons Music | Free to use with attribution; check specific license |
To avoid any copyright issues, always double-check the licensing information for each track you intend to use. You can look at the video description on YouTube or the official licensing page of the artist. If you’re unsure, consider using platforms like Epidemic Sound or Artlist, which provide a library of licensed music tailored for content creators.
In summary, understanding copyright is essential when adding music to your iMovie projects. Respecting the rights of artists not only keeps you legally safe but also supports the creative community. Now that we’re clear on the rules, let’s move on to the practical steps of adding YouTube Music to your iMovie projects!
Also Read This: Are YouTube Ads Getting Worse
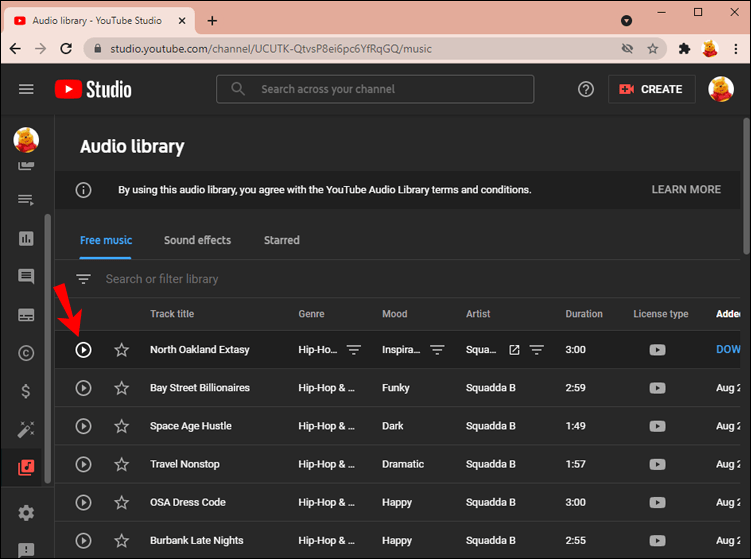
3. Preparing Your YouTube Music for Download
Before diving into the world of editing with iMovie, it’s essential to ensure your YouTube music is ready for download. This involves a few simple steps that will save you time and prevent any headaches down the line.
First, you'll want to find the perfect track on YouTube. Consider the tone and feel of your project. Is it upbeat, somber, or motivational? Once you’ve found the right song, make sure to check if the artist allows downloads and usage in personal projects. Many artists provide this information in the video description.
Here are some key points to consider:
- Check the video description for licensing information.
- Look for songs labeled as 'Creative Commons' for easier usage.
- Make note of the track's title and artist for crediting later.
Next, think about the quality of the audio. YouTube streams music at a decent bitrate, but if you're serious about your project, you might want higher-quality audio. Some tools and services allow you to extract audio from YouTube in better quality, so keep that in mind as you prepare your track.
Once you’ve settled on a song and confirmed its usage rights, you can then move on to downloading it. But remember, preparation is key. Make sure you have the right tools and a clear idea of what you want to achieve with your project!
Also Read This: Shuffling a YouTube Playlist for Randomized Favorites
4. Downloading YouTube Music Legally
Now that you’ve prepared your music, it’s time for the exciting part: downloading your chosen track from YouTube. However, it’s crucial to do this legally to respect copyright laws and the rights of the artists.
To download music legally, consider using one of the following options:
- YouTube Premium: With a subscription, you can download music directly from YouTube. This is the most straightforward method and ensures that artists are compensated for their work.
- Creative Commons Sources: Some artists allow their music to be downloaded legally under Creative Commons licenses. Websites like Free Music Archive or Incompetech are great places to legally source music.
- Official Artist Websites: Sometimes, artists offer free downloads of their music directly on their sites. Always check the official page of your chosen artist!
If you opt for a third-party downloading tool, make sure it complies with local copyright laws. Tools like 4K Video Downloader or YTD Video Downloader can be useful, but double-check that the music you are downloading is free for use or that you have permission.
In summary, always prioritize legal avenues when downloading music. This not only honors the work of creators but also keeps your project above board. With your music downloaded legally, you’re now ready to bring that audio into your iMovie project and create something truly special!
Also Read This: How to Stop YouTube from Trying to Connect to TV and Enjoy a Seamless Experience
5. Importing Music into iMovie
Once you've snagged your favorite YouTube Music tracks, it's time to bring them into iMovie for some creative magic! Let’s break down the importing process into simple steps.
Step 1: Open iMovie
Launch iMovie on your Mac. If you don’t have an existing project, go ahead and start a new one by clicking on “Create New” and then choosing “Movie.”
Step 2: Access the Media Library
On the left sidebar, you’ll see the Media library. This is where all your imported files will reside. Click on the “Import Media” button, usually located at the top of the media section.
Step 3: Locate Your Music Files
A window will pop up, allowing you to browse your computer. Navigate to the location where your YouTube Music tracks are saved. If you downloaded them from a site, they might be in your Downloads folder.
Step 4: Import the Tracks
Select the music files you want to import. You can hold down the Command key to choose multiple tracks at once. Once selected, click on the “Import Selected” button. Your music will now be available in the media library!
Step 5: Add Music to Your Timeline
Now, find your imported tracks in the media library. Drag and drop them directly onto your timeline beneath the video clips. You can place them wherever you want the music to start playing. Easy peasy!
And there you go! Your YouTube Music is now sitting pretty in iMovie, ready for the next step: syncing it with your video clips.
Also Read This: How to Unlike a YouTube Video: A Complete Guide
6. Syncing Your Music with Video Clips
Now that your music is imported into iMovie, it’s time to make sure it syncs perfectly with your video clips. This step is where the real fun begins, as you can enhance the emotional vibe of your project through careful timing.
Step 1: Play Your Video
Start by playing your video timeline. Keep an ear out for points in the video where the music can enhance the visuals, like transitions or impactful moments.
Step 2: Adjust the Music Clip
To sync effectively, you may need to trim your music clip. Click on the edge of the music track in the timeline until you see a yellow trim handle. Click and drag it to the left or right to adjust the length of your music as needed. You can also use the Command + B shortcut to split the audio track if you need to remove a section.
Step 3: Fine-Tune the Volume
To ensure your music complements the dialogue or sound effects in your video, adjust the volume levels. Click on the audio clip, and you’ll see a line running through it. Drag this line up to increase volume or down to decrease it. Find a balance that works well with your video.
Step 4: Add Fades for Smooth Transitions
No one likes abrupt starts or stops in music! To create a smooth entry and exit for your music, add fade effects. Hover over the music track and drag the small circle at the beginning and end of the clip to create a fade-in and fade-out effect. This little touch can elevate your project significantly!
Step 5: Preview Your Project
Finally, click on the play button to preview your project. Listen closely to the music and visuals together. Make any minor adjustments as necessary to ensure everything feels seamless.
Syncing music can truly transform your iMovie project, making it resonate with your audience. Happy editing!
Also Read This: Who is John Millionaire on YouTube? Exploring the Story Behind His Channel
7. Adjusting Audio Levels in iMovie
Once you've added your YouTube music to your iMovie project, it’s essential to adjust the audio levels to ensure everything sounds just right. You don’t want your background music overpowering the dialogue or vice versa! Here’s how to fine-tune those audio levels:
Step 1: Click on the audio clip in your timeline. You’ll notice a yellow border appear around it, signaling that it’s selected.
Step 2: Look for the volume control line running horizontally through your audio clip. You can click and drag this line up or down to increase or decrease the volume. A good rule of thumb is to keep your music slightly lower than the dialogue. Aim for around 10-15% lower volume for a balanced mix.
Step 3: If you want to be more precise, click on the clip, and then go to the Audio tab in the inspector panel located on the right side. Here, you’ll see a volume slider that you can adjust to your desired level.
- Tip: Use the Playhead to preview adjustments as you go. This way, you can catch any discrepancies in audio levels in real time.
- Tip: Adjust the audio level of other clips similarly, ensuring a consistent sound throughout your project.
Step 4: If your YouTube music has sections where the volume fluctuates, consider using keyframes. This feature lets you gradually change the volume over time. To do this, control-click (or right-click) on the volume line where you want to set a keyframe, and select Add Keyframe. You can add multiple keyframes to smoothly transition between different volume levels.
By balancing your audio levels, you create a more professional-sounding project. Remember that a well-mixed audio track enhances the viewer's experience, making your iMovie project stand out!
8. Exporting Your Final Project
Congratulations on getting to the final stage of your iMovie project! Now that you’ve adjusted your audio levels and added your YouTube music, it’s time to export your masterpiece. Here’s how to do it:
Step 1: Click on the File menu in the top left corner of your screen and select Share. You’ll see several options, but for most purposes, File is the best choice.
Step 2: A new window will pop up, allowing you to customize your export settings. Here’s a quick rundown of what to look for:
- Title: Give your project a catchy title that reflects its content.
- Format: Choose Video and Audio for most projects.
- Resolution: Depending on your needs, select either 720p, 1080p, or 4K. Higher resolutions look better but result in larger file sizes.
- Quality: Opt for High for a good balance between quality and file size.
Step 3: Next, select where you’d like to save your project on your computer. Choose a location that’s easy to remember!
Step 4: Finally, click Next and then Save. iMovie will begin exporting your project, which may take a few minutes depending on the length and complexity of your video.
Once the export is complete, you’ll have a high-quality video file ready to share on social media, upload to YouTube, or keep for personal use. Enjoy showcasing your creativity!
 admin
admin


