Welcome to the world of YouTube audio recording! If you’re venturing into creating content for YouTube, you might be surprised how much audio quality can impact your videos. The right recording tools and techniques can elevate your content, making your voice crisp, clear, and engaging. Whether you’re a seasoned creator or just starting out, understanding the basics of audio recording is essential. Let’s dive into why it’s crucial to focus on audio and how you can get started!
Why Record YouTube Audio?

So, why should you prioritize audio recording for your YouTube channel? Here are a few compelling reasons:
- Audience Engagement: Viewers are more likely to stick around if they can clearly hear what you’re saying. Poor audio can lead to frustration and a quick exit.
- Professionalism: High-quality audio gives your videos a polished feel. It shows that you care about your content and your audience’s experience.
- Branding: Consistent audio quality helps establish your brand identity. Whether it’s a specific tone or style, good audio can reinforce your brand’s message.
Let’s break down these points a bit further:
1. Audience Engagement
Imagine tuning into a video where the audio sounds like it was recorded in a wind tunnel. Not pleasant, right? Clear audio keeps your viewers engaged. When they can hear you without straining or adjusting their volume, they're more likely to focus on your message and stick around for more. For example, channels like Marques Brownlee and Peter McKinnon are known for their crisp audio, which keeps viewers coming back for their high-quality content.
2. Professionalism
In a crowded space, professionalism can set you apart. A well-recorded audio track tells your audience that you’ve invested time and effort into your content. Think of it this way: if someone hears a clear, well-mixed audio track, they’re more likely to trust the information you’re sharing. Consider channels like Vsauce or CGP Grey, where the audio quality complements their informative style, making their content more engaging and trustworthy.
3. Branding
Your audio style is part of your unique voice. Whether you choose a specific microphone for a distinct sound or develop a particular way of speaking, your audio can reinforce your brand identity. For instance, podcasts like How I Built This have a distinct audio style that listeners recognize. Similarly, your YouTube channel can develop an audio signature that makes your content memorable.
In summary, recording high-quality audio is vital for enhancing engagement, projecting professionalism, and establishing a recognizable brand. As you embark on your YouTube journey, remember that your audience deserves the best—and that starts with clear, crisp audio!
Also Read This: What Happened to Precision Transmission on YouTube? Updates and Insights
3. Essential Tools for Recording YouTube Audio

When diving into the world of YouTube content creation, having the right tools for recording audio is crucial. Quality audio can make or break your video, so let's explore some essential tools that every YouTuber should consider.
Microphones: The heart of any audio setup is the microphone. There are several types to consider:
- Dynamic Microphones: Great for reducing background noise, these are often used in live settings. Consider the Shure SM7B for professional quality.
- Condenser Microphones: Ideal for capturing vocals and acoustic instruments, these mics are sensitive and provide a rich sound. The Rode NT1 is a popular choice among YouTubers.
- Lavalier Microphones: Perfect for on-the-go recording, these clip-on mics are discreet and convenient. The Rode SmartLav+ can connect directly to your smartphone.
Audio Interface: If you choose a professional microphone, you'll likely need an audio interface. This device converts your microphone's analog signal into a digital one. The Focusrite Scarlett 2i2 is a reliable option that many creators swear by.
Headphones: Quality headphones are essential for monitoring audio while recording. Look for closed-back headphones to prevent sound leakage. The Sony MDR-7506 is a favorite in the industry for its clear sound and comfort.
Pop Filters and Shock Mounts: These accessories can significantly improve your audio quality. A pop filter reduces plosive sounds (like “p” and “b” sounds) that can cause distortion, while a shock mount minimizes vibrations and handling noise. Both are inexpensive investments that yield great results.
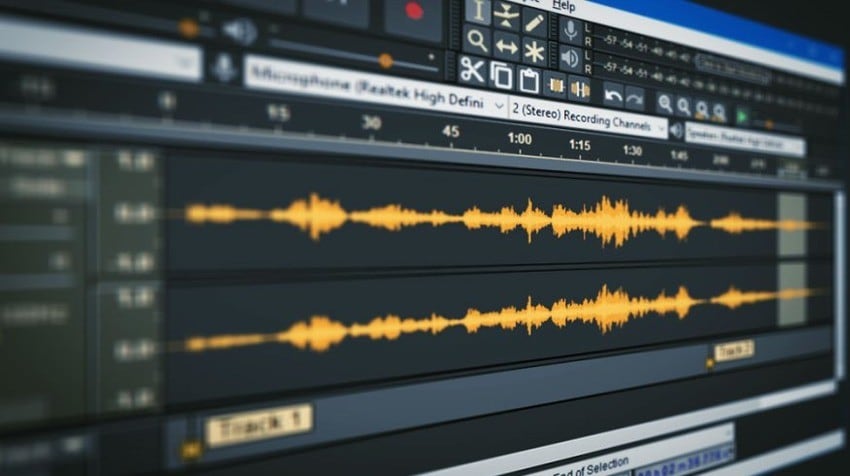
In addition to these primary tools, don’t forget about software. Programs like Audacity or Adobe Audition can help you edit and refine your audio after recording, ensuring you achieve the best sound possible.
Also Read This: How to Share TikTok Videos on YouTube Without Losing Quality
4. Techniques for Recording High-Quality Audio

Now that you have your tools, let’s talk techniques. Here are some tried-and-true methods to ensure your audio sounds professional:
1. Choose the Right Environment: Sound quality is heavily influenced by your recording environment. Aim for a quiet space with minimal background noise. Consider using soft materials like blankets or foam panels to absorb sound and reduce echo.
2. Maintain Proper Microphone Technique: Positioning your microphone correctly is key. Keep it about 6-12 inches from your mouth and slightly off to the side to avoid plosives. Speak directly into the mic at a consistent volume to maintain clarity.
3. Use a Pop Filter: As mentioned earlier, a pop filter is your best friend for achieving crisp audio. It filters out those pesky plosives, ensuring that your voice comes through clearly and professionally.
4. Monitor While Recording: Always wear headphones while recording to catch any issues in real-time. This allows you to adjust your speaking volume or microphone placement immediately if you notice any problems.
5. Test and Adjust Levels: Before diving into your full recording, always do a quick test run. Speak at the volume you’ll be using and check your audio interface levels. Aim for a level that’s not too quiet but also doesn’t peak (distort) at louder moments.
6. Experiment with Editing: Don’t be afraid to spend some time editing your audio. Removing background noise, adjusting volume levels, and adding effects can elevate your audio quality significantly. Learn the basics of your audio editing software to take your recordings to the next level.
By following these techniques and using the right tools, you’ll be well on your way to creating high-quality audio for your YouTube videos. Quality audio not only enhances the viewing experience but also helps you connect better with your audience. So, gear up and get recording!
Also Read This: Why Does YouTube Turn My Comments Off? Understanding YouTube’s Comment Moderation Policies
5. Step-by-Step Guide to Recording YouTube Audio

Recording YouTube audio might sound daunting, but with the right approach and tools, you can create high-quality audio for your videos that engages your audience. Let’s break it down into simple steps:
- Choose Your Recording Environment: Find a quiet space to minimize background noise. Soft furnishings like curtains and carpets can help absorb sound, making your audio clearer.
- Select Your Equipment: You don’t need the fanciest gear to get started. A decent USB microphone, like the Audio-Technica AT2020USB+, can do wonders. If you're on a budget, consider using your smartphone's voice memo app as a starting point!
- Set Up Your Microphone: Position your microphone about 6-12 inches from your mouth. Use a pop filter to reduce plosive sounds from letters like "P" and "B." If you have a boom arm, it can help you find the perfect angle.
- Use Recording Software: For beginners, Audacity is a free, user-friendly choice. If you're using more advanced software like Adobe Audition, familiarize yourself with its features to maximize your recording quality.
- Test Your Levels: Before you dive into recording, do a quick test. Speak at your normal volume and adjust the input levels to avoid clipping. Aim for a level peaking at around -6 dB to -3 dB.
- Start Recording: Hit the record button and begin speaking naturally. Imagine you’re having a conversation with a friend. Emphasize key points and maintain an engaging tone.
- Monitor While Recording: If possible, use headphones to monitor your audio in real time. This allows you to catch any issues, like background noise or microphone interference, as they happen.
- Wrap Up Your Recording: Once you’re done, take a moment to breathe and refresh before moving on to the editing phase. Save your file in a lossless format like WAV or AIFF for the best quality.
Following these steps will ensure you have a solid audio foundation for your YouTube videos. Remember, practice makes perfect, so don’t hesitate to experiment with different techniques!
Also Read This: How to Get Rid of Popups on YouTube for a Cleaner Interface
6. Editing Your Recorded Audio
Once you’ve recorded your audio, the editing process is crucial to polish your sound and enhance the overall quality. Here's how to effectively edit your recorded audio:
- Import Your Audio: Open your chosen editing software and import the recorded audio file. For instance, in Audacity, simply drag and drop your file into the workspace.
- Remove Unwanted Noise: Use noise reduction tools to eliminate background sounds. In Audacity, select a portion of silence, go to Effect > Noisereduction, and capture the noise profile. Then apply it to the entire track.
- Trim Unnecessary Parts: Cut out any mistakes or long pauses. Focus on keeping your content concise and engaging for your audience.
- Adjust Levels: Normalize your audio to ensure consistent volume throughout. Use the Amplify effect to raise quieter sections or reduce louder parts, aiming for a balanced sound.
- Add Effects and Enhancements: Consider adding subtle effects like reverb or EQ adjustments for a more professional sound. Be careful not to overdo it—less is often more.
- Insert Music or Sound Effects: If your video requires background music or sound effects, ensure they complement your voice rather than overpower it. Websites like AudioJungle or SoundCloud can provide great options.
- Export Your Final Audio: Once satisfied with your edits, export your audio file. Choose a format suited for YouTube, like MP3 or WAV, ensuring it maintains good quality without being too large.
Editing audio might take some time initially, but as you practice, you’ll develop a rhythm that enhances your workflow. Each video you create is a step toward mastering the art of audio recording and editing!
Also Read This: How to Schedule YouTube Shorts for Posting: A Complete Tutorial
7. Common Mistakes to Avoid
Recording audio for your YouTube videos can be a tricky process, especially if you're just starting out. Here are some common pitfalls to watch out for:
- Ignoring Background Noise: One of the biggest mistakes is neglecting your recording environment. Unwanted sounds like traffic, air conditioning, or even a ticking clock can ruin your audio quality. Always choose a quiet space and consider using soundproofing techniques, like heavy curtains or foam panels.
- Using Low-Quality Microphones: While it might be tempting to use your laptop's built-in mic, investing in a decent microphone can drastically improve your audio quality. Look for options like USB mics or even lavalier mics for a clearer sound.
- Not Monitoring Audio Levels: Failing to monitor your audio levels can lead to clips that are too quiet or, worse, distorted from being too loud. Use headphones to check your levels while recording, and make adjustments as needed.
- Neglecting Post-Production: Some creators think their job is done after recording, but post-production is just as crucial! Editing software can help you clean up audio, remove background noise, and add effects like compression or EQ for a professional touch.
- Skipping the Script: Going in without a plan can lead to rambling or forgetting key points. Prepare a script or at least an outline to keep your content focused and engaging.
- Not Testing Before Recording: Always do a test recording to check audio quality and levels. This simple step can save you from hours of re-recording later!
By being mindful of these common mistakes, you can significantly enhance the quality of your audio recordings and create a more enjoyable experience for your viewers.
8. Conclusion: Enhancing Your YouTube Experience
Recording high-quality audio for your YouTube videos is essential to creating content that resonates with your audience. The sound quality can make or break your viewer's experience, so it's worth putting in the time and effort to get it right. Here are a few final tips to elevate your audio:
- Experiment with Techniques: Don’t be afraid to try different recording methods or techniques. For example, using a shotgun mic for focused sound or a condenser mic for a broader range can lead to exciting results.
- Stay Updated: Technology evolves quickly, so keep an eye on new tools and techniques in audio recording. Following industry trends can help you maintain high-quality standards.
- Engage with Your Audience: Ask for feedback on your audio quality. Your viewers may provide insights that can help you improve further.
- Enjoy the Process: Lastly, have fun! The more you enjoy creating content, the more it will resonate with your audience. Your passion will shine through your audio.
Remember, audio quality is not just about the equipment but also about how you use it. With the right tools, techniques, and mindset, you can enhance your YouTube experience for both you and your viewers. Happy recording!
 admin
admin


