Welcome to our step-by-step guide on braiding! Braiding isn't just a practical way to style hair; it's also an art form that allows for creativity and personal expression. Whether you're getting ready for a special occasion, want a fun everyday look, or just want to learn a new skill, mastering various braids can elevate your style. From classic looks to modern twists, braiding can add flair to any outfit. Ready to dive in? Let’s explore the fascinating world of braids together!
Types of Braids to Explore
Now that you’re excited about braiding, let’s delve into some popular types of braids you can try. Each braid has its own unique charm and can be styled for any occasion. Here’s a breakdown of some favorites:
- Three-Strand Braid: The classic braid everyone learns first. Perfect for beginners!
- French Braid: A chic and elegant option that incorporates hair as you braid down the head.
- Fishtail Braid: A more intricate braid that creates a stunning, textured look.
- Dutch Braid: Similar to the French braid but with an inverted technique, giving it a 3D effect.
- Boxer Braids: Two Dutch braids worn close to the scalp, a trendy and sporty look.
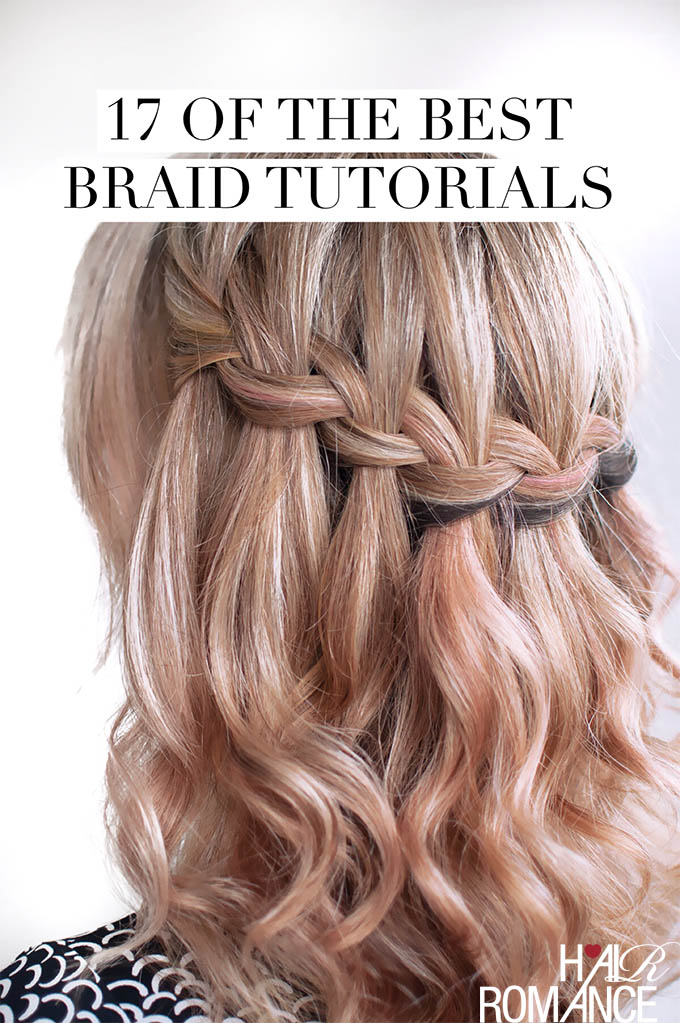
- Waterfall Braid: A beautiful braid that allows strands to cascade down, perfect for romantic styles.
Let’s take a closer look at a couple of these braids:
Three-Strand Braid
The three-strand braid is the foundation of all braiding techniques. To start, divide your hair into three equal sections. Cross the right section over the middle, then the left section over the new middle. Repeat this process, alternating sides until you reach the ends. Secure it with a hair tie. This simple braid is versatile and can be dressed up with accessories or left casual.
French Braid
For the French braid, begin similarly with three sections. However, as you braid, add small pieces of hair from the sides into the braid. This creates a seamless look that stays close to the scalp and works beautifully for both formal and casual occasions. Practice makes perfect, so don’t hesitate to try a few times until you get the hang of it!
In our next sections, we’ll explore even more braids, tips on how to keep them looking fresh, and where to find video tutorials on Dailymotion to guide you through the process. Happy braiding!
Also Read This: Stunning Watch Party Makeup Tutorials on Dailymotion
3. Essential Tools and Materials for Braiding

Before diving into the world of braiding, it’s crucial to gather your tools and materials. Having the right equipment on hand can make the process smoother and more enjoyable. Here’s a list of essentials you should consider:
- Hairbrush or Comb: A good quality hairbrush or wide-tooth comb is essential for detangling your hair before you start braiding. This ensures that your strands are smooth and manageable.
- Hair Ties: Invest in some clear or colored hair elastics. You’ll need these to secure the ends of your braids. If you're working with thicker hair, opt for strong, stretchy ties.
- Hair Clips: These are handy for sectioning off hair. They keep your work area tidy and prevent any stray hairs from getting in the way as you braid.
- Hair Spray or Mousse: A light mist of hairspray can help hold your braid in place, while mousse adds volume and texture. Choose a product depending on your hair type and the style you’re aiming for.
- Mirror: A good mirror, preferably a handheld one, can help you check your progress as you braid. It’s easier to make adjustments when you can see from different angles.
Optional items you might consider include:
- Heat Protection Spray: If you plan to use heat styling tools before braiding, a heat protectant is crucial for maintaining healthy hair.
- Texturizing Spray: Perfect for adding grip to fine or slippery hair, this can make the braiding process easier.
- Decorative Accessories: Ribbons, beads, or hairpins can add a fun touch to your braids, making them stand out even more!
Once you have everything ready, you’ll be set to create stunning braid styles that can elevate any look.
Also Read This: How to Make Rubber Band Bracelets by Hand: Fun DIY Tutorial on Dailymotion
4. Step-by-Step Instructions for Each Braid Style
Now that you have your tools, let’s explore some popular braid styles and how to achieve each one step by step. Here’s a breakdown of three classic braids: the three-strand braid, the fishtail braid, and the Dutch braid.
Three-Strand Braid
- Start with your hair brushed and free of tangles.
- Section your hair into three equal parts: left, center, and right.
- Take the right section and cross it over the center section.
- Now take the left section and cross it over the new center section (which was previously the right section).
- Continue alternating the right and left sections over the center until you reach the end of your hair.
- Secure the braid with a hair tie.
Fishtail Braid
- Brush your hair to eliminate any knots.
- Divide your hair into two equal sections.
- Take a small piece from the outer edge of the left section and cross it over to join the right section.
- Do the same with the right section: take a small piece from the outer edge and cross it over to the left section.
- Repeat this process, alternating sides, until you reach the ends of your hair.
- Secure with a hair tie.
Dutch Braid
- Start by parting your hair down the middle or to one side.
- Take a section from the front and divide it into three parts.
- Instead of crossing the strands over each other as in a traditional braid, cross the right strand under the center, then the left strand under the new center strand.
- As you continue, add hair from the scalp to each section before crossing under. This creates a braid that sits on top of your hair.
- Once you reach the nape of your neck, continue braiding the remaining hair in a regular three-strand braid.
- Finish with a hair tie.
With these step-by-step instructions, you’ll be well on your way to mastering these beautiful braid styles. Happy braiding!
Also Read This: How to Create a Channel on Dailymotion Guide for New Creators and Users
5. Tips for Perfecting Your Braids
When it comes to mastering the art of braiding, practice makes perfect! Here are some handy tips to elevate your braiding skills and ensure your styles look flawless:
- Start with the Right Tools: Invest in a good-quality brush, hair ties, and, if needed, some edge control or hair gel to keep flyaways in check.
- Prep Your Hair: Clean, dry hair can be easier to manage. If your hair tends to be slippery, consider using a light texturizing spray to provide some grip.
- Sectioning is Key: Take your time to section your hair evenly. Whether you’re doing a simple three-strand braid or a more intricate style, neat sections make all the difference.
- Practice Tension: Maintain even tension throughout the braid. Too tight can cause breakage, while too loose may lead to an unruly look.
- Watch Your Angles: Depending on the style, the angle at which you hold your hair can impact the final look. Experiment with different angles to find what works best for you.
- Finishing Touches: Once you’ve completed your braid, don’t forget to secure it properly with a hair tie. For a polished finish, you can gently tug at the braid’s edges to create a fuller look.
Don’t forget to check out some tutorials on Dailymotion for visual guidance! Watching someone else can really help you get the hang of the techniques.
Also Read This: Effective Ways to Mute or Avoid Ads on Dailymotion
6. Common Mistakes to Avoid While Braiding
Even the most seasoned braiders make mistakes from time to time. Here are some common pitfalls to avoid, ensuring your braids turn out beautifully every time:
- Skipping the Prep Work: One of the biggest mistakes is not prepping your hair before you start. Always detangle and section your hair beforehand to make the process smoother.
- Inconsistent Tension: If you pull some strands tighter than others, it can result in an uneven braid. Focus on maintaining consistent tension throughout for a cohesive look.
- Overlooking Product Use: While it’s tempting to go all-natural, sometimes a bit of product can help. Using a light styling cream or mousse can provide the hold you need without making your hair stiff.
- Not Taking Breaks: If you’re braiding for a long time, don’t forget to take breaks! This helps prevent fatigue in your hands and allows you to check for any mistakes.
- Ignoring Hair Types: Different hair types require different techniques. What works for straight hair may not be suitable for curly hair. Be adaptable and consider your hair’s unique texture.
- Skipping Finishing Steps: Always secure your braid with a hair tie and, if desired, finish with hairspray or serum to keep everything in place. Skipping this step can lead to frizz and flyaways.
By avoiding these common mistakes, you'll be well on your way to creating stunning braids that last all day. Remember, practice and patience are essential, so don’t get discouraged if you don’t get it right immediately!
Also Read This: Loom Band Creations Made Easy with Your Fingers
7. How to Maintain Your Braids
Once you've mastered the art of braiding and have your beautiful styles in place, it's essential to keep them looking fresh and fabulous. Proper maintenance can extend the life of your braids and protect your natural hair underneath. Here are some tips to ensure your braids stay healthy and stylish:
- Keep Them Clean: Clean your scalp regularly. Use a gentle sulfate-free shampoo to avoid stripping moisture. You can also opt for a cleansing spray specifically designed for braided hair.
- Moisturize: Hydration is key! Use a spray bottle with a mixture of water and a lightweight leave-in conditioner. Lightly spritz your braids and scalp to keep everything nourished.
- Avoid Excessive Tension: If you feel too much pull on your scalp, consider loosening your braids. Tension can lead to breakage and discomfort.
- Protect at Night: Use a silk or satin scarf or pillowcase to reduce friction while you sleep. This helps prevent frizz and keeps your braids looking polished.
- Regular Touch-Ups: If you notice any loose strands or frizz, don't hesitate to do some DIY touch-ups. You can re-braid sections to keep the look sharp.
Lastly, remember to listen to your hair. If it feels dry or damaged, consider taking a break from braids and give your hair some TLC. Regular deep conditioning treatments can work wonders!
8. Conclusion and Further Resources
Congratulations on diving into the world of braids! Whether you're a beginner or looking to enhance your skills, mastering different braiding techniques allows you to express your personality and style in unique ways. Remember, practice makes perfect. The more you braid, the better you’ll get!
For those eager to learn more, here are some fantastic resources to keep your braiding game strong:
- Dailymotion Tutorials: Check out specific braiding tutorials on Dailymotion for visual guidance. Channels often provide step-by-step instructions to help you follow along.
- Instagram Influencers: Many hairstylists share quick tips and braiding tricks on social media platforms. Follow them for inspiration and new techniques!
- YouTube: For more in-depth lessons, YouTube has a plethora of braiding channels. Look for playlists dedicated to styles you’d like to master.
- Books: Consider investing in books that focus on hair styling techniques. They often include detailed instructions and tips from professionals.
Stay creative, experiment with different styles, and most importantly, have fun with your braids! Happy braiding!
 admin
admin


