Are you looking to add a splash of color to your hair without the commitment of permanent dye? Hair chalk is your go-to solution! It's a fun, temporary way to express yourself, perfect for kids and adults alike. You can easily create your own hair chalk at home using simple materials. In this blog post, we’ll explore what hair chalk is, how you can make it, and the benefits of using it. Let’s dive into the colorful world of DIY hair chalk!
Benefits of Using Hair Chalk
Why choose hair chalk over traditional hair dye? Here are some fantastic benefits:
- Temporary Change: Hair chalk washes out easily with shampoo, allowing you to change your look as often as you like. Think of it as a new accessory for your hair!
- No Damage: Unlike chemical dyes that can damage your hair, hair chalk is generally much gentler, especially when made with natural ingredients.
- Creative Freedom: With hair chalk, the color possibilities are endless! You can experiment with ombre effects, streaks, or even rainbow hair.
- Easy to Apply: Using DIY hair chalk is straightforward. You can apply it directly to your hair with your hands or use a brush for more precision.
- Fun for All Ages: Hair chalk is a fun activity for children at parties or events. Let them get creative and express themselves without any long-term effects.
- Perfect for Special Occasions: Whether it’s a festival, costume party, or just a day out, hair chalk can give you that extra flair for the occasion!
Embracing this colorful and fun method can uplift your mood and let your personality shine through. Imagine walking into a room with vibrant streaks of teal or pink in your hair, turning heads and sparking conversations. Plus, you can easily match your hair color to your outfit or the season!
So, if you’re searching for a way to refresh your look or just want to have some fun, hair chalk is an amazing choice. Let's get creative!
Also Read This: How to Download Dailymotion Videos Using Firefox: A Step-by-Step Method
3. Gathering Your Materials
Before you dive into the colorful world of DIY hair chalk, it’s essential to gather all the materials you’ll need. Having everything at your fingertips will make the process seamless and fun! Here’s a handy list of what you’ll require:
- Chalk Pastels: Look for soft chalk pastels in your favorite colors. The softer the chalk, the easier it will be to work with!
- Hair Gel: A clear or colored hair gel will help the chalk adhere to your hair. You can find this at any drugstore.
- Water: A small bowl of water will help in wetting the chalk for a more vibrant application.
- Hair Spray: To seal in your masterpiece, grab a can of hair spray. This will ensure your colors stay vibrant throughout the day!
- Old Towels or a Disposable Tablecloth: Things can get a bit messy, so protect your workspace with old towels or a disposable tablecloth.
- Gloves: Wearing gloves will keep your hands clean and allow you to experiment without worry.
- Comb or Brush: For detangling your hair before applying the chalk.
Once you’ve rounded up all these items, you’re ready to transform your hair into a canvas of creativity! Remember, the more colors you have, the more fun you can have mixing and matching. So, feel free to get a few extra shades to really express yourself. Now, let’s move on to the exciting part—making your hair chalk!
Also Read This: Is God an Alien Concept on Dailymotion? Analyzing the Content on the Platform
4. Step-by-Step Guide to Making Hair Chalk
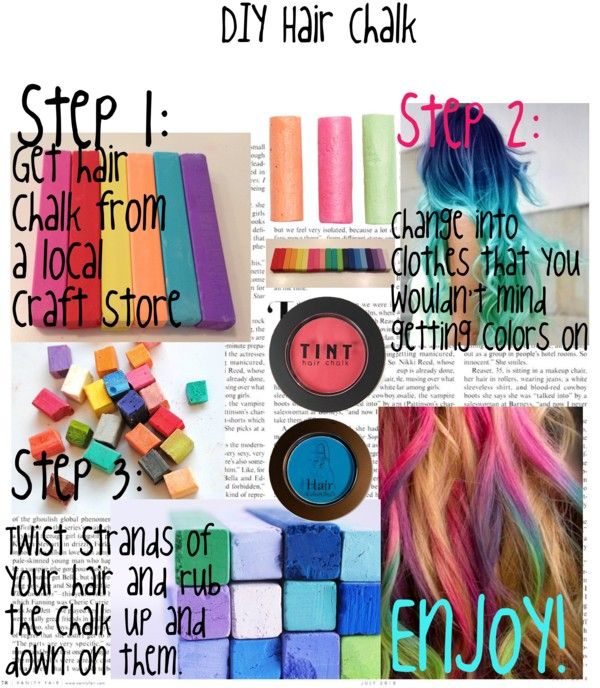
Now that you have all your materials ready, let’s jump straight into the fun part—making your DIY hair chalk! Follow this simple step-by-step guide to create vibrant, temporary hair colors:
- Prep Your Workspace: Lay down your towels or disposable tablecloth to keep things tidy. Make sure you’re in a well-ventilated area, especially if you’re working with soft pastels!
- Break the Chalk: Using your hands or a hammer, carefully break your chalk pastels into small pieces. Aim for sizes that are manageable for your hands. You want them to be about the size of a grape.
- Mix with Hair Gel: In a small bowl, mix about 2-3 tablespoons of hair gel with one broken piece of chalk. You can adjust the ratio based on how vibrant you want the color to be. For a stronger hue, use more chalk!
- Add Water (Optional): If you find the mixture too thick, add a few drops of water to help create a smoother consistency. Just be careful not to make it too runny!
- Test the Mixture: Before applying it to your hair, do a small test on a piece of paper or an old towel. This will ensure you’re happy with the color before putting it on your locks!
- Apply to Hair: Using the gloves, take a small section of hair and apply the chalk mixture from mid-length to the ends. You can use your fingers or a brush for a more even application. Remember, the thicker the layer, the more vivid the color!
- Set the Color: Once applied, let the chalk sit for a few minutes to dry. Then spray a light mist of hair spray to seal in the color and add a bit of shine.
- Enjoy Your Colorful Look: Rock your new hair color! Whether you’re heading out for a fun night or just want to express your creative side, enjoy every moment of your colorful transformation!
And there you have it! With just a few simple steps, you’ve created your very own DIY hair chalk. The best part? It washes out easily with shampoo, so you can switch up your style whenever you feel like it. Happy coloring!
Also Read This: How to Effectively Monetize Your Dailymotion Account
5. Creative Ways to Use Hair Chalk
If you thought hair chalk was just for adding a pop of color to your locks, think again! There are so many creative ways to incorporate hair chalk into your beauty routine. Here are a few fun ideas:
- Temporary Highlights: Want to try highlights without the commitment? Use hair chalk to create vibrant streaks. Pick a few strands, apply the chalk, and voilà! Instant highlights that wash out at the end of the day.
- Colorful Updos: Add a splash of color to your favorite updo. Whether you're creating a messy bun or a sleek ponytail, a touch of hair chalk can make your hairstyle stand out.
- Pattern Play: Get adventurous with patterns! Use stencils or your fingers to apply hair chalk in fun shapes or stripes. This can be a fantastic way to express your personality, especially for festivals or parties.
- Festival Glam: Hair chalk is perfect for festivals. Bright colors can enhance your boho look, and you can even match your hair chalk to your outfit for a cohesive style.
- Kids’ Parties: If you're throwing a party for kids, hair chalk can be a fun activity. Set up a station where kids can color their hair, giving them a chance to express their creativity.
These ideas are just the tip of the iceberg! Feel free to mix and match colors, styles, and techniques until you find what suits you best. The beauty of hair chalk is in its versatility and the opportunity to try something new!
Also Read This: Ultimate Guide to Using the Dailymotion App for Mobile Users
6. Tips for Applying Hair Chalk
Applying hair chalk can be a bit tricky if you're not familiar with it. But don’t worry! Here are some handy tips to ensure you get the best results:
- Choose the Right Chalk: Make sure you’re using hair chalk specifically designed for hair. Some art chalks can be too harsh and may damage your hair. Brands like Hair Chalk by Splat and Chalkola are great options.
- Prep Your Hair: Start with clean, dry hair. If your hair is dirty or oily, the chalk may not adhere properly. A little styling product, like mousse, can help the color stick better.
- Section Your Hair: For more precise application, section your hair into manageable parts. This way, you can focus on one area at a time, ensuring an even distribution of color.
- Wet Method vs. Dry Method: You can apply hair chalk either dry or wet. The dry method gives a softer, more pastel look, while the wet method creates a bolder color. Experiment with both to see which you prefer!
- Seal It In: After applying the chalk, use a flat iron or curling iron to set the color. This will help lock it in and prevent it from rubbing off. Just be careful not to burn your hair!
Lastly, remember that practice makes perfect! Don’t get discouraged if it doesn’t turn out exactly as you envisioned on your first try. Have fun with it, and let your creativity shine through!
Also Read This: Tips to Achieve Healthy, Shiny, and Silky Hair at Home
7. Cleaning Up After Using Hair Chalk
So, you’ve had a blast coloring your hair with vibrant chalks, but now it’s time to tackle the aftermath. Cleaning up after using hair chalk doesn’t have to be a chore. Here are some easy steps to ensure your space is back to normal in no time:
- Protect Your Workspace: Before you start, lay down an old towel or newspaper. This will catch any stray chalk dust and save your surfaces from color stains.
- Gather Your Tools: You’ll need a damp cloth or paper towels, a brush, and maybe a vacuum cleaner if you’ve made quite the mess.
- Wipe Down Surfaces: After you’re done coloring, use the damp cloth to wipe down your table or any surfaces where chalk dust might have settled. A little soap can help if you notice any stubborn stains.
- Brush Away Residue: If you’ve got chalk dust in your hair or on your clothes, gently brush it off. For hair, a quick shake or a brush through can do wonders.
- Vacuum the Area: If you’ve splashed chalk around, a quick vacuum will help collect any stray bits. It’s amazing how much can end up on the floor!
- Launder Your Clothes: If your clothes got a bit colorful, throw them in the wash as soon as possible. Most hair chalks are designed to wash out, but it’s best to act quickly.
And there you have it! A quick and easy clean-up that gets you back to your normal routine without too much hassle. Remember, a little preparation goes a long way in keeping the mess to a minimum, so next time you decide to get creative, just follow these tips!
8. Conclusion: Embrace Your Colorful Style
DIY hair chalking is not just a fun way to express your creativity; it’s also an opportunity to embrace your unique style without any long-term commitments. Whether you’re looking to add a pop of color for a special occasion or just want to experiment with new looks, hair chalk offers a perfect solution.
With the tips and tricks we've covered, you can easily make your own hair chalk, apply it like a pro, and keep your space clean afterward. Remember, there are no rules when it comes to expressing yourself through color. Play with different techniques, mix shades, and don’t be afraid to stand out!
So grab your hair chalk and let your imagination run wild. Whether it’s a vibrant blue ombre or playful pink streaks, every application is a chance to showcase your personality. So, what are you waiting for? Go ahead, color your world!
 admin
admin


