Hey there, content creators! If you’ve been wondering how to share your amazing YouTube videos on Instagram for more engagement, you’re in the right place. Instagram is a fantastic platform to boost your visibility and connect with your audience. By sharing your YouTube content, you can drive traffic back to your channel while keeping your followers entertained. Let's dive into how you can seamlessly integrate your
Understanding Video Formats and Duration Limits
When it comes to uploading videos from YouTube to Instagram, understanding video formats and duration limits is crucial for maximizing your engagement.
First off, let’s talk about video formats. Instagram supports various formats, but the most common and effective ones are:
- MP4 - This is the go-to format for Instagram, providing good quality with manageable file sizes.
- MOV - This format also works well, especially for videos edited on Apple devices.
- GIF - While not ideal for longer videos, GIFs can add a fun touch to your posts.
Now, let’s discuss the duration limits for videos:
- Feed Posts: You can upload videos that are up to 60 seconds long.
- Stories: Each story can be up to 15 seconds, but you can post multiple stories in sequence.
- Reels: These can be up to 90 seconds, allowing for more creativity!
- IGTV: For longer content, IGTV allows videos from 1 minute to 60 minutes, depending on your account type.
To make the most of these formats and limits, consider these tips:
- Keep it Short and Sweet: If you’re sharing clips, select the most engaging parts of your video to capture attention quickly.
- Use Eye-Catching Thumbnails: Thumbnails play a significant role in attracting viewers. Choose a compelling image!
- Incorporate Captions: Many users watch videos without sound, so including captions can help convey your message effectively.
By understanding these formats and limits, you can tailor your YouTube videos for Instagram, ensuring they fit perfectly and resonate with your audience. Ready to take your content sharing to the next level? Let’s keep rolling!
Also Read This: How to Cake That on YouTube – A Fun and Easy Tutorial
3. Step-by-Step Guide to Downloading YouTube Videos
Ready to take your YouTube content and share it on Instagram? First things first: you need to download those videos. Here’s a simple guide to help you do just that!
Step 1: Choose a YouTube Video Downloader
There are several reliable tools available for downloading YouTube videos. Some popular options include:
- 4K Video Downloader: A user-friendly option with high-quality downloads.
- YTD Video Downloader: This tool allows you to convert and save videos easily.
- Online Video Converter: A quick web-based solution if you don’t want to install software.
Step 2: Copy the Video URL
Head to YouTube, find the video you want to download, and copy the URL from the address bar. Make sure you have permission to download the content if it’s not your own!
Step 3: Paste the URL into the Downloader
Open your chosen downloader, and look for an option to paste the URL. Most tools will have a prominent button for this. Simply click and paste!
Step 4: Select Video Format and Quality
Here’s where the fun begins! You’ll usually have the option to choose between various formats (like MP4, AVI, etc.) and quality settings (like 720p, 1080p). For Instagram, MP4 format and 1080p quality are ideal!
Step 5: Hit the Download Button
Once you’ve made your selections, click the download button. The video will start downloading, and you can keep an eye on the progress bar.
Step 6: Locate Your Downloaded Video
After the download is complete, navigate to your downloads folder. You should see the video file ready for editing or uploading!
Also Read This: Can PiHole Block YouTube Ads? A Complete Guide to Ad Blocking
4. How to Edit YouTube Videos for Instagram
Now that you’ve downloaded your video, it’s time to get creative! Editing your YouTube videos before uploading them to Instagram can significantly boost engagement. Here’s how to do it:
Step 1: Choose an Editing Tool
There are plenty of great editing tools out there. Some popular choices include:
- Adobe Premiere Pro: A professional tool with plenty of features for advanced editing.
- iMovie: Perfect for Mac users and great for simple edits.
- InShot: A mobile app that’s user-friendly and perfect for quick edits.
Step 2: Import Your Video
Open your editing software and import the downloaded video. This process may vary based on the software you choose, but it’s usually straightforward. Look for the “Import” option!
Step 3: Trim and Cut
Instagram has a time limit for videos (60 seconds for feed posts, 15 seconds for stories). Trim your video to fit this format. You can also cut out any sections that don’t add value.
Step 4: Add Engaging Elements
Engagement is key! Consider adding:
- Text Overlays: Highlight important points or add captions for clarity.
- Music: A catchy soundtrack can make your video more enjoyable.
- Transitions: Smooth transitions keep the flow and maintain interest.
Step 5: Export in the Right Format
Once you’re happy with your edits, it’s time to export. Make sure to choose MP4 format, as it’s Instagram-friendly! Adjust the resolution to 1080p for the best quality.
Step 6: Preview Before Uploading
Take a moment to preview your video. Ensure everything looks and sounds great. If it does, you’re ready to upload it to Instagram and wow your audience!
Also Read This: Is YouTube Music Growing? The Rise of YouTube's Streaming Service
5. Uploading YouTube Videos to Instagram Stories
Instagram Stories are a fantastic way to share snippets of your YouTube content and engage with your audience. Imagine showing behind-the-scenes clips, teasers, or highlights that pique curiosity! Here’s how you can effectively upload your YouTube videos to Instagram Stories.
Step 1: Select Your Content
Choose a captivating clip from your YouTube video. Aim for an exciting moment—something that showcases the essence of your video. A good rule of thumb is to keep it under 15 seconds, as that’s the maximum length for a single Instagram Story slide.
Step 2: Download Your Clip
You can use various online tools or apps to download your YouTube video. Websites like Y2Mate or apps like 4K Video Downloader are great options. Ensure you download the part you want to share.
Step 3: Transfer to Your Phone
If you downloaded the video on your computer, transfer it to your phone via email, Google Drive, or a USB cable. This step is crucial for easy access when uploading to Instagram.
Step 4: Open Instagram
Launch the Instagram app, swipe right, or tap your profile picture to create a new Story. Tap the camera icon or swipe up to access your gallery where your downloaded clip is located.
Step 5: Edit and Share
- Use Instagram’s built-in tools to add stickers, polls, or text to your Story. Engage your audience by asking questions or encouraging them to swipe up to watch the full video on YouTube.
- Don’t forget to include a call-to-action! Phrases like “Check out the full video on my YouTube channel!” will help guide your followers.
Keep in mind that Instagram Stories disappear after 24 hours, so consider saving them as highlights for prolonged visibility. This way, new followers can easily access your YouTube content later!
Also Read This: How to Block YouTube on Mac Computer and Focus on Productivity
6. Sharing YouTube Videos on Instagram Feed
Posting YouTube videos directly on your Instagram Feed can significantly boost your engagement. Here’s how to do it right:
Step 1: Create a Shortened Version
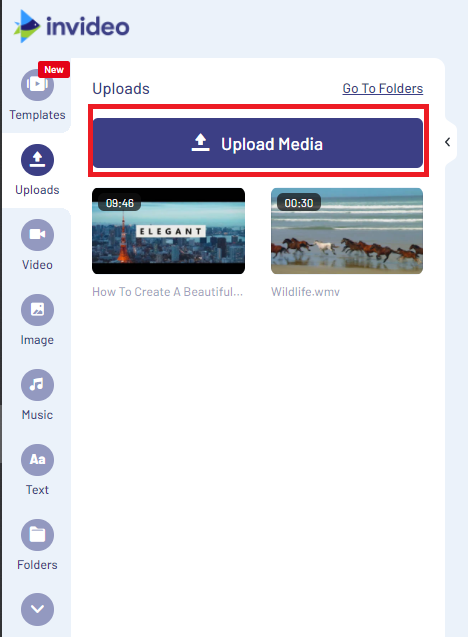
Instagram allows longer videos, but it’s best to keep your feed posts under one minute for maximum engagement. Edit a concise version of your YouTube video, ensuring it’s engaging from the first second. Use tools like Canva or InVideo for easy editing.
Step 2: Prepare Your Thumbnail
A captivating thumbnail can make a huge difference in attracting viewers. Create a visually appealing image that encapsulates the video’s theme. You can use Canva or Adobe Spark for this. Make sure it’s vibrant and bold!
Step 3: Write an Engaging Caption
Your caption should hook your audience right away! Consider including:
- A brief overview of what viewers can expect.
- Questions to encourage comments.
- Hashtags relevant to your content, such as #YouTube, #VideoContent, or specific hashtags related to your video topic.
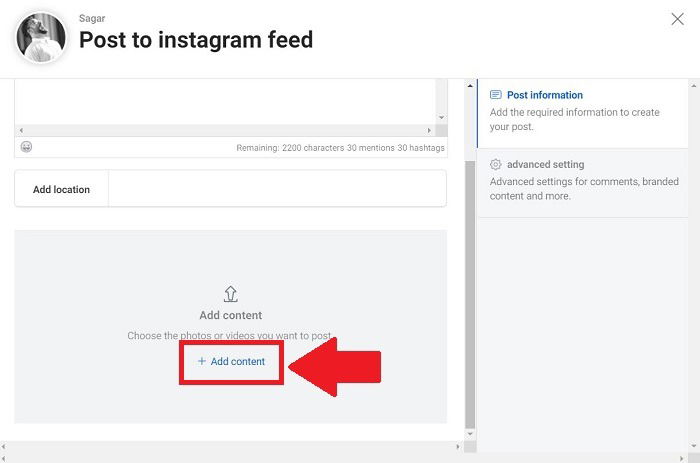
Step 4: Post and Promote
Once you’re satisfied with your video and caption, hit that share button! After posting, promote your new video in your Stories or on other social platforms to drive more traffic. Engage with comments promptly—this interaction can increase your video’s visibility.
Remember to include a link to your YouTube channel in your bio or use the “Link in Bio” feature to guide followers directly to your full video. Engaging with your audience is key—ask them what they think about the video or topics they’d like you to cover next!
Also Read This: How Valuable Is a YouTube Play Button?
7. Using Instagram Reels to Showcase YouTube Content
Instagram Reels have taken the platform by storm, and they’re a fantastic tool for showcasing your YouTube content! If you’re not already leveraging Reels, you’re missing out on a huge opportunity to connect with your audience in a fresh and engaging way.
First, let’s talk about the magic of Reels. They allow you to create short, captivating videos that can be up to 60 seconds long. This is perfect for grabbing the attention of your followers and enticing them to check out your full YouTube videos. Here’s how to do it:
- Teasers: Create teaser Reels that highlight the best moments of your YouTube videos. For instance, if your YouTube video is a tutorial on baking a cake, show a quick clip of the cake coming out of the oven and the final decorated product.
- Behind-the-Scenes Footage: Share snippets of your video creation process. Viewers love seeing the effort that goes into making content, and it creates a personal connection. For example, a quick Reel showing you setting up your camera or having fun while filming can be very engaging.
- Call-to-Action: Always include a strong call-to-action in your Reels. Encourage viewers to check out the full video on YouTube. You can say something like, “Want to see how I made this? Head over to my YouTube channel for the full recipe!”
Additionally, make sure to use trending music and hashtags in your Reels to increase their visibility. The more people see your Reels, the more likely they are to follow your page and check out your YouTube channel. So, get creative and have fun with it!
8. Tips for Increasing Engagement with Your Videos
Engagement is the lifeblood of social media, and if you want your videos to shine on Instagram, you need to make sure you’re actively encouraging interaction. Here are some practical tips to boost engagement on your Instagram videos:
- Ask Questions: At the end of your video, pose a question to your audience. For example, if you’re sharing a travel vlog, you might ask, “What’s your favorite travel destination?” Questions invite viewers to comment, increasing interaction.
- Use Polls and Quizzes: Instagram Stories offer great features like polls and quizzes. After posting your video, create a Story where you can ask viewers to vote on their favorite part of your video or answer trivia related to it. This keeps the conversation going!
- Engage Back: When followers comment on your videos, respond to them! Acknowledging their input makes them feel valued and encourages future interactions. Try to respond within a few hours to keep the momentum going.
- Consistent Posting: Develop a consistent posting schedule. If your audience knows when to expect new content, they’re more likely to engage with each post. Consider using a content calendar to plan your uploads ahead of time!
Finally, always analyze your engagement metrics. Instagram Insights can show you what types of content resonate most with your audience. Don't be afraid to experiment and adjust your strategy based on what works!
By implementing these tips and utilizing Instagram Reels, you can create a vibrant community around your content and drive more traffic to your YouTube channel. Happy posting!
 admin
admin


