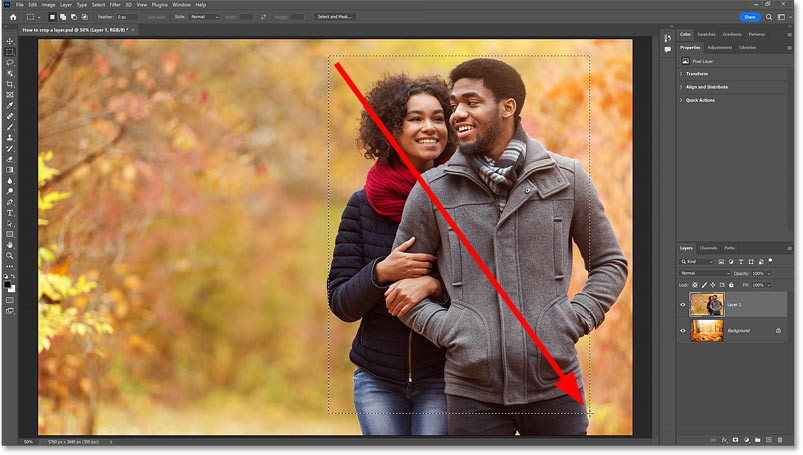
Whether you're a seasoned graphic designer or just starting your creative journey, mastering image selection in Photoshop is crucial. Selecting parts of an image allows you to edit, enhance, or manipulate specific areas without affecting the entire picture. This flexibility opens up a world of possibilities, from creating stunning collages to refining details in photos. In this post, we'll explore the various tools Photoshop offers for making selections, ensuring you can confidently isolate and enhance any part of your images!
Understanding Different Selection Tools
Photoshop is packed with a variety of selection tools, each designed to help you isolate specific areas of your images efficiently. Let’s break down some of the most commonly used tools:
- Marquee Tool: This tool is perfect for making rectangular or elliptical selections. Simply click and drag to create your desired shape. It’s ideal for quick selections of uniform areas.
- Lasso Tool: If you need more freedom with your selections, the Lasso Tool allows you to draw freehand. There’s also the Polygonal Lasso Tool, which lets you create straight-edged selections by clicking points around your target area.
- Magic Wand Tool: Need to select areas of similar color? The Magic Wand Tool is your friend! Click on a color in the image, and it will select all adjacent pixels with similar hues. You can adjust the tolerance level to fine-tune your selection.
- Quick Selection Tool: This tool uses a brush-like approach to select areas based on color and texture. Simply paint over the area you want to select, and it will automatically detect the edges. It’s great for more complex selections like hair or intricate patterns!
- Pen Tool: For the precision-loving designers, the Pen Tool is unmatched. It allows you to create paths that can be converted into selections. With a bit of practice, you can achieve incredibly accurate selections, especially for detailed subjects.
Each of these tools has its strengths, and the best choice often depends on your specific project. For example, the Marquee Tool might be perfect for cropping out a simple rectangular area, while the Quick Selection Tool shines when isolating a complex subject like a person against a busy background.
Don’t forget to experiment with the Select and Mask feature, which is particularly useful for refining your selections. This feature allows you to smooth edges, feather selections, and even adjust the contrast to ensure that your selected area blends seamlessly with the rest of the image.
In conclusion, understanding these selection tools will empower you to tackle any project in Photoshop. As you gain confidence in using them, you’ll find that the possibilities for creativity are truly endless. So grab your digital canvas and start making those selections!
Also Read This: Embedding a YouTube Video in Behance for Enhanced Multimedia Projects
3. Step-by-Step Guide to Using the Marquee Tool
The Marquee Tool in Photoshop is one of the simplest yet most powerful tools for selecting parts of your images. Whether you want to select a rectangular area or an elliptical one, the Marquee Tool has got you covered. Let’s dive into how to use it effectively!
Step 1: Select the Marquee Tool
First, locate the Marquee Tool in the toolbar on the left side of your screen. It looks like a dotted rectangle. You can quickly access it by pressing the M key on your keyboard. If you click and hold the icon, you’ll see options for the Rectangular Marquee Tool and the Elliptical Marquee Tool. Choose the one that fits your selection needs.
Step 2: Make Your Selection
Now, click and drag your mouse over the area of the image you want to select. If you’re using the Rectangular Marquee Tool, just create a box around the desired area. For the Elliptical Marquee Tool, hold down the Shift key while dragging to create a perfect circle or oval.
Step 3: Adjusting Your Selection
If you need to adjust your selection, you can simply hold down the Spacebar while dragging, which allows you to reposition the selection without starting over. This is super handy when you’re trying to get that perfect fit!
Step 4: Refine Your Selection
After making your selection, you can refine it using the options in the menu bar. For example, you can modify the feathering to create a soft edge, making your selection blend better into the background.
Step 5: Apply Your Selection
Once you’re happy with your selection, you can copy it, delete it, or even apply filters. Just go to Edit > Copy or Edit > Delete to execute your desired action. It’s that simple!
And voilà! You’ve just used the Marquee Tool to select a part of your image. With a bit of practice, you’ll get faster and more precise, making your Photoshop experience much more enjoyable.
Also Read This: Hiding Featured Images in WordPress Posts
4. Using the Lasso Tool for Freehand Selection
If you’re looking to select irregular shapes or freeform areas of an image, the Lasso Tool is your best friend. It allows for a more artistic touch when making selections. Let’s explore how to use this versatile tool!
Step 1: Choose the Lasso Tool
Just like the Marquee Tool, you can find the Lasso Tool in the toolbar. It looks like a lasso rope. Press the L key on your keyboard, and you're ready to go! You’ll notice there are different types of Lasso Tools: the standard Lasso Tool, the Polygonal Lasso Tool, and the Magnetic Lasso Tool. Each has its special use!
Step 2: Make a Freehand Selection
To make a freehand selection, simply click and hold the mouse button, then drag around the area you want to select. Try to keep your hand steady for smoother curves. Don’t worry if you're not perfect; you can always refine it later!
Step 3: Using the Polygonal Lasso Tool
If you need straight-edged selections, switch to the Polygonal Lasso Tool. Click to create points around your subject. Once you click the first point again, your selection will close. This is great for selecting geometric shapes!
Step 4: Magnetic Lasso Tool for Smart Selections
The Magnetic Lasso Tool is perfect for selecting objects with high-contrast edges. It automatically detects edges as you drag along them. Just click at the starting point and trace the outline. If you stray off course, you can click to add anchor points manually!
Step 5: Finalizing Your Selection
After you’ve made your selection, you can refine it with the Select and Mask feature. Go to Select > Modify to smooth or expand your selection edges. Once you’re satisfied, proceed with your desired edits!
The Lasso Tool offers amazing flexibility, allowing for creative selections that fit your unique vision. With a little practice, you’ll find yourself fluently navigating around your images in no time!
Also Read This: Capturing Audio from YouTube Videos: A Simple Guide
5. Creating Selections with the Magic Wand Tool
When it comes to selecting parts of an image in Photoshop, the Magic Wand Tool is a powerful ally, especially for images with solid colors or distinct boundaries. Let’s dive into how you can leverage this tool effectively.
To get started, simply select the Magic Wand Tool from your toolbar (it looks like a wand – pretty fitting, right?). Once selected, click on the area of the image you want to select. The tool will automatically select pixels based on color similarity. Here are some tips to make the most of it:
- Tolerance Setting: The Magic Wand Tool has a Tolerance setting, which controls how similar in color the selected pixels need to be. A low tolerance (e.g., 10-20) will select only colors very similar to the one you clicked, while a higher tolerance (e.g., 30-50) will include a broader range of similar colors.
- Contiguous Option: By default, the tool selects contiguous pixels (those that are touching). If you want to select non-contiguous areas as well, simply uncheck the Contiguous option in the settings bar.
- Shift-Click: If you want to add to your selection, hold down the Shift key while clicking on additional areas. Conversely, if you want to subtract from your selection, hold down the Alt (or Option on Mac) key.
After making your selection, you might want to refine it further. Don’t worry if it’s not perfect on the first try. The Magic Wand Tool is great for getting a quick selection, but sometimes it requires a little tweaking for precision.
Also Read This: Image Inversion: Flipping an Image in Microsoft Word
6. Refining Your Selections with Quick Selection Tool
Once you’ve made a selection using the Magic Wand, or if you want to create a selection from scratch, the Quick Selection Tool is your go-to option. This tool allows you to paint over the area you want to select, making it super intuitive and flexible.
To use the Quick Selection Tool, follow these simple steps:
- Select the Tool: Find the Quick Selection Tool in the toolbar (it looks like a brush with a dotted circle).
- Paint Over the Area: Click and drag over the part of the image you want to select. The tool will automatically detect edges and create a selection as you paint.
- Adjust Brush Size: If you need to select finer details, adjust the brush size by using the brackets keys [ ] on your keyboard. A smaller brush is great for tight spots, while a larger brush covers more area quickly.
Sometimes the initial selection might include areas you don’t want, or it might miss certain details. Not to worry! You can easily refine your selection:
- Add to Selection: As with the Magic Wand Tool, hold down the Shift key to add to your selection.
- Subtract from Selection: Hold down the Alt (or Option) key to remove areas from your selection.
After you have your selection just right, don’t forget to check it against the image. Zoom in (using Ctrl + + or Cmd + + on Mac) to see how clean your edges are. If needed, you can refine the edges further using the Select and Mask option to smooth, feather, or contrast your selection, ensuring it blends seamlessly with your image.
And there you have it! With the Magic Wand Tool and Quick Selection Tool in your Photoshop toolkit, you’re well on your way to making precise selections like a pro.
Also Read This: How to Cut Out an Image in Canva for Stunning Visuals
7. Saving and Editing Selections
Once you’ve created a selection in Photoshop, you might want to save it for later use or make edits to it. This can be incredibly handy, especially if you’re working on a complex project that requires repeated use of certain selections. Let’s explore how to save and edit your selections efficiently.
Saving Your Selection
To save a selection, go to the Select menu and choose Save Selection. A dialog box will pop up asking you to name your selection. Give it a memorable name, especially if you plan to make multiple selections. Click OK, and your selection is saved in the Channels panel. You can always come back to this saved selection later.
How to Access Saved Selections
To access your saved selection, simply navigate to the Channels panel. You’ll see your saved selections listed there. Click on the channel, and then hold down the Ctrl (or Cmd on Mac) key and click the channel thumbnail. This will load the selection back onto your canvas, ready for further editing or adjustments.
Editing Your Selection
Editing a selection can be done in several ways. If you need to modify the edges of your selection, use the Select and Mask feature. This tool allows you to refine your selection with options like feathering, smoothing, and shifting the edge. It’s especially useful for selections involving hair or intricate details.
- Feathering: Softens the edges of your selection.
- Smoothing: Reduces jagged edges, creating a cleaner look.
- Shift Edge: Moves the selection inward or outward, allowing for precise adjustments.
Once you’re happy with your edits, click OK, and your modified selection will be applied. Remember, you can always undo any changes with Ctrl + Z if you’re not satisfied!
8. Common Mistakes to Avoid with Selections
Making selections in Photoshop can be a bit tricky at times, especially if you're just starting. Here are some common pitfalls to avoid that can save you a lot of frustration and time.
1. Not Using the Right Tool
One of the biggest mistakes is not choosing the appropriate selection tool for the job. For example, if you’re trying to select a complex shape, the Pen Tool or Lasso Tool may be more effective than the Rectangular Marquee Tool. Always assess the shape you’re selecting and choose the tool that will give you the best results.
2. Ignoring Feathering
Feathering is often overlooked, but it’s crucial for achieving realistic results. If your selection edges are too sharp, it can lead to a harsh look that screams “Photoshop!” A little feathering can go a long way in blending your selection smoothly into the background.
3. Forgetting to Save Your Hard Work
Imagine spending hours perfecting a selection only to lose it because you didn’t save it! Always save your selection after you create it. This way, if you need to return to it later, you won’t have to start from scratch.
4. Overlooking the Zoom Tool
When working on intricate details, don’t forget to zoom in! It’s easy to miss small areas when you’re viewing your image at a normal size. Zooming in can help you select with precision, avoiding any accidental omissions.
By being aware of these common mistakes, you can streamline your selection process and enhance the quality of your work. Happy editing!
 admin
admin


