Are you tired of slow-loading websites due to bulky image files? Hosting your images on SiteGround can be a game-changer! With its robust infrastructure and user-friendly tools, SiteGround makes it easy to store and manage your images efficiently. In this blog post, we’ll dive into the benefits of hosting images on SiteGround and how it can enhance your website’s performance. Get ready to elevate your site with fast-loading images that impress your visitors!
Benefits of Hosting Images on SiteGround
When it comes to hosting images, SiteGround offers several advantages that can significantly boost your website's performance and user experience. Let’s explore some of these benefits:
- Superior Speed: SiteGround is renowned for its fast loading speeds. With their SSD storage and advanced caching mechanisms, images load quickly, enhancing your site’s performance.
- Easy Management: SiteGround provides a user-friendly interface that allows you to upload, organize, and manage your images effortlessly. You can drag and drop files, making it a breeze even for beginners.
- Free CDN Integration: With SiteGround, you can integrate a Content Delivery Network (CDN) at no additional cost. This means your images are stored in multiple locations worldwide, ensuring faster delivery to users no matter where they are.
- Automatic Backups: SiteGround’s automatic backup feature ensures your images are safe and can be restored quickly in case of any mishap. No more worrying about losing important visuals!
- Awesome Support: Their customer support is top-notch, available 24/7. If you face any issues with image hosting, you can count on their knowledgeable team to assist you promptly.
In addition to these advantages, hosting images on SiteGround can improve your SEO performance. Faster load times contribute to better search engine rankings, helping your site reach a wider audience.
In summary, SiteGround isn’t just a web host; it’s a solid partner for your image hosting needs. With its blend of speed, security, and ease of use, you’ll find that managing your website’s visuals becomes a seamless process. Ready to take your images to the next level? Let’s dive deeper into the specifics of how to get started with hosting images on SiteGround!
Also Read This: How to Get Paid from Getty Images Earning from Your Photography
3. Step-by-Step Guide to Uploading Images
So, you’re ready to upload images to your SiteGround account? Fantastic! Let’s walk through the process step-by-step.
First things first, you’ll need to access your SiteGround account. Here’s how to do it:
- Log in to your SiteGround account.
- Navigate to the Websites tab in the top menu.
- Locate the website you want to manage and click on the Site Tools button.
Once you’re in Site Tools, follow these steps:
- Access the File Manager: In the left sidebar, find the Site section, and click on File Manager. This is where all your website files live.
- Choose the Right Directory: Navigate to the public_html folder if you’re hosting your image for a website. Here, you can create a new folder for your images to keep things tidy. Click on New Folder, name it something like images, and hit Create.
- Upload Your Images: Click on the folder you just created, and look for the Upload Files button at the top. Click on it, then select the images you want to upload from your computer. You can upload multiple files at once!
- Check Your Uploads: Once the files are uploaded, you’ll see them listed in your folder. Double-check to ensure all images are there.
And there you have it! You’ve successfully uploaded images to your SiteGround account. Now you can start using these images in your website’s content. Easy peasy!
Also Read This: How to Sell Photos on iStock – A Step-by-Step Process for Creators
4. Optimizing Images for Better Performance
Now that your images are uploaded, let’s talk about optimization. Why is this important? Well, optimized images load faster, which means a better user experience and improved SEO. Here are some practical tips to optimize your images:
- Choose the Right Format: Use JPEG for photographs and PNG for graphics with fewer than 16 colors. This helps to balance quality and file size.
- Resize Before Uploading: Don’t upload images that are larger than necessary. If your website displays images at a maximum width of 800 pixels, resize them to that width before uploading.
- Compress Your Images: Use tools like TinyPNG or ImageCompressor to reduce the file size without losing quality. This can drastically improve load times!
- Use Descriptive Filenames: Instead of “IMG_1234.jpg,” rename your images to something descriptive, like “sunset-beach-vacation.jpg.” This helps with SEO and makes it easier to find your images later.
- Add Alt Text: When you use images on your website, make sure to include alt text. This not only improves accessibility but also helps search engines understand what the image is about.
By following these optimization tips, you’ll ensure that your images enhance your website’s performance rather than hinder it. Your visitors will appreciate the quick load times, and you’ll likely see a boost in search engine rankings. Happy optimizing!
Also Read This: Embedding Images in Canvas
5. Using SiteGround's Tools for Image Management
Managing images on your website is crucial for maintaining a fast and user-friendly experience. Fortunately, SiteGround offers a variety of tools that make image management straightforward and efficient. Here’s how you can leverage these tools:
1. Site Tools Dashboard: Once you log into your SiteGround account, head over to the Site Tools section. This is your command center for everything related to your website, including image management. You will find an option for File Manager, which allows you to upload, delete, and organize your images effortlessly.
2. Image Optimization: SiteGround provides an integrated solution for optimizing images, which is essential for improving your site's loading speed. By using the Image Optimization tool, you can automatically compress images as you upload them. This ensures that your images don’t take up unnecessary space while maintaining quality. You can also manually optimize existing images with just a few clicks.
3. CDN Integration: SiteGround includes a Content Delivery Network (CDN) in its hosting plans. This means your images are cached on servers worldwide, allowing for quicker access by visitors no matter where they are located. Just enable the CDN in your Site Tools, and your images will be served faster, enhancing user experience.
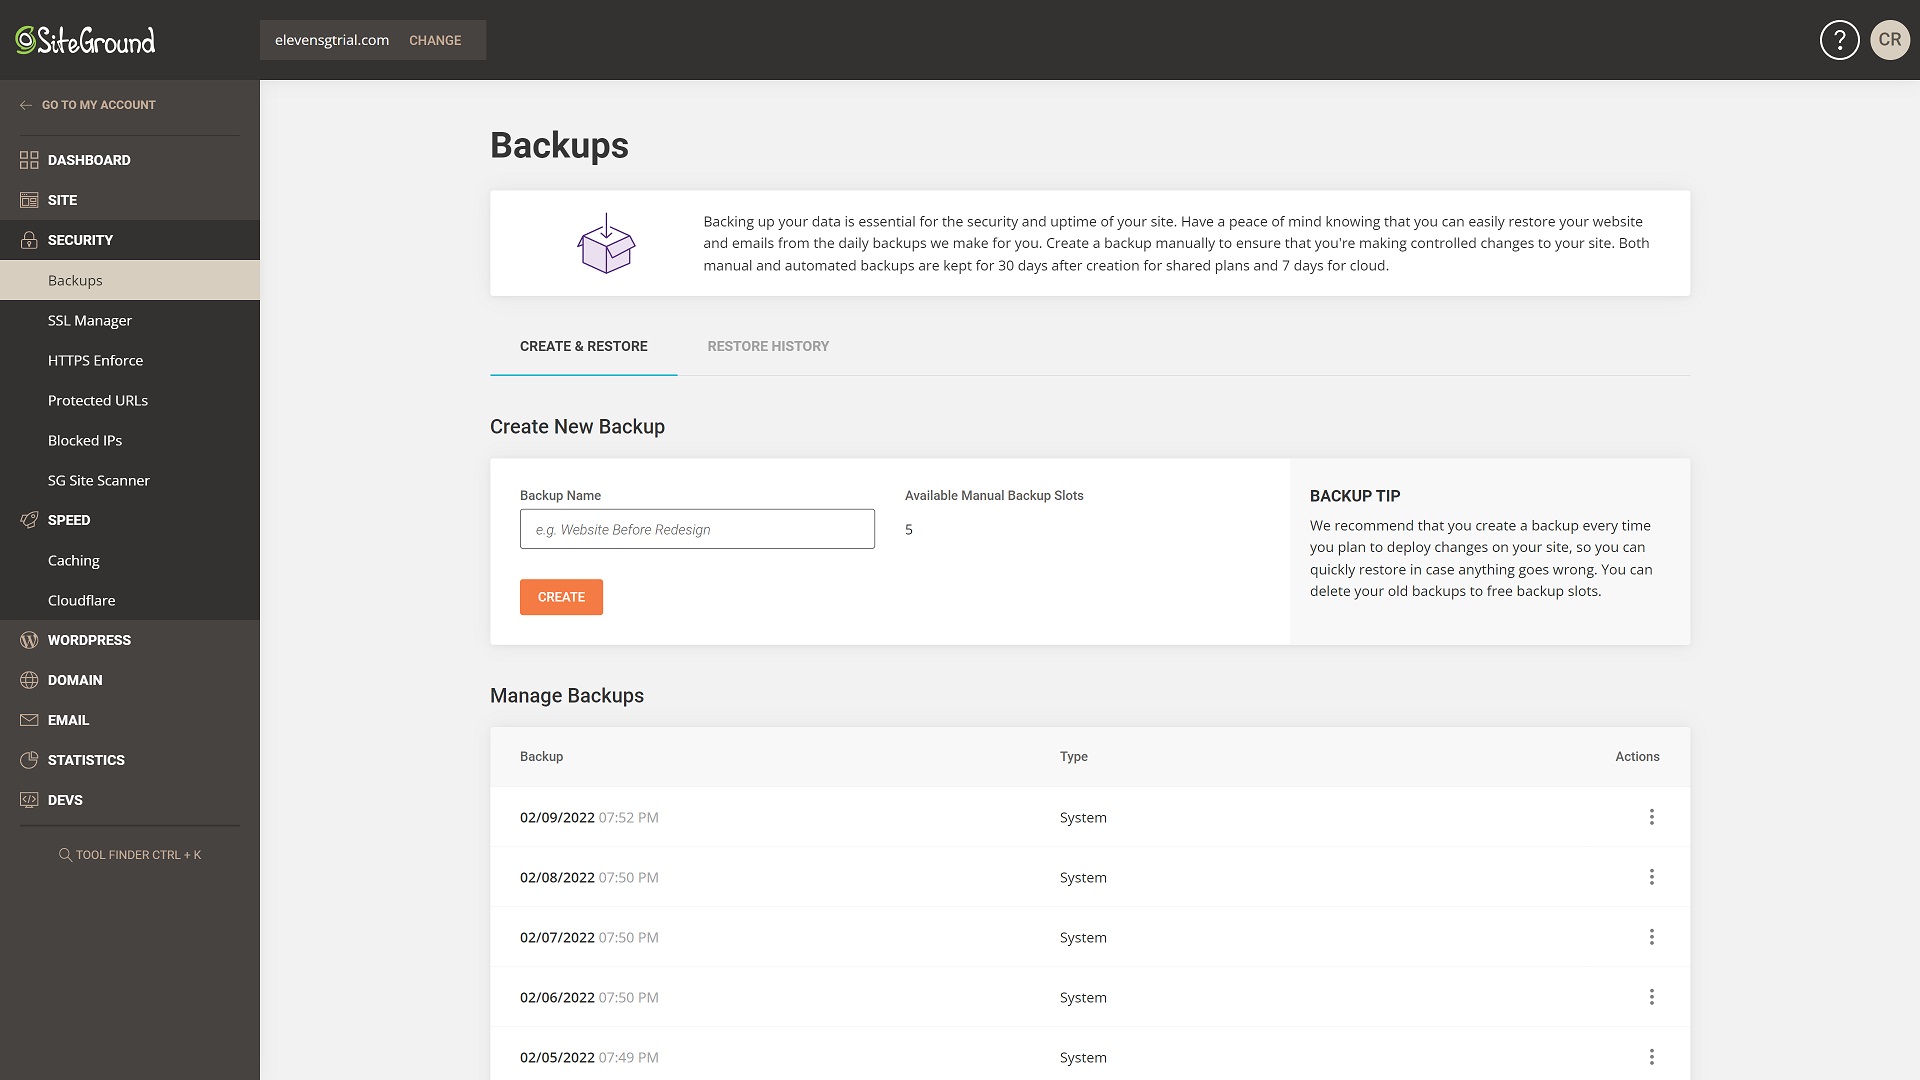
4. Backups: SiteGround’s automated backup system is another invaluable feature. You can easily restore previous versions of your images if needed. Simply navigate to the Backup section in the Site Tools, and you can select a date to restore your site, which includes all images. This peace of mind is crucial when experimenting with different images or layouts.
By utilizing these tools, you can effectively manage your images, ensuring they enhance rather than hinder your website's performance. Make sure to explore each feature and see how they can work together to improve your site's overall functionality!
Also Read This: Stretching an Image Without Distortion
6. How to Embed Hosted Images on Your Website
Now that you have your images hosted on SiteGround, the next step is embedding them into your website. This process is essential for displaying visuals that engage visitors. Here’s a simple guide on how to do it:
Step 1: Locate the Image URL
To embed an image, you first need its URL. Go to your Site Tools and open the File Manager. Navigate to the folder where your images are stored. Once you find the image, right-click on it (or use the options available) and select Copy URL. This will give you the direct link to the image.
Step 2: Use HTML to Embed
Now, you can embed the image using HTML. The basic syntax is:
<img src="IMAGE_URL" alt="Description of Image">
Replace IMAGE_URL with the URL you just copied. The alt attribute is important for accessibility and SEO, so make sure to describe what the image depicts.
Step 3: Insert into Your Page
Whether you're using a website builder, CMS, or coding from scratch, paste the code where you want the image to appear on your webpage. If you’re using a platform like WordPress, you can switch to the HTML editor to add the code directly.
Step 4: Adjust Image Properties (if needed)
You might want to adjust the size of your image to fit your design. You can do this by adding width and height attributes:
<img src="IMAGE_URL" alt="Description of Image" width="500" height="300">
Adjust the numbers according to your desired dimensions.
And voila! Your hosted image is now embedded on your website. Make sure to preview your changes to ensure everything looks good. By embedding images correctly, you enhance the visual appeal of your content while improving user engagement.
Also Read This: Why 123RF Is Your Ultimate Destination for Creative Solutions
7. Troubleshooting Common Issues with Image Hosting
Hosting images on SiteGround can be a breeze, but like any tech process, you might run into a few bumps along the way. Here are some common issues you might encounter and how to troubleshoot them:
- Image Not Displaying: This can happen for a couple of reasons. First, check the image URL. Make sure it's correctly linked and that there are no typos. You can test this by pasting the URL directly into your browser. If it doesn’t load, there’s likely an issue with the upload process.
- Slow Loading Times: If your images are taking too long to load, consider optimizing them. Large image files can slow down your site significantly. Use tools like TinyPNG or ImageOptim to compress images without losing quality.
- Permission Errors: Sometimes, you might see a 403 Forbidden error when trying to access an image. This often relates to file permissions. Ensure that your image files have the correct permissions set. Typically, 644 is a good standard for image files on most servers.
- Broken Links: If you've moved images or changed their names, broken links can occur. Regularly check your site for broken links using tools like Broken Link Checker. Updating or redirecting these links can help maintain a seamless user experience.
- Format Issues: Make sure your images are in web-friendly formats like JPEG, PNG, or GIF. If you’re using an unusual file format, it might not display properly. Most browsers support these formats, but others might not.
If you find yourself stuck, don’t hesitate to reach out to SiteGround’s customer support. They’re known for their excellent service and can often resolve issues quickly. Additionally, their extensive knowledge base can be a valuable resource when troubleshooting on your own.
8. Conclusion and Best Practices for Image Hosting
Hosting images on SiteGround doesn’t have to be overwhelming. With the right approach, you can ensure your images contribute positively to your website’s performance and user experience. Here are some best practices to keep in mind:
- Optimize Your Images: Always compress and properly size your images before uploading them. This can help speed up loading times and improve your site’s performance.
- Use a CDN: Consider using a Content Delivery Network (CDN) to serve your images. This can drastically improve loading times for users located far from your server.
- Regular Backups: Always keep backups of your images. If something goes wrong, having a backup can save you a lot of stress.
- Maintain Organization: Create a clear folder structure for your images in SiteGround. This will help you find what you need quickly and keep your files organized.
- Monitor Performance: Use tools like Google PageSpeed Insights to monitor how your images affect your site's performance. Regular checks can help you identify areas for improvement.
By keeping these best practices in mind, you can ensure that your image hosting is efficient, effective, and contributes positively to your overall site experience. Happy hosting!
 admin
admin


