If you're looking for a fun and creative hobby, candle making is a fantastic choice! Not only can you customize scents, colors, and shapes, but you also get to enjoy the warm glow and inviting aroma of your creations. Plus, making candles at home can be a relaxing experience, allowing you to unwind after a long day. Whether you're crafting for yourself or as thoughtful gifts for family and friends, this easy step-by-step guide will have you lighting up your space in no time!
Essential Supplies for DIY Candle Making
To start your candle-making journey, you'll need a few essential supplies. Don’t worry; you don’t have to break the bank to gather these items. Here’s a handy list of what you’ll need:
- Candle Wax: You can choose from various types such as paraffin, soy, beeswax, or palm. Soy wax is great for beginners since it’s easy to work with and burns cleanly.
- Wicks: The size and type of wick will depend on the wax you’re using and the size of your container. Cotton or wood wicks are popular choices.
- Containers or Molds: Whether you prefer glass jars, metal tins, or silicone molds, your choice will impact the final look of your candles. Make sure they can withstand heat!
- Fragrance Oils: To make your candles smell amazing, choose high-quality scent oils. You can experiment with blends like lavender and vanilla or citrus and mint.
- Dye: If you want to add a pop of color, candle dye is an easy way to do it. Liquid or block dyes work well, depending on your preference.
- Double Boiler or Melting Pot: For melting your wax safely, a double boiler setup is ideal. If you don't have one, you can use a heatproof bowl over a pot of simmering water.
- Thermometer: It’s vital to monitor the temperature of your wax to avoid overheating or underheating it.
- Stirring Utensil: A wooden spoon or a silicone spatula will work for mixing in your fragrance and dye.
- Pouring Pitcher: A heat-resistant pouring pitcher makes it easier to pour wax into your containers without spills.
Once you have gathered these supplies, you’re ready to dive into the exciting world of candle making! Each item plays a vital role in achieving the perfect candle, so pay attention to quality and compatibility. In the next sections, we'll explore the step-by-step process of crafting your own beautiful candles at home. Get ready to unleash your creativity!
Also Read This: Your Go-To Platform for DIY and Educational Content: Dailymotion
3. Choosing the Right Wax for Your Candles
When it comes to candle making, the type of wax you choose can significantly affect the quality, burn time, and scent throw of your candles. Here’s a quick rundown of the most popular types of wax and what makes each one special:
- Paraffin Wax: This is the most common wax used for candle making. It’s affordable and readily available. Paraffin holds fragrance well and produces a strong scent throw, but it’s derived from petroleum, which isn’t as eco-friendly.
- Soy Wax: A popular choice for those wanting a more natural option, soy wax is made from soybeans. It burns cleanly and slowly, which means longer-lasting candles. Plus, it's biodegradable! Keep in mind that soy wax can sometimes be a bit more challenging to work with, especially when it comes to achieving a great scent throw.
- Beeswax: If you’re aiming for a luxurious candle, beeswax is your go-to. It has a natural honey scent and burns very long. However, it can be pricier than other options. Plus, beeswax candles have a beautiful golden hue that adds a touch of elegance.
- Coconut Wax: This is the newest kid on the block! Made from coconut oil, it’s incredibly creamy and burns evenly. It’s fantastic for holding fragrance and is often mixed with other waxes for the best results. It’s also eco-friendly!
When choosing your wax, consider what you want from your candle. Do you want it to burn longer? Go for soy or beeswax. Want a strong fragrance? Paraffin or coconut blends might be your best bet. It’s all about personal preference!
Also Read This: How to Make a Paper Diamond Easy: Dailymotion’s Simple Craft Guide
4. Step-by-Step Instructions for Making Candles
Now that you've chosen your wax, it’s time to get your hands a little waxy! Here’s a simple, step-by-step guide to making your own candles at home:
- Gather Your Supplies: You’ll need wax (of your choice), a double boiler (or a makeshift one using a pot and a heat-safe container), candle wicks, a thermometer, fragrance oils, and containers or molds for your candles.
- Measure Your Wax: Use a kitchen scale to measure out the amount of wax you’ll need based on the size of your container. A general rule is to fill your container with water, measure that in ounces, and use that same number of ounces of wax.
- Melt the Wax: Fill the bottom pot of your double boiler with water and bring it to a gentle simmer. Place your wax in the top pot and stir occasionally until it's completely melted. Use your thermometer to keep an eye on the temperature, as different waxes have different melting points. Aim for around 170-180°F.
- Add Fragrance (optional): If you want to add some delightful scents, this is the moment! Add fragrance oils once the wax has melted. Follow the recommended usage rates on the oil's packaging to avoid overpowering scents.
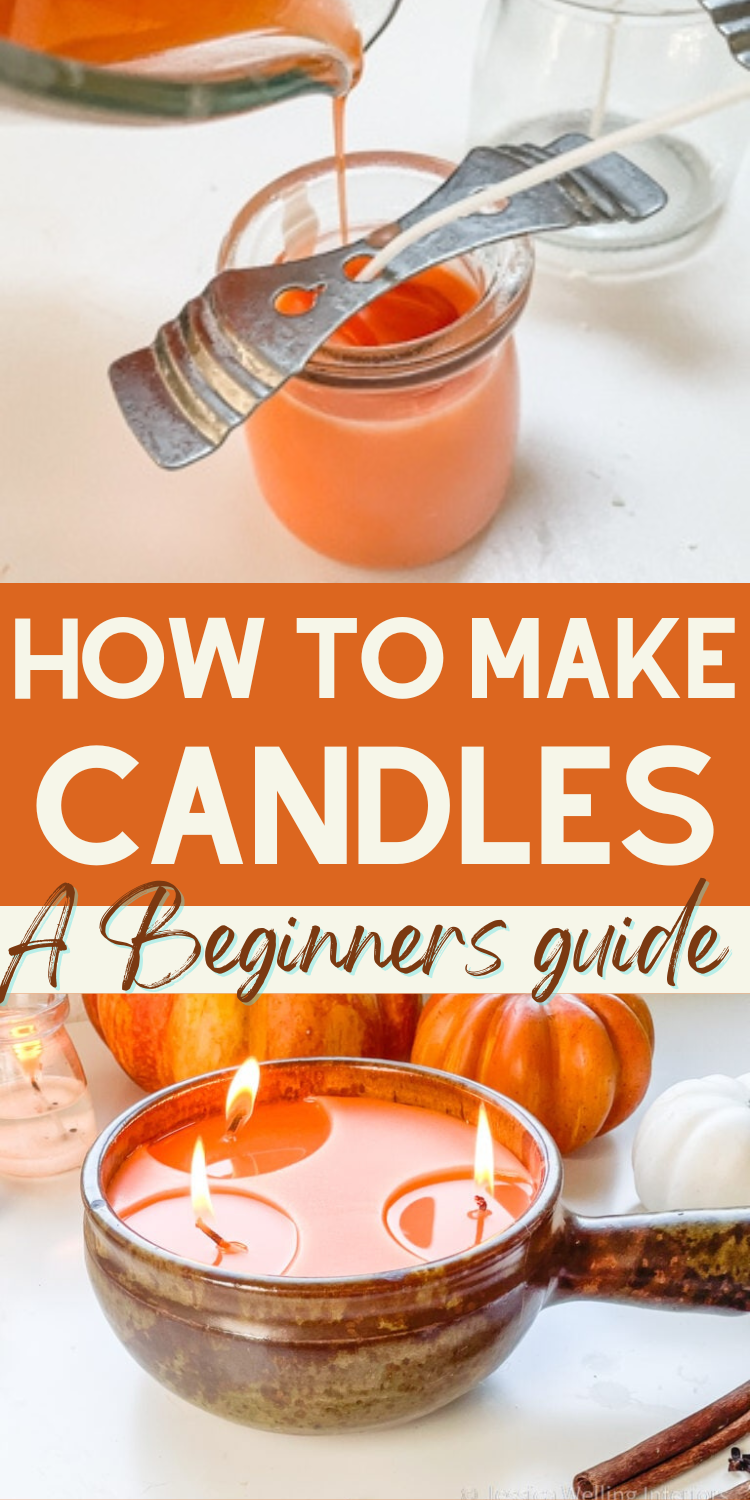
- Prepare Your Containers: While your wax is melting, set your containers or molds on a flat surface. If you’re using a wick, dip the metal base into the melted wax and stick it to the bottom of your container. This helps secure the wick in place.
- Pour the Wax: Once your wax is ready and at the right temperature, carefully pour it into your prepared containers. Leave a little space at the top for aesthetics!
- Secure the Wick: If your wick is not already secured, use a wick holder or a pencil laid across the top of the container to keep it centered as the wax hardens.
- Let It Cool: Allow your candles to cool undisturbed for several hours or until completely hardened. This is crucial for achieving a smooth top and avoiding cracks.
- Trim the Wick: Once cooled, trim the wick to about ¼ inch above the wax surface. This will help ensure a clean burn.
- Enjoy Your Creation: Light your candle, sit back, and enjoy the fruits of your labor!
And there you have it! Making your own candles at home is not just a fun project, but it’s also a great way to add a personal touch to your space. Plus, you get to enjoy those lovely scents wafting through your home!
Also Read This: How to Make a Bracelet with Loom Bands
5. Tips for Adding Fragrance and Color
Adding the right fragrance and color to your candles can elevate your candle-making experience from basic to extraordinary! Here are some easy tips to ensure your candles smell amazing and look visually appealing.
Choosing the Right Fragrance: When selecting fragrance oils, opt for high-quality ones specifically designed for candle making. Essential oils can also be used, but they might not be as potent. A good rule of thumb is to use about 1 ounce of fragrance per pound of wax. Experiment with different combinations to find your signature scent!
- Test Small Batches: Before committing to a larger candle, create small test batches. This allows you to tweak the fragrance strength and blend until it’s just right.
- Consider Scent Throw: Cold throw is how the candle smells when unlit, while hot throw is the scent released when it’s burning. Make sure both are pleasant!
Adding Color: Color adds a delightful touch to your candles, making them not just scented but visually stunning too. You can use candle dyes, color chips, or even natural colorants like turmeric for a warm yellow or spirulina for a green hue.
- Use Color Sparingly: Start with a small amount of dye and gradually add more until you achieve the desired shade. Remember, the color may appear differently when melted than it does in solid form!
- Mix Colors: Feel free to blend different colors for a unique look. Just make sure they are compatible with the type of wax you're using.
Finally, let your creativity flow! Combine fragrances and colors that resonate with your personal style or the season. For instance, a warm cinnamon and orange blend can be perfect for autumn, while a fresh eucalyptus and mint can brighten up your spring.
Also Read This: How to Make a Tie Knot with an Easy Dailymotion Tutorial
6. Common Mistakes to Avoid When Making Candles
Candle making is a fun and rewarding hobby, but it does come with its challenges. Here are some common mistakes to steer clear of, ensuring your candles turn out beautifully every time!
- Skipping the Temperature Check: One of the most critical steps is pouring wax at the right temperature. Pour too hot, and the wax might warp; too cold, and it may not adhere well. A good range is typically between 150°F to 170°F.
- Not Measuring Ingredients: Candle making is a science! Use a kitchen scale to ensure accurate measurements of wax, fragrance, and color. Eyeballing it can lead to inconsistent results.
- Using the Wrong Wick Size: The wick is like the engine of your candle. A wick that’s too small will burn poorly, while one that’s too large can create soot. Consult wick sizing charts based on your wax type and candle diameter.
Neglecting Safety Precautions: Always work in a well-ventilated area and use heat-resistant gloves when handling hot wax. Keep a fire extinguisher nearby, just to be safe!
- Overlooking Cure Time: After pouring, let your candles cure for at least a few days to a week. This allows the fragrance to bind properly with the wax.
- Ignoring Clean-Up: Wax can be tricky to clean. Use mineral spirits or a wax remover for your tools and surfaces before the wax hardens.
By avoiding these mistakes, you’ll be well on your way to crafting beautiful, fragrant candles that you and your friends will love. Happy candle making!
Also Read This: Discovering Dailymotion Features for Beginners and Enthusiasts
7. Creative Ideas for Candle Shapes and Designs
When it comes to making candles at home, the fun doesn’t stop at just choosing the scent or color. One of the most enjoyable aspects is getting creative with the shapes and designs of your candles! Here are some exciting ideas to inspire your next candle-making session:
- Geometric Candles: Use molds to create candles in fun geometric shapes like pyramids, cubes, or even hexagons. These modern designs can enhance your home decor and make striking centerpieces!
- Seasonal Shapes: Embrace the seasons by crafting candles in shapes that reflect the time of year. Think snowflakes for winter, flowers for spring, and leaves for autumn. You can even try pumpkin shapes for Halloween!
- Layered Candles: Get adventurous with colors by pouring different layers of wax to create a rainbow effect. Make sure each layer cools slightly before adding the next one to achieve crisp lines.
- Embedded Objects: Add a personal touch by embedding dried flowers, herbs, or even small trinkets into your candles. Just be careful to use materials that are safe when burned.
- Candle Jars with Personality: Instead of traditional candle molds, consider repurposing glass jars or containers. Customize the jars with paint, decorations, or labels that reflect your style or the candle’s scent.
- Floating Candles: For a unique twist, create floating candles! Use small, round molds and float them in a bowl of water, adding decorative elements like flower petals or colored stones underneath for a beautiful display.
- Personalized Candle Sets: Make a matching set of candles with different shapes that fit a theme. For example, create a set inspired by a tropical vacation with palm tree, seashell, and sun shapes!
Remember, the best part of candle-making is that there are no strict rules—it's all about having fun and letting your creativity shine. So grab your supplies, choose a design, and let your imagination run wild!
8. Conclusion and Final Thoughts
Making candles at home is more than just a craft; it’s a delightful journey into creativity and relaxation. Whether you’re looking to fill your home with lovely scents, create unique gifts for friends and family, or simply enjoy a new hobby, candle-making offers endless possibilities.
As we've explored, from selecting the right materials to experimenting with shapes and designs, the process can be incredibly rewarding. Here are a few final takeaways:
- Start Simple: If you’re new to candle-making, begin with basic shapes and scents. As you gain confidence, you can dive into more complex designs and techniques.
- Experiment: Don’t be afraid to try new things! Play with different wax types, scents, and colors. The more you experiment, the more you’ll find what you enjoy the most.
- Safety First: Always prioritize safety when working with hot wax and wicks. Keep a fire extinguisher handy, use gloves, and work in a well-ventilated area.
- Share Your Creations: Once you’ve mastered the art of candle-making, share your creations with friends or host a candle-making party! It’s a great way to bond and inspire others to get crafty.
In conclusion, candle-making is all about personal expression and creativity. So gather your supplies, embrace the process, and enjoy the glow of your handmade candles lighting up your space!
 admin
admin


