Hey there! If you've ever wanted to achieve those gorgeous, bouncy curls without the hassle of multiple styling tools, you're in the right place. Curling your hair with a straightener might sound a bit unconventional, but trust me, it’s a game-changer! Not only does it save time, but it also gives you more control over your curls, allowing you to create everything from loose waves to tight ringlets. So, let’s dive into this convenient method that can transform your hair styling routine!
What You Need Before You Start
Getting ready to curl your hair with a straightener is exciting, but preparation is key for the best results. Here’s a handy checklist to ensure you have everything you need:
- Flat Iron: Choose a straightener with a smooth surface and preferably a width of 1 inch. This size is versatile for creating different curl types.
- Heat Protectant Spray: Protecting your hair from heat damage is crucial. A good heat protectant will keep your locks safe while ensuring your curls last longer.
- Hair Clips: These are essential for sectioning your hair, making it easier to curl each part evenly.
- Comb or Brush: A wide-tooth comb or a paddle brush will help detangle your hair and make it smooth before you start curling.
- Hair Products (optional): Depending on your hair type, you might want to use styling mousse or hairspray for extra hold. Just a little can make a big difference!
Before you begin, it’s also a good idea to make sure your hair is clean and dry. Curls tend to hold better on freshly washed hair, but if your hair is a bit oily, using a dry shampoo can help give it some texture.
Once you’ve gathered your tools and prepared your hair, you’ll be all set to create stunning curls with that straightener of yours! Are you ready? Let’s get curling!
Also Read This: How to Make a Simple Cake Without Oven: Dailymotions Quick Recipe Guide
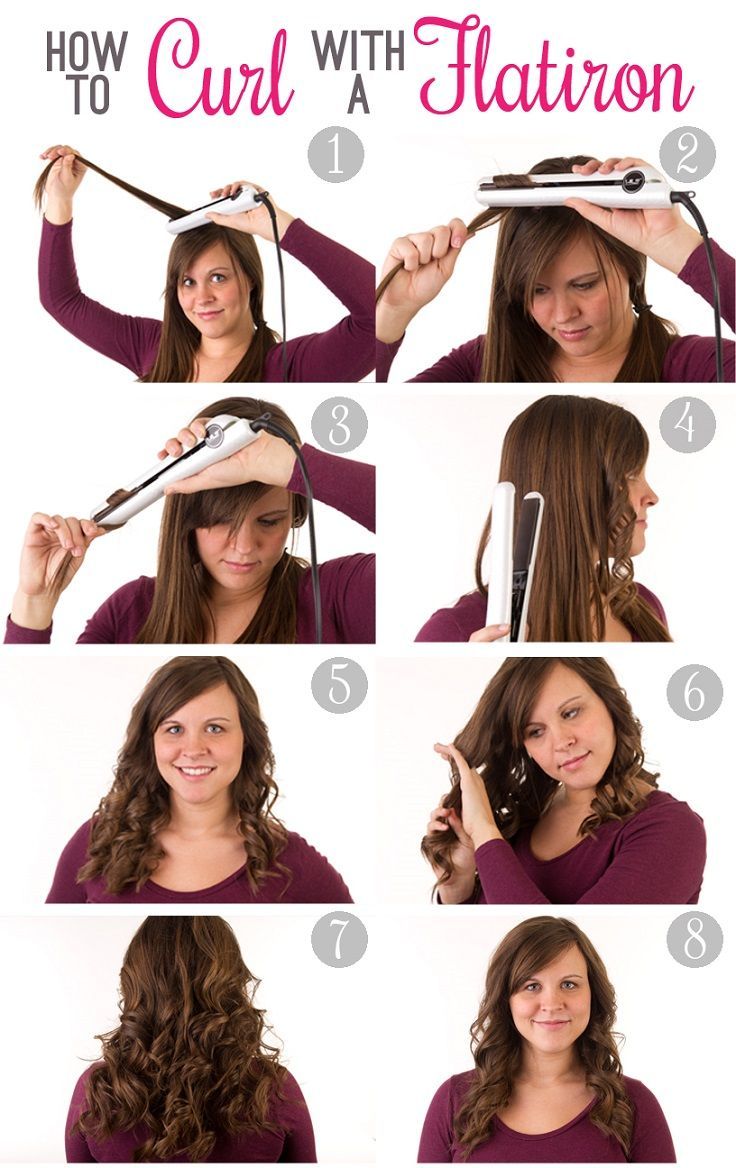
3. Step-by-Step Instructions for Curling Hair
Alright, let’s get into the nitty-gritty of curling your hair with a straightener! It may sound a bit tricky at first, but once you get the hang of it, you'll be whipping up gorgeous curls in no time. Here’s a step-by-step guide:
- Start with Clean, Dry Hair: Make sure your hair is clean and completely dry before you begin. If your hair is a bit dirty or has product buildup, the curls won't hold as well.
- Prep Your Hair: Apply a heat protectant spray or serum. This step is crucial to prevent heat damage. Look for products that also help with hold, like a light mousse.
- Section Your Hair: Divide your hair into manageable sections. Use clips to hold the upper layers out of the way. Generally, working with 1-2 inch sections will yield the best results.
- Heat the Straightener: Turn on your straightener and set it to a temperature that suits your hair type. For fine hair, 300°F (150°C) is ideal, while thicker hair may need up to 400°F (200°C).
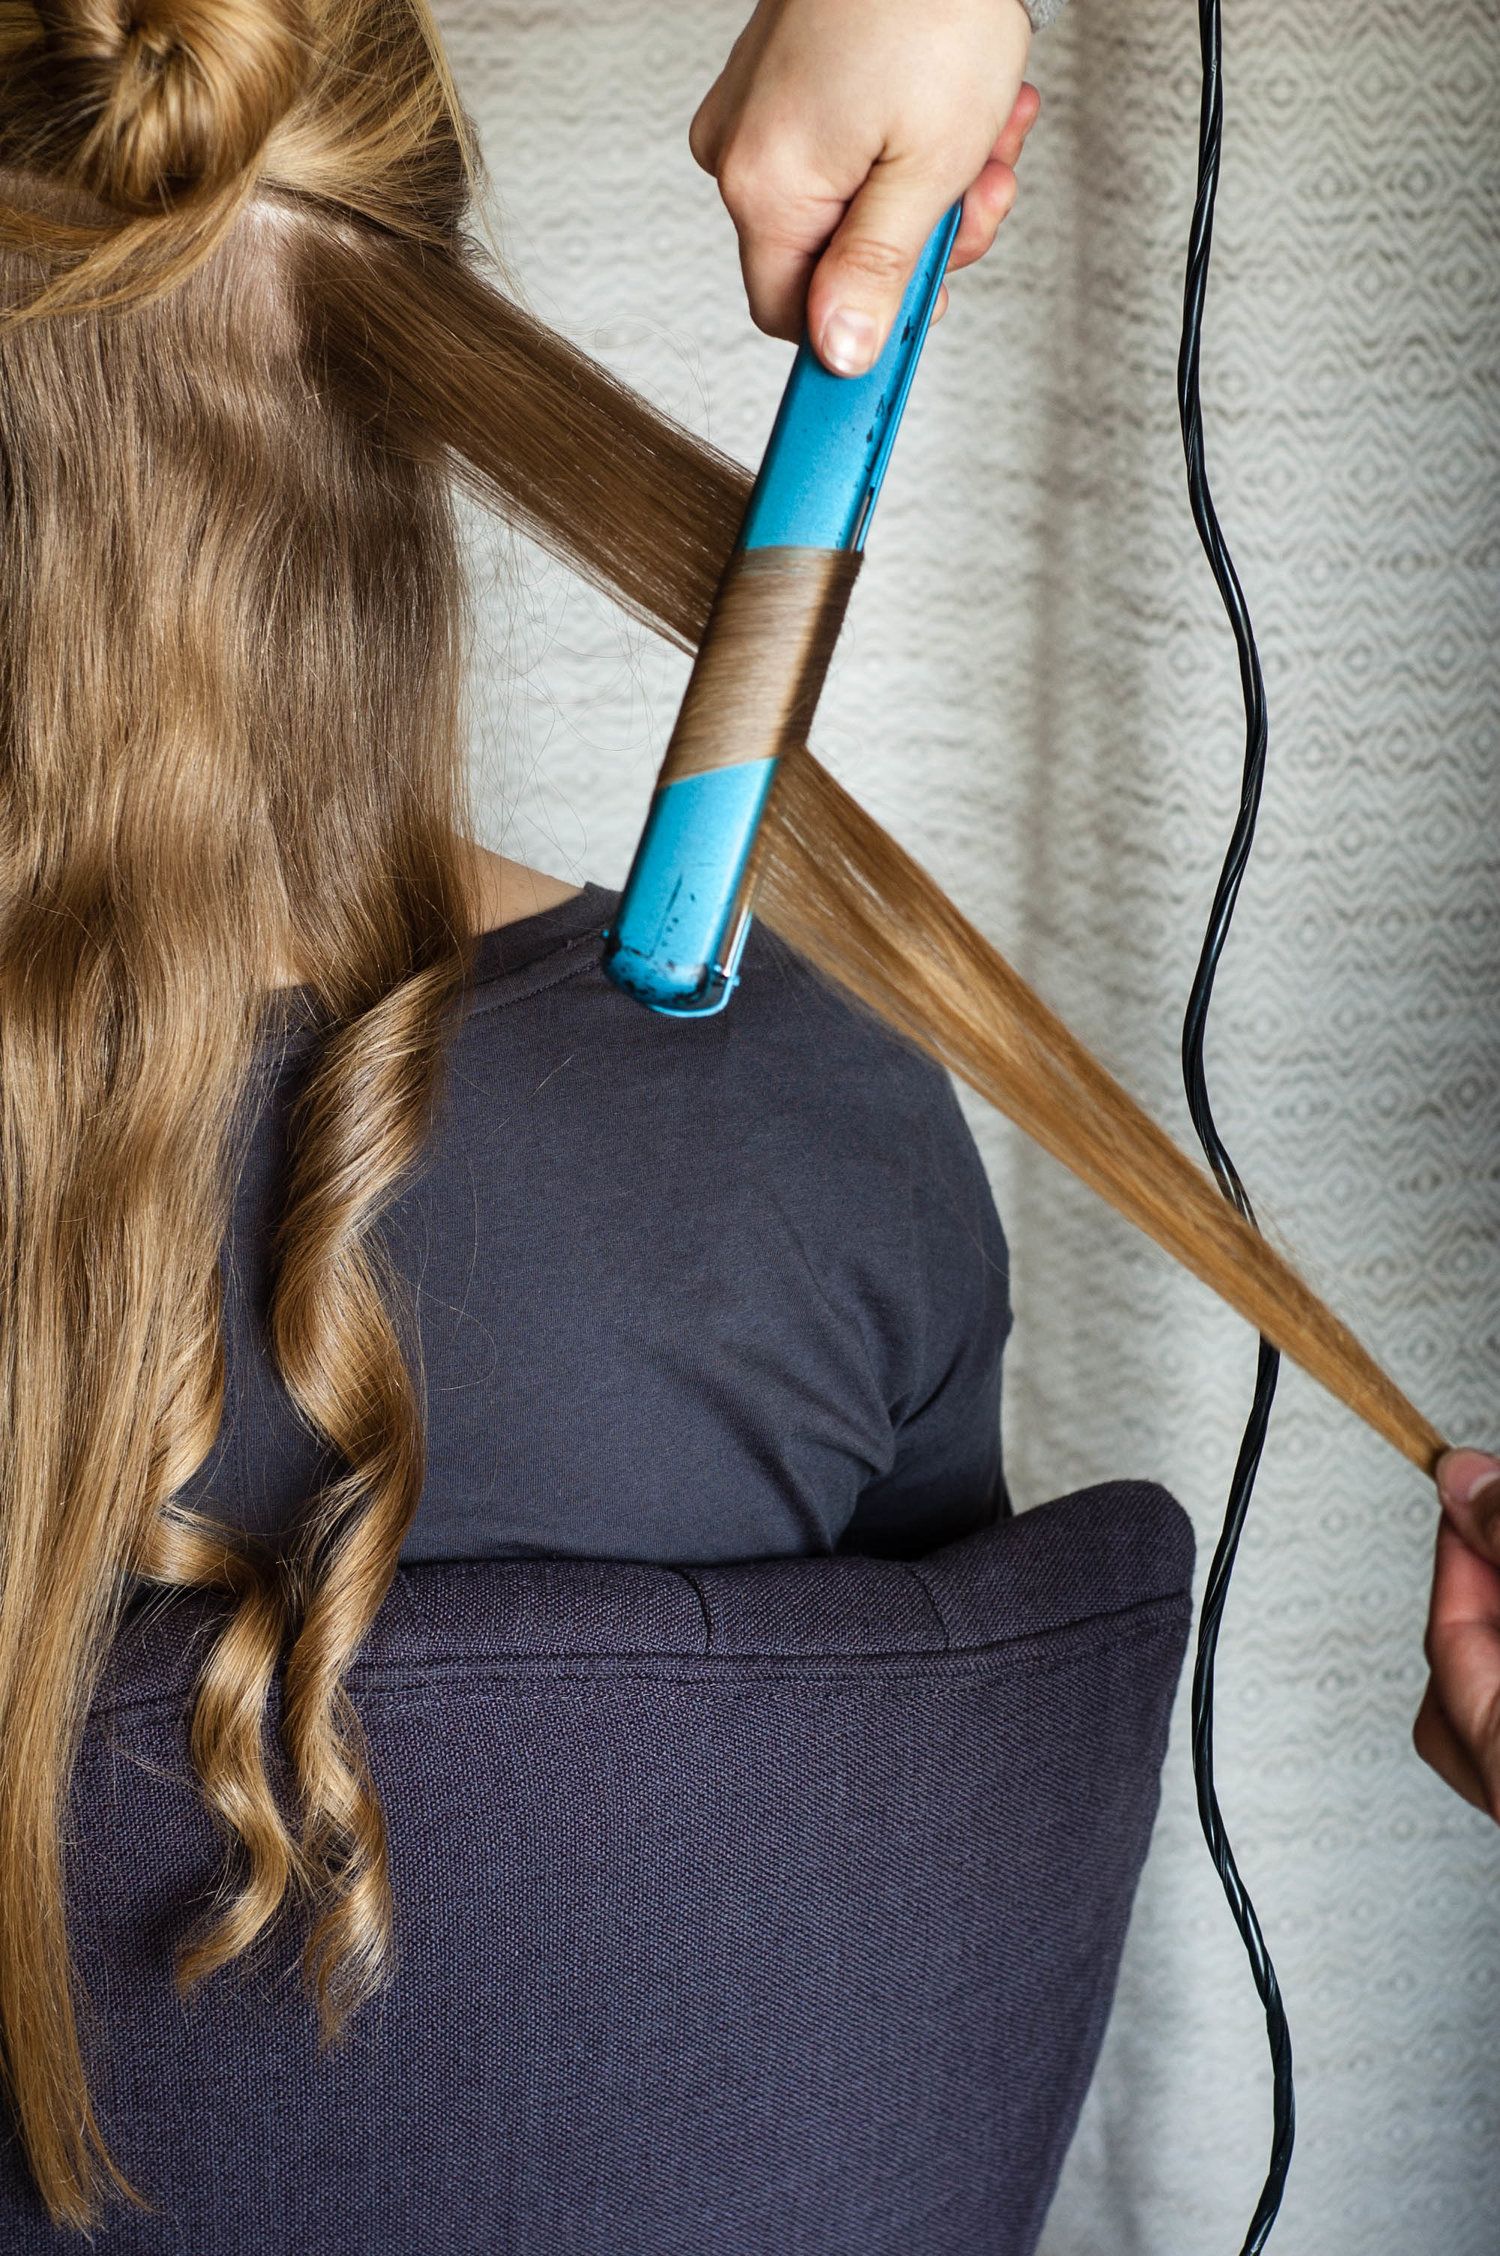
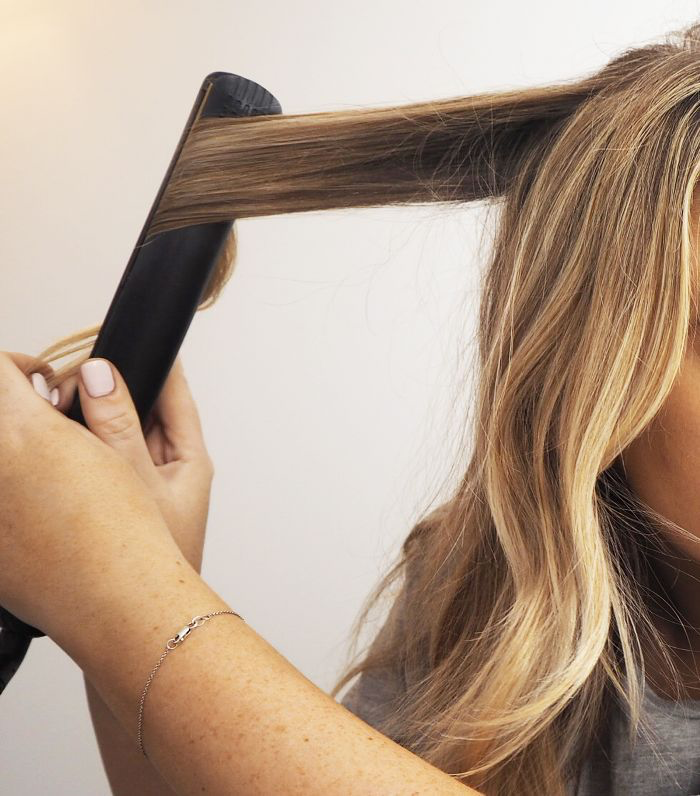
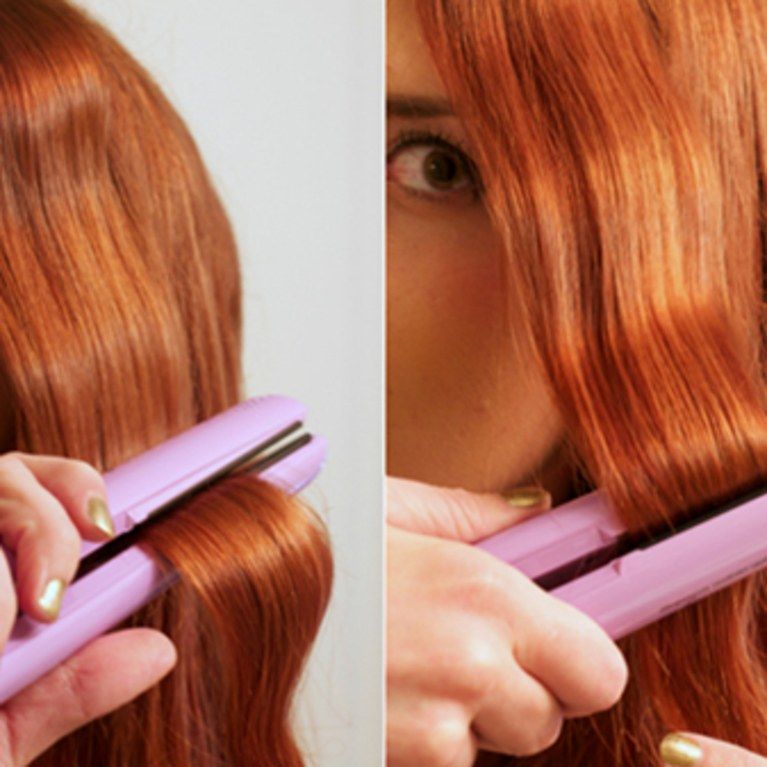
- Position the Straightener: Take a small section of hair and clamp it with the straightener about 3-4 inches away from your scalp.
- Twist and Glide: Now comes the fun part! Twist the straightener away from your face while simultaneously gliding it down the length of your hair. Aim for a full 360-degree twist for tighter curls or a half turn for looser waves.
- Hold and Release: Hold the hair in the straightener for about 5-10 seconds, depending on your hair’s thickness. When you release it, let the curl fall into your palm to help it retain its shape.
- Repeat: Continue this process throughout your hair, alternating the direction of the curls for a more natural look. For instance, curl some sections towards your face and others away from it.
- Set Your Curls: Once all sections are curled, let them cool. You can either leave them as they are for a more relaxed vibe or gently tousle them with your fingers.
And there you have it! You've just curled your hair with a straightener. Easy, right? Now, let’s ensure those curls stay bouncy and beautiful!
Also Read This: How to Save Videos from Dailymotion and Keep Your Favorite Content
4. Tips for Achieving Perfect Curls
Now that you know the steps, let’s dive into some handy tips that will help you achieve those perfect curls effortlessly:
- Use the Right Straightener: Not all straighteners are created equal. Opt for one with rounded edges; this design makes it easier to create curls compared to square-edged straighteners.
- Don’t Overdo the Heat: Using excessively high temperatures can damage your hair. Stick to the recommended range for your hair type and adjust as necessary.
- Work in Small Sections: The smaller the section, the tighter the curl. If you want voluminous waves, work with larger sections but experiment to see what works best for you.
- Finish with Hairspray: Once you’ve curled all your hair, spritz some flexible-hold hairspray to keep those curls in place without making them stiff.
- Experiment with Products: Try different styling products like mousse or light gel to find what holds your curls best without weighing them down.
- Practice Makes Perfect: Don’t get discouraged if your curls don’t turn out perfect the first time. With a bit of practice, you’ll be a pro in no time!
Remember, the key to beautiful curls is finding a technique that works for you. Enjoy the process, and don’t forget to have fun with your hair!
Also Read This: Is Dailymotion Safe for Users – Debunking Myths About Viruses and Ads
5. Common Mistakes to Avoid
Curling your hair with a straightener can be a game changer, but it’s easy to make a few common mistakes that can leave you with less-than-ideal results. Here are some pitfalls to watch out for:
- Using Too Much Hair Product: While a little product can help hold your curls, too much can weigh them down or make them look greasy. Stick to lightweight products, like a heat protectant spray, before you start curling.
- Rushing the Process: Patience is key! If you don’t give the hair enough time to heat up in the straightener, you might end up with limp curls that fall flat. Take your time with each section.
- Not Preparing Your Hair: Curling can be tough on your hair if it’s not prepped properly. Make sure your hair is clean, dry, and free of tangles. You can also use a heat protectant to shield your strands from damage.
- Grabbing Too Large Sections: Using big sections of hair can lead to uneven curls. Aim to take smaller sections (about 1 inch wide) for more defined and consistent curls.
- Neglecting to Adjust Temperature: Not all hair types are the same. Fine hair typically requires lower heat settings, while thicker hair can handle more heat. Always adjust your straightener’s temperature accordingly to avoid damage.
By being mindful of these mistakes, you’ll set yourself up for more successful curling sessions. Remember, practice makes perfect, so don’t get discouraged if it doesn’t turn out exactly right the first time!
6. How to Maintain Your Curls
You’ve spent the time curling your hair, and now you want those beautiful curls to last! Here are some tips to help maintain your curls throughout the day:
- Use the Right Products: After curling, applying a light hairspray can help keep your curls in place without making them crunchy. Look for products specifically designed for curls; they often provide hold while enhancing shine.
- Avoid Touching Your Hair: The more you touch your curls, the more they can lose their shape. Try to resist the urge to run your fingers through your hair; this will help maintain your style longer.
- Pin Curls for Longevity: If you want to keep your curls for even longer, consider pinning them up after curling. Use bobby pins to secure each curl against your scalp until they cool completely. This helps set the shape of the curl.
- Sleep with a Silk Scarf: When it’s time for bed, protect your curls by wrapping them in a silk or satin scarf. This reduces friction while you sleep, helping to keep curls intact and frizz at bay.
- Refresh with a Curl Cream: If your curls start to droop the next day, use a curl-refreshing cream to revive them. Just a small amount can help redefine your curls without the need to re-curl!
With these maintenance tips, you can enjoy your gorgeous curls for longer. Remember, the key is to keep your hair healthy and hydrated, which in turn helps your curls look their best!
 admin
admin


