Welcome to the world of Blender! If you're just getting started, you're in for a treat. Blender is a powerful, open-source 3D creation suite that's used by professionals and hobbyists alike. Whether you’re aiming to create stunning animations or intricate models, knowing how to insert images can take your projects to the next level. In this post, we'll explore the basics of image insertion in Blender, making it easier for you to enhance your 3D scenes.
Preparing Your Image for Blender
Before diving into Blender, it’s crucial to have the right images prepared. Here’s a step-by-step guide to help you get your images ready:
- Choose the Right Format: Blender supports various image formats such as PNG, JPEG, and TIFF. For most projects, PNG is a great choice due to its lossless compression and transparency support.
- Resolution Matters: Depending on your project, consider the resolution of your image. Lower resolutions are suitable for backgrounds or textures, while higher resolutions are better for detailed images. A common resolution for textures is 1024x1024 pixels.
- Image Editing: Use software like GIMP or Photoshop to edit your images. You might need to crop, resize, or adjust brightness and contrast to ensure your image fits perfectly in Blender.
- Save Your Images: Once you’re satisfied with the edits, save the files in the appropriate format and keep them organized in a dedicated folder for easy access.
By preparing your images thoughtfully, you’ll save time in Blender and enhance your creative workflow. It’s all about setting a solid foundation before you jump into the 3D magic!
Also Read This: Identifying the Most Promising Technology Sectors in the USA
3. Step-by-Step Guide to Inserting Images in Blender
So, you’re ready to bring some visuals into your Blender project? Inserting images is a straightforward process, and I’m here to guide you through it step-by-step. Let’s dive in!
- Open Your Project: First, launch Blender and open the project where you want to insert the image. If you’re starting fresh, create a new file.
- Switch to the Right Workspace: Depending on what you’re working on, switch to the Modeling or Sculpting workspace. You can find this option at the top of the window.
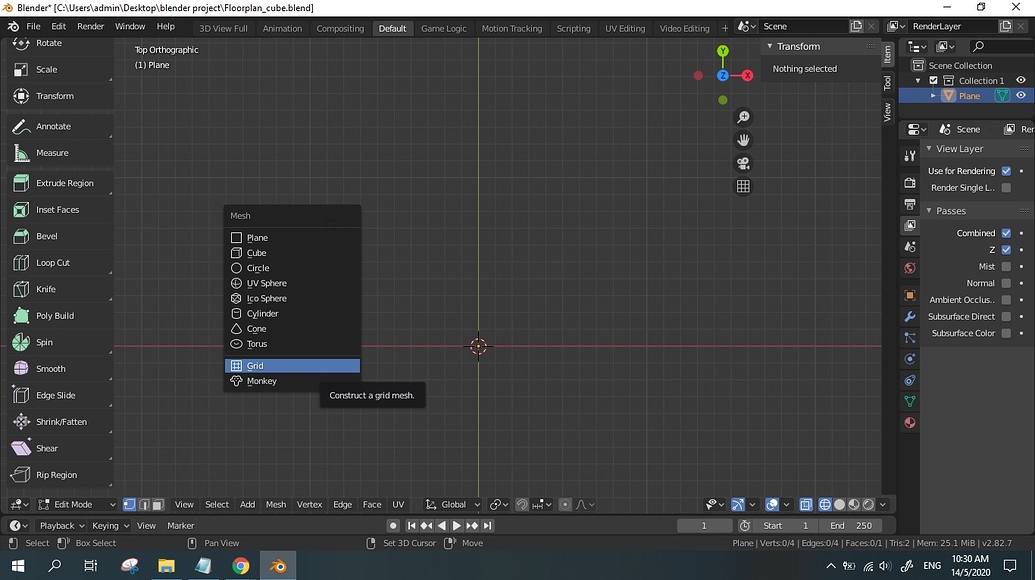
- Add an Image: Press Shift + A to open the Add menu. Hover over Image, and you’ll see options like Image from File.... Click on it.
- Select Your Image: A file browser will pop up. Navigate to the location of your image file, select it, and click Load Image.
- Position Your Image: Once the image loads into your scene, you can move it around. Use the G key to grab and drag it to your desired location.
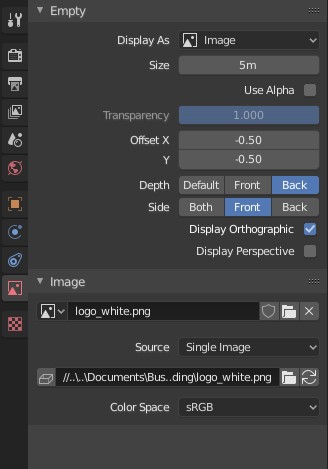
- Adjust the Settings: With the image selected, head to the properties panel on the right. Here, you can tweak settings like opacity, size, and whether or not the image should be displayed in wireframe mode.
- Final Touches: If you want your image to be aligned or rotated, use the R key for rotation and the S key for scaling. You can make it fit perfectly into your scene!
And there you go! In just a few simple steps, you’ve successfully inserted an image into Blender. Why stop here? Let’s explore how to use images as references in your 3D modeling.
Also Read This: how to convert image to jpg in android
4. Using Images as References in 3D Modeling
When it comes to creating 3D models, using images as reference can dramatically improve your workflow. Not only do they help with accuracy, but they also enhance creativity. Here’s how you can effectively use images as references in Blender.
- Choose Your Reference Image Wisely: Pick images that are clear and show various angles of the subject. For example, if you’re modeling a character, select front, side, and back views.
- Insert Your Reference Images: Follow the same steps we discussed earlier to insert your reference images into Blender. It’s best to have multiple images for different angles.
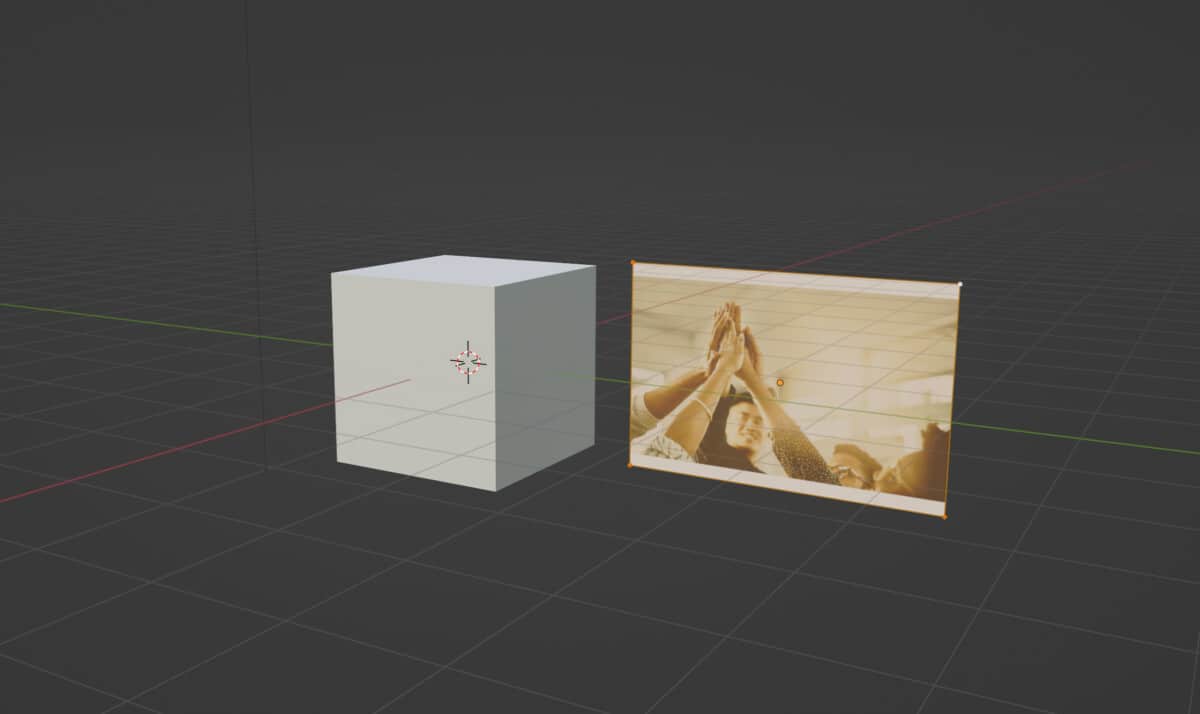
- Set Up Image Planes: To make the referencing process smoother, you can use image planes. Go to Add > Image > Reference to create a flat plane that displays your image. This allows you to view the image from any angle as you model.
- Position the Image Planes: Align your image planes according to your modeling needs. Use the G key to grab and position them in the right places around your model.
- Adjust the Transparency: Sometimes, you might want to see your model through the reference image. Adjust the opacity in the properties panel to make it semi-transparent for a better view.
Using images as references not only gives you a solid foundation for your 3D modeling projects but also boosts your confidence as you create. You can constantly check against your reference to ensure the proportions and details are just right. Happy modeling!
Also Read This: Why Are AI-Generated Celebrity Images So Popular?
5. Common Issues and Troubleshooting Tips
Inserting images in Blender can sometimes lead to a few hiccups. Don't worry; you're not alone! Here are some common issues you might encounter, along with troubleshooting tips to help you get back on track:
1. Image Not Displaying: If your image isn’t showing up in the viewport, it could be a simple issue with the image path. Ensure that the Image Texture node in the Shader Editor and verifying the file path. If the path is broken, re-link it by clicking the folder icon and navigating to the correct location.
2. Images Appearing Blurry: Sometimes, images can appear pixelated or blurry in Blender. This is often due to low-resolution images. Make sure you’re using higher resolution images for better quality. Additionally, check the mapping settings in the UV Editor to ensure that the image is properly aligned and scaled.
3. Incorrect UV Mapping: If your image is not aligning correctly on the model, it might be an issue with UV mapping. To fix this, go to the UV Editing workspace and ensure that your UV layout corresponds to the image dimensions. You can unwrap the model again if needed by selecting your object, pressing U, and choosing the appropriate unwrap option.
4. Texture Not Showing in Render: If your image texture is visible in the viewport but not in the rendered view, check the render settings. Make sure that the image texture node is connected properly in the Shader Editor and that you’re using the correct render engine (Cycles or Eevee). Also, ensure that the Object properties have the correct material assigned.
5. Blender Crashes or Freezes: If Blender crashes when you try to load an image, it could be due to the image file type or size. Try converting your image to a different format (like PNG or JPG) or reducing its file size. Keeping your Blender updated can also help prevent crashes.
By keeping these common issues and solutions in mind, you can streamline your workflow and focus on creating amazing 3D models without the frustration of technical challenges!
6. Conclusion and Further Resources
Inserting images in Blender is a powerful way to enhance your 3D projects, whether it’s for texturing, creating backgrounds, or using reference images. With the steps outlined in this guide, you should be well on your way to mastering this technique.
To further elevate your skills, here are some additional resources:
- Blender Official Documentation: The Blender website has comprehensive documentation that covers every aspect of the software, including image handling. Check it out here.
- YouTube Tutorials: Channels like Blender Guru and CG Geek offer fantastic video tutorials that walk you through inserting images and more advanced techniques. Try searching for “Blender image texture tutorials” for visual guidance.
- Blender Artists Community: Join forums like Blender Artists where you can ask questions, share your work, and learn from experienced users. Engaging with the community can provide valuable insights and tips.
- Online Courses: Websites like Udemy or Coursera offer structured courses on Blender, which can help you deepen your understanding of 3D modeling and image integration.
Remember, practice makes perfect! Experiment with different images and Blender features to discover what works best for your projects. Happy Blending!
 admin
admin


